So I described my work on the wardrobe and even the light fixture, but I really should have first talked about how much work I’ve done to get the bedroom ready. In reality, the wardrobe and light were like finishing touches compared to how long I spent re-wiring, adding outlets, repairing the plaster, drywalling & mudding.
First off, this room is behind the bathroom, where there was a door-sized opening connecting this bedroom with the bathroom. Since the bathroom is (nearly) finished, the opening was closed in on that side except for the hole-in-the-wall where my medicine cabinet will eventually be installed. But because the tub/shower was previously along this wall, there was major water damage even on the bedroom side of the wall. The plaster was bubbled and crumbling all along where the tub would have been. Each time I tried to scrape it flat in preparation to mud over it, it just kept crumbling. The ceiling wasn’t in the best shape either, it was sagging in the middle and had major cracks from one wall to the next. I could have spent time scraping out each crack, reattaching the plaster to the wood slats, and then mudding and sanding.
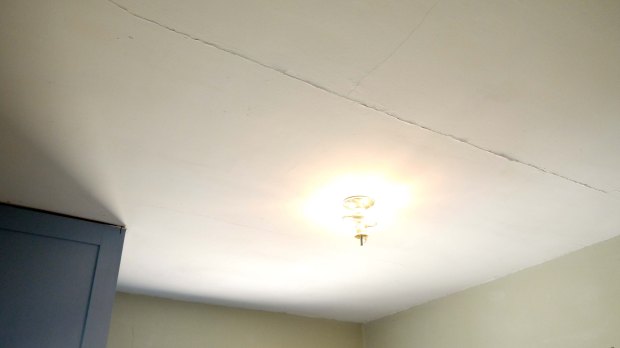
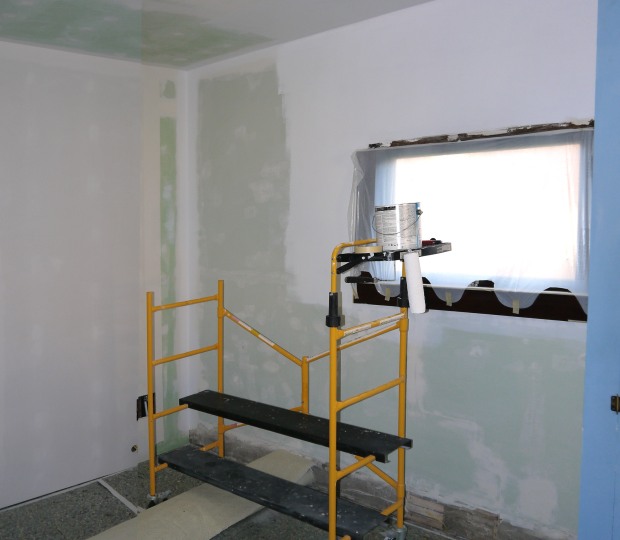
But in my mind, I kept thinking it wouldn’t last long and I’d be unhappy with the ceiling in just a short while. So I decided to drywall both the ceiling and the damaged plaster wall. No need to tear the plaster off (a ridiculous amount of work, dust, mess, and trash). I found the ceiling joists & wall studs and installed the drywall right over top, making sure my screws were long enough to reach through the plaster and secure the drywall to the framing.
First though, a friend helped me re-wire this bedroom to replace the knob & tube wiring and put the room on it’s own dedicated breaker (less electrical demand on the “whole-house breaker” of whoever previously wired my electric panel). From the crawlspace to the attic, we re-wired the ceiling light, light switch, and upgraded the room from 1 lonely outlet to 1 outlet per wall – meeting today’s standard of every 6 linear feet. This was not really an attempt to meet today’s residential electrical requirement, but more for convenience in the future since most standard lamps and other electrical items have a 6′ cord. When it came time to add outlets, rather than today’s standard height in the wall, I am installing them horizontally in the baseboard. There are already several rooms in the house where a previous owner added outlets in the baseboard, so to maintain a consistent look I decided that’s where I would add them also. The baseboards in my house are 9″ tall, so this places the outlets about 4″ off the floor. And a brown outlet and brown cover almost disappear on the dark stained woodwork.
Back to prepping the walls & ceiling. Once the drywall was hung I began to tape and mud all the seams and corners. This was my first time mudding drywall on a ceiling. Now this sounds like it would be the same as seams on the wall, but trust me it’s not the same. There is so much more coordination required with managing drywall knives while stepping up and down the step stool, and a lot more accidentally dropping (or throwing) drywall mud – landing on my pants, shoes, and the floor. I’m glad I didn’t tear the carpet out until after all this work, it caught all my mess. Lots of thin coats of mud, lots of drying time, and finally a few hours carefully sanding.
No, water resistant greenboard drywall was not required for this ro0m – I purchased more than I needed when I renovated the bathroom and couldn’t return it. At the the end of the day it’s still drywall, and once painted no one will know the difference.
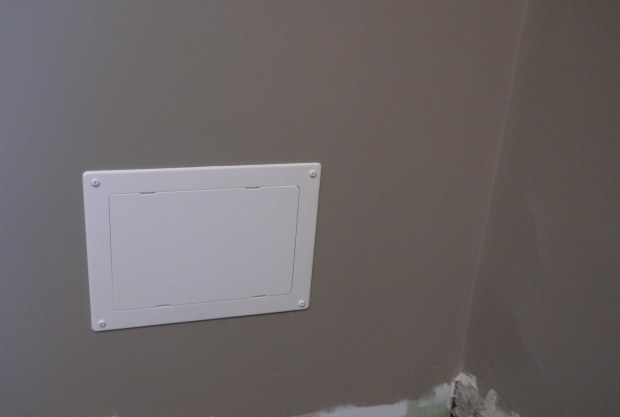
One detail I included in this room was an access panel to the shut-off valves for the tub & shower on the other side of the wall. It’s a simple plastic frame with a snap off cover if I ever need to do repairs or for some reason shut off the water lines to the tub.

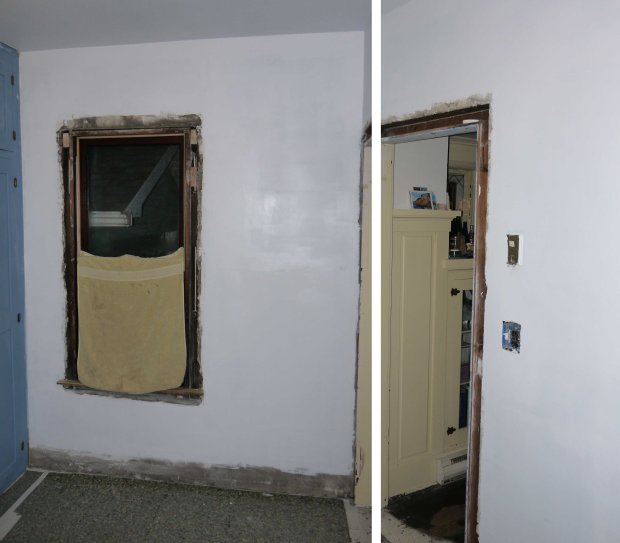
While mudding I also tried my best to fix any cracks, holes, or divots in the plaster walls. These two walls below are not drywall, but rather plaster – and there is maybe more mud on these walls than on the new drywall.

I also sanded out all of the previous owners bad patch jobs, like where they slapped on spackling compound and didn’t sand it flat to the wall. Sanding is a messy job, and I always forget that until I’m covered in dust after just an hour or so.

In the end, I was pretty impressed with myself for how the walls turned out. Priming is the real reveal.

 There is one corner that isn’t perfect, but I can live with it. Imperfection is character, or so I keep telling myself.
I already had the woodwork for the windows scraped, sanded, stained & poly’d, and I was eager to nail it back into place once the walls were painted and dry. I still need to fill & stain the nail holes, but I am so happy with how this room is coming together. It will actually be the most complete room in the house in another weeks time when I get the baseboards nailed into place – and take some after photos of the full room!
