Archive for category Exterior
Restore or Replace – Part 1
Posted by Adam A. Ries in Exterior, Home Improvement on September 2, 2015
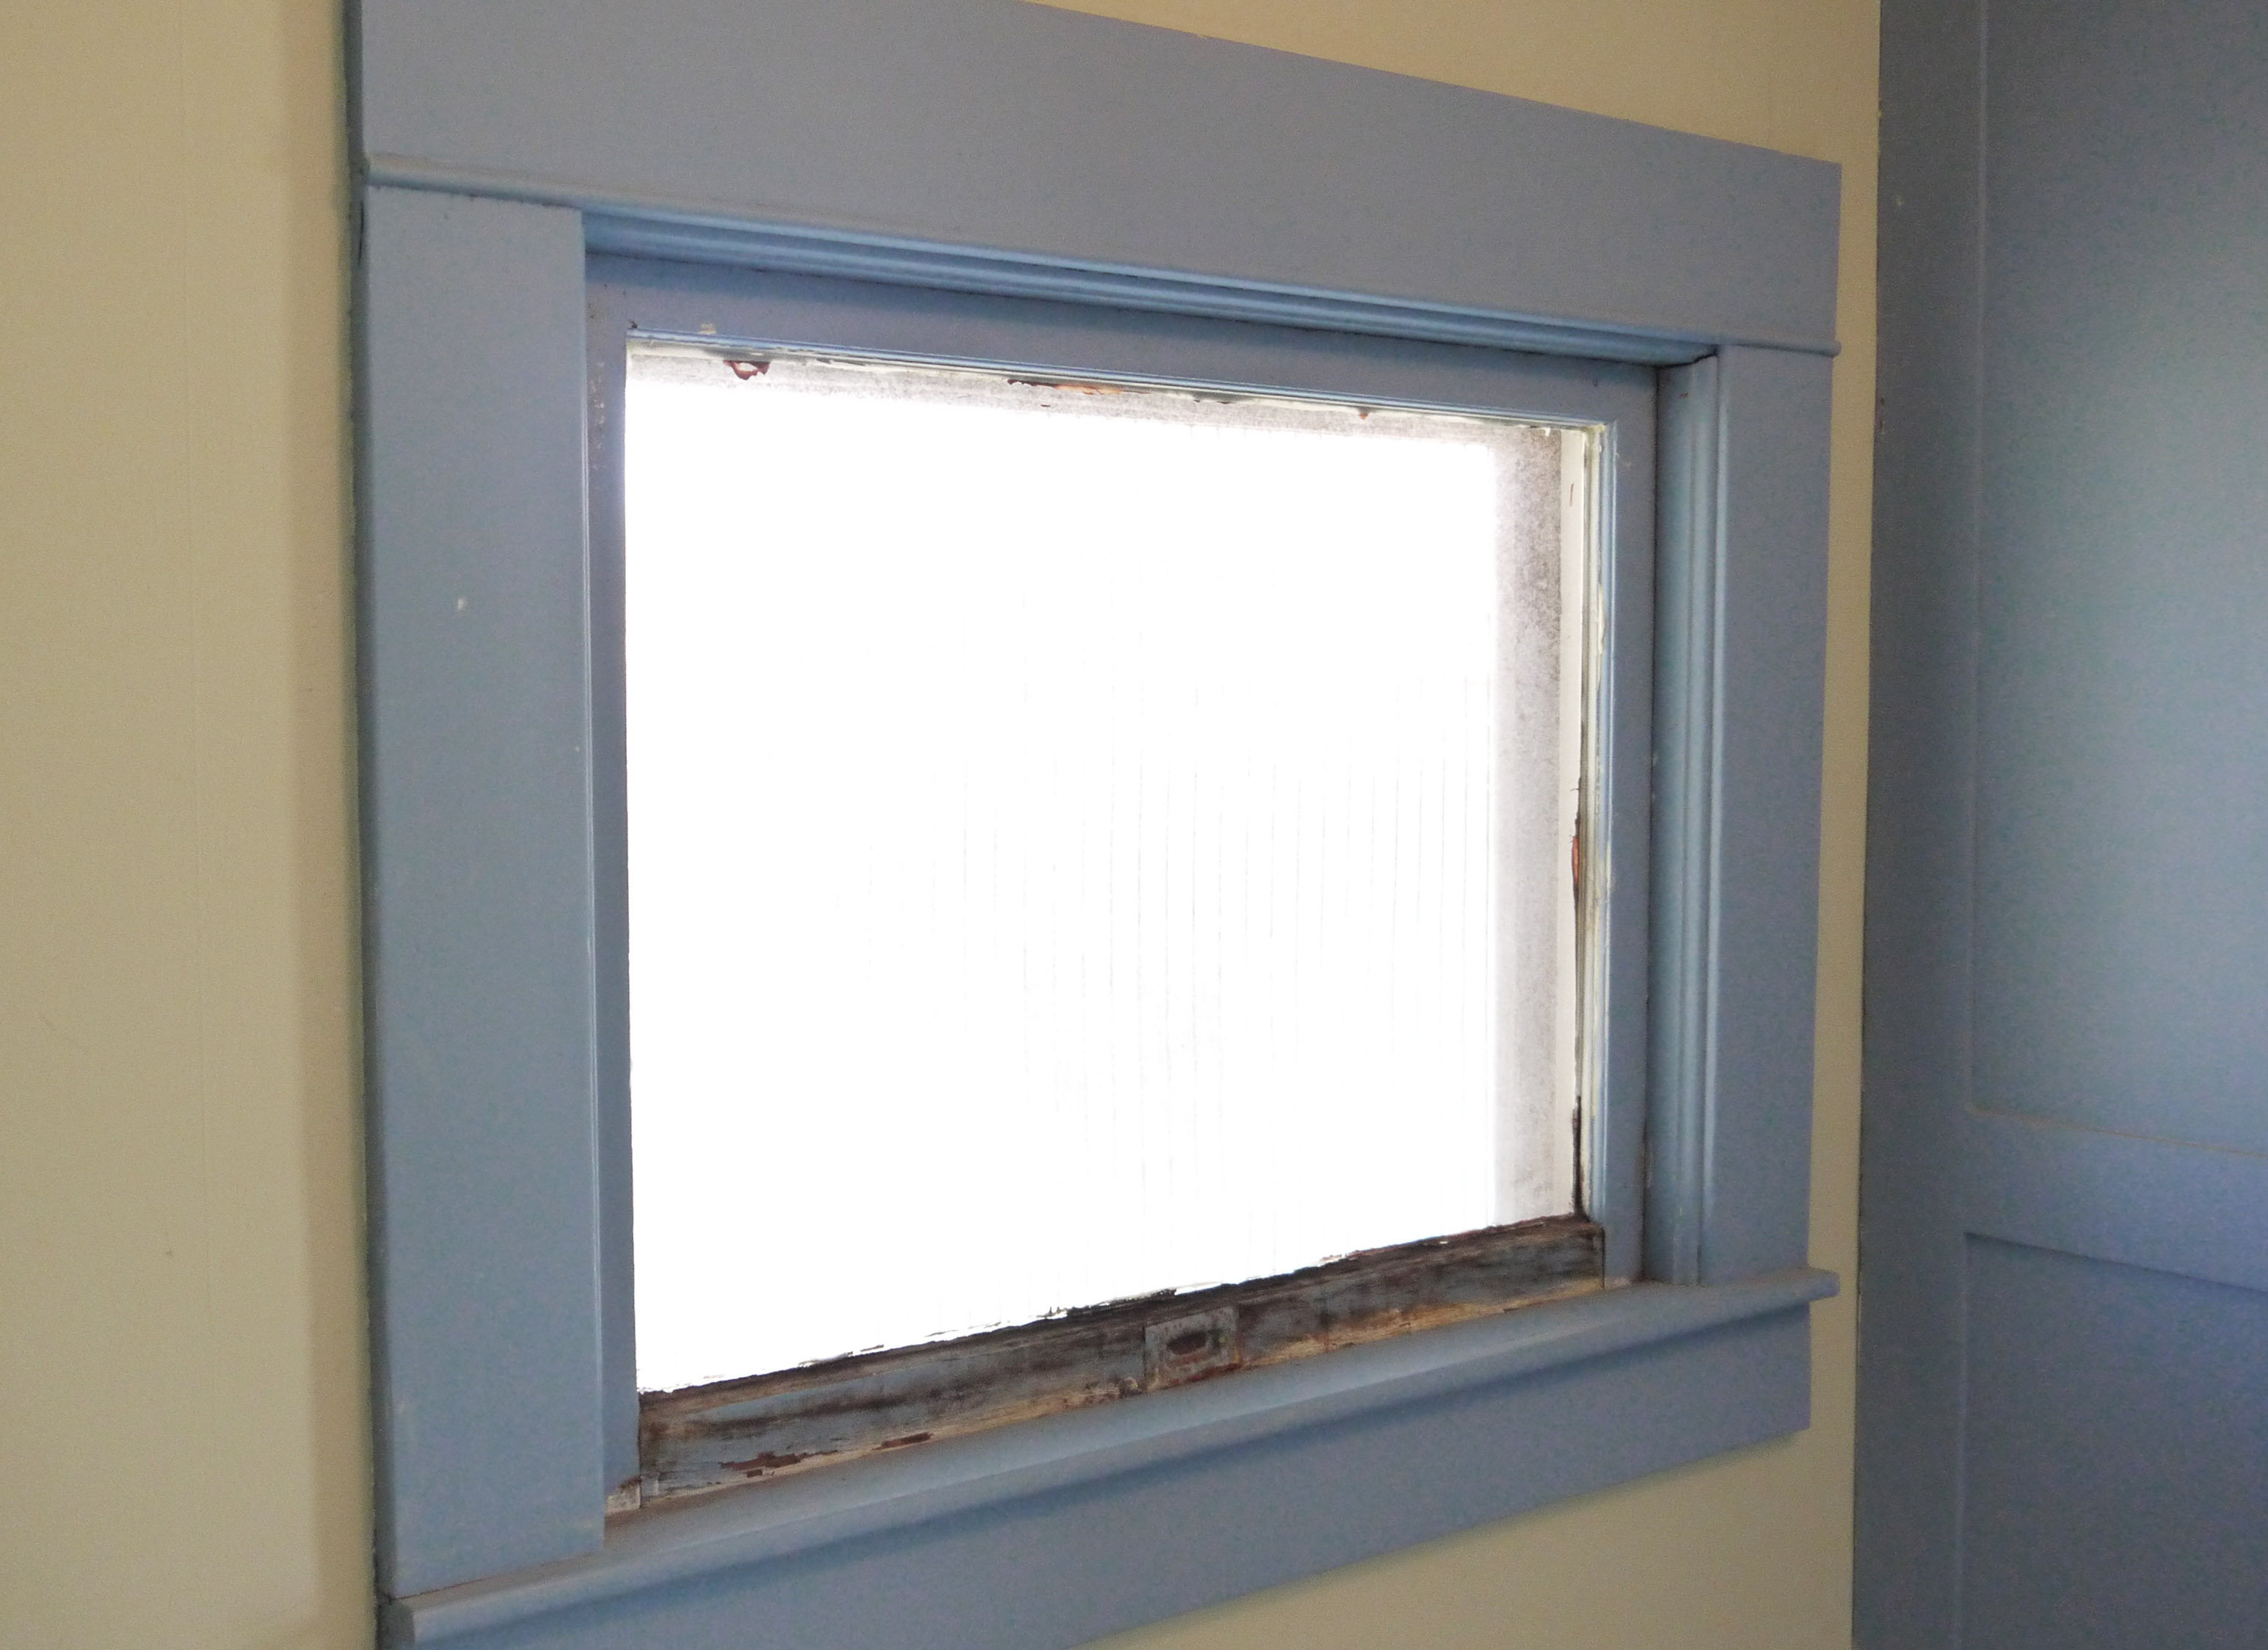
When I bought this humble bungalow (over a year ago!), one of the features I found most interesting was the distorted glass in each of the original wood windows. “Wavy” glass is an understatement. When I really study them, there are bubbles, circles, lines, and other imperfections in every piece of glass. I still remember the 1st or 2nd time looking at the house with the realtor, how beautiful the light danced on the walls through the imperfect glass. Of course, the deterioration of the windows and the rattling glass was one of the scariest features. While the whistling of the wind and drafts around each frame this past winter was an expensive feature.
Working in the field of downtown development, I’ve been lucky to attend dozens of workshops and training events about the importance of building preservation and wood windows. I’ve heard them use the fancy phrases, how wood windows are part of a building’s historic fabric, the vast difference between old growth wood and dimensional lumber available today. And more recently I’ve experienced how downtown revitalization grants can help with almost every aspect of restoring a historic building facade, but the Historic Preservation Office is adamant that grant funds will pay to have wood windows restored- not replaced.
So over the winter months — as I was reluctantly turning up the thermostat, putting more of my paycheck into the “heating” budget, and watching the shrink-wrap plastic flicker from the cold air blowing in around each window — I began seriously researching the best option for my house.
I do advise CAUTION here – only begin typing the word replacement, vinyl, fiberglass, aluminum clad, or easy-to-clean in any internet search engine and the only results will be replacement window companies – hundreds of them claiming that all of my home’s energy problems will be solved if I toss the old windows into a dumpster & install the cheapest vinyl windows on the market. Others claimed I could stand on the windows (before installing them I assume?), $99 window sales, solid vinyl sash frames, one finger open & close, multiple warranties, and even custom colors for the exterior to match any decor.

But then I searched for an answer to my real question, “wood windows restore or repair.” The results were countless forums, threads, magazines, blogs, and even energy efficient building research. They all said the same – wood windows, when restored correctly with the right materials, adding a mix of original and modern weather stripping, and with a quality storm window- will match or even outperform replacement windows in energy efficiency. Add to that the embodied energy already in the existing windows, the un-matchable strength of 100+ year old lumber, and the compiled data of historic home sales that show original windows add significantly to home & neighborhood values. Or do a little more online digging and read how 5 of the largest US replacement window manufacturers were recently charged with class action lawsuits against their false & deeply exaggerated “statistics” of energy savings they claim their windows will achieve. Eventually these 5 companies settled with the Federal Trade Commission to delete the language from their advertising when they can not consistently prove the numbers to be true.
Last summer I had 3 different window salesmen stop me while working outside or mowing the lawn. They tried their hardest to come inside, sit down and talk about their products, the “50% – 55% energy savings I could experience.” When one salesman revisited this spring, I asked him a simple question:
“These windows have lasted almost 100 years; Can you sell me a replacement window that will last that long?”

The answer is no. Many of the highest priced residential replacement windows offer only a 20 year (and very limited) manufacturers warranty. Even then the warranty is often for only the mechanical operations of the window – NOT on the low E gas seals, air-tightness, or their bold energy efficiency claims. And all the research I’ve read from professionals in the historic preservation world say property restored wood windows can last another 100 years (although with painting & glazing repairs in the middle at least once).
I read every online article, blog, and discussion thread I could find. I watched YouTube videos late into the evenings, trying to take notice of the slight differences from one professional’s process to the next – mostly minor, or they each have a different favorite method for steps such as removing paint, making repairs, etc. But the process is the same – remove all paint, remove all glazing, carefully remove glass. Sand, re-glue, prime, reglaze, paint, and re-install.
But I still had so many unknowns and fears about taking this on by myself: the details of weather-stripping (bronze? silicone bulb? vinyl flange? brush.., foam.., felt??) And what are the differences between the many types of glazing compound. Is that the same as glazing putty? And where do I find replacement sash cord that won’t stretch over time, or combination lift/sash locks? Oil or latex primer and then paint?
It was perfect timing to learn about a hands-on wood window workshop taking place in Columbus back in March, hosted by a new historic preservation group somewhat affiliated with the organization my workplace is involved with. Two days, hands on learning, BYOT (bring your own tools), and learn the entire process working alongside 3 professionals. Sign me up.
In Part 2 I’ll describe the workshop in depth, and the basic tools, methods, & products the professionals there taught us – based on each of their 30+ years in this work. But one blog I have found to be very helpful – and exactly step by step in line with the teachings from the workshop – is The Craftsman Blog. The writer is owner of a historic home restoration company so of course the entire blog is a very full resource for old home enthusiasts. But his specific posts detailing window restoration are almost a printable instruction guide. Thank you Scott for all the incredible content you share, I have learned so much from your blog!
Wrapping up the Roof
Posted by Adam A. Ries in DIY, Exterior, Home Improvement on October 16, 2014
So it took almost 3 weekends and a few work days in between, but this past Sunday we did it! My friends and I finished laying shingles on the east side of the roof not too long after lunch, and later in the afternoon we unrolled the ridge vent and nailed down the ridge pieces. By 5:15, it was official: the roof on the house was finished!

Above is standing on the roof of the garage, looking south. The home across the street is really similar in size and scale to my bungalow, so many of the homes in this block are almost duplicates to the ones beside or across the street.
Notice how flat the shingles look? I was so thrilled to finally get to this point! It got a high of 65 the last day we worked, and the shingles were gluing themselves down as fast as we could nail them. The scaffold was really helpful on this project, it made getting on and off the roof faster, gave us a nice platform to stand on, and helped with getting the new shingles onto the roof faster.
I think we worked most efficiently with 3 people: one walked shingles from the back yard to the ladder; the 2nd person laid or threw the shingles onto the roof; the 3rd person, mostly me or Dave, was up on the roof with the nail gun, lining up each shingle and nailing it down.
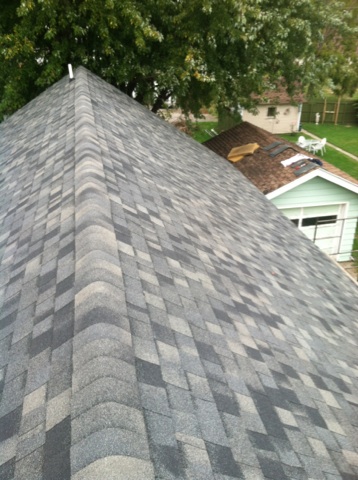
The photo above shows the east side of the roof looking north. On the north end close to the ridge is the only penetration in the new roof, a white pvc pipe for the waste drain vent. The small 1 car garage is in the background on the right, we focused first on re-roofing the house and haven’t started the garage roof yet. It looks like the weather is going to cooperate this weekend, so Nick and I are starting Friday afternoon and planning to work all weekend. In scale, its only 1/4 the size of the house roof and much less steep; we’re hoping it will be quick and much easier.
At the end of the last post I mentioned what I discovered in the attic. Although the lighting is dim, what this photo shows are 3 individual leaded glass windows in the gable above the front entrance of the house!

No, I’m not kidding. Leaded glass. As in, should make the front of the home more dramatic and beautiful, not to mention provide daylight and natural venting into the attic. These will be uncovered before I am finished with the house, mark my words.
As Nicole Curtis says in the intro of every episode of Rehab Addict, “Why the hell would anyone cover that up?!”
Roofing 101
Posted by Adam A. Ries in DIY, Exterior, Home Improvement on October 2, 2014
Hire it done.
When that is not an option, call in your friends and hope the weather holds. And when it doesn’t, buy tarps.
Before I begin writing about this project, I do need to mention how grateful I am for everyone who has pitched in to help this past weekend. It is humbling to have friends eager to pick up a shovel and help me out for a day or two knowing its a messy and tiresome job, yet several did just that. Dave, Jim, Dennis, Kyle, Nick, Chet; my brother and sister have pitched in, and my mom has fed everyone lunch or dinner each day or evening – there is no way I could have taken on this crazy idea of tackling a roof without all of this help.
About two weeks ago, I looked at the extended weather forecast and decided it would be a nice chance to tackle the roof on the humble bungalow. I knew when I purchased it that the roof was in bad shape. In fact, the bank that had foreclosed on the previous owner required me to sign a document making sure I understood the meaning of “as-is,” with almost 3 pages describing that they were not responsible or aware of any issues with the roof. Yeah right. Even my insurance agent felt the same; he actually warned me that the insurance company would probably drop my coverage if the roof wasn’t replaced before winter. So these months as I’ve been working inside, I’ve kept in the back of my head that the roof needed replaced – and tried to budget time and money accordingly.
Well, not just replaced, but torn off, with sagging rafters repaired, and then all new decking before I can even lay shingles. Sounds like light work, no?

Turns out there were 2 layers of asphalt shingles (well, actually about a layer and a half – so many shingles fly off each time the wind blows, I’m still in shock that I’ve never found a leak during a rainstorm), and then a layer of the original wood shake shingles. Shingle-eater shovels made quick work of the asphalt, while the claw end of a hammer was quick pulling off the shake one row at a time.
Beneath all of those layers, the skip sheathing (also called cedar breather or skip lath) was finally uncovered. Whereas a traditional shingle roof has solid boards or plywood sheathing underneath, wood shake was installed over 1 x 3 boards, each spaced a few inches apart running the length of the roof. The advice I got from contractors was to keep the skip boards in place, as they keep the rafters tied to one another, and to install new sheathing over them.

Unfortunately, in the hustle of making sure everyone had a shovel and no one was falling off (the 6/12 pitch is a little steep and took some getting used to), I forgot to take photos before or during the tear off. The photo above is not my roof, but looks a lot like what we found. (Except above shows a paper layer beneath the shake shingles – mine did not have that.)
From the ground, I could see that both sides of the roof had areas of sagging rafters. The east facing side was barely noticeable, and after shingles torn off was even less noticeable. So we went right to laying new sheathing and then paper over this portion. I should also mention here that I chose not to use traditional felt paper, but a synthetic version over the new roof deck – it’s thinner, lighter, and more like fabric. It’s designed to be more durable during the installation, in case the roof doesn’t get shingles right away. In fact, the product warranty is good even if exposed to rain and sunlight for 6 weeks before the shingles go down. It was about a 1/4 more expensive, but worth the peace of mind in case it rained during the roofing process (IF, ha!)
The west side was where the sagging was the most obvious – as in, my friend the contractor simply said, “whoa.” He was convinced I must have several broken rafters and was baffled to learn they were simply sagging that much. The sagging was in 2 separate areas, and I identified and marked 9 rafters on the north end of the house and 7 on the south that would need fixed to bring the roof deck flat again. I’ll detail that process in a follow-up post, including photos of the old rafters beside the new rafters. During that process, I found the neatest surprise in my attic – it amazes me that people cover up craftsmanship and beauty in the name of aluminum siding.
The roof isn’t finished yet – in fact, I haven’t even started shingling yet. But what was supposed to be an evening spent finishing the sheathing and paper on the west side was quickly rained out. Yes, we draped the exposed part of the roof in tarps and, yes, we got soaking wet.
