Posts Tagged Interior Design
Getting A Little Wired
Posted by Adam A. Ries in DIY, Home Improvement, Interior Design on June 25, 2014
Although I do admit to keeping cold beer in the fridge, no, this post is not about my social drinking habits. I’m referring to the work at the house over the last few weeks. It started like this:
I have 2 great friends who had previously committed to helping with any renovation-related tasks; “just ask,” they kept saying. Up until this point, I mostly knew what I was doing or was able to watch instructional videos through YouTube or This Old House to learn what I needed. But it was getting time to wire up new light fixtures and outlets in the bathroom. So I called in the big guns, aka Paul and Dennis. Paul is a former trade electrician, and now part of the maintenance department at a local manufacturing company. Dennis has every construction tool known in the industry, along with knowing all there is to know about construction and especially electricity; he now owns a printer supply store here in town. They both showed up the Saturday before last, toolboxes in hand, and scratched their heads simultaneously at the sight of the existing electrical panel.
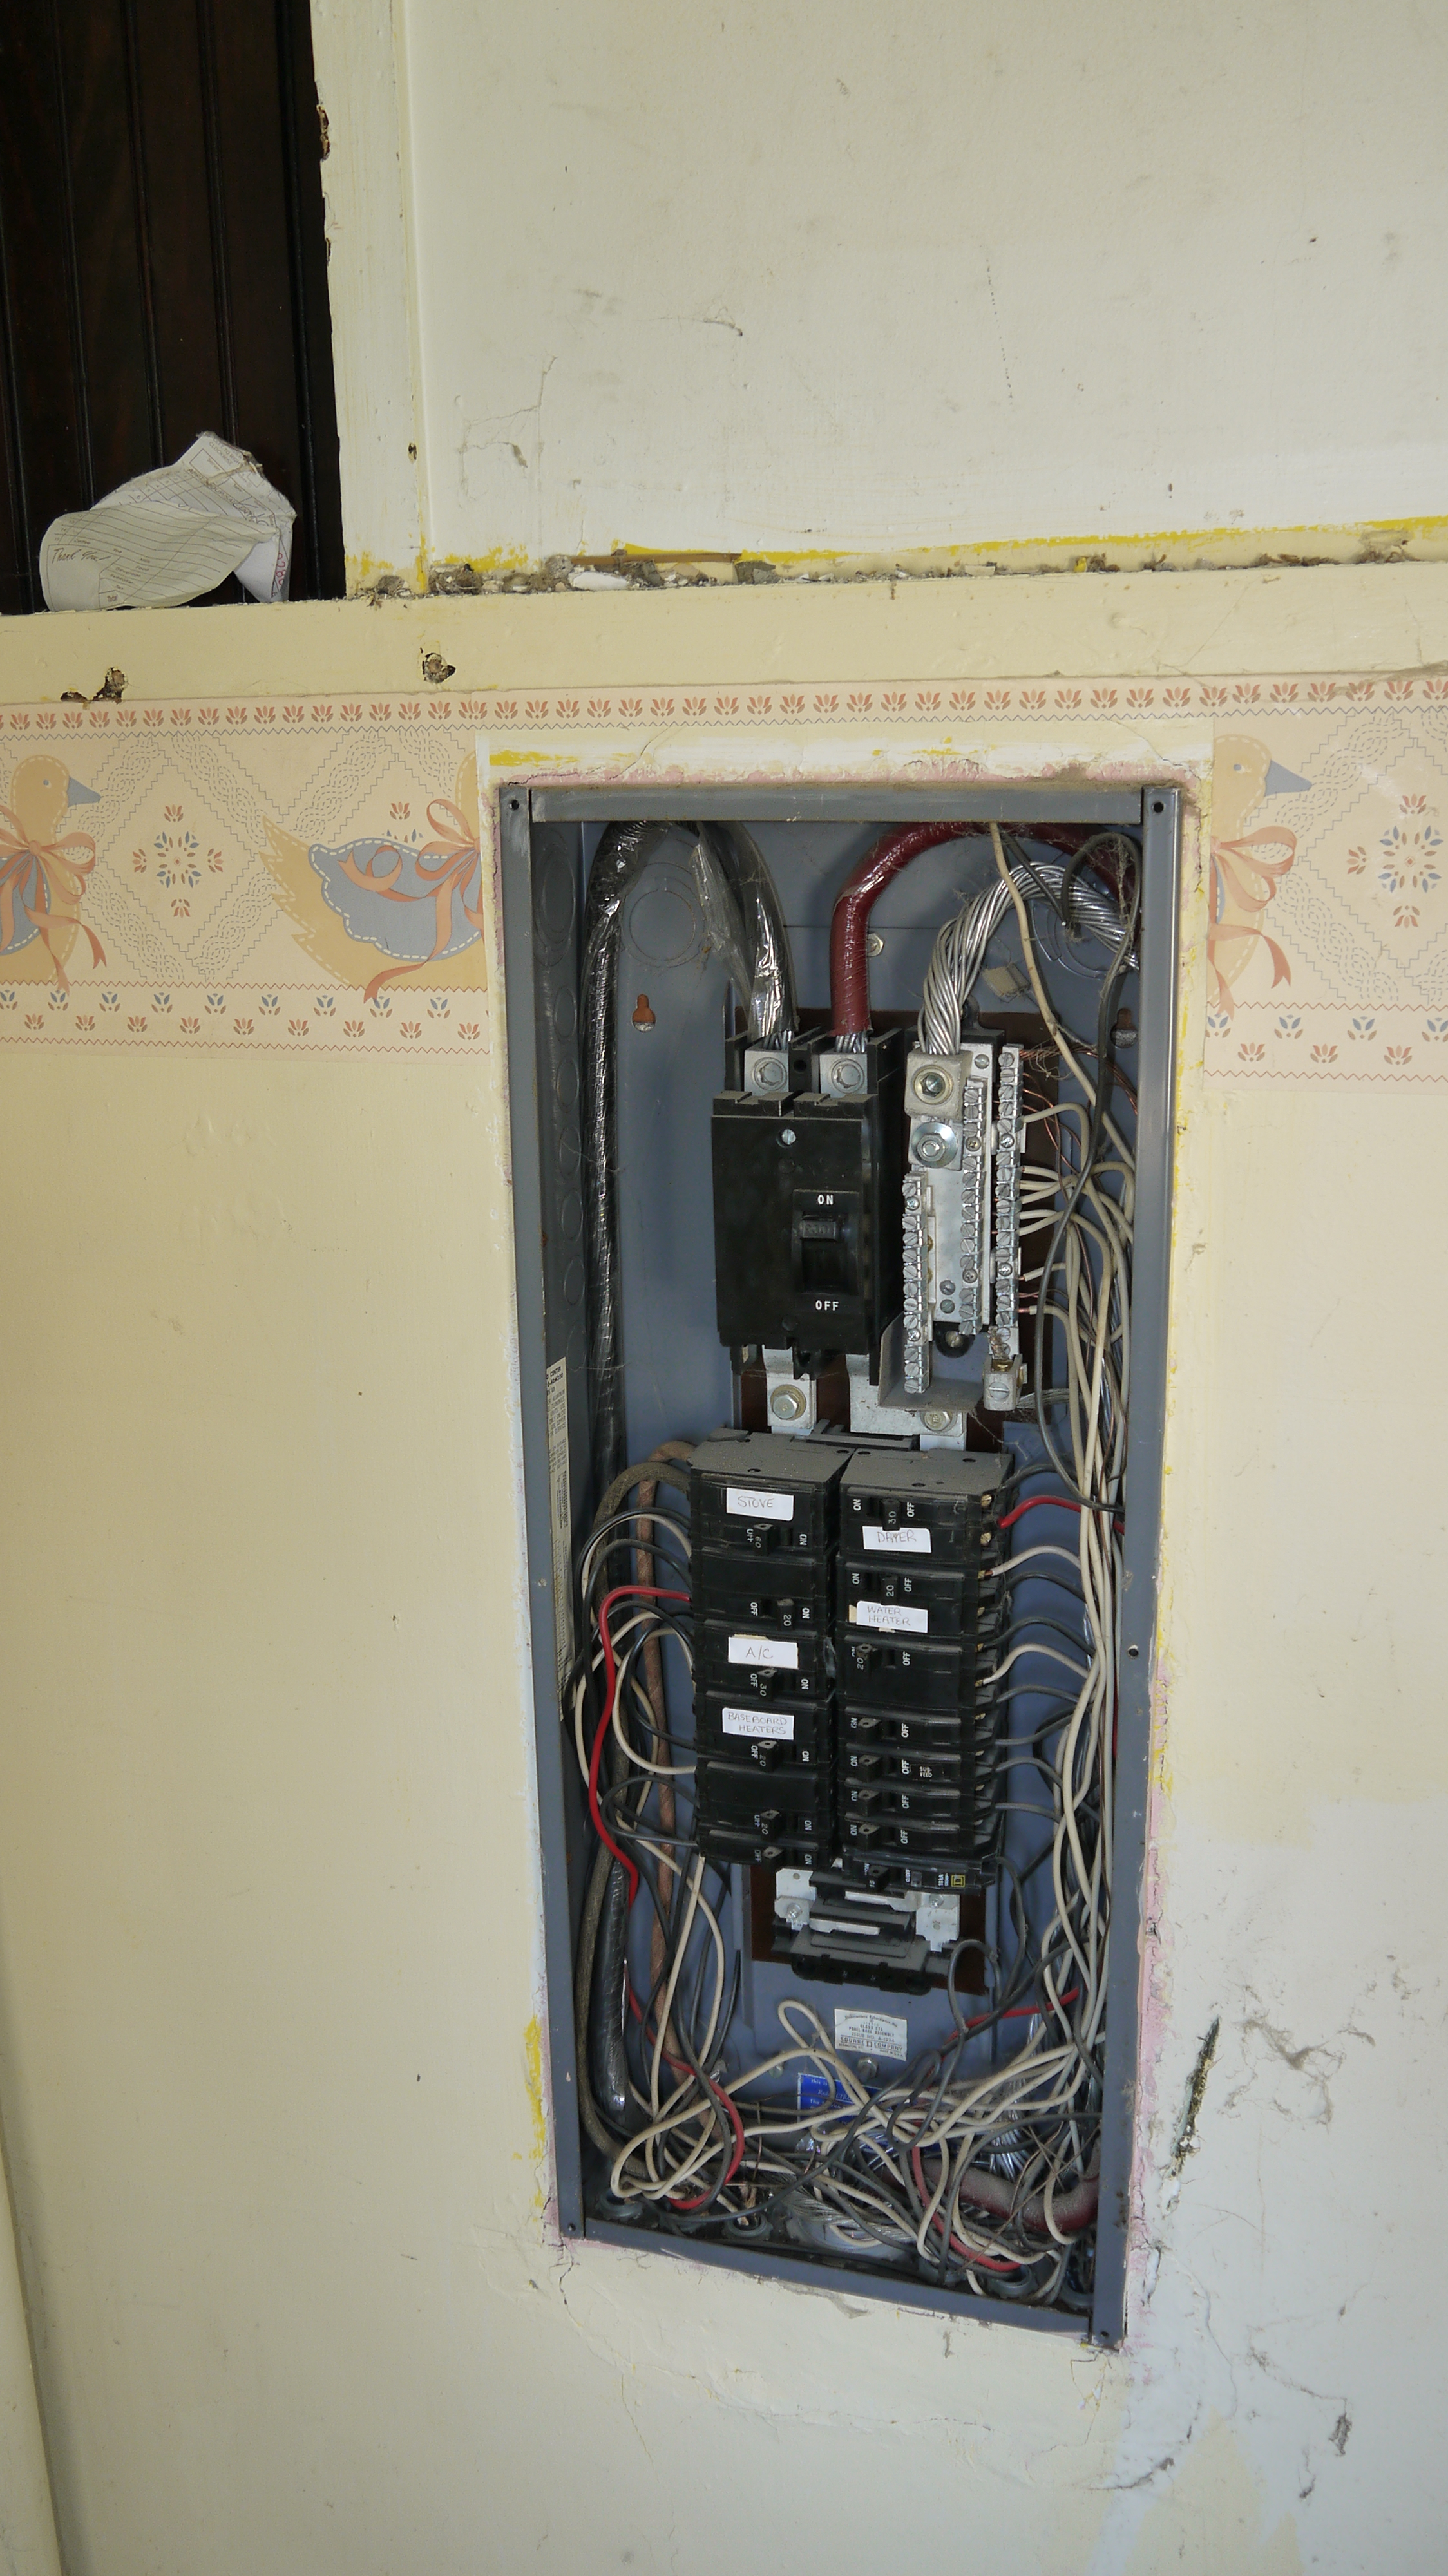
The rats nest of wires was enough to make me dizzy, and they felt the same. Now here’s the interesting part: only 1 breaker in this entire panel is in the “on” position, yet throughout the entire house every outlet and light fixture is working – including the garage and outbuilding. Other than the range, dryer, and heaters, I have no idea where or what the remaining 7 breakers must serve.
So while Paul taught me how to install outlet boxes and the tricks of the trade for running Romex wire, Dennis went to town stripping out the panel box. They both agreed the 200 amp service box is in good shape and enough space to serve the house, they wanted to organize the wire maze and distribute power in the house onto multiple breakers, the way a new house would be wired.
In the bathroom, I thought I had a reasonable electrical layout planned (2 outlets near the light switch), but both of Dennis & Paul’s wives and another female friend agreed that I should plan on additional outlets for all of the crazy hair and beauty products women use everyday and apparently need a half-dozen outlets to power. I settled on a double outlet box on either side of the vanity mirror, a straight line down from where I had already planned for light sconces flanking the mirror.
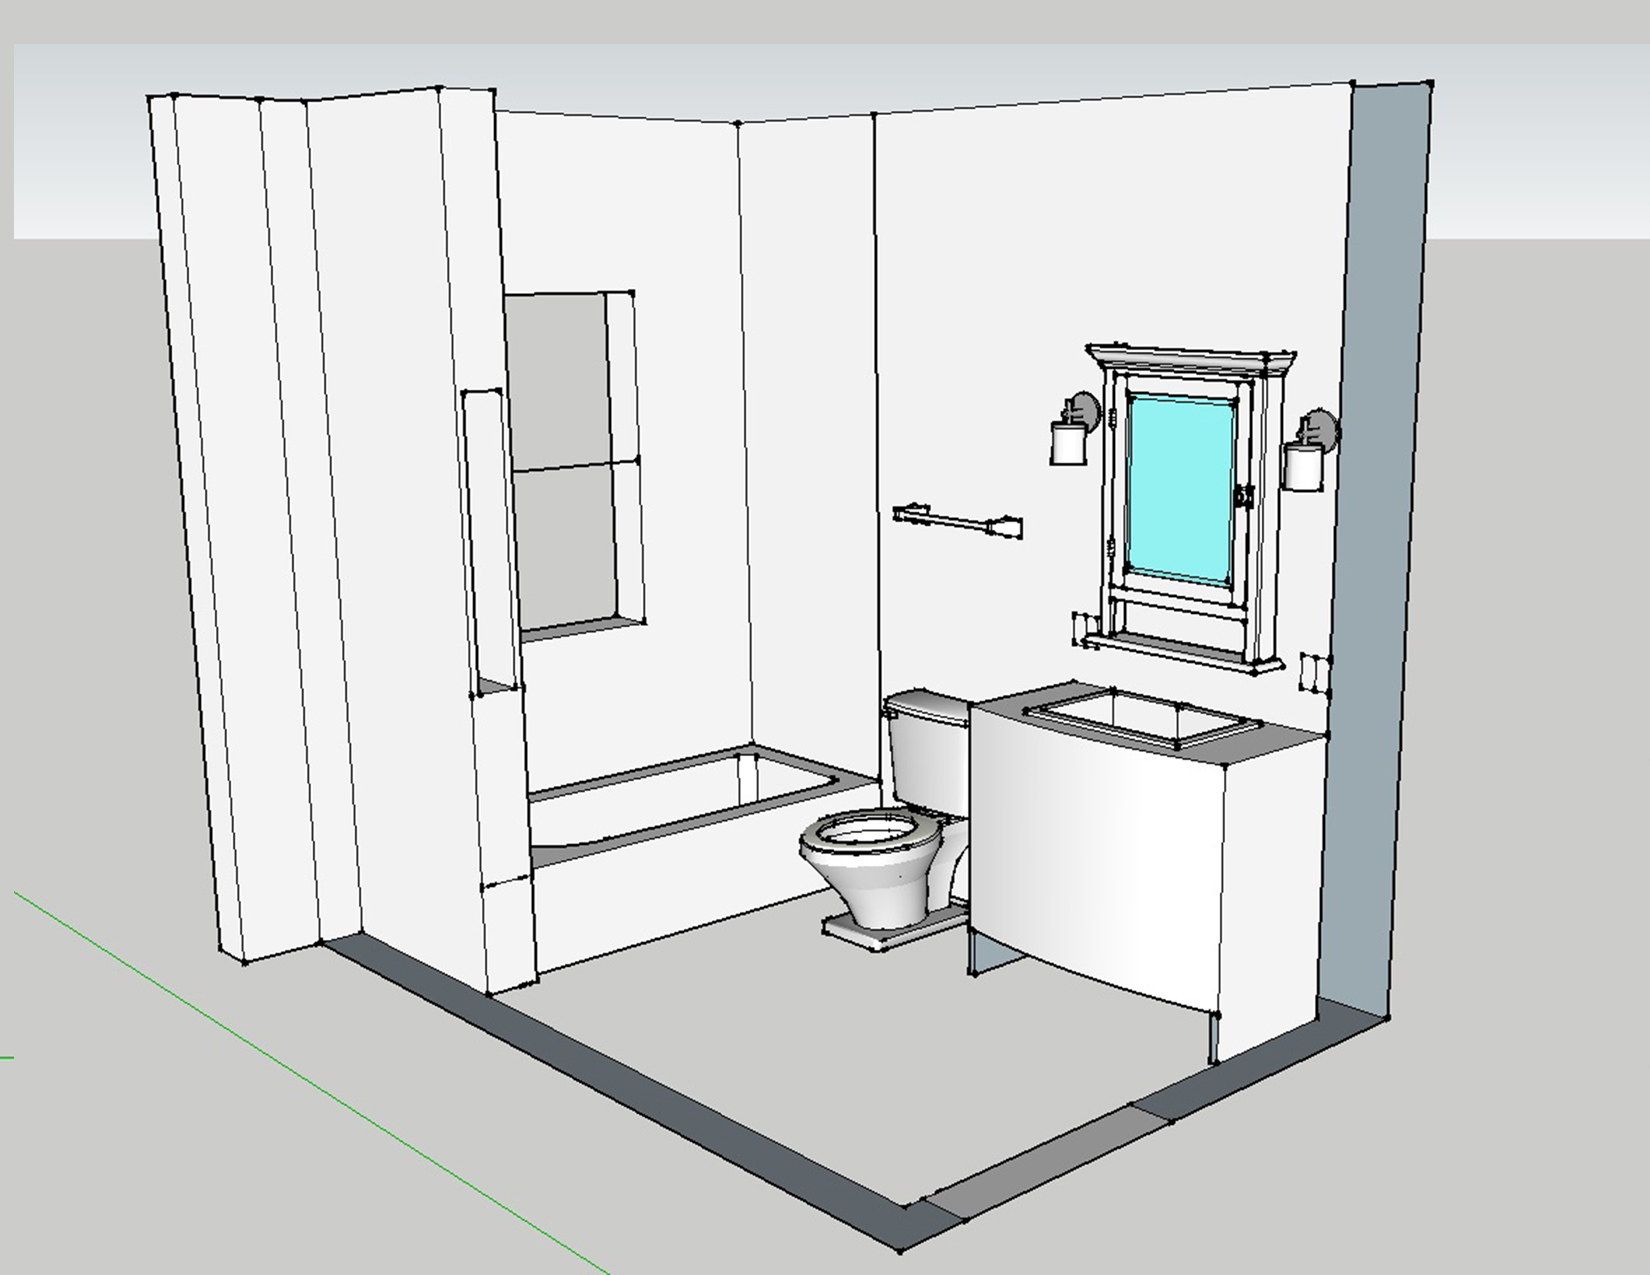
This quick 3D model was made in SketchUp, a great tool for quick rendering to plan out a space or construction detail.

This photo shows the double sets of outlets, with the light fixture boxes above each one, and the light switches on the wall to the right. One switch will control the light sconces beside the mirror, the other is 2 small switches so I can independently turn on and off the ceiling exhaust fan & light. The bathroom did not previously have an exhaust fan. Putting one in was just a matter of finding the center of the room and then finding the nearest ceiling joist. I drilled a hole from up above so I knew where the edge of the joist was, then used that as my starting point for drawing a square on the ceiling the size of the fan housing box. A jigsaw cut the plaster and lathe, and the box dropped right into place from above the ceiling. Paul held the box flush with the plaster ceiling down below while I used drywall screws up above to secure it to the ceiling joist. Once it was wired, I left it go until just yesterday when I finally drilled a 4″ hole in the gable end of the house and vented the fan outside using a dryer vent cover and 4″ flexible dryer hose.
Opposite of the bathroom in the laundry/utility room, we wired a GFCI outlet for the washing machine, a 220 volt dryer outlet, and rewired the laundry room ceiling light using 3-way light switches. I can turn the light on from the kitchen doorway like before, but now I can also turn on the light as soon as I come into the house from the back door. In the same bay at the back door, we left space for additional switches for a new back porch light, outdoor light, and outlet for the utility room. Having all the switches in one box will look so much more organized than 1 beside the door and 2 others on the adjacent wall, all at different heights currently.

In the process, Dennis made sure everything was split onto appropriate amount of breakers in the electrical panel, and even labeled each breaker space! And did I mention that we are using outlet boxes? As in, every outlet or switch is housed correctly in a box. Why do I emphasize that? Of the entire house, we have only found 3 or less receptacles boxes. All the other switches or outlets are simply a hole cut in the wall, bare wires touches plaster, lath, wood paneling, baseboard, etc. That’s perfectly safe, right? NO! Even our local Fire Chief remarked that he isn’t sure how the place didn’t catch fire at some point. I know why: because this house was waiting on me.

And here is how the breaker panel looks now – complete with hand-drawn breaker diagram on the plaster wall to the right. Each wire has a purpose and a home. Don’t ask me where those additional wires at the bottom must lead, because the whole house still has power even though those have been pulled out of the box. They are probably individual baseboard heaters, but I still need to trace each one. Eventually, Paul and Dennis assure me they are going to help me get the entire house re-wired. From what they’ve taught me so far, it shouldn’t be too bad; the majority of it seems finished with the bathroom and laundry out of the way. The rest of the rooms will just have regular outlets, light switches, and ceiling lights – replacing what’s already there – and adding all necessary receptacle boxes!
House Tour
Posted by Adam A. Ries in About Me, Home Improvement on May 5, 2014
I told myself the full house tour would be the first post about the new house. I took photos of every room the first week I had the keys. I even asked the realtor not to remove the “Sold” sign too early, until I could get a photo outside on a blue sky day. But then I got so excited about ripping out and tearing into the bathroom, that I never organized and posted the photos. So without further ado, won’t you please come in!
From the street, it has a nice size covered front porch, just begging for refreshed flooring, lush planters, and a porch swing.
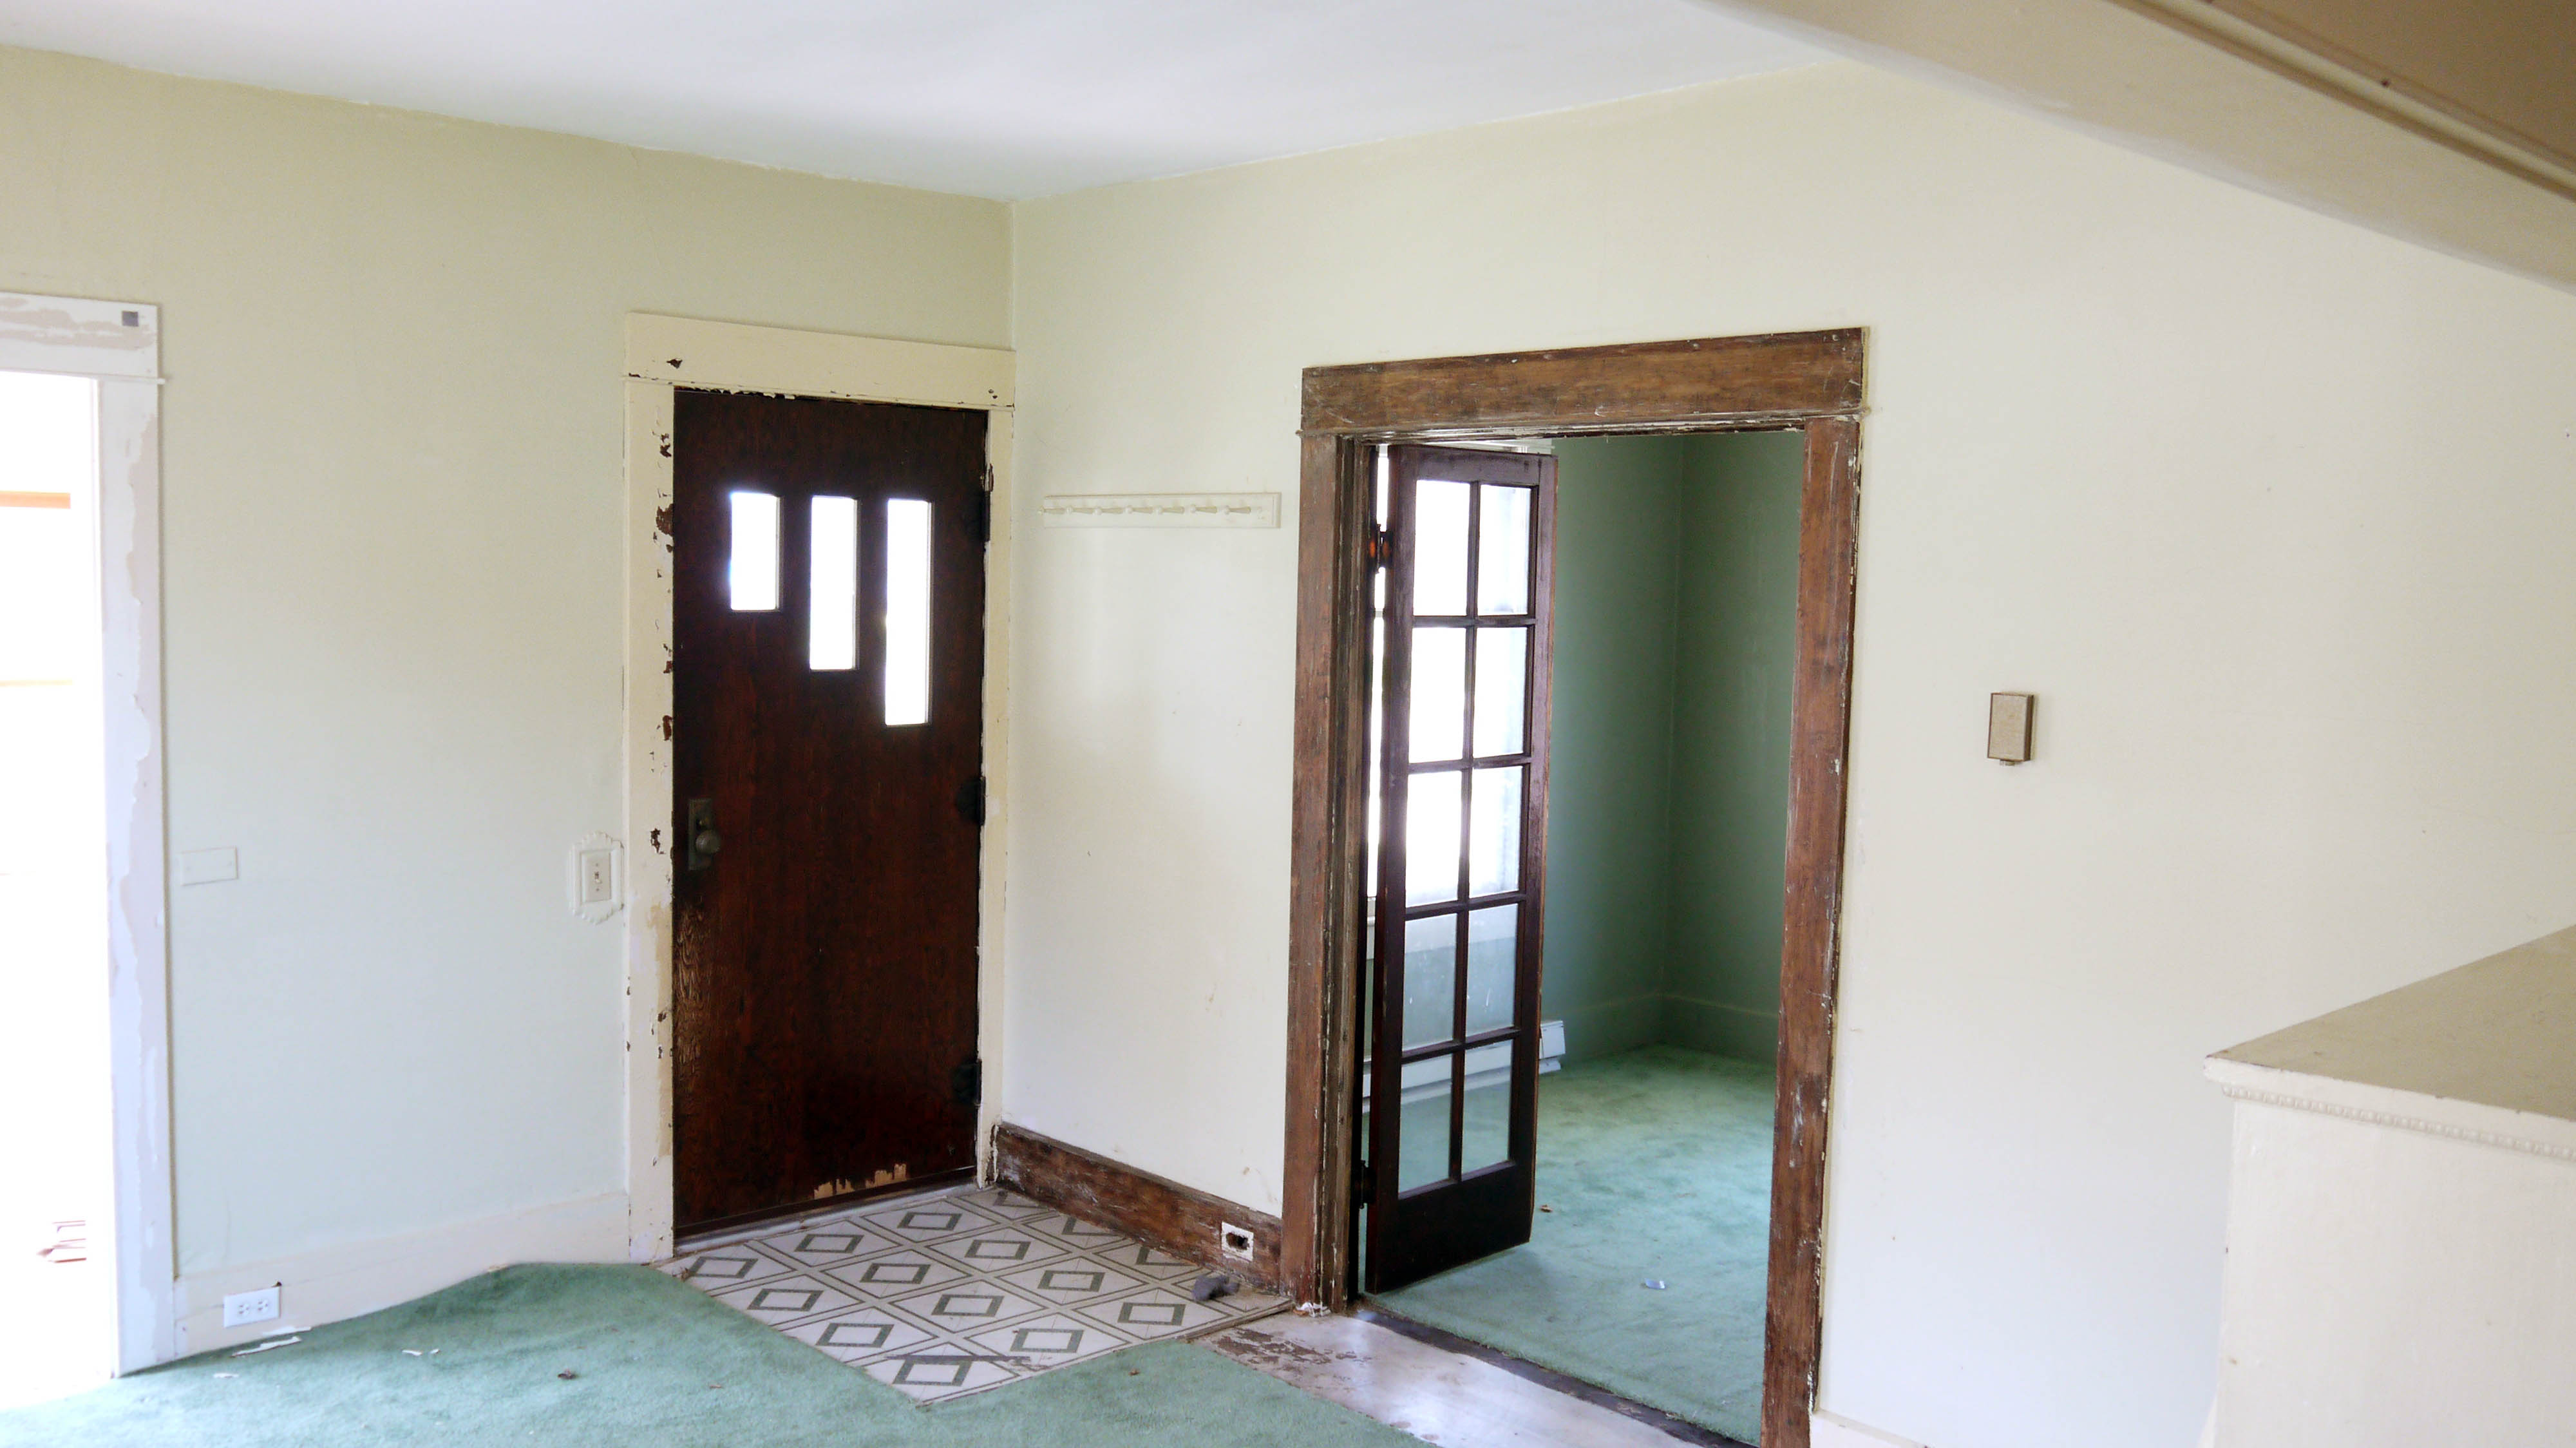
The front door is probably not enticing. It’s old, yes, but the style doesn’t match the other Craftsman qualities about the house, especially because it is veneered. The door handle is pretty cool, but the latching mechanism or spring must be broken, and the inside handle is about to fall off.

Through the front door is the living room. Very square, but with a nice large window looking east, and built-ins creating some separation from the dining room. As you can see, the woodwork is painted as far as the eye can see.

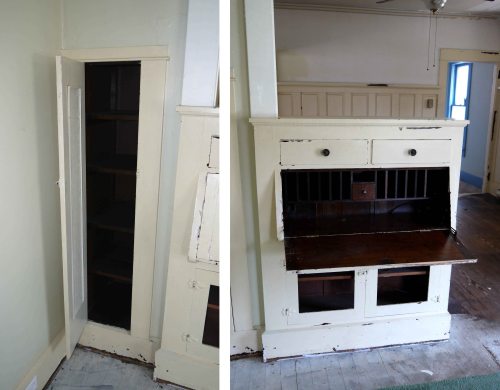
I especially love the little nook cabinet in the corner, and then this fold down secretary! How awesome that it is still in the house.
Decent size windows in the house fill nearly every room with ample sunlight. I didn’t yet have the electricity on when I took these photos, and it was super light inside. I’d like to say bright and cheerful, but I’ll stick with just bright. I’m gonna have to restore the cheerful.

From the living room is also the doorway into the closed-in side of the porch.

With lots of windows, this will be a great cozy space to drink coffee in the mornings and get some plants growing.
Back to the west, a set of double French doors open into the first bedroom.
From the inside, the door trim is just a little bit fancier: this is the only room where the woodwork above a door has this cornice or cap at the very top. My guess is every room had these at one time, and they either broke or they wanted to tone down the Victorian influence so they were removed.

Once again, it is the original details throughout that sold me on this house. Can I please have a full house of door handles & escutcheon plates to match this one?

Two large windows in this bedroom.

And some details I could do without, like this ceiling fan. The electrical box was probably not originally for a fan, which must be secured tighter. So what happens when the wiggling of the fan makes the plaster start to crumble? Just tape and staple up a piece of plastic, that will fix it.
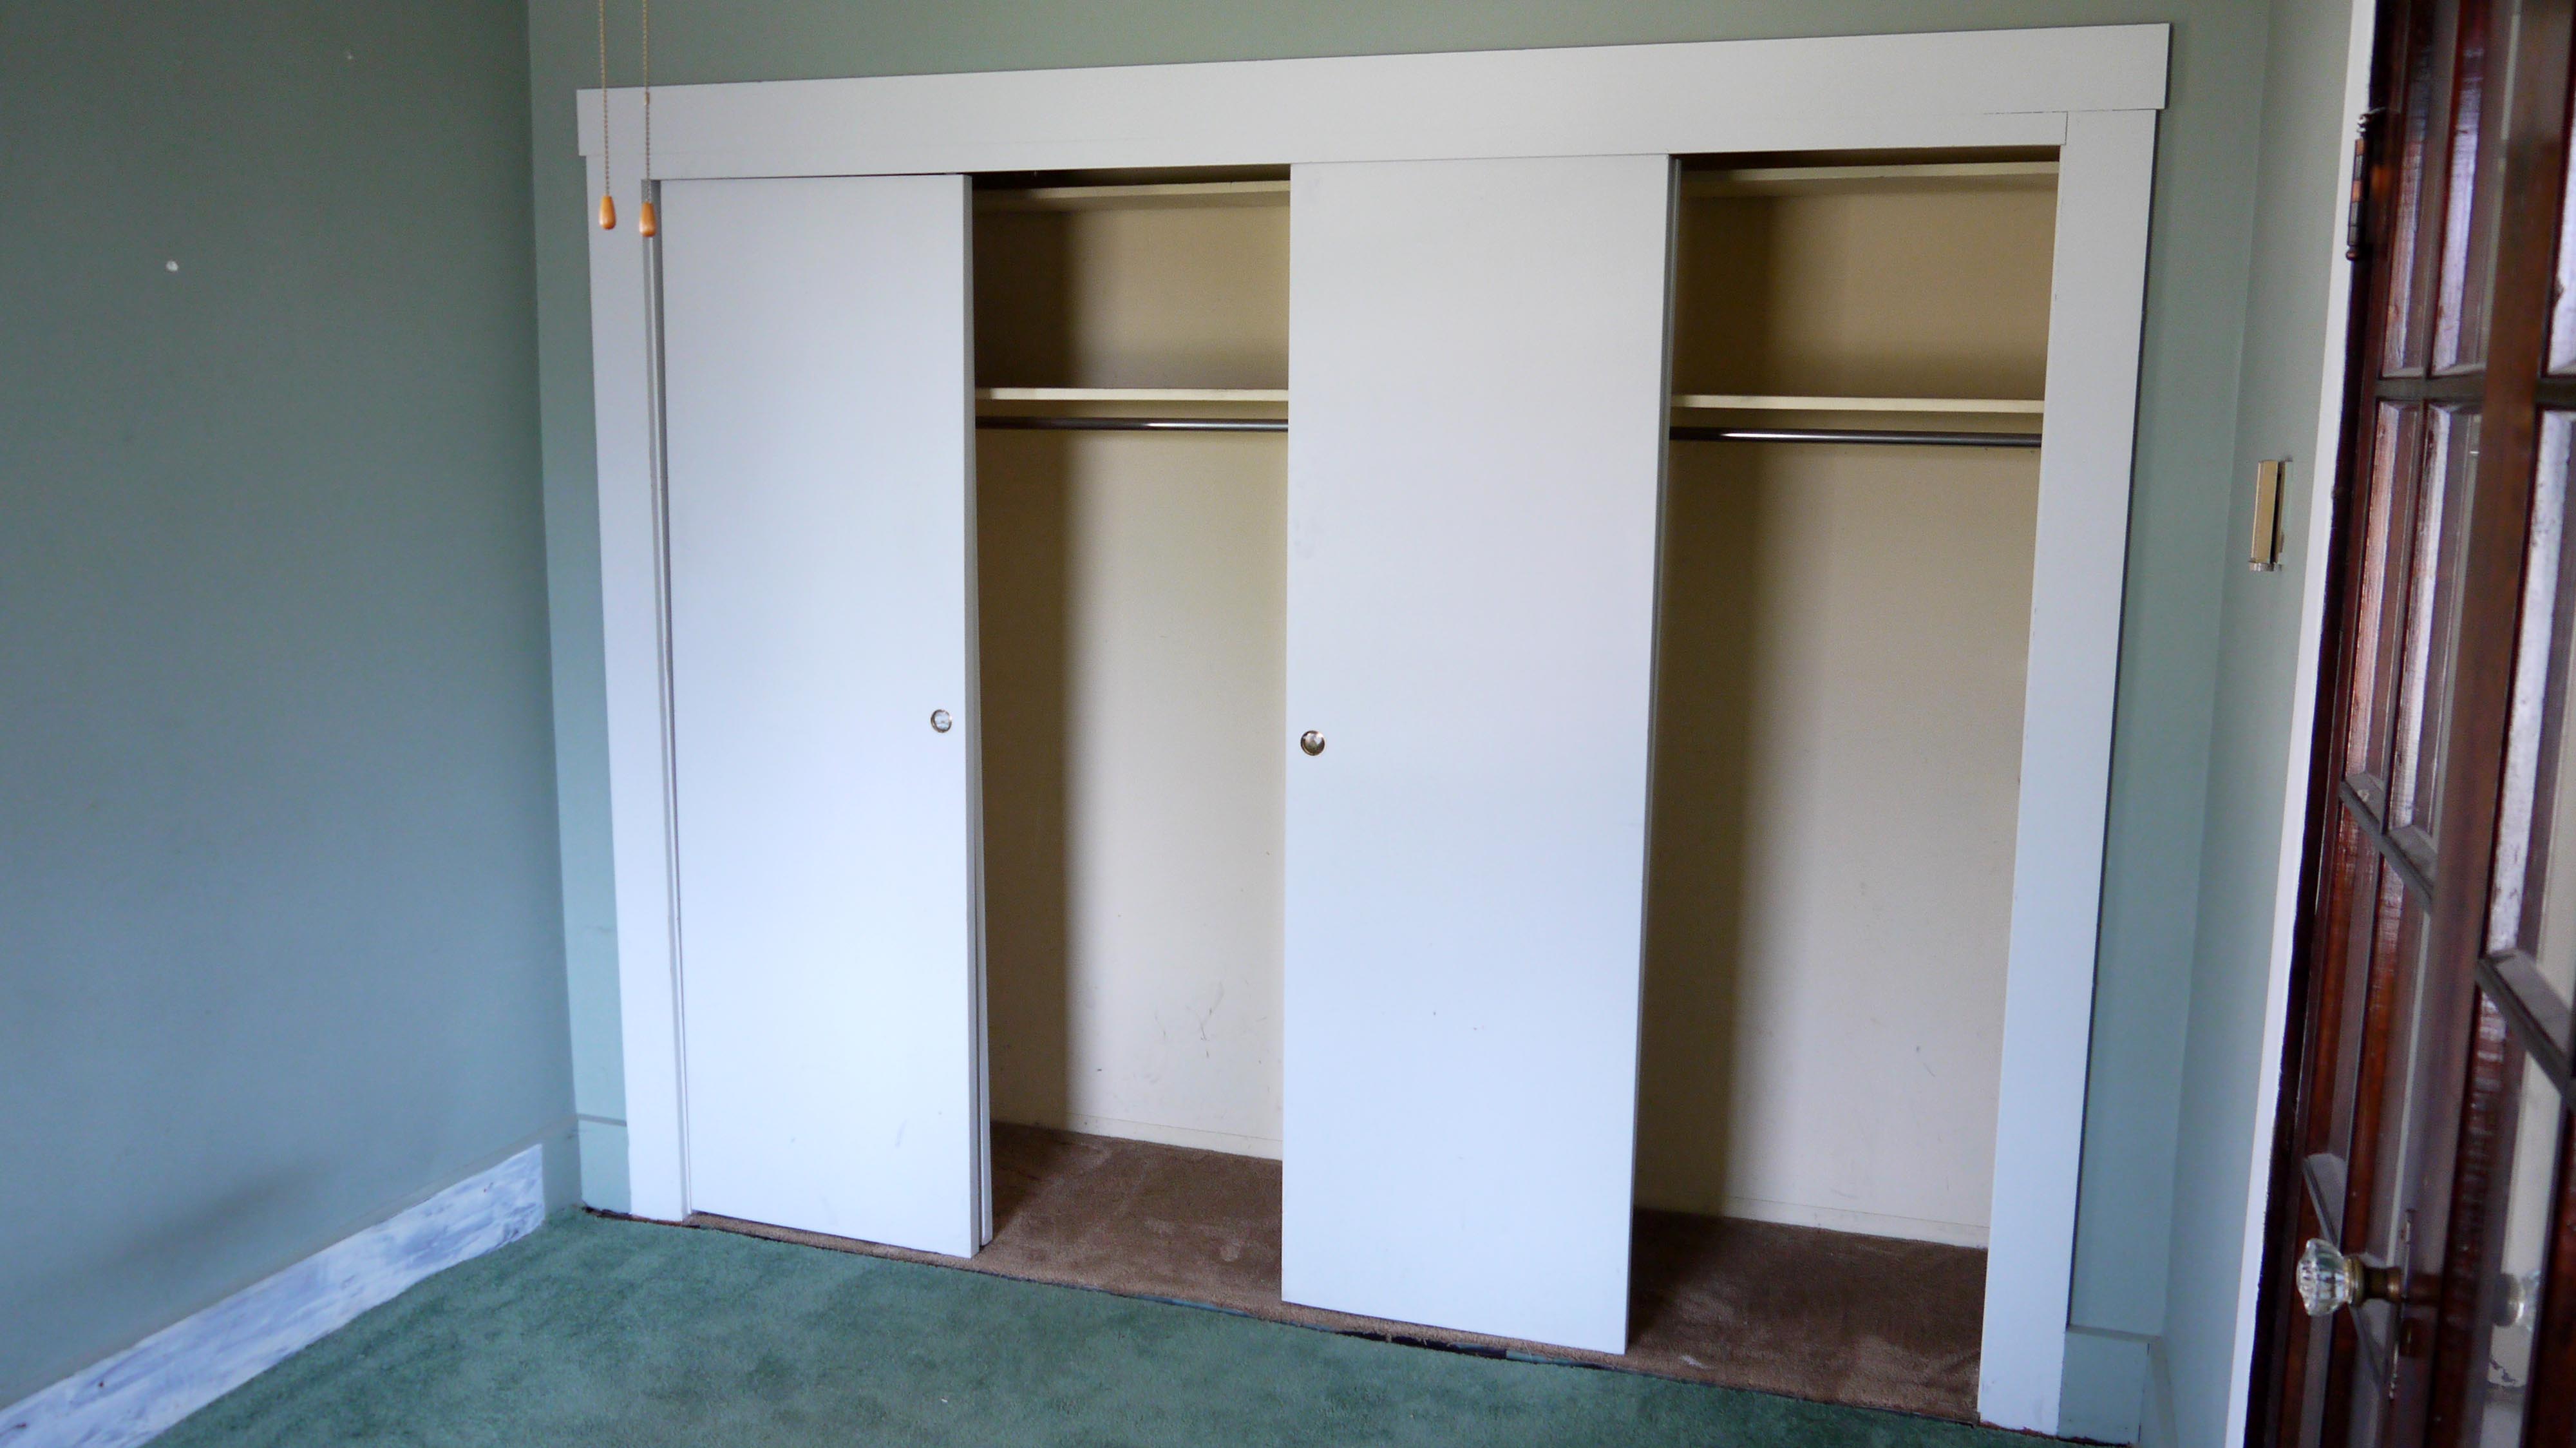
This bedroom does have a nice double wide closet. The trim suggests that it was added later, as they are just flat painted boards, along with the sliding hollow doors. I have a great idea to make this closet look more original, using salvaged trim and doors (that are nearly a perfect match!) from a commercial building that was demolished earlier this winter.
Back through the living area, we walk into the dining room. This is the room that sold me on the house. The cabinets, paneled walls, and built-in buffet are just screaming for me to strip them of their layers of paint. And now a glimpse of the wood floors too, which are in every room either under carpet or linoleum. And we also get a sense of how beautiful the woodwork is under the dingy carpet and paint.

Who would paint these paneled walls?

And what a nice air conditioner unit… not.
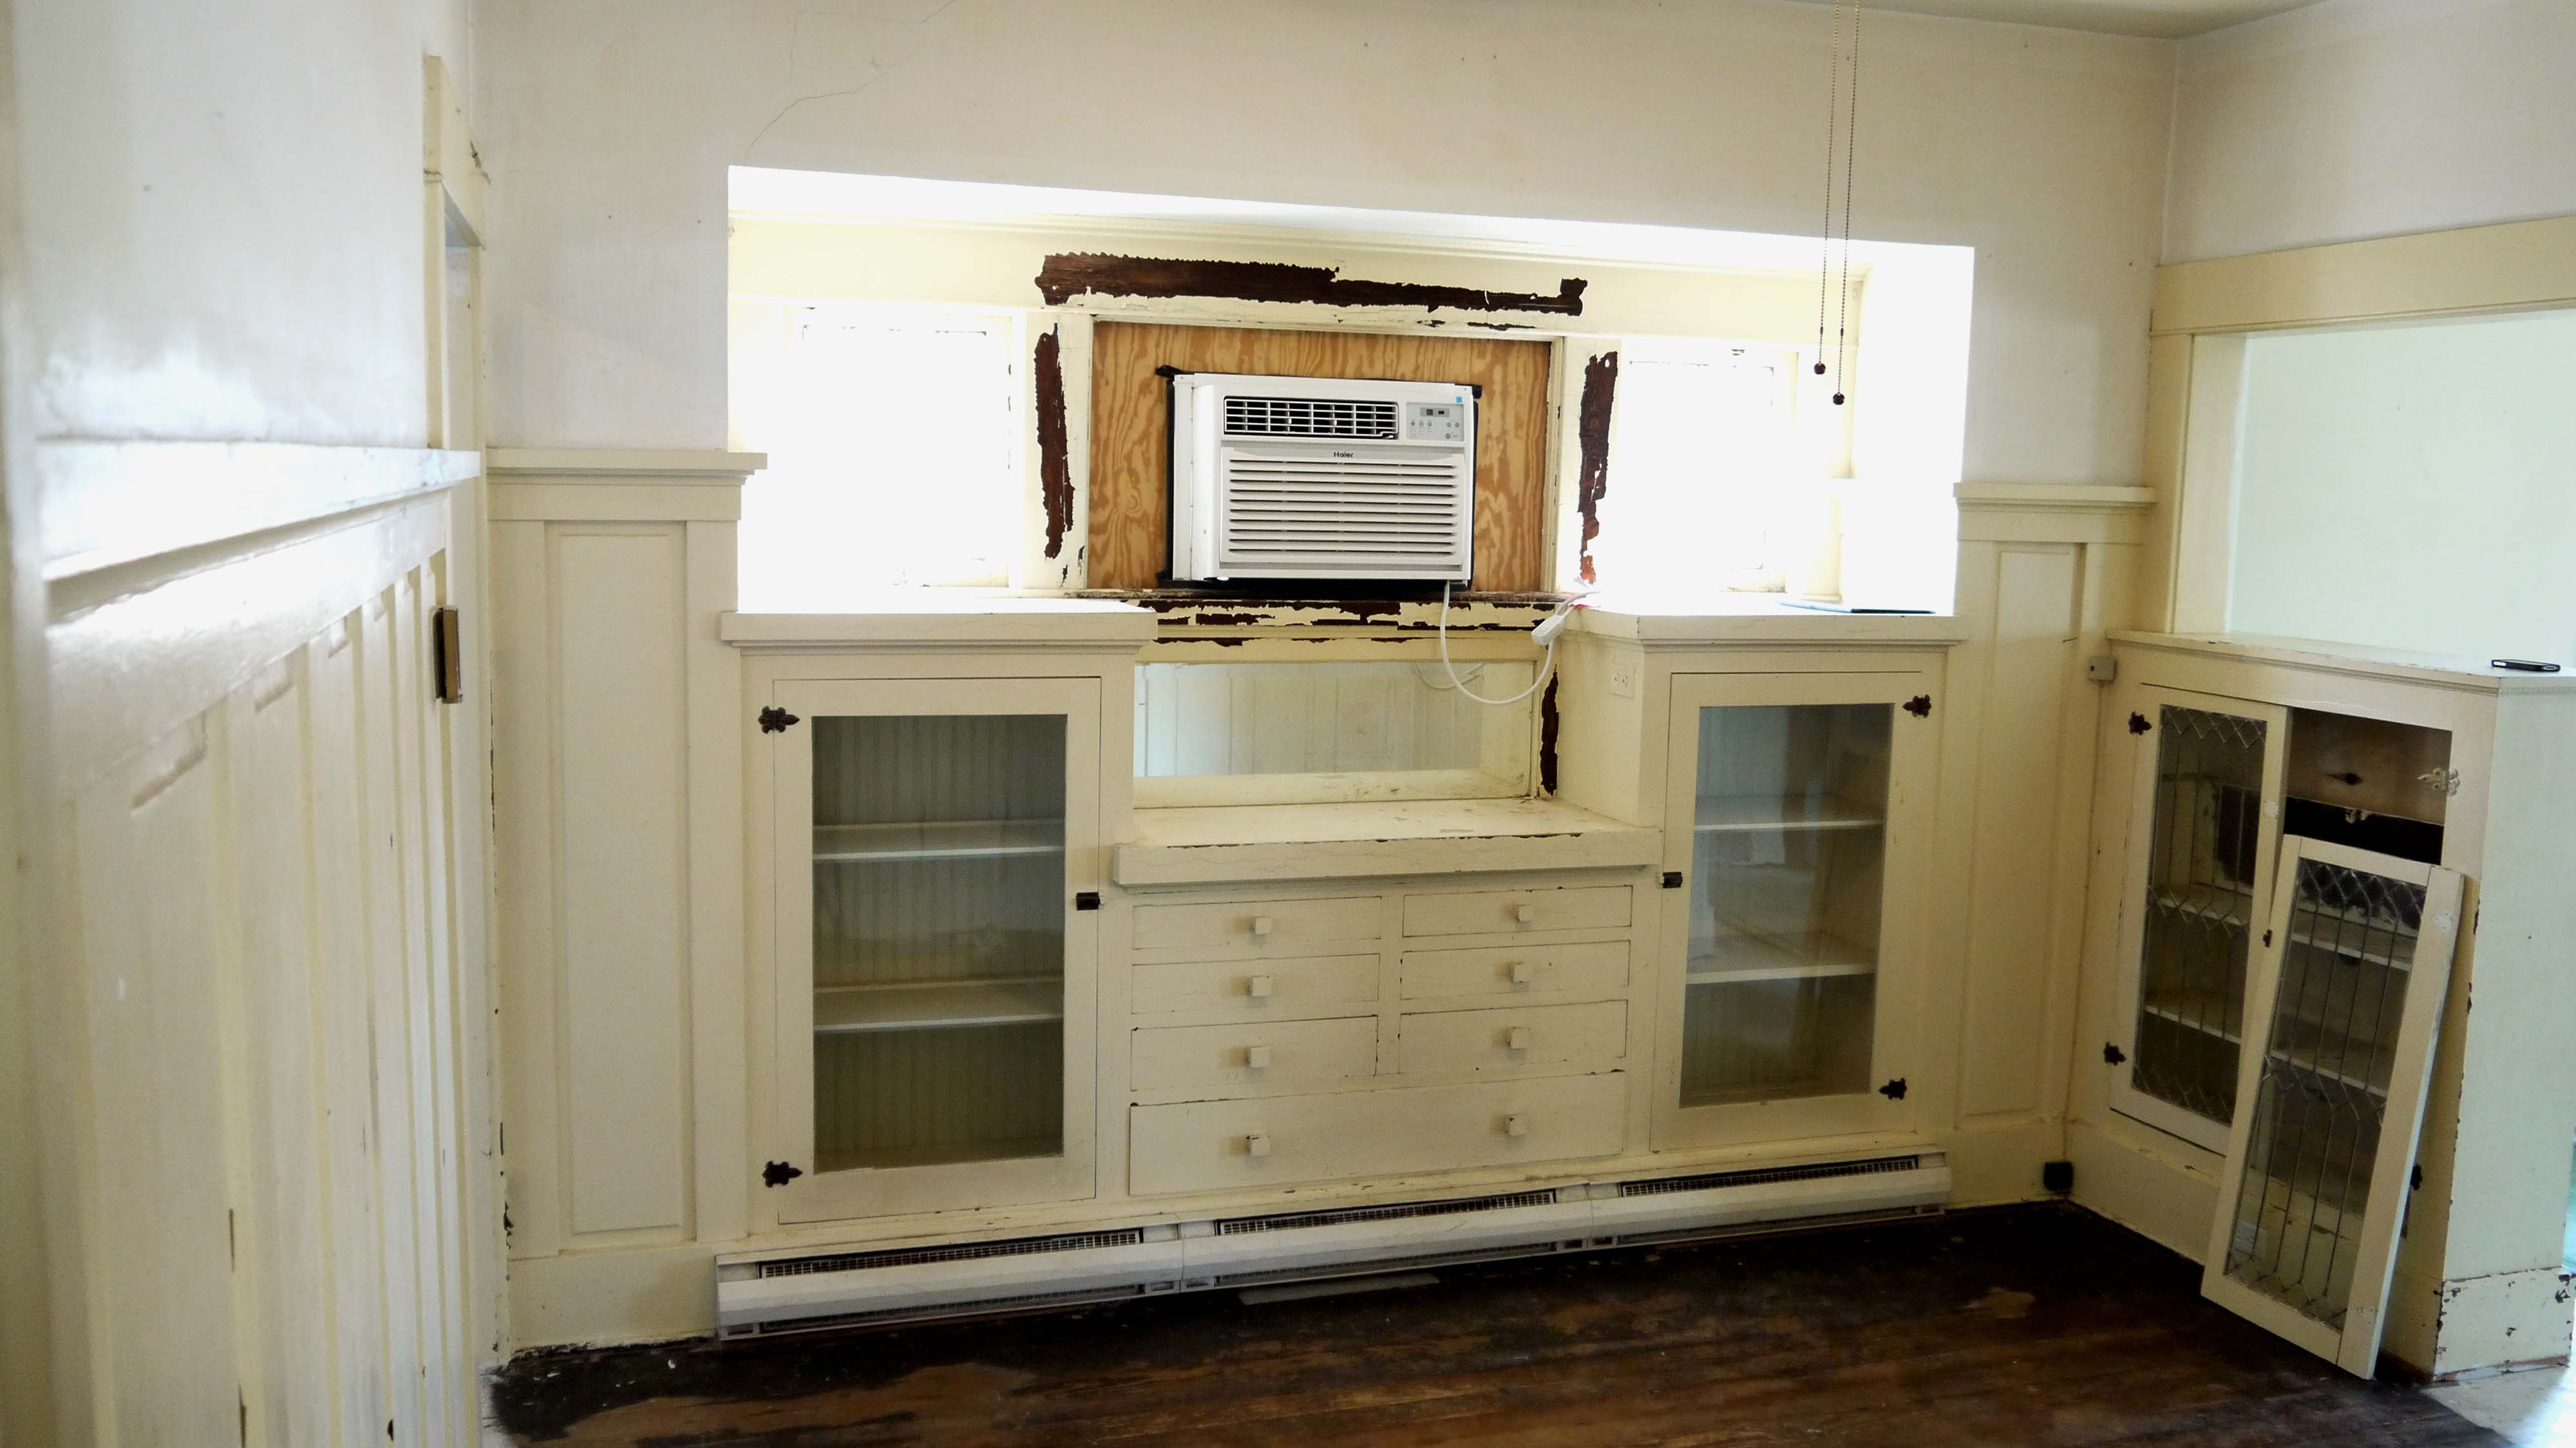
I can’t help but think that the center window must have been leaded glass like the two on the sides, and it was removed for an air conditioner. I’m still hoping to find the original window in the attic somewhere.

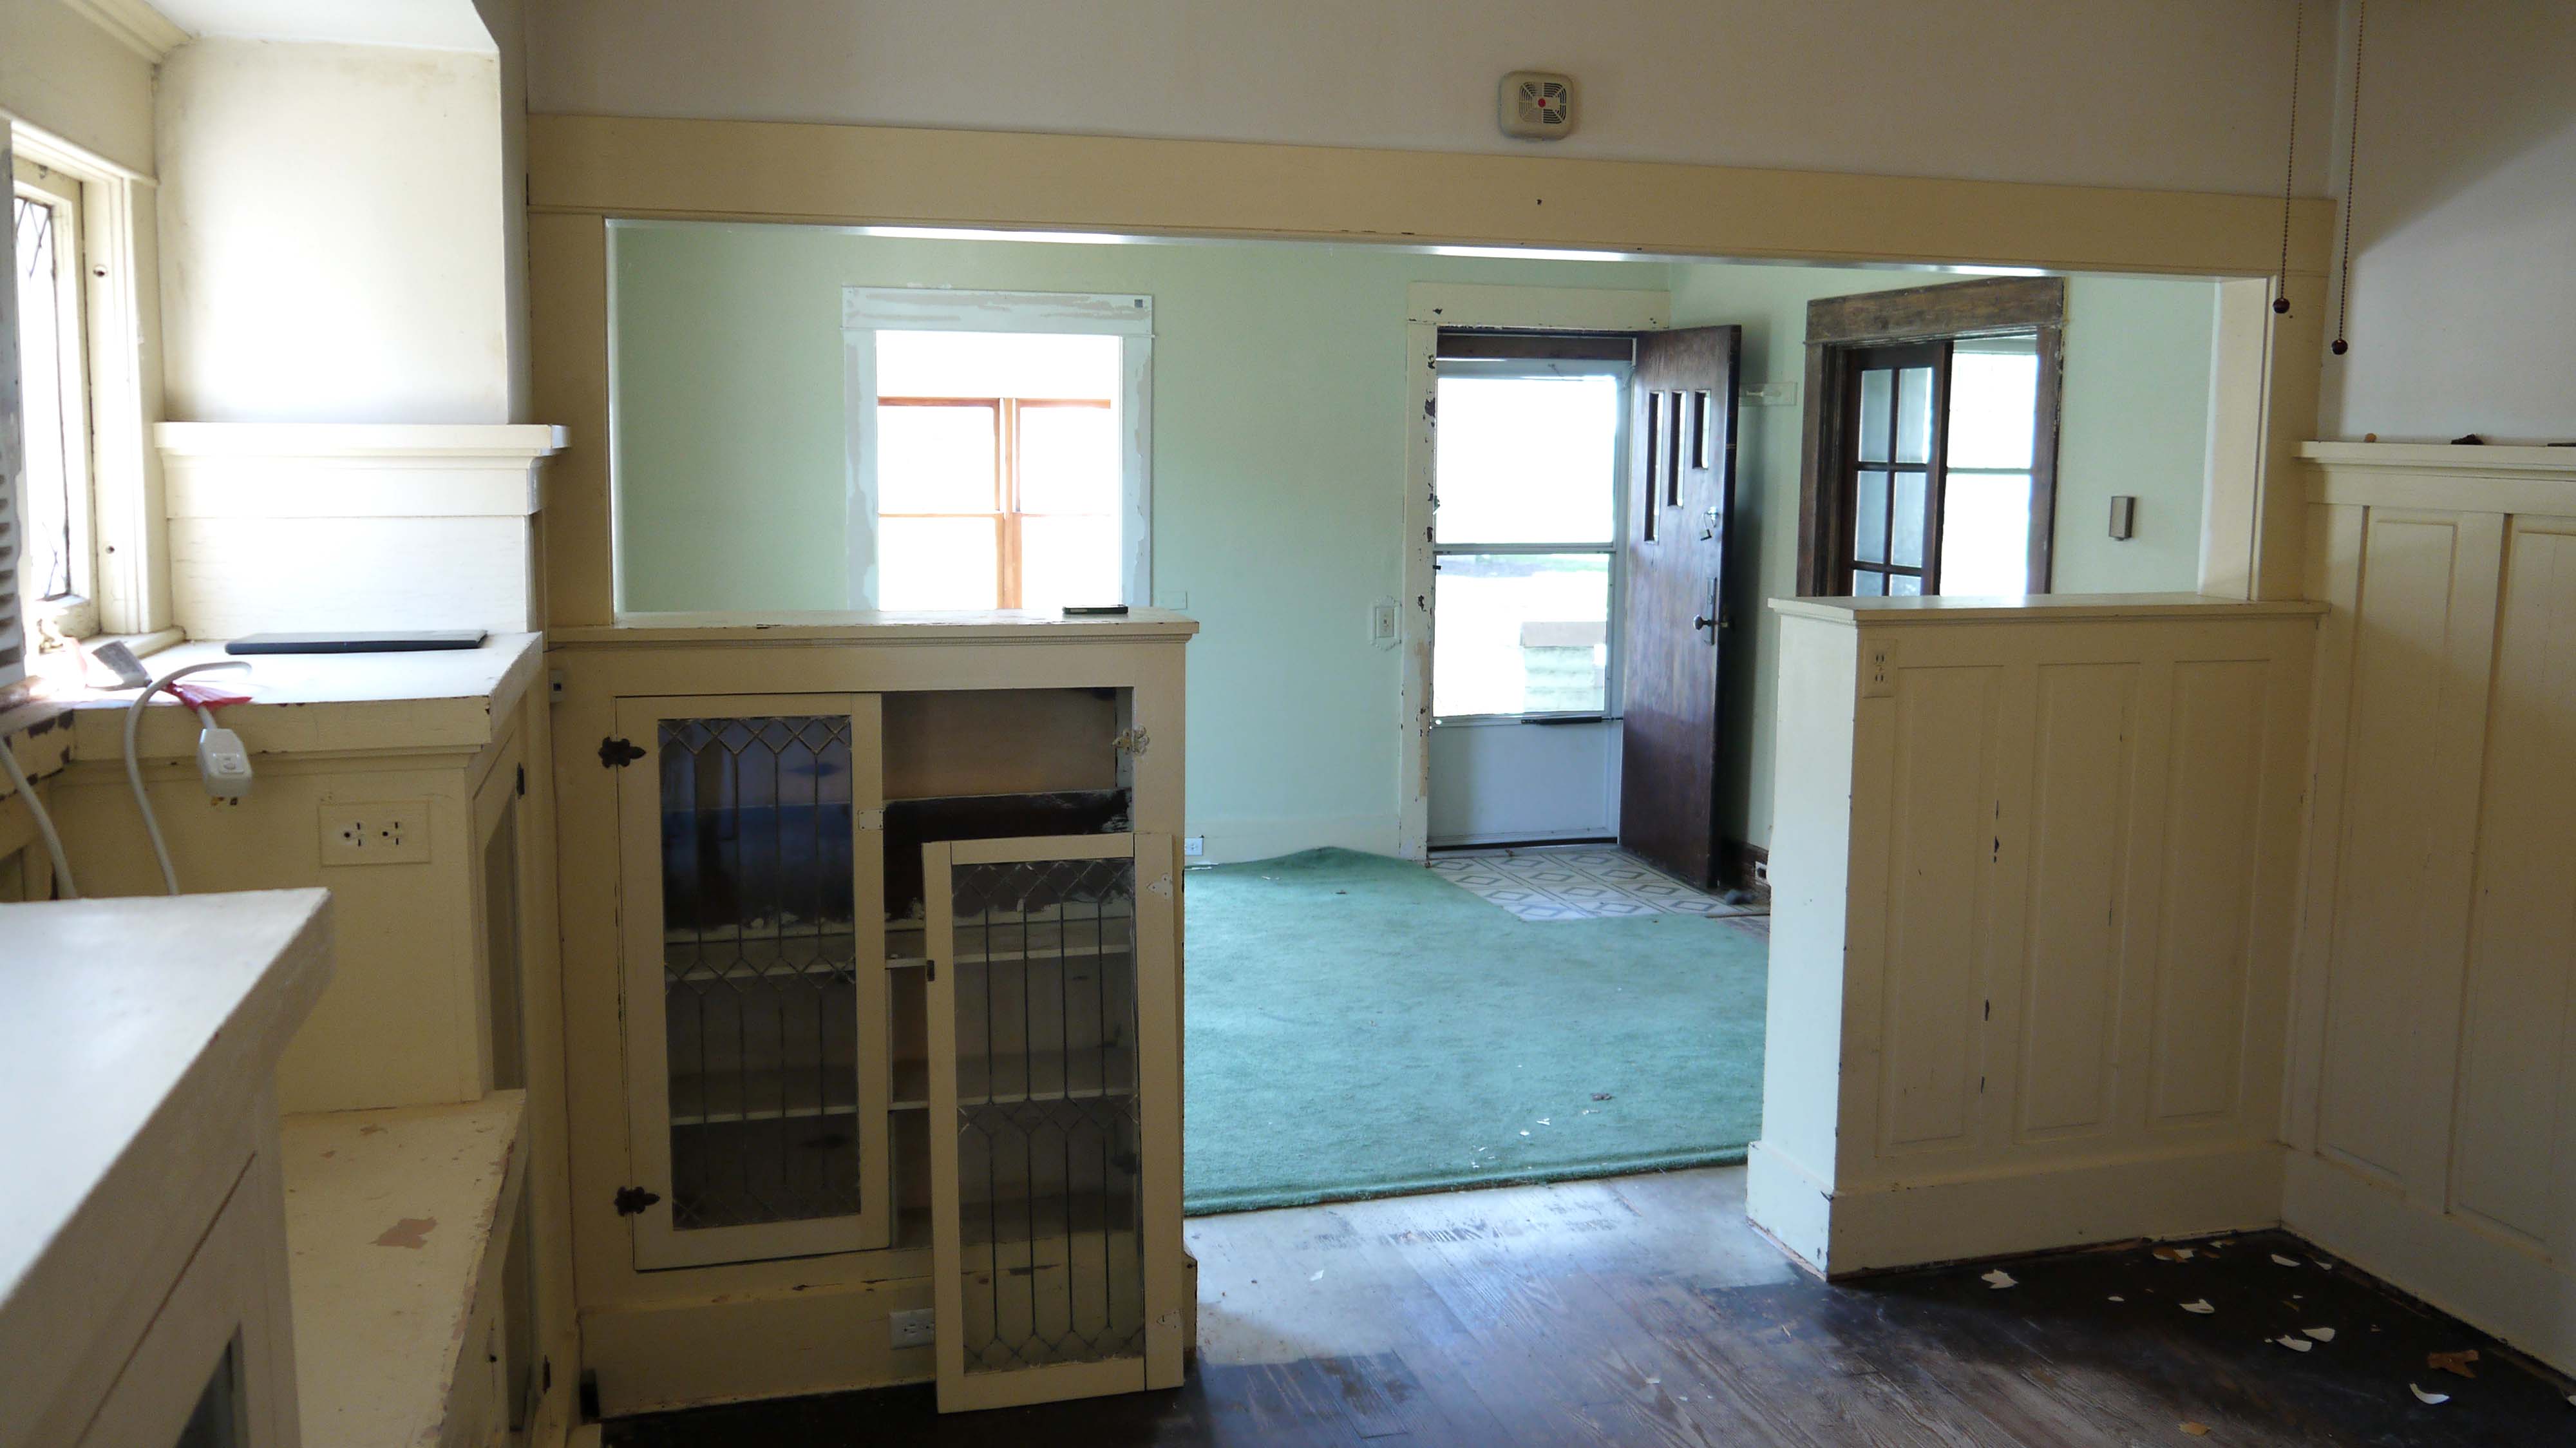
And the doors to the left bookcase are leaded glass too! The frame on the one is bad, it has come unglued and the glass became loose, which is why it is off of its hinges. But at least it is still there, and wasn’t trashed at some point. It’s easier to fix something broken than replace something not there.
The dining room leads first into the second bedroom, or as I have been calling it, the blue room. Overall, it feels a little more private than the first bedroom. Not only is it in the back of the house, but is has much smaller windows which makes it a little darker. There is no closet, but a built-in wardrobe from floor to ceiling.

The window to the back yard is half as tall as any others in the house. The large blank wall to the left will work as a space to center a large bed and headboard, with room for a nightstand on either side.

This window faces east and, although it is too bright to see out, actually shows the detached garage. Unfortunately, the cardboard piece covers a broken corner of the window. So terrible, because all of the windows in the house are original, and they show it. They are wavy and full of lines, bubbles, and those imperfections that show they are panels of hand blown glass. Made by hand. Not rolled on a glass machine and perfectly flat. They show the signs of how they were made, and looking through them they slightly distort the view outside. The light coming in is also refracted a bit, making neat patterns on the walls, like little sunbursts that move on the walls in each room.

Walking back through the dining room, this doorway to the west leads into the kitchen. There are just a few spots on the ceilings where the paint is peeling like this. There doesn’t seem to be much evidence of water damage, so I have to believe the drastic temperature changes from no heat this past winter is what made the paint start to peel. This photo also gives you a sense of how tall the dining room paneling is.

It’s by far not a glamorous space yet, I will not be hosting any dinner parties in the near future at least. But it is a nice square room, and I’m hopeful that I can pull up the old linoleum and reveal wood floors to refinish.
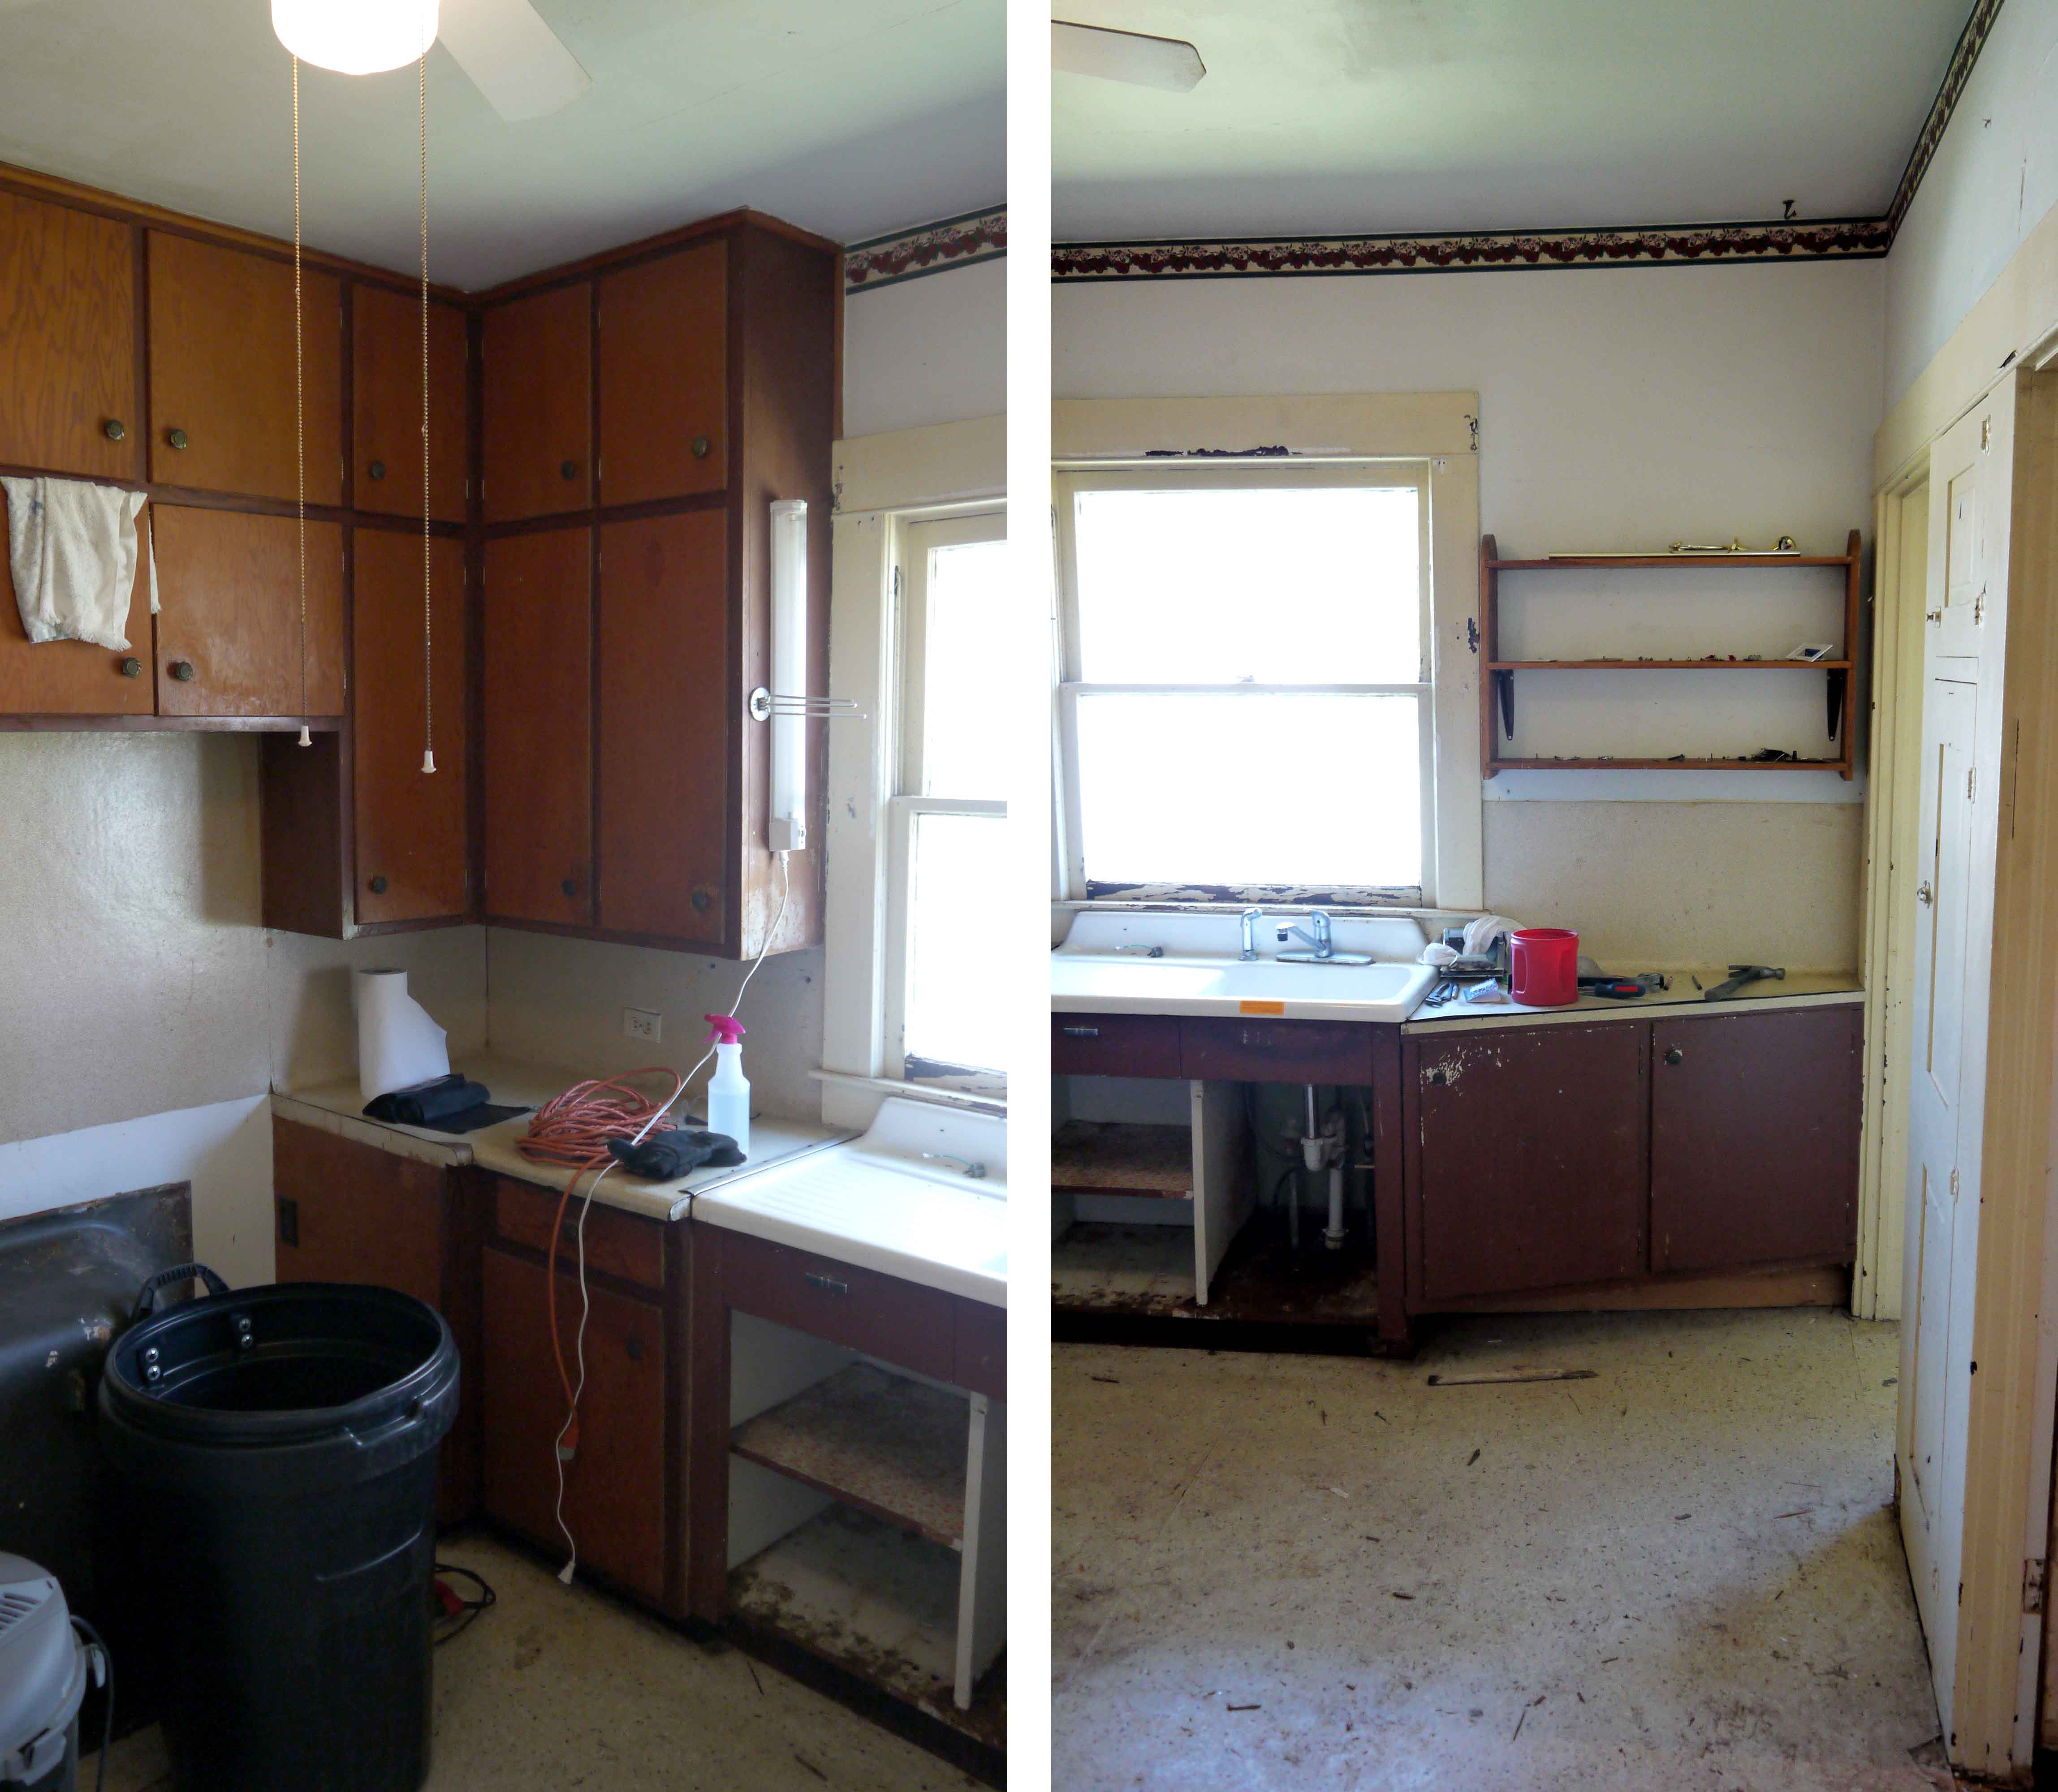
In the mean time, it just needs a thorough scrub-down. The tall cabinets are a good start! And yes, as I mentioned before, you can see how the stove and fridge are on the left, and in there place is the underneath side of my tub.

The best thing about the kitchen is the porcelain sink! What a statement piece, enormous for this size of kitchen, with its built in drain board. This is staying! Or, rather, it will get tore out, scrubbed top to bottom, and then put back in.

Standing with the sink at my left, this shot looks into both the laundry room and bathroom. I already detailed the bathroom “before” condition in this post. And in the space between them is another shallow wall cabinet, it looks as though it originally held a fold-down ironing board (like this one), but it’s been removed. I wonder if I could ever find one to replace it? Or perhaps build one to look original? Can you tell I love these little cubbies? These Craftsman home builders thought of everything. Why buy so much furniture; instead just build a house with a wardrobe, bookcases, buffet, and wall cabinets all as part of the design. Form meets function? I think so.
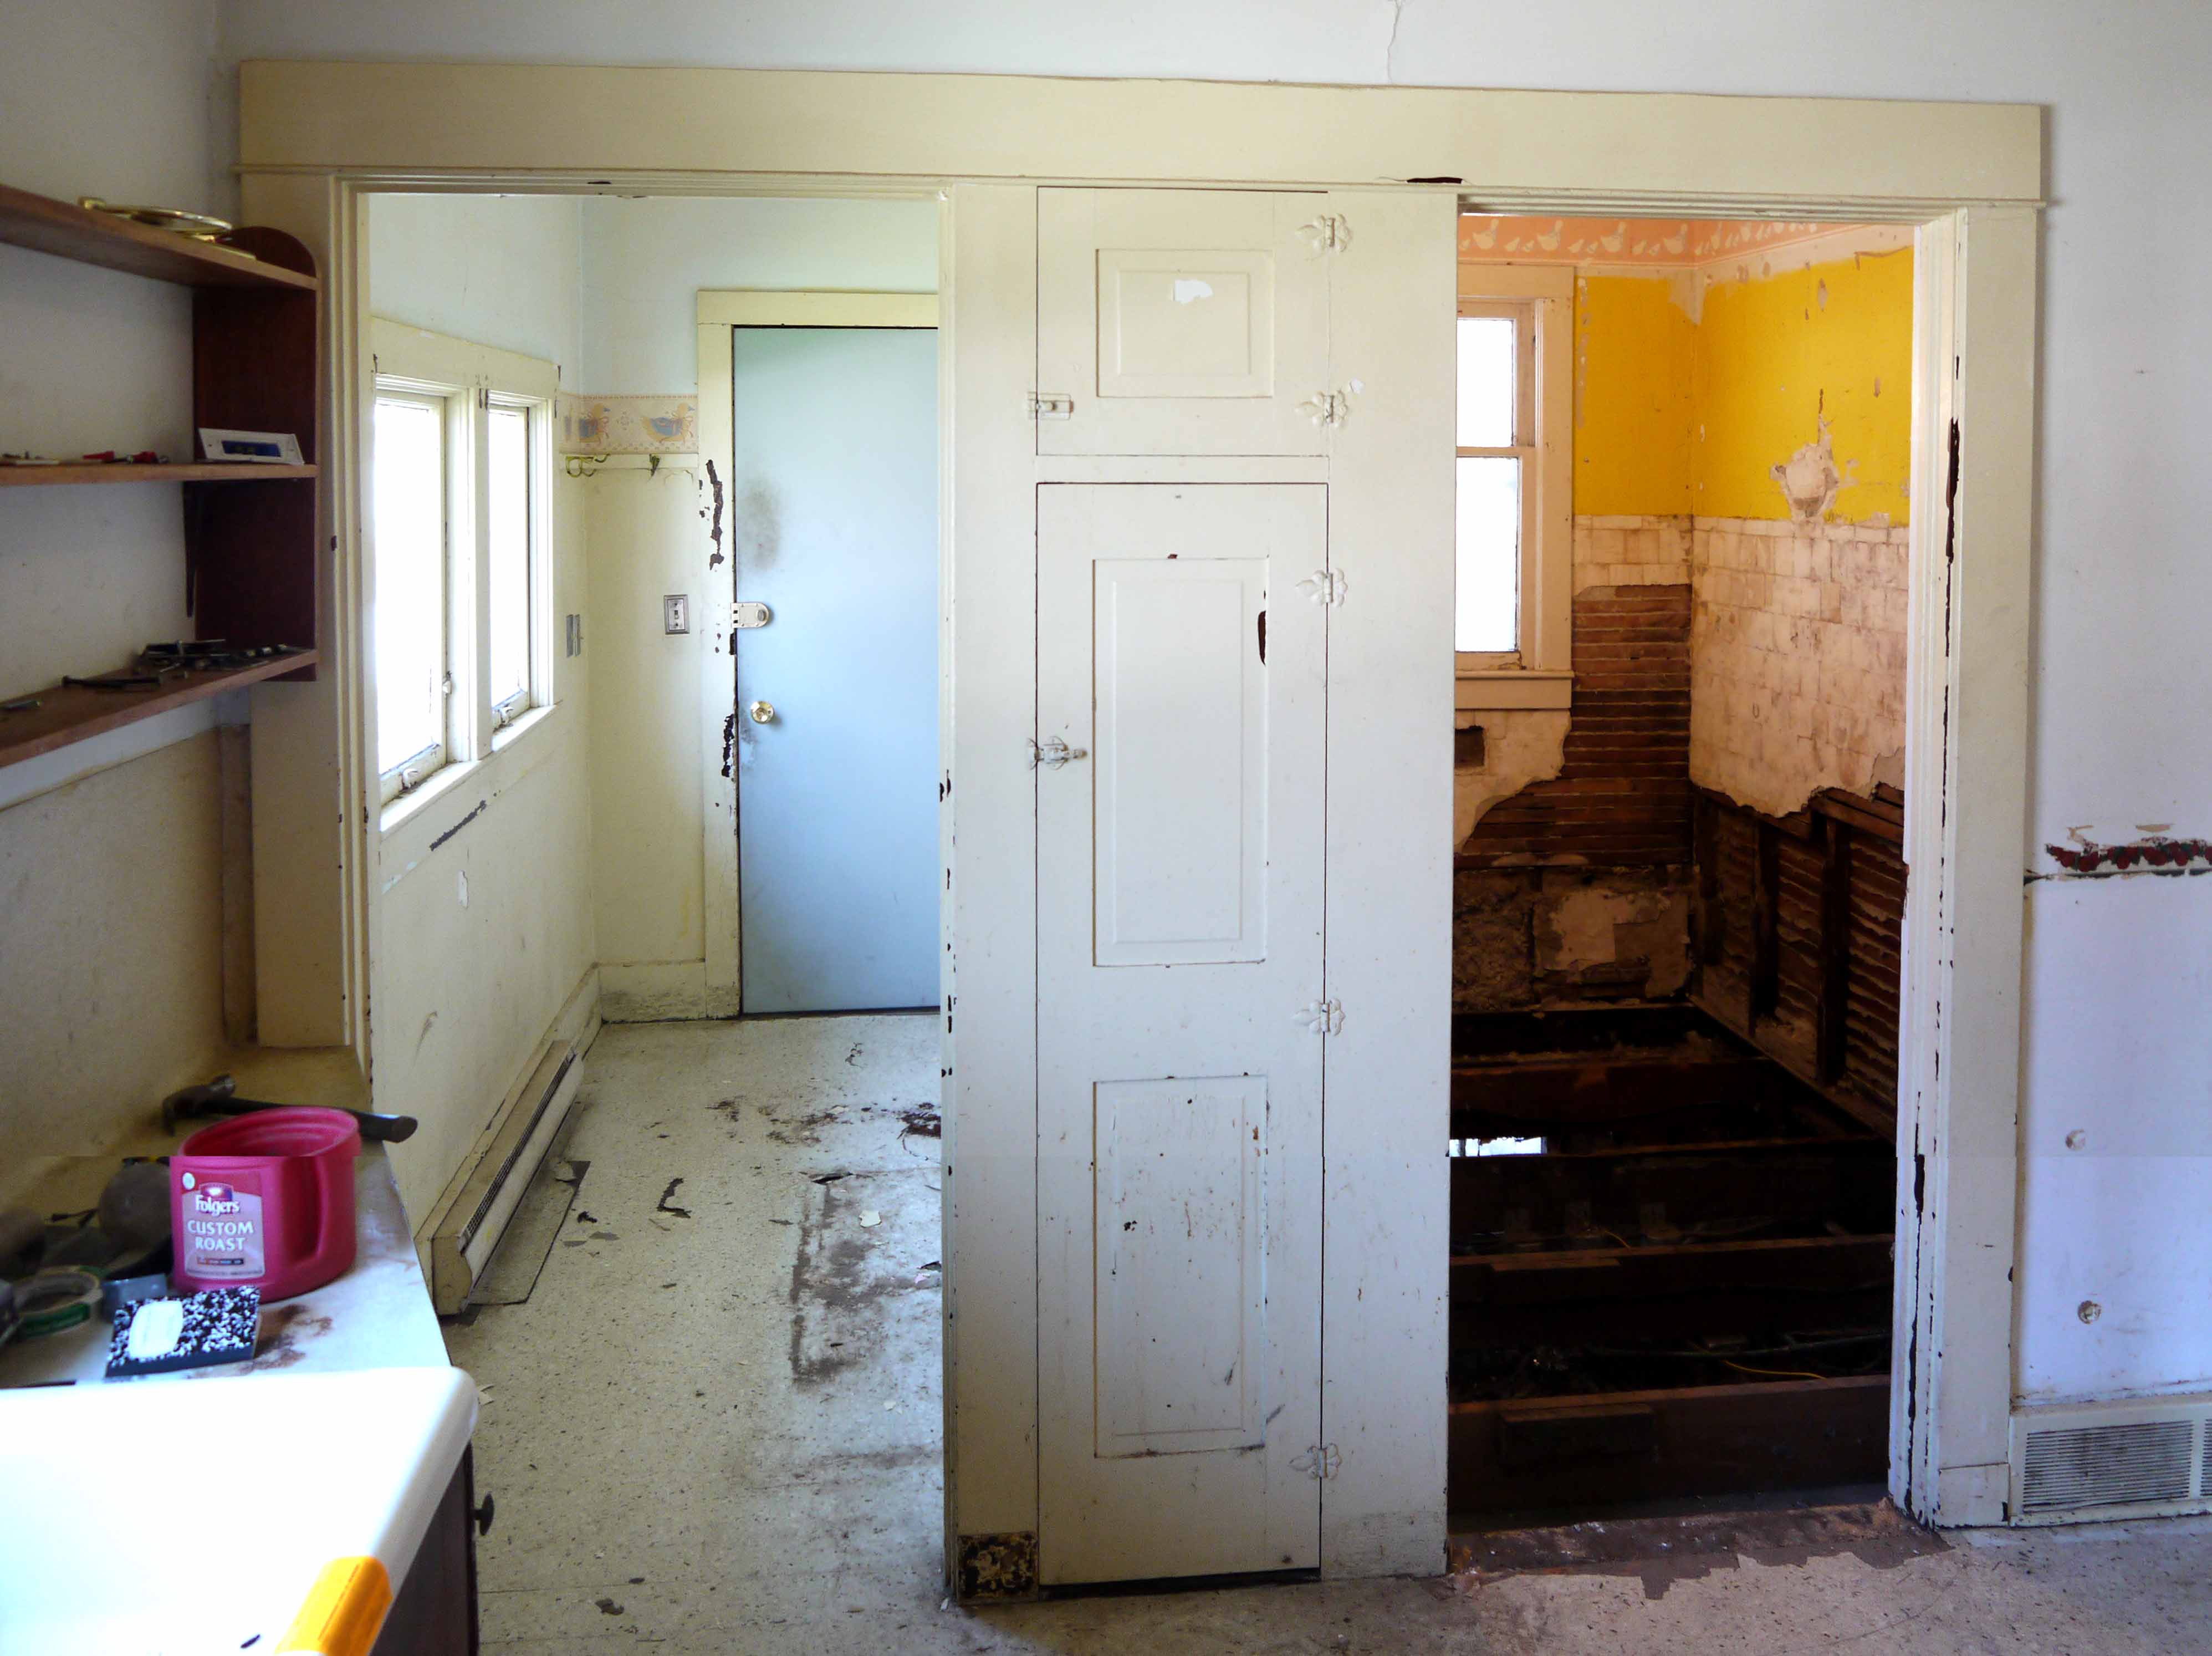
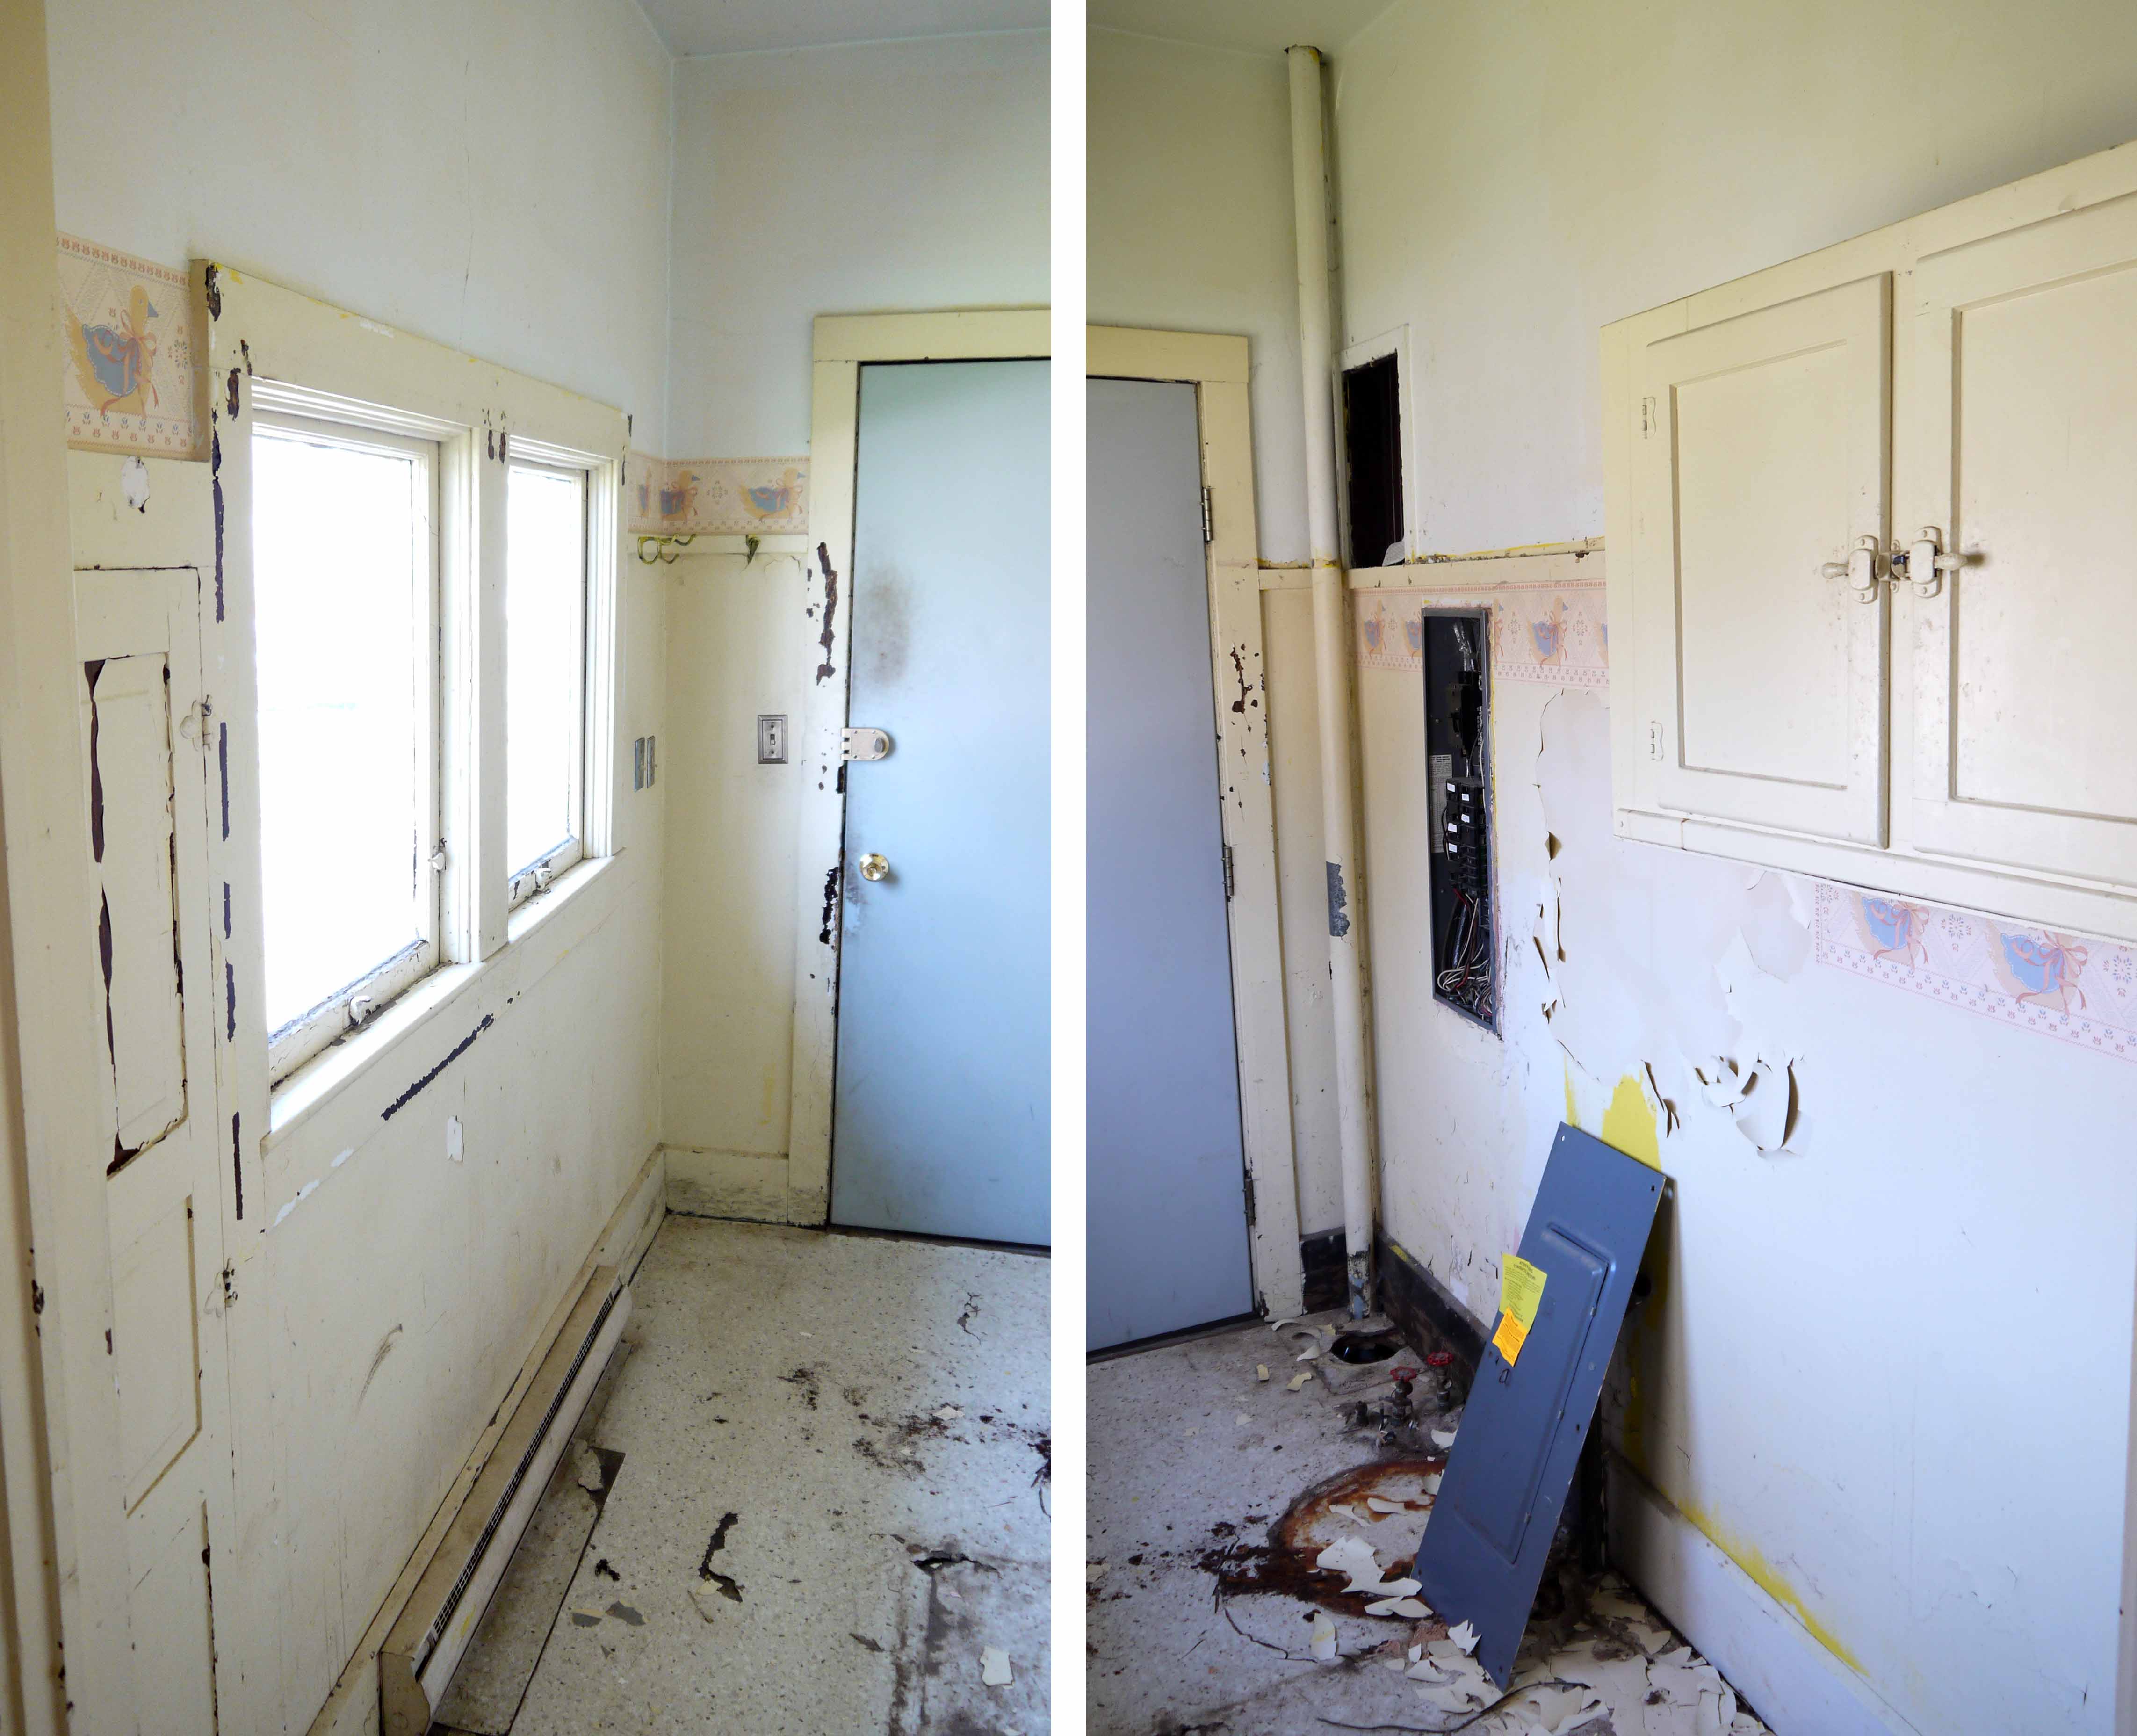
And then through the doorway, you see the narrow but bright laundry room. Another shallow wall cupboard on the left is perfect for a broom closet, and the double window floor floods the room with light. On the right is the drain plumbing vent and electrical panel (with door sitting on the floor). I hope to run the plumbing vent through the wall, but the breaker panel is staying. It’s 200 amp, and has empty breaker bays for expanding.
The rust circle on the floor shows where the water heater was, I carried that out the first week (and my hand went right through the bottom it was so rusted). I am researching tankless water heaters in hopes of saving that much floor space, as this is really a small room. Under the cabinet is where the washer and dryer go, and the steel door leads to the back yard.
So that’s the tour! I didn’t think to take photos of the outside of the house, including the garage and outbuilding, so that will be next. My family helped last weekend to do some yard clean-up, raking, planting a few perennials and trimming the overgrown shrubs.
Gutting the Bathroom
Posted by Adam A. Ries in DIY, Home Improvement, Interior Design on April 14, 2014
In a 1 bathroom house, it is no surprise the bathroom is about the number 1 priority before I can officially move in, especially since I knew it needed some major remodeling. Just from a simple peek into the bath cabinet, I had pretty much already made up my mind that I would be needing to run new plumbing. There were signs of prolonged leaking around every fixture in the house (water heater, washer, kitchen sink, toilet, tub… I think that’s nearly the whole house). And from peaking into the crawlspace, I could tell that much of the drainpipes were still cast iron or steel, which had me thinking new PVC drains for the whole house would just be good measure also.
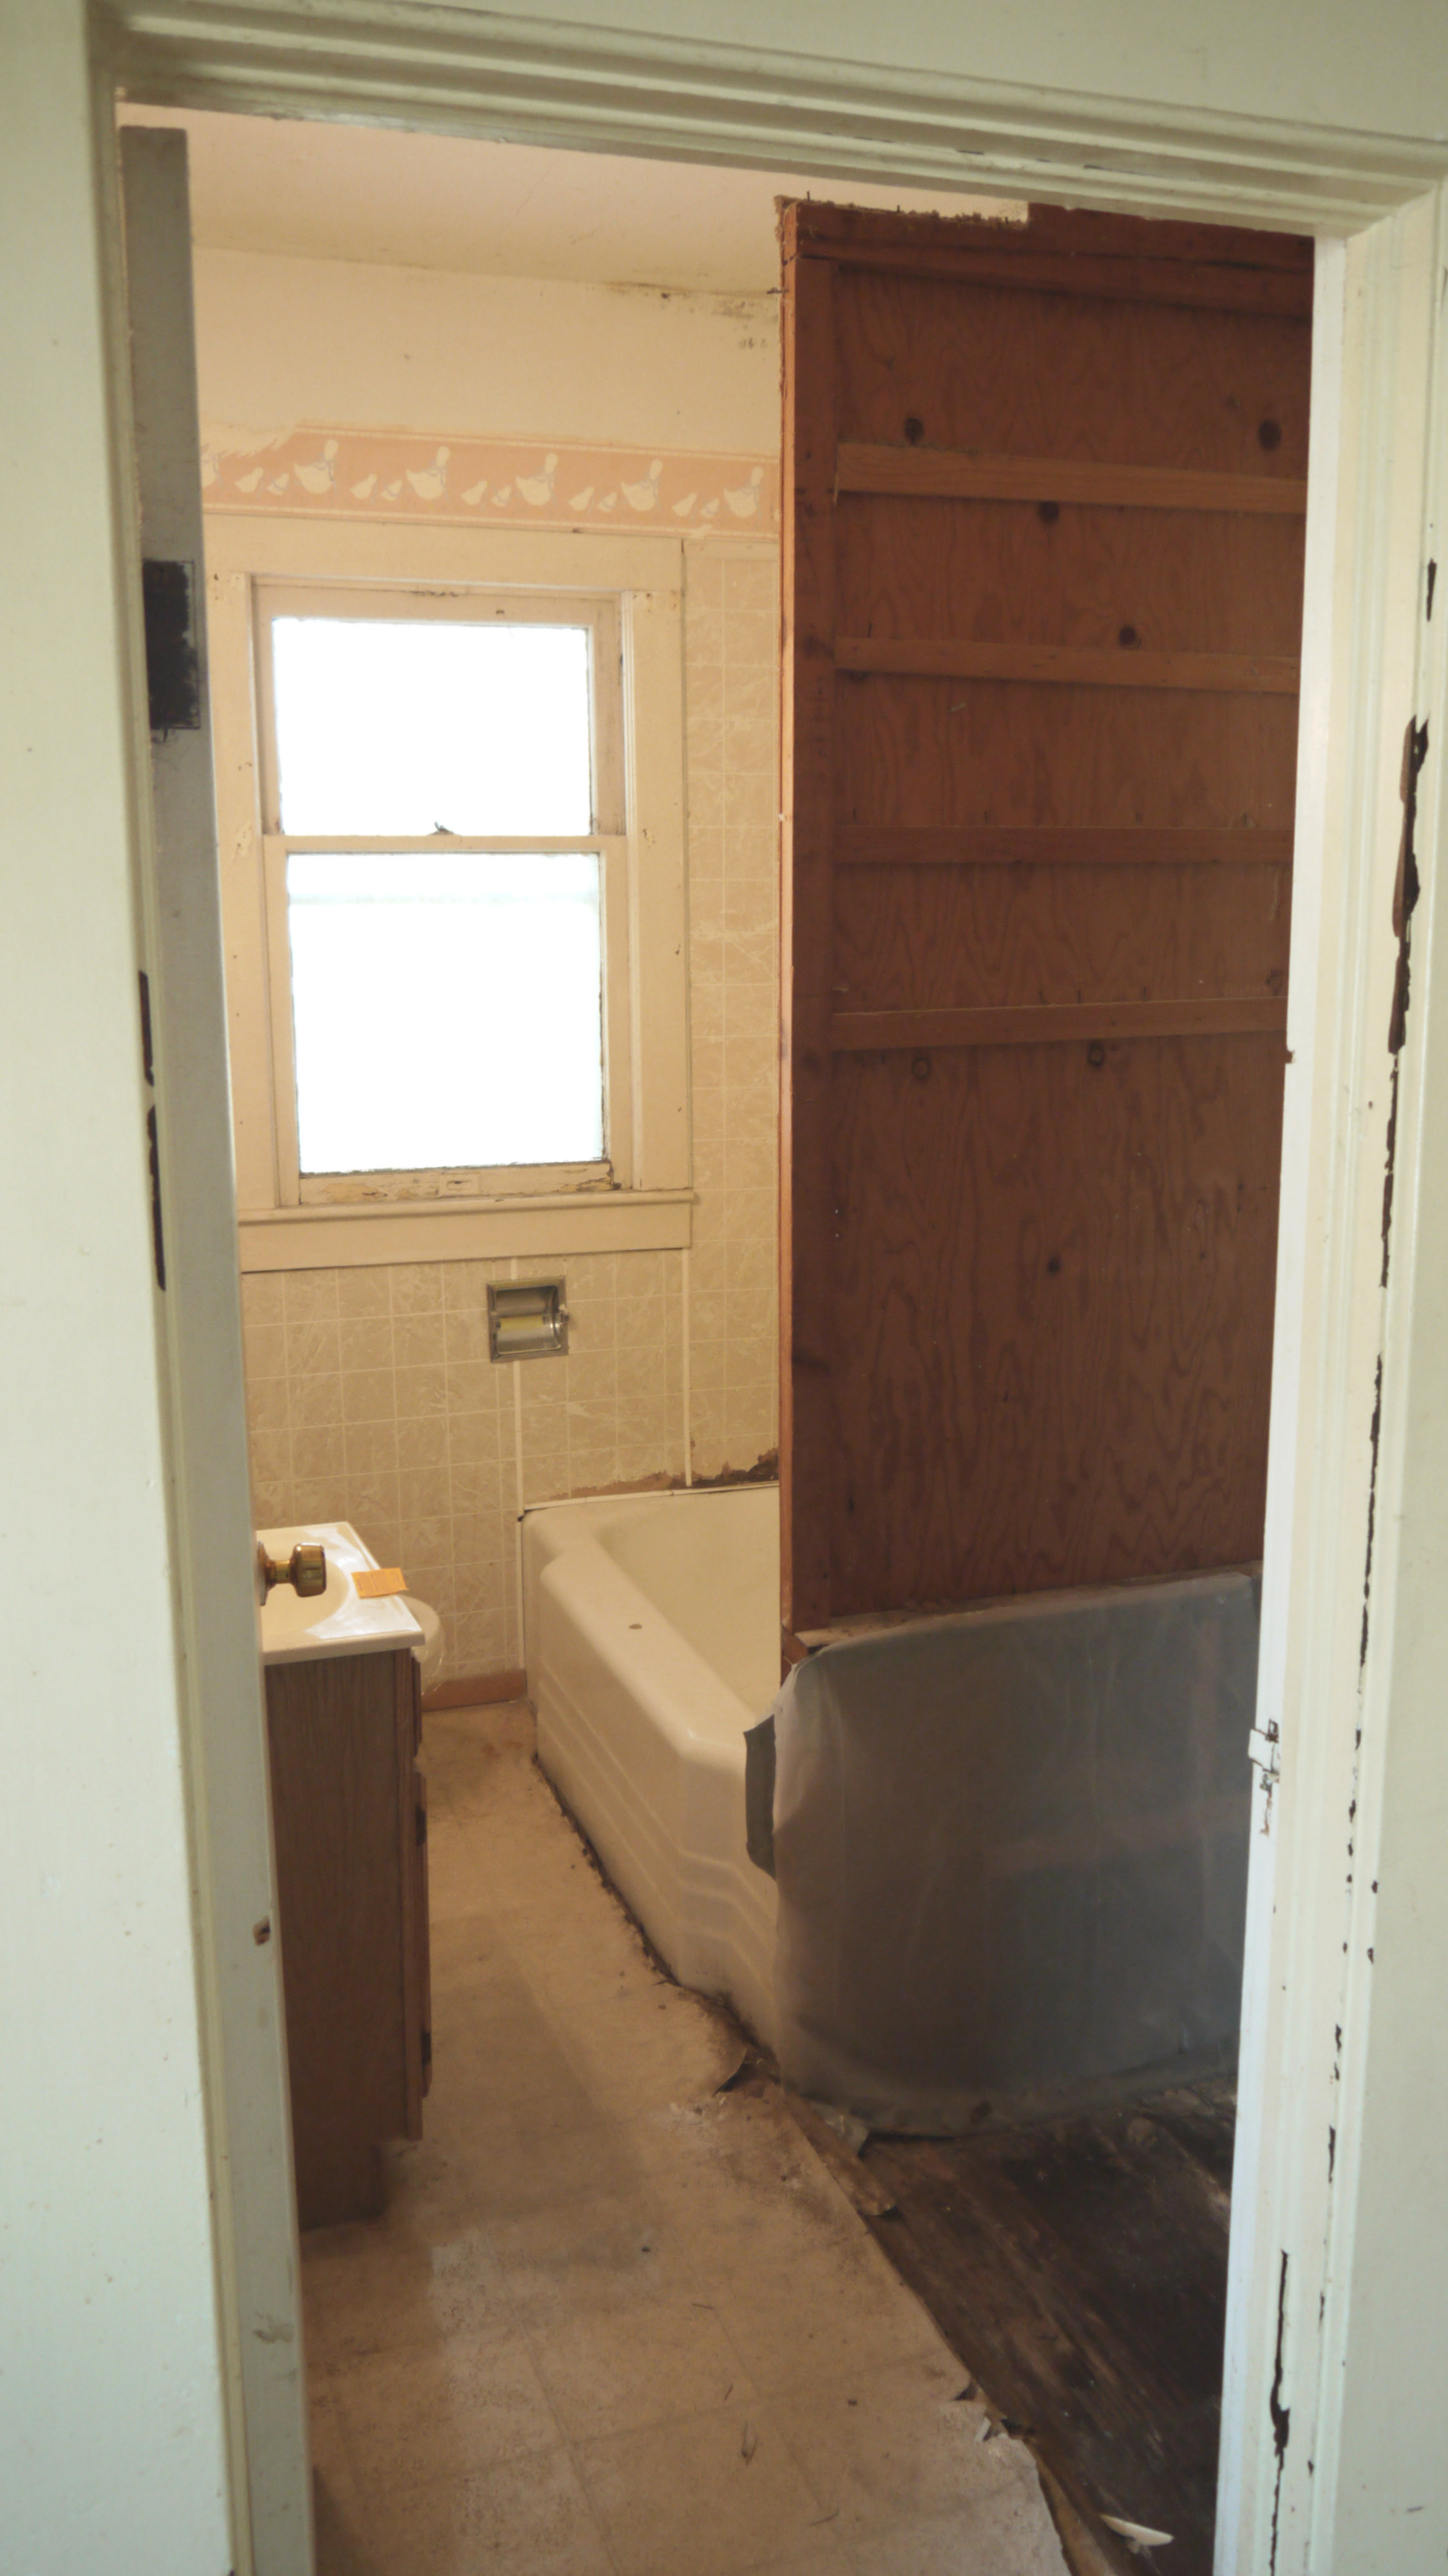
So here is basically how I found the bathroom (for all the bath “before” photos, scroll down or click here).
Within just a few hours work, the bathroom was almost empty. I tried to loosen the bolts “holding” the toilet to the floor, but they were seriously rusted tight. So I tried to see how loose it might be to get a saw blade underneath to cut the bolts, and I nearly picked it right up off the floor, no kidding! It was only held on one side, and barely at that. The sink vanity, although not in bad shape (I plan to put it by the curb with a “FREE” sign) literally felt like a child’s sink in height. I can only imagine the neck and back pains trying to wash my hands or brush my teeth in that, not exactly chiropractor approved for my 6′-4″ tall self.
The flimsy paneling wasn’t glued at all, just a few nails into the plaster so it ripped off so quick. And then I started ripping up the flooring. I didn’t take photos of every layer, so let me describe it: imagine a sandwich of linoleum, 1/2″ thick plywood, linoleum, strangely soft and termite eaten panel board, and then another layer of linoleum on top of the home’s original wood floor. Each layer showed signs of being glued at one time, but thanks to the amount of water it survived and what looks like hungry termites, they simply peeled off like a freshly baked Pillsbury grands biscuit. Hungry? Me neither.
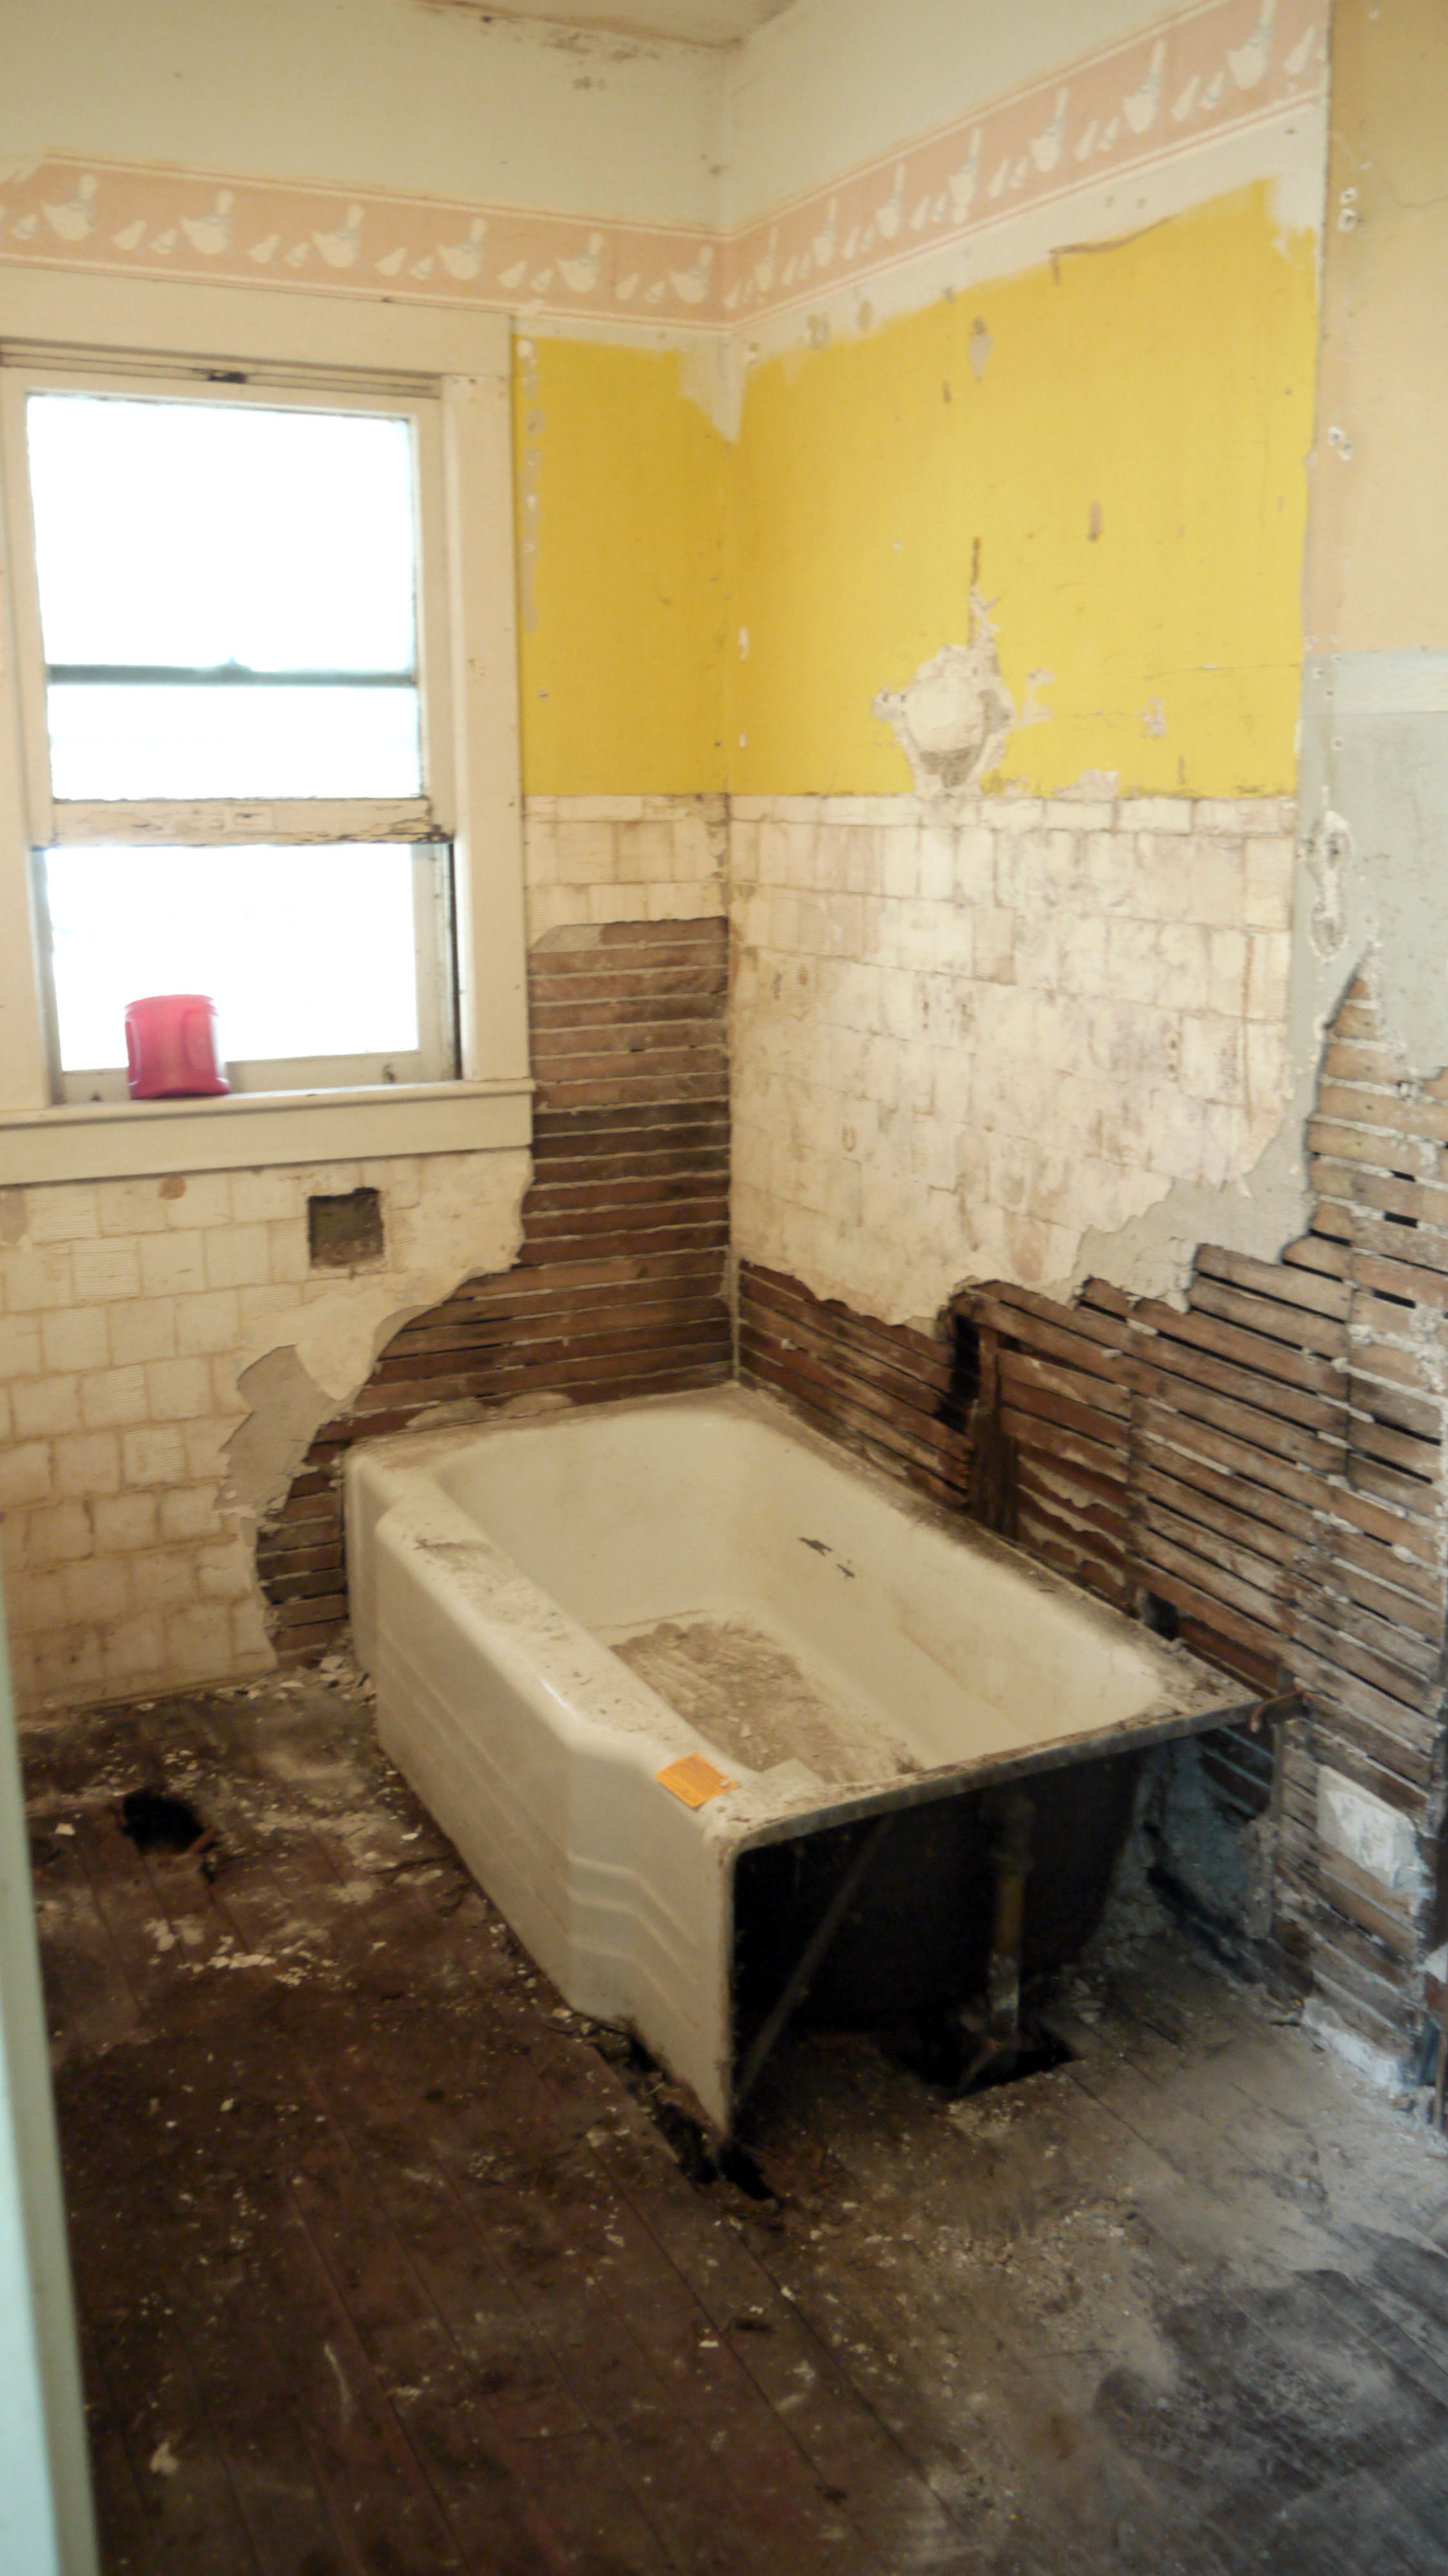
At first, I was super excited to see the wood floor peak out under all those layers of wet flooring. But the closer I got to the tub and toilet stack, the worse the wood got. Until eventually, I put accidentally put my foot right through the spot where the toilet bowl would have been. It just splintered apart. And the board broken at the front edge of the tub was rotted through, it came up like ripping apart a dry sponge. And trying not to fall through the floor was the cruelest game of hop-scotch.
I debated about whether or not to remove the tub. My debate lasted all but 10 seconds. The tub drain had signs of leaking, with every connection corroded. But I have never moved a cast iron tub before. Thank goodness for friends who are willing to come over and help lift a tub. Seriously, thanks Kyle!
Next came knocking down the loose plaster. I didn’t think this step through. I figured knock down what was loose, then take out the floor. Looking back, I should have simply cut out all the plaster and lath for the entire wall behind the tub and on the toilet wall right then. For the window wall, I don’t want the insulation to fall out, and I don’t plan to run any pipes or wires through that wall, so that lath can stay.

So now the tub is sitting in my kitchen, where a normal person would have a stove and refrigerator. But I am not a normal person, so I have a tub in mine. I love the look of the enameled cast iron, and it’s really very solid. I expect it to clean up really well with a ton of elbow grease after I get it reinstalled.
Where I left it on Saturday was beginning to cut out the wood floor. Yes, cried a little at this step, knowing how nice a dark and luxurious wood floor would be beautiful in an otherwise classic black and white tile bathroom. But the amount of rotted wood was just too much, the entire half of the room closest to the window would have needed replaced. I would have found boards to match, and by cutting out the floor I gain a larger access into the crawlspace for when its time to run new plumbing and add new electrical lines to a few other rooms. So attack it I did with the Sawzall, and there’s no looking back now. Plus, many homes of this age originally had marble or hex-tile bath floors, so my finished look should pass as age appropriate.
So what is getting me through the panic attack of not having a bathroom floor at the moment? Below is my bathroom inspiration:

White, lots of white. Except imagine a dark wood medicine cabinet built into the wall, as well as dark wood trim and door. I’m not too much a fan of painted woodwork (yes, this house will be the real test of my paint stripping abilities), and I think a black and white bathroom with just a little bit of deeply stained wood will make the room feel very rich. But in the mean time, I have got some major crawlspace work to do!
