Posts Tagged Shower
Finding my Niche
Posted by Adam A. Ries in DIY, Home Improvement, Interior Design on September 3, 2014
I love the look of white and gray Carrara marble, especially the aged floors and walls one can find in period homes and old buildings. It’s a rather soft stone, so it shows wear after decades of use. But that wear adds to its beauty.
Unfortunately, I really couldn’t afford marble for my bathroom. There is just too much tile on the walls, and even the floor would have been too expensive in marble hexagon mosaic. I just couldn’t justify investing that much into this modest of a home – a humble 2-bedroom house in this neighborhood won’t see that return on re-sale anytime soon.
But I found a way to get my beloved marble after all – and affordably.
When it came to tiling the built-in niche, I used the mini-subway tiles (2″ x 3″) for the back wall, and I planned to use bullnose edge tiles for the sides to wrap back to the shower wall. But I didn’t like how the bullnose tiles looked on the bottom ledge. Knowing that soap bars and bottles would be sitting here wet, that would have meant constantly dirty grout lines. Not to mention, I’m not sure how I would make a shelf in the middle using smaller tiles – how would it hold itself up?
So while walking through the tile aisle at Home Depot, I saw how affordable 12″ x 12″ marble tiles are – $3.99. And I realized I could get both the bottom ledge and center shelf from a single square.
I cut and installed the bottom ledge first, and I liked how it looked to keep it slightly proud – 1/8″ or so – of the surrounding wall tiles. It gives it more pronunciation, and that “I designed it like this on purpose” look. To make sure it drains, I pressed it into the fresh thin-set and pressed harder along the front edge – so it is slightly slanted out toward the tub.

For the sides, I used a bullnose tile. Because the niche is 4″ deep, the 3″ bullnose tile wasnt deep enough. I had to use 4″ bullnose tiles, so up and down both sides I had to cut each tile so that the grout lines would line up. I went 4 tiles high -the equivalent of 12 inches- then set the next marble piece in to act as the upper shelf. It sits on the tiles below it.
Where the top and sides meet, I cut the meeting edge at a 45 degree angle to miter the corners. The resulting niche is below.
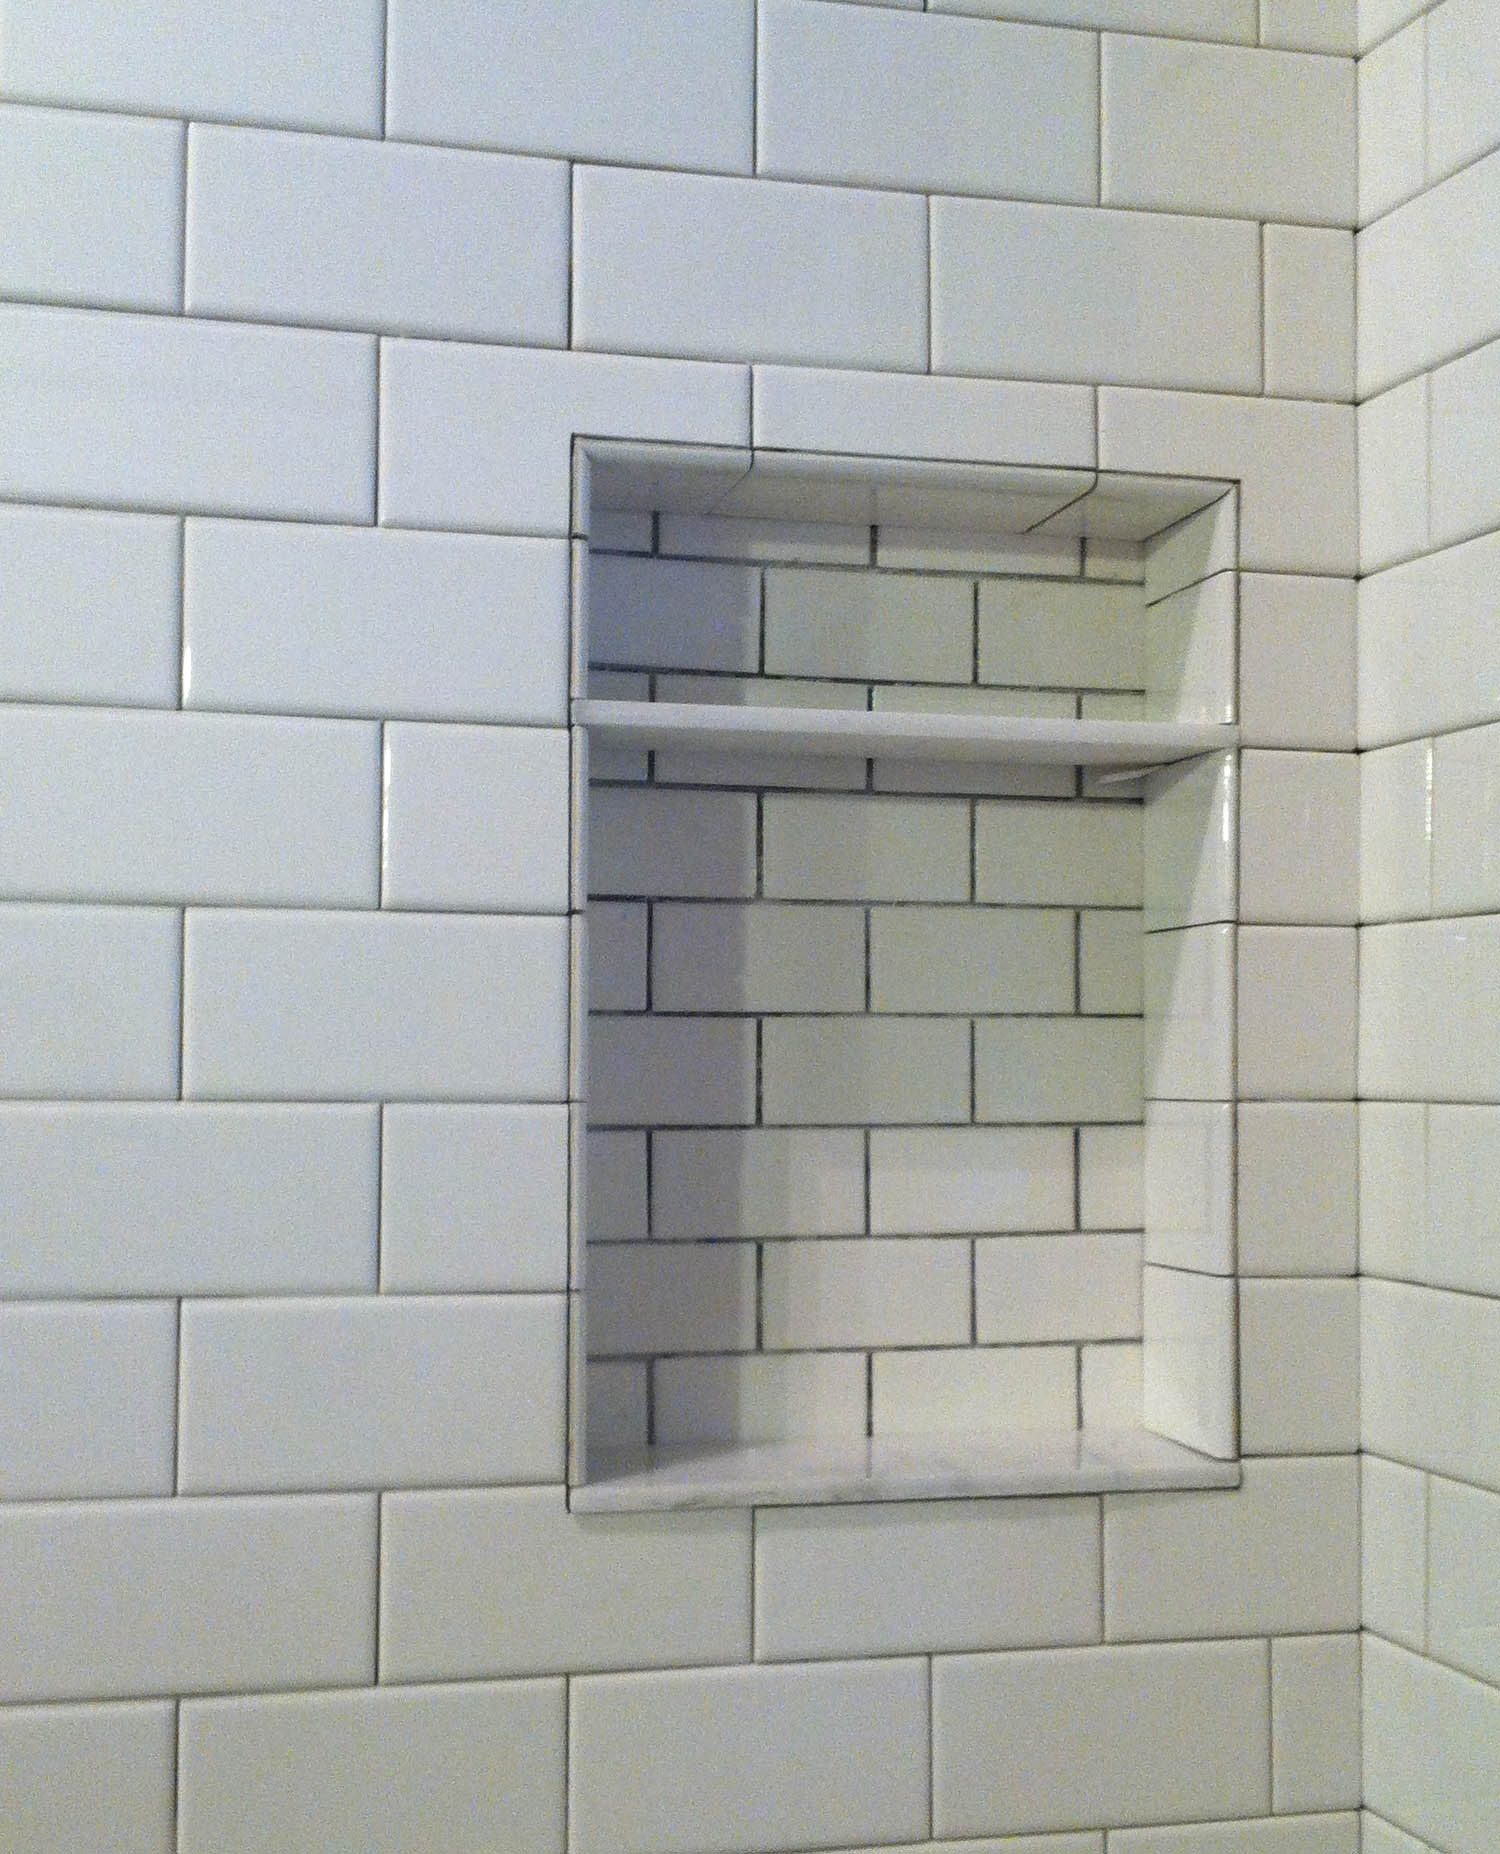
The marble looks great, just a hint of natural stone in the field of all white ceramic tile. Both the ledge and shelf are just slightly pitched to drain outward, so water will drain. The only thing I realized afterward is that the factory edge of the marble isn’t exactly smooth. In fact, it’s almost sharp. Not “cut off a finger” sharp, but “ouch,” noticeably sharper than it should be. I’m thinking I will try to hone it down with wet-sandpaper and see what that does.
Grouting this was a little tricky also. The tile float was almost too big, especially in the upper part. But the beauty of grout is that messy doesn’t matter, it all sponges off.
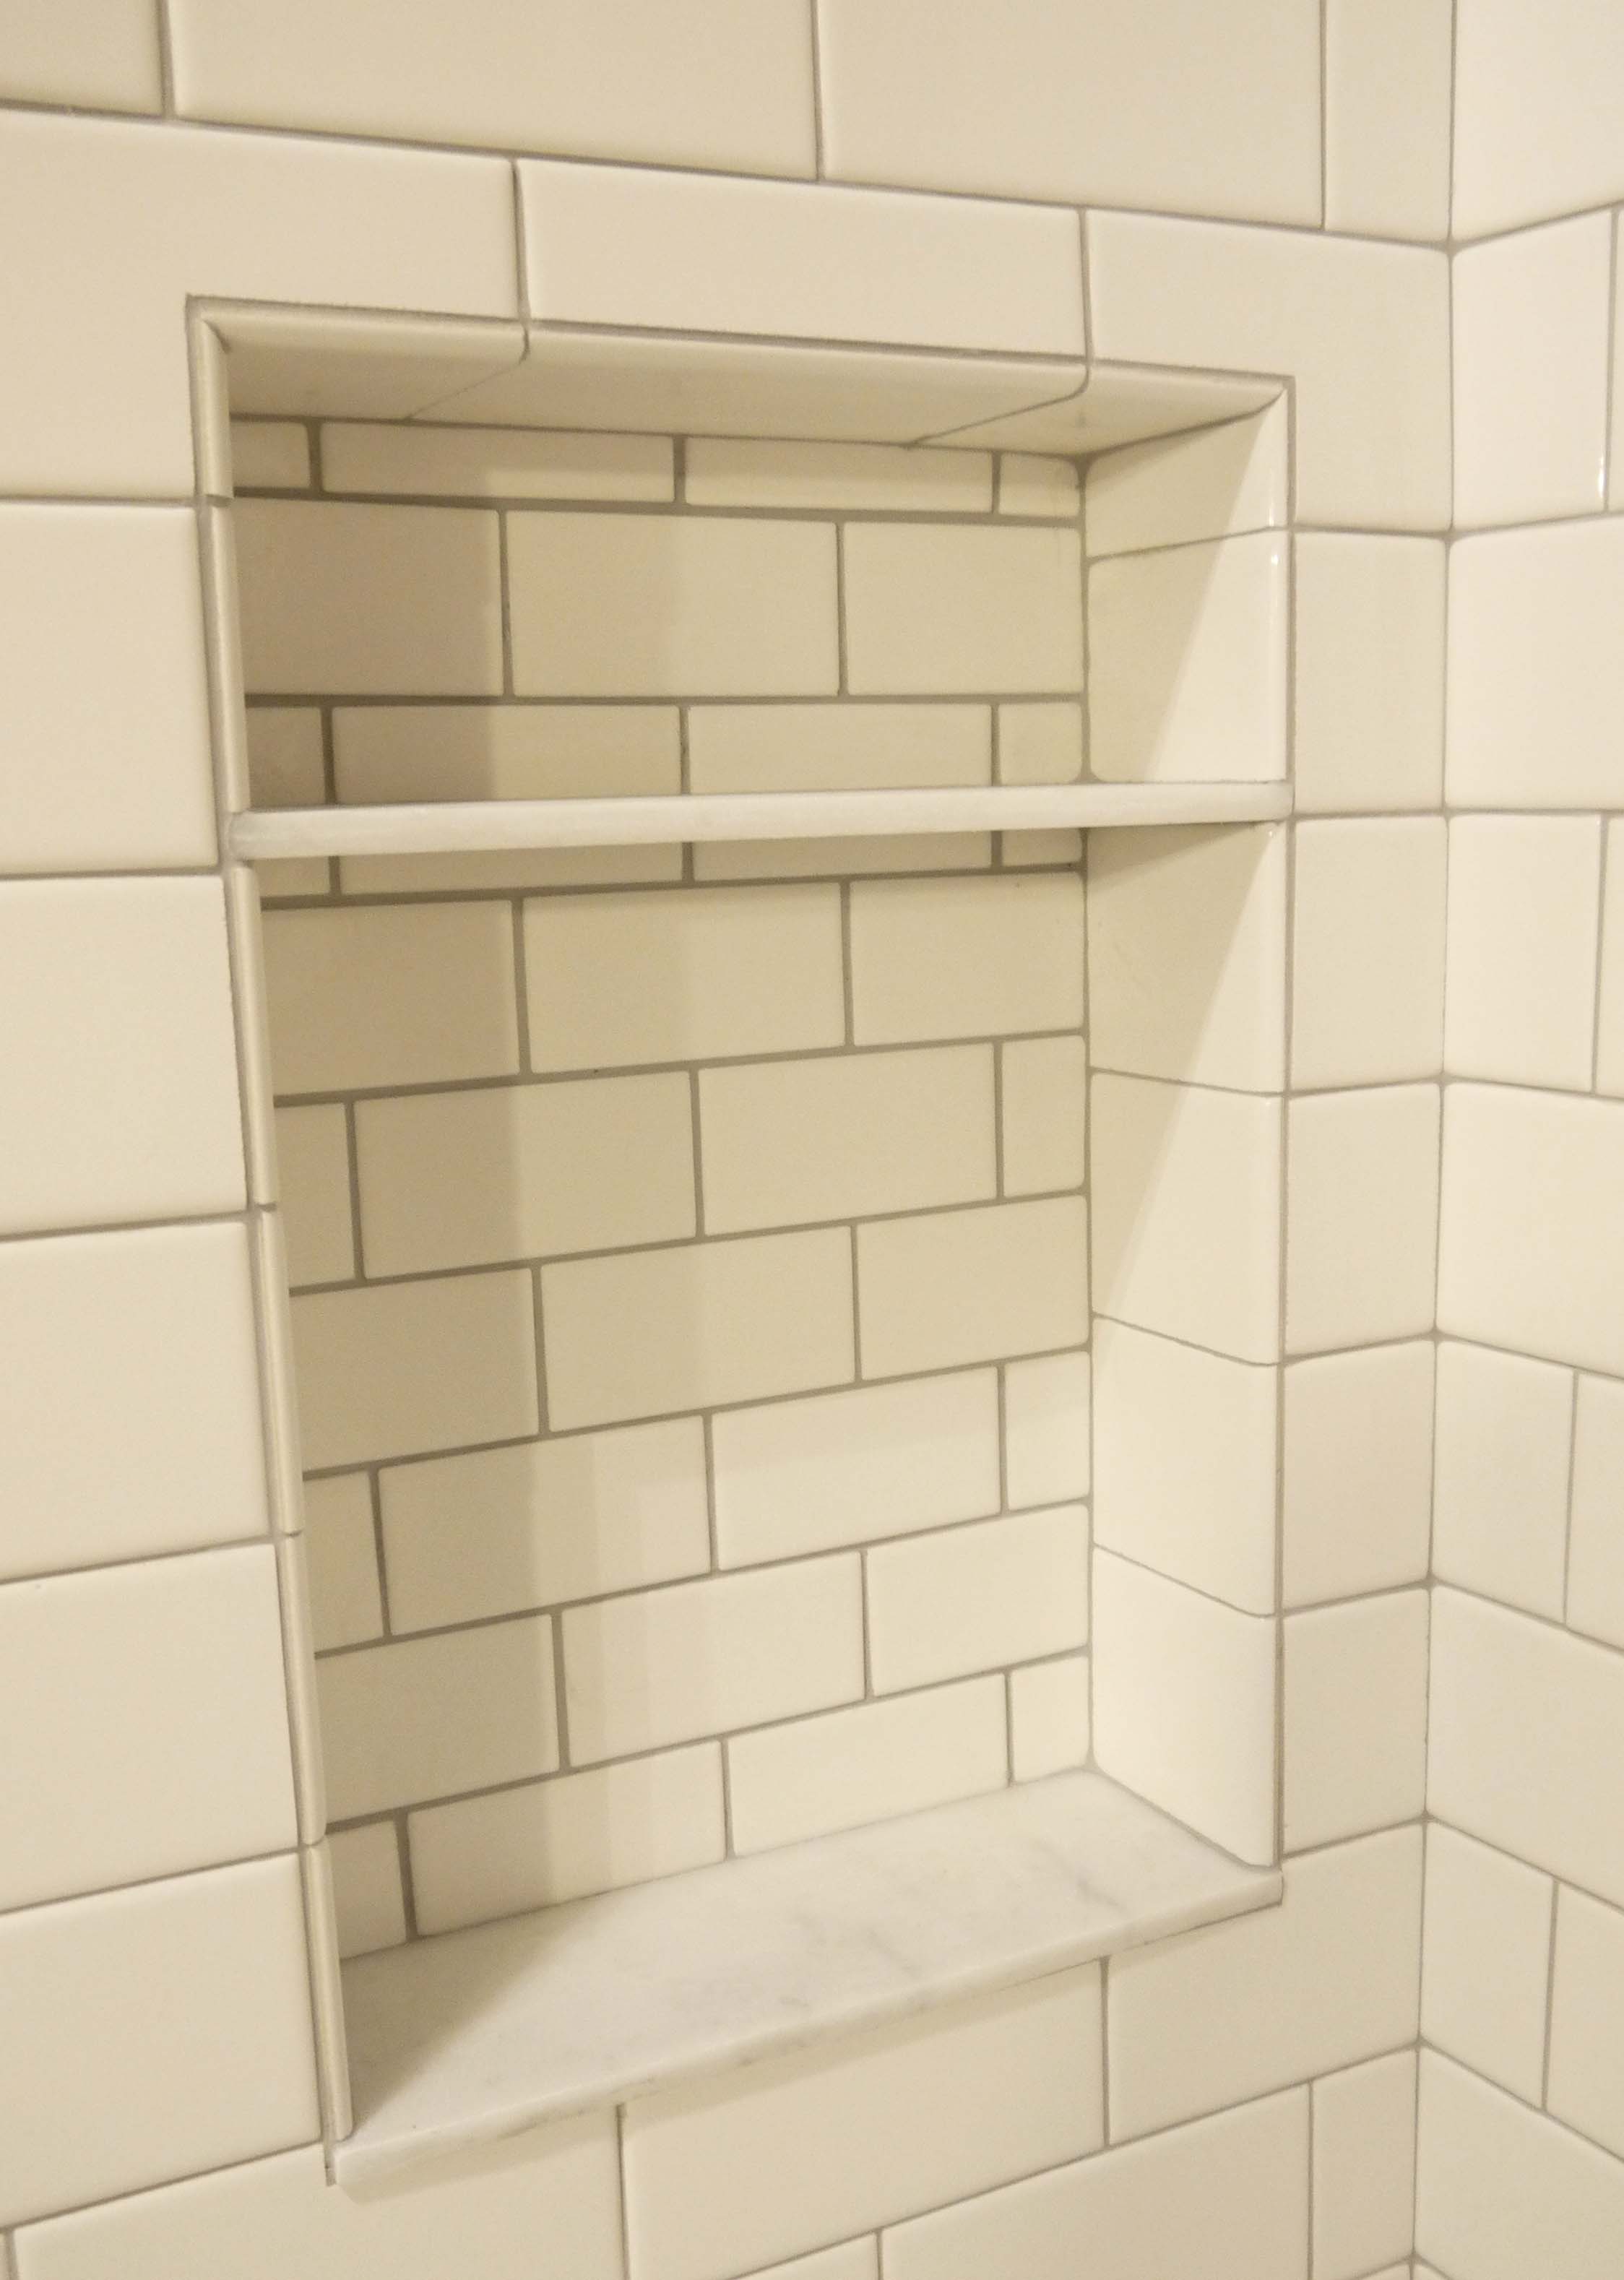
I’m thrilled with how it looks! Not a huge amount of shampoo storage, but enough for 5 or 6 bottles lined up sideways, and a few bars of soap on the shelf above.
The window ledge and sides will be done very similarly, only I’m planning to use a piece of marble threshold for the ledge. Lowe’s sells them in different widths and lengths, so I can find one to fit and not have any seams along the sill. But I have another week yet until the window arrives. In the mean time, I’m working on getting the wood dresser transformed into the bathroom vanity. Check out how it looks so far:

One Month Later
Posted by Adam A. Ries in DIY, Home Improvement, Interior Design on September 1, 2014
It turns out tiling takes forever. Or at least a full month for me. Part of the reason is that I’ve traveled to visit friends on my weekends or helped on house projects with family members. The majority of the tiling I had left required using the deathly loud wet saw, and I feel terrible cranking that thing up later than 7 o’clock at night – it is seriously the loudest piece of equipment I’ve ever used, all wrapped up in a table-top saw. I decided to spare my neighbors the screaming from the wet saw, and in turn the tiling wasn’t getting done. Here is how it looked at the last post:

The walls were nearly all tiled, just the trim pieces missing along the top, and of course that pesky wall niche. But more on that later, as I couldn’t make up my mind how I wanted to trim it out.

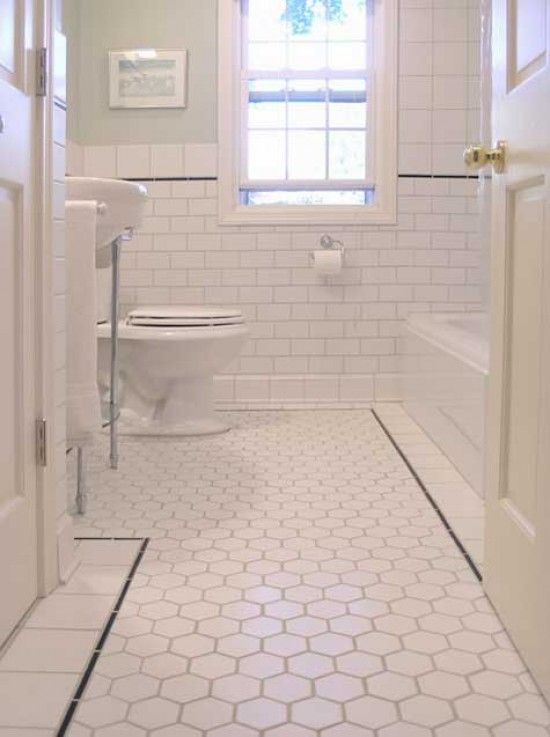
So it was time for the floor. I sketched out a pattern for the floor that I thought would complement the walls. I knew I wanted white hexagon tile, but I liked how many of the period bathrooms I saw had a black border around the edge, either in black hexagons, little stars, or a solid stripe. In the name on consistency, I used the same narrow black lines that I used on the walls, only a single black line rather than a double.
I started with a 6″ square all around the room and flat up against the tub, then the skinny black liner tile, and then filled in the center – about 5 ft x 5 ft – with the white hex.

While the border pieces went down 1 at a time, I thought the center field would be faster because the hex comes in 12″ sheets with the tiles glued to a mesh backing. But once again I made it more difficult on myself in an effort to ensure the final result looked like a professional installation. In my weeks spent searching inspiration photos on Pinterest and Google, I’ve come across too many bathrooms where intentions were great – but execution was less than impressive. Below is just one example – notice that line where each sheet starts and ends? I vowed not to let that happen.

So my solution was to cut the first sheet of every 2nd row in half and lay the sheets across the floor the way one might lay brick – in a running bond pattern. And although the tiles are glued to a mesh, the spacing between the tiles still wants to vary. It took constant eyeballing the lines and watching for any spacing that looked too thin or too wide. And I still used a ton of 1/8″ plastic spacers.

By this point, I was nearly as far as I could go using full sheets. This last row by the doorway I cut and laid 2 rows at a time, and then it was down to the little fillers around the border. These pieces – each one just a little smaller or larger than the one beside it. What a pain in the ass:

Seriously – the worst part of the whole tiling job right there. Other spots were tricky, but in a good way – like a “DIY Show Off” challenge, like these chair-rail returns:
![P1030849 B]](https://humblebungalow.com/wp-content/uploads/2014/09/p1030849-b.jpg)
But those tiny slivers to finish the floor? Pretty sure every other finger has been cut trying to push those tiny pieces through the wet saw. I was glad when the floor was finished. Speaking of injury, this tiling project has been cruel. Cut hands and fingers on sharp tile edges; tiny little tile chips from the wet saw stick to my arms, but don’t try to brush them off – more cuts like little slivers of glass; like dozens of little paper cuts!
And then there are my knees. By the time I finished, I wish I had invested in a quality pair of knee pads. Lesson learned for the next flooring project. Check out those hexagons!

But in the end, the result was worth all the blood, sore finger tips, and smashed knees. As my neighbors described it over the weekend when they stopped by for a progress tour, “it looks like a charming historic hotel bathroom!” My goal all along has been something that looks “timeless.” I want anyone who sees it to wonder if it’s the home’s original bathroom. By the way, I have some awesome neighbors who are super friendly and invite me over for homemade ice cream… #homebuyingscore.

Everyday I’m Tiling
Posted by Adam A. Ries in DIY, Home Improvement on July 31, 2014
But still not finished. I must have put in the equivalent of 5 full 8 hour work days over the course of last week, doing any last minute prep and then tiling the shower surround and bathroom walls.
As far as last minute prep: I caulked the seam around the window opening between the cement board and old window frame (which becomes the rough opening for the new replacement window) and then painted the waterproofing membrane over top once the silicone was dry – one cannot be overly waterproof. I also caulked the joint where the cement board meets the tub, running my finger along the bead of silicone to make sure it wouldn’t dry proud of the cement board and effect the tiles adhering flat.
And then it was time to bust out the wet saw and mix up mortar. I also purchased a manual tile cutter, because I thought it might be faster for straight cuts on these small tiles, but a wet saw is the only way I know how to cut corners or grind rounded shapes in a piece of porcelain tile. And sometimes I just need to shave the slightest sliver away from a cut, and the wet saw is the best for this also.
For mortar, the tile store sold me Full Flex Premium thin set mortar. They explained that it would be the best product to use for everything – the shower walls, bath walls, and floor. I roughly followed the mixing ingredients, until it was about the thickness of cake icing. Although the professionals will trowel it onto the walls in a small section at a time, I kept finding it would dry too quickly that way (lots of cutting tiles, then re-cutting tiles, and before too long the mortar wasn’t sticky any more). So I switched to using the back-butter method, where I lather up each tile, scrape with a notched trowel, and then push the tile into place. It goes slower, but I felt it was cleaner and gave me more control.
The large areas went fairly quick.
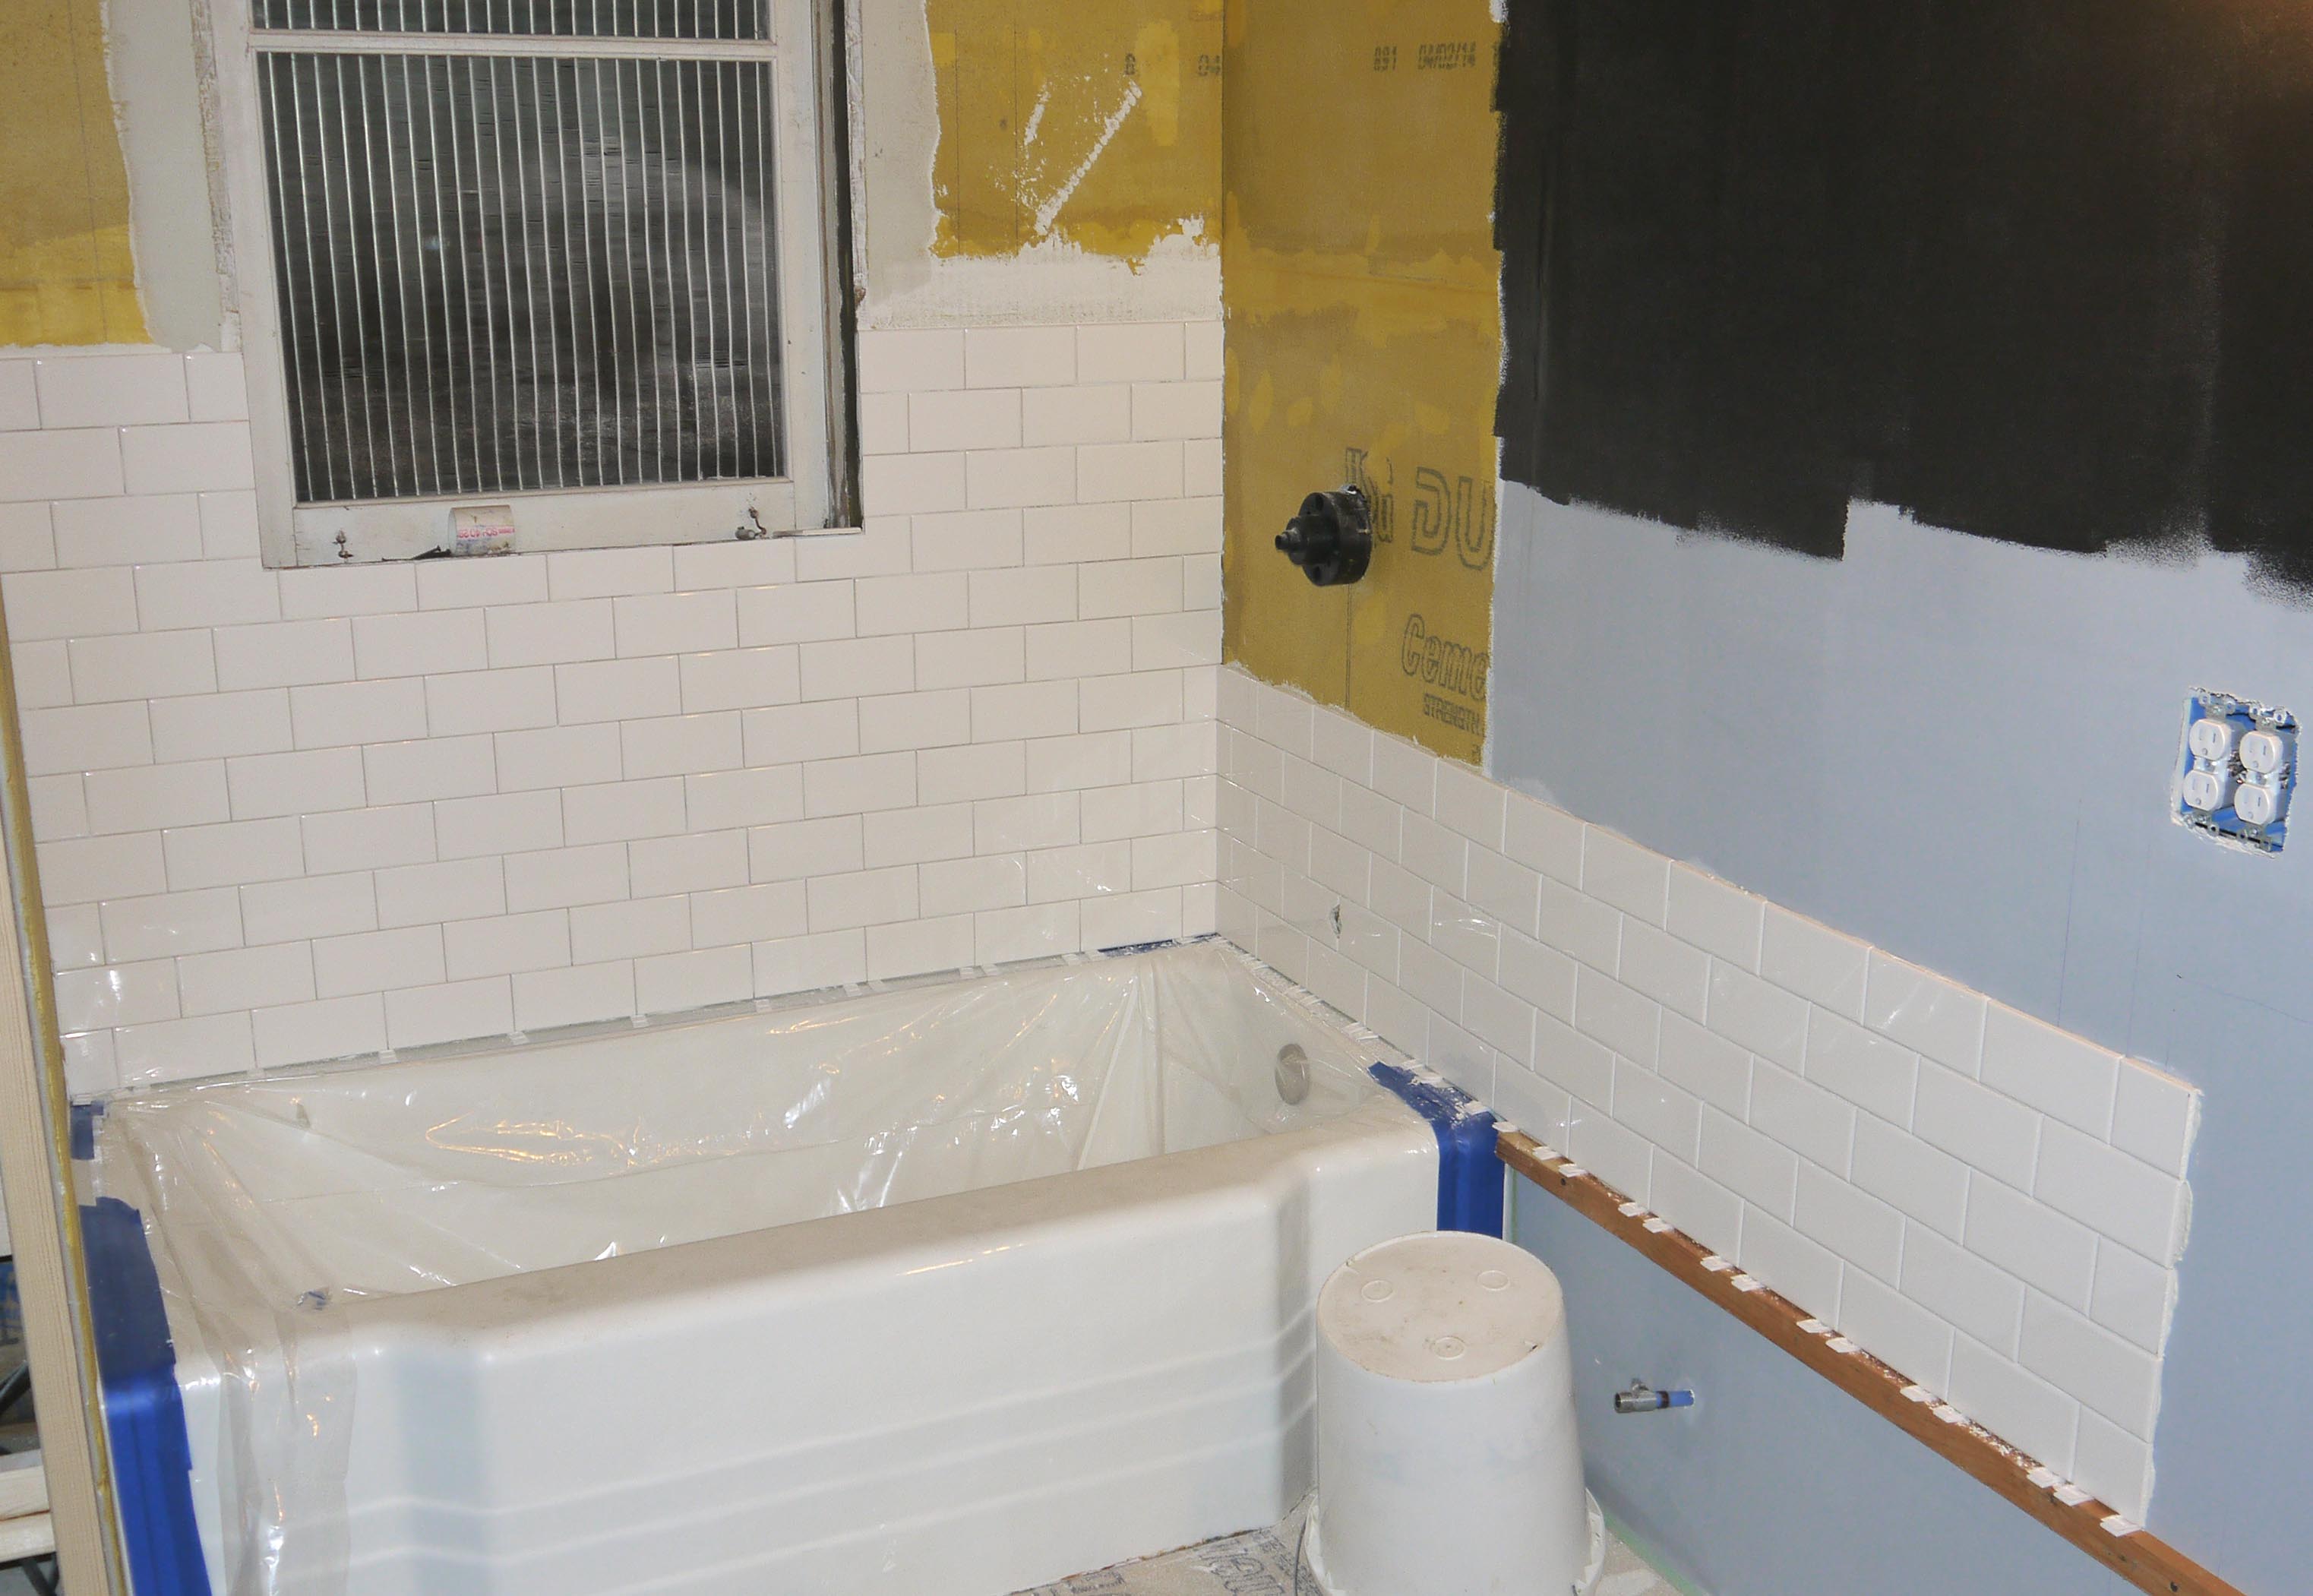
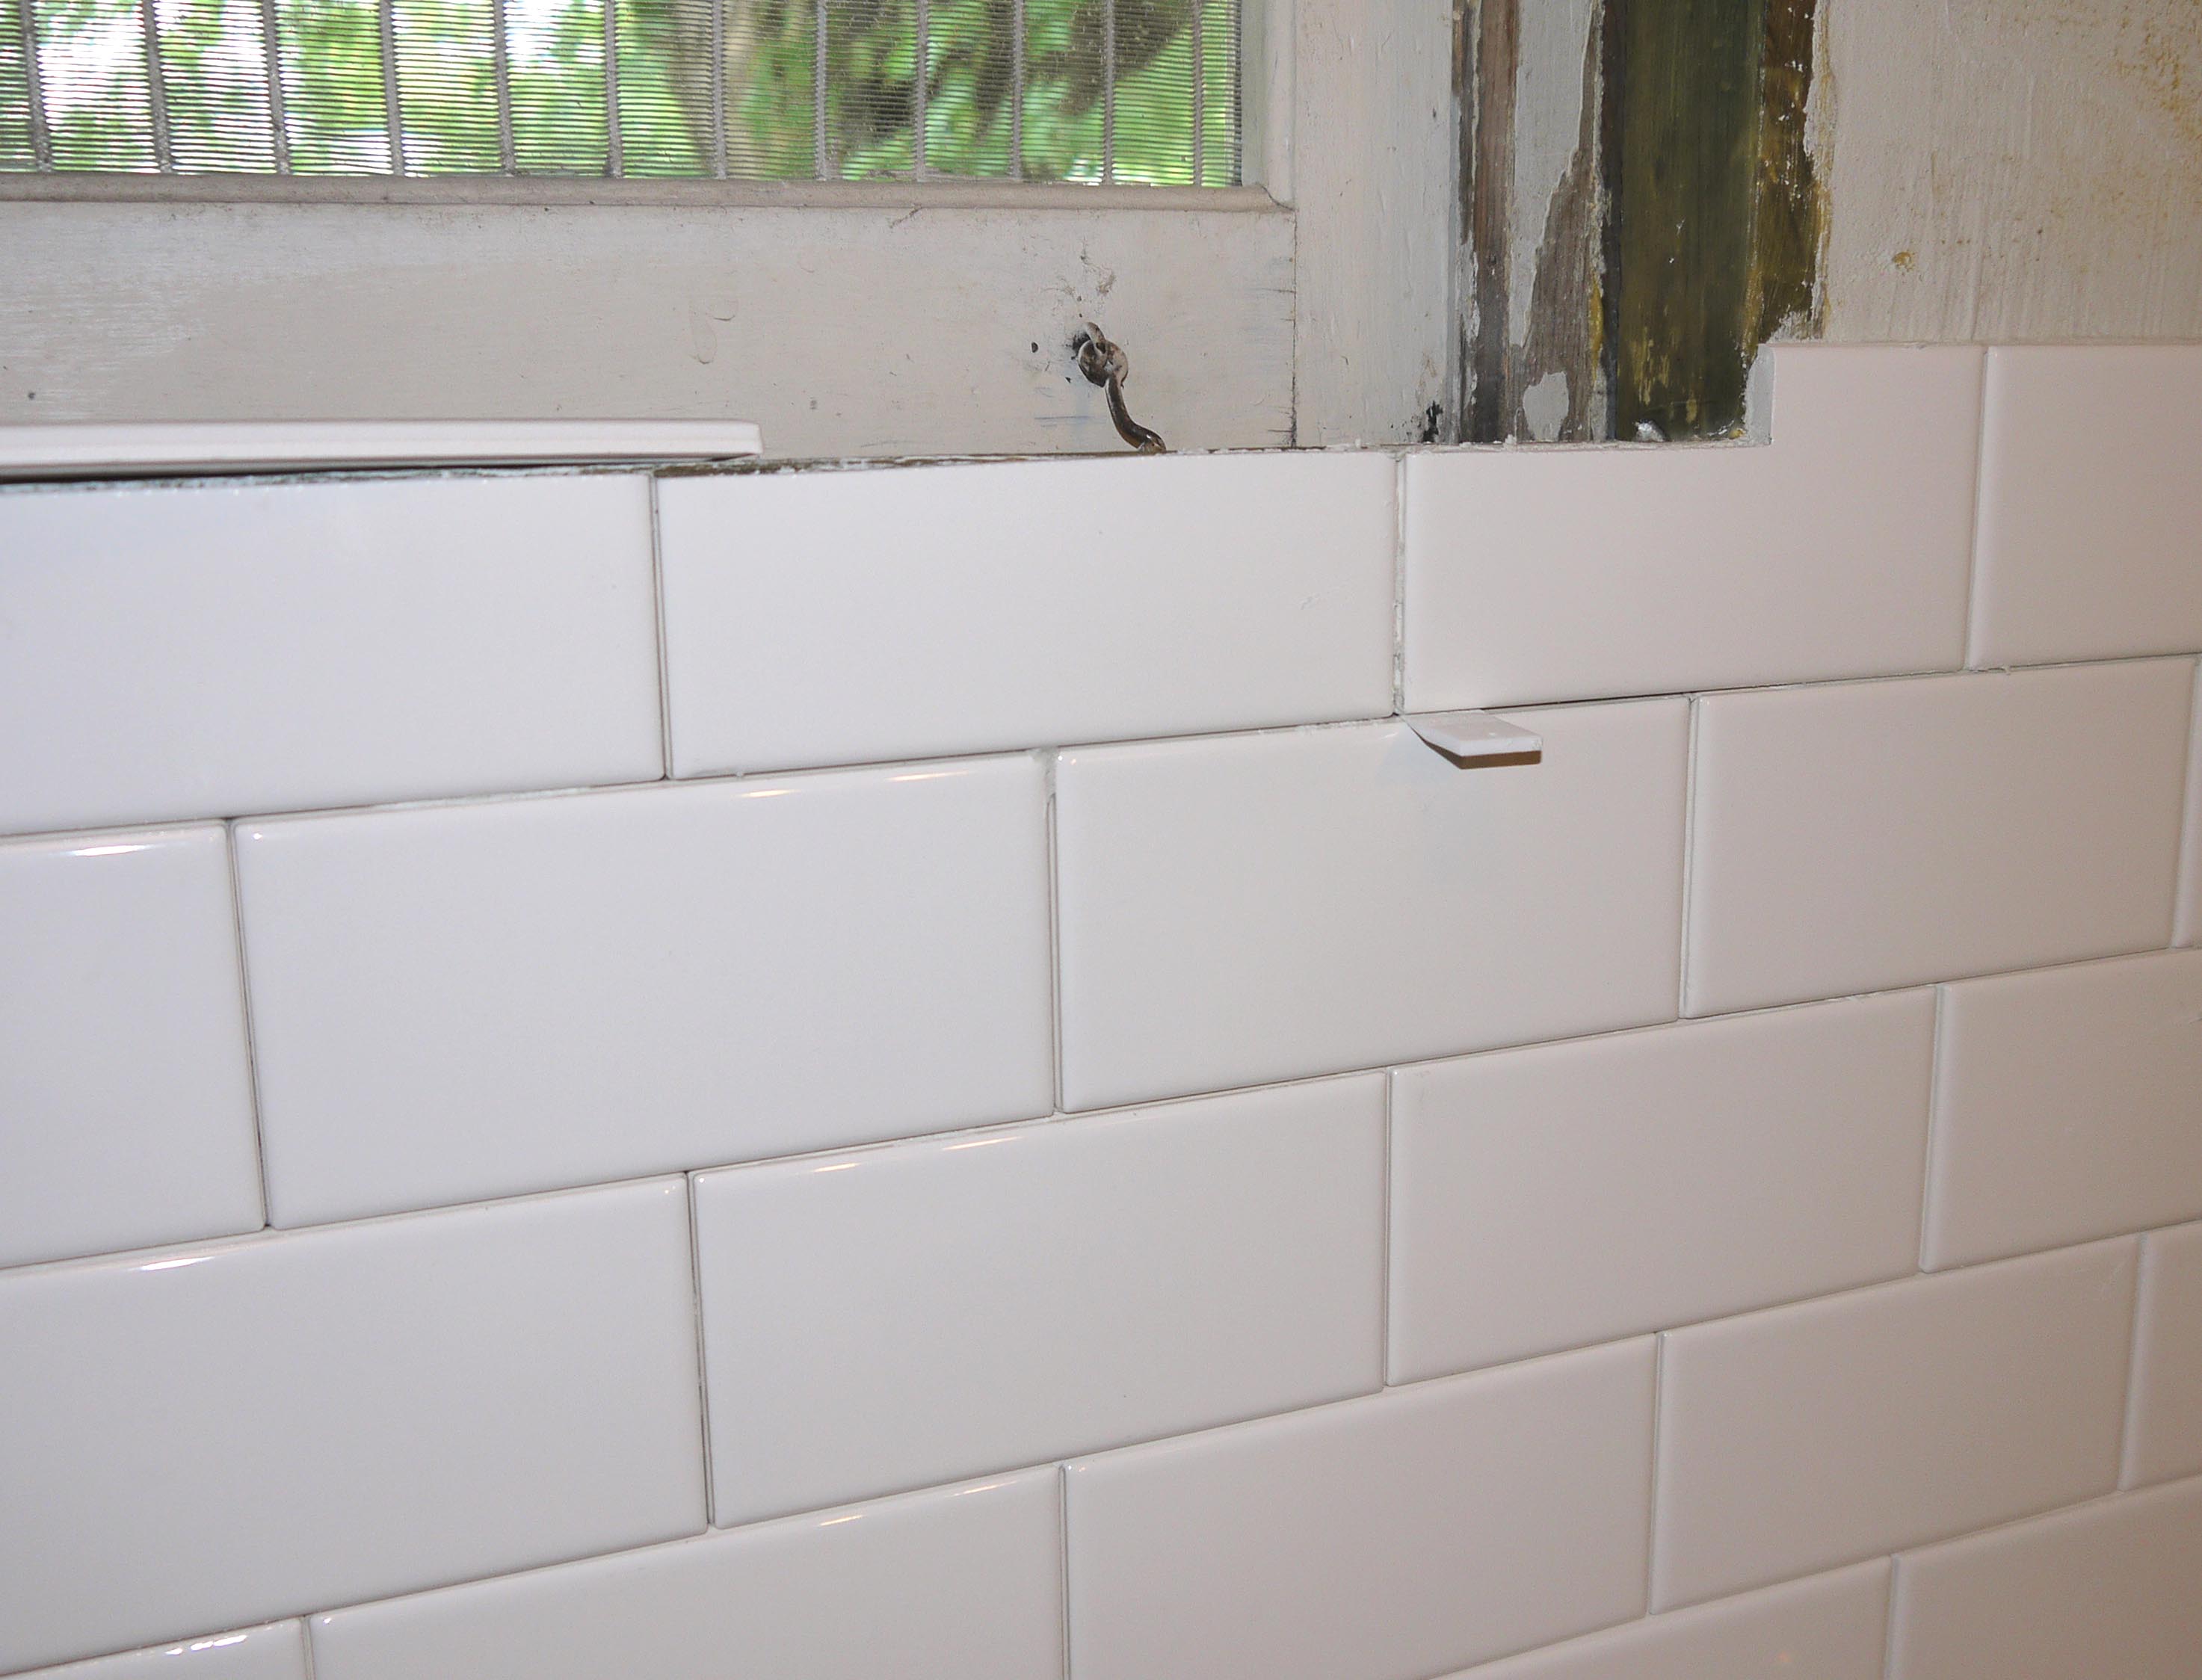
I started with the tub side wall, under and around the window. Rather than get fancy with the corners, I simply tiled the side wall all the way to the corner and then butted each row of the front and back wall up against the corner once again. Once its all grouted, it will just be a straight line in the corner rather than a weave that a professional might make by doing one row at a time and alternating each row.
Above is the closeup of the corner. I also left an 1/8th inch gap between the bottom row and the lip of the tub, as instructed by the TileMasterGA via YouTube. Rather than grout this line, it will be filled with white silicone to seal the space and create a waterproof line so water cannot get beneath the tile or behind the tub.
The wood trim attached to the wall provided a straight edge to begin tiling this wall, level with the ledge of the tub. This way, each row would meet in the corner and the grout lines would be aligned.
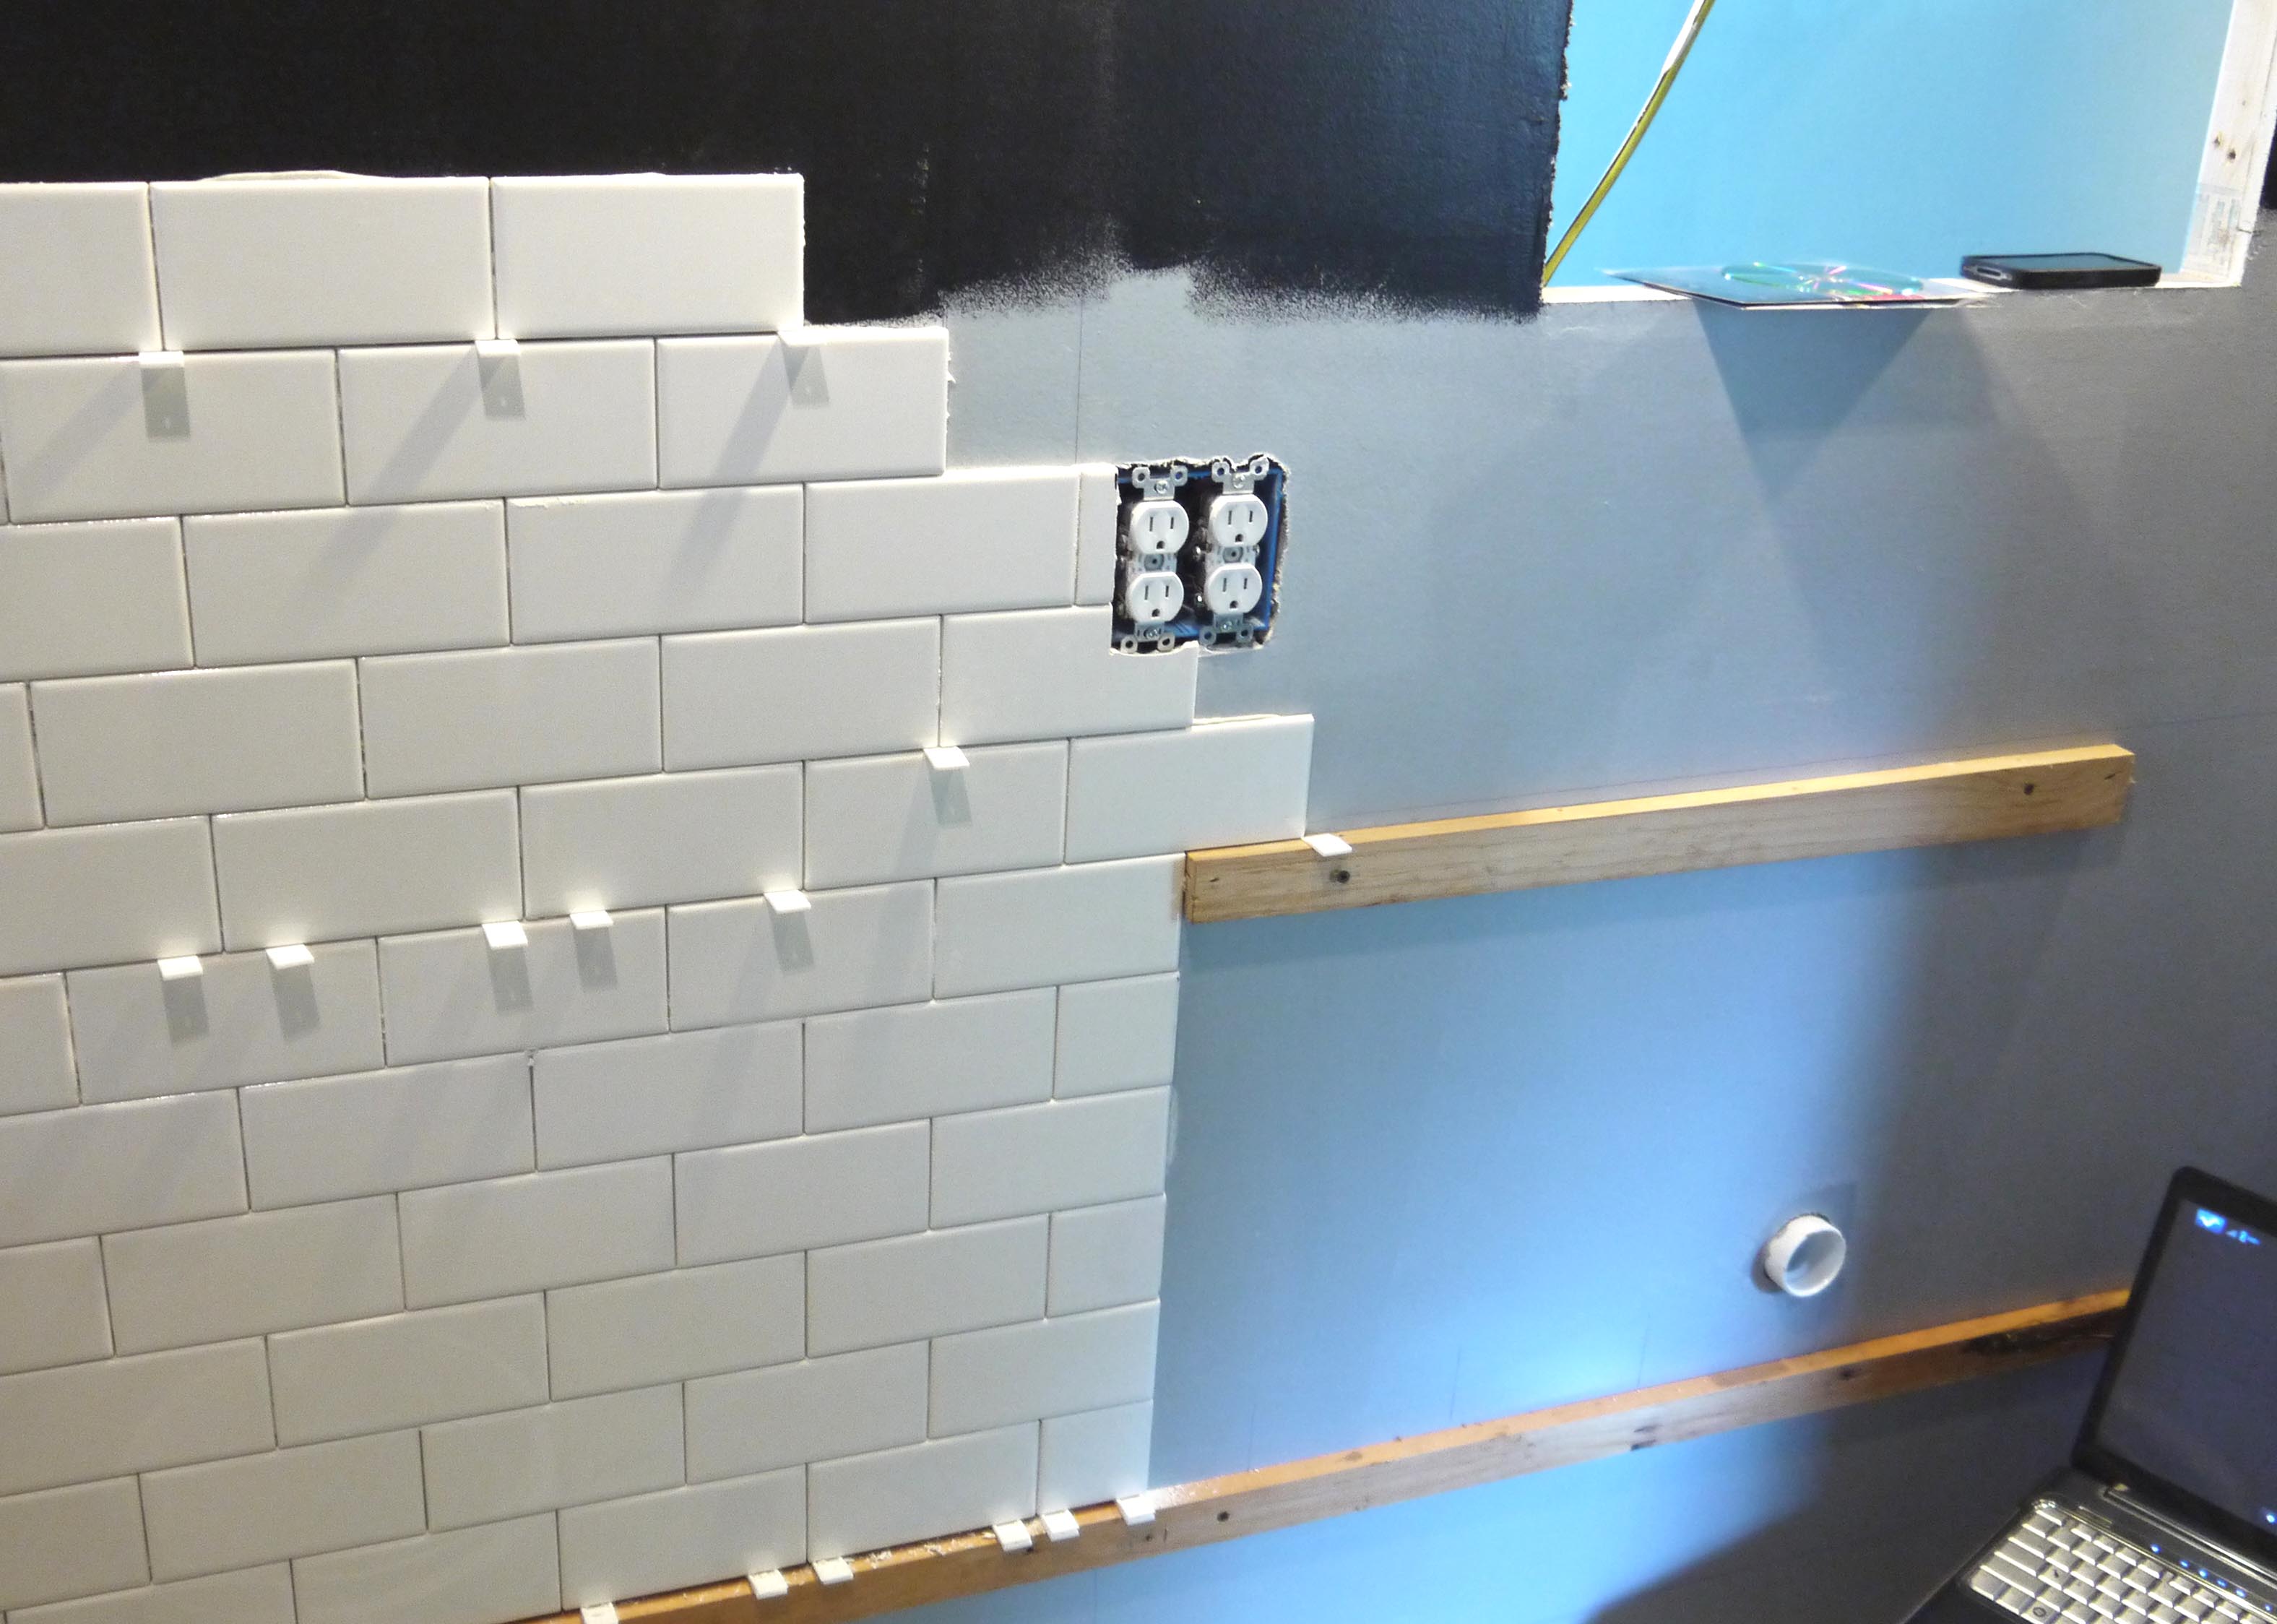
The second wood piece is just slightly below what will be the top edge of the vanity cabinet. Since I expect the cabinet to be pretty permanent, I went all cheap scape and decided I didn’t need to tile the area that would be hidden behind the cabinet. Seemed like a waste of tile and time.
Around the window, I cut the ties flush with the inside edge of the wood frame. The new window will be a snug fit inside this frame, and once the window is installed I can place the marble ledge for the window sill and use bullnose edge tiles up the sides to finish the inside edges.
It took several long days, hundreds of trips outside to the wet saw to cut (and then re-cut – and then cut my fingers on sharp edge of the tile), but the large areas went pretty fast.
Above is a sneak peak of my floor tile, I plan to start that next week. Although it will have a simple border along the walls, it should go much faster being 12×12 inch sheets and a simple square floor area. It was the trim pieces and corners and anything needing cut after cut which took longer. A few days later, and this is the result:
This last photo shows the top details where the tile meets the painted drywall. Black line, mini subway tiles, a 2nd black line, and then a decorative chair rail cap. I finished the wall tile late tonight, but I still need to scrub some excess mortar out some of the joints so that the grout will be even. I’m thinking super pale gray grout for the walls (just slightly off-white to provide some contrast), and medium gray grout for the floor tile to give that antique floor look. But I’ll get the floor fully tiled first, and then I’ll begin the grouting step. My inspiration for the floor: