Archive for category About Me
Restore or Replace – Part 2
Posted by Adam A. Ries in About Me, DIY, Home Improvement on September 4, 2015
Part II of how I came about deciding to restore the wood windows in my house instead of simply tearing them out and installing new replacement windows. Part I at this link.
Of course, by this point I had decided replacement was not an option (except for the bathroom window, which I did replace with vinyl – I wouldn’t dream of building a shower with a wood window in the wall).
I learned about an organization in Columbus hosting a 2 day hands-on window restoration workshop, and I signed up right away. I even took my own tool belt so I wouldn’t look like such a novice. In reality, I did find I had a lot more knowledge than some of the others – a range of individuals who had never held a hammer, to a few woodworking professionals expanding their skills. Just a few hours in, and it felt like all the reading I had done about wood window restoration was coming to life in front of me. There is nothing better than learning by working alongside a seasoned professional craftsman.

I didn’t just learn the steps in the process, but I learned great tips from their years of experience; how to keep the sash cord from slipping into the wall cavity by accident; the right tool to carefully pry out the parting stop; how to remove brittle glazing without cracking the glass. And the right products such as glazing compound, sash chain v cord, and great online resources to order the correct replacement parts.
Beyond what I learned, the workshop took away my fear of doing a step wrong or getting in over my head.
I didn’t immediately drive home and tear every window apart – though I wanted to. But I did start ordering supplies and price checking half a dozen websites to find out which sold each product at the best price. Restoring windows on average is less expensive than replacing them, but that still doesn’t mean it is cheap – especially when the best price is ordering in bulk. So 1 gallon of this, 100 yards of that, 5 of these, 30 meters of this, and 300 copper nails. I was just about halfway through finishing the plaster repairs in the laundry room when I went to the workshop, and I made myself wait until I had the entire room painted & woodwork refinished. Then it was window time.
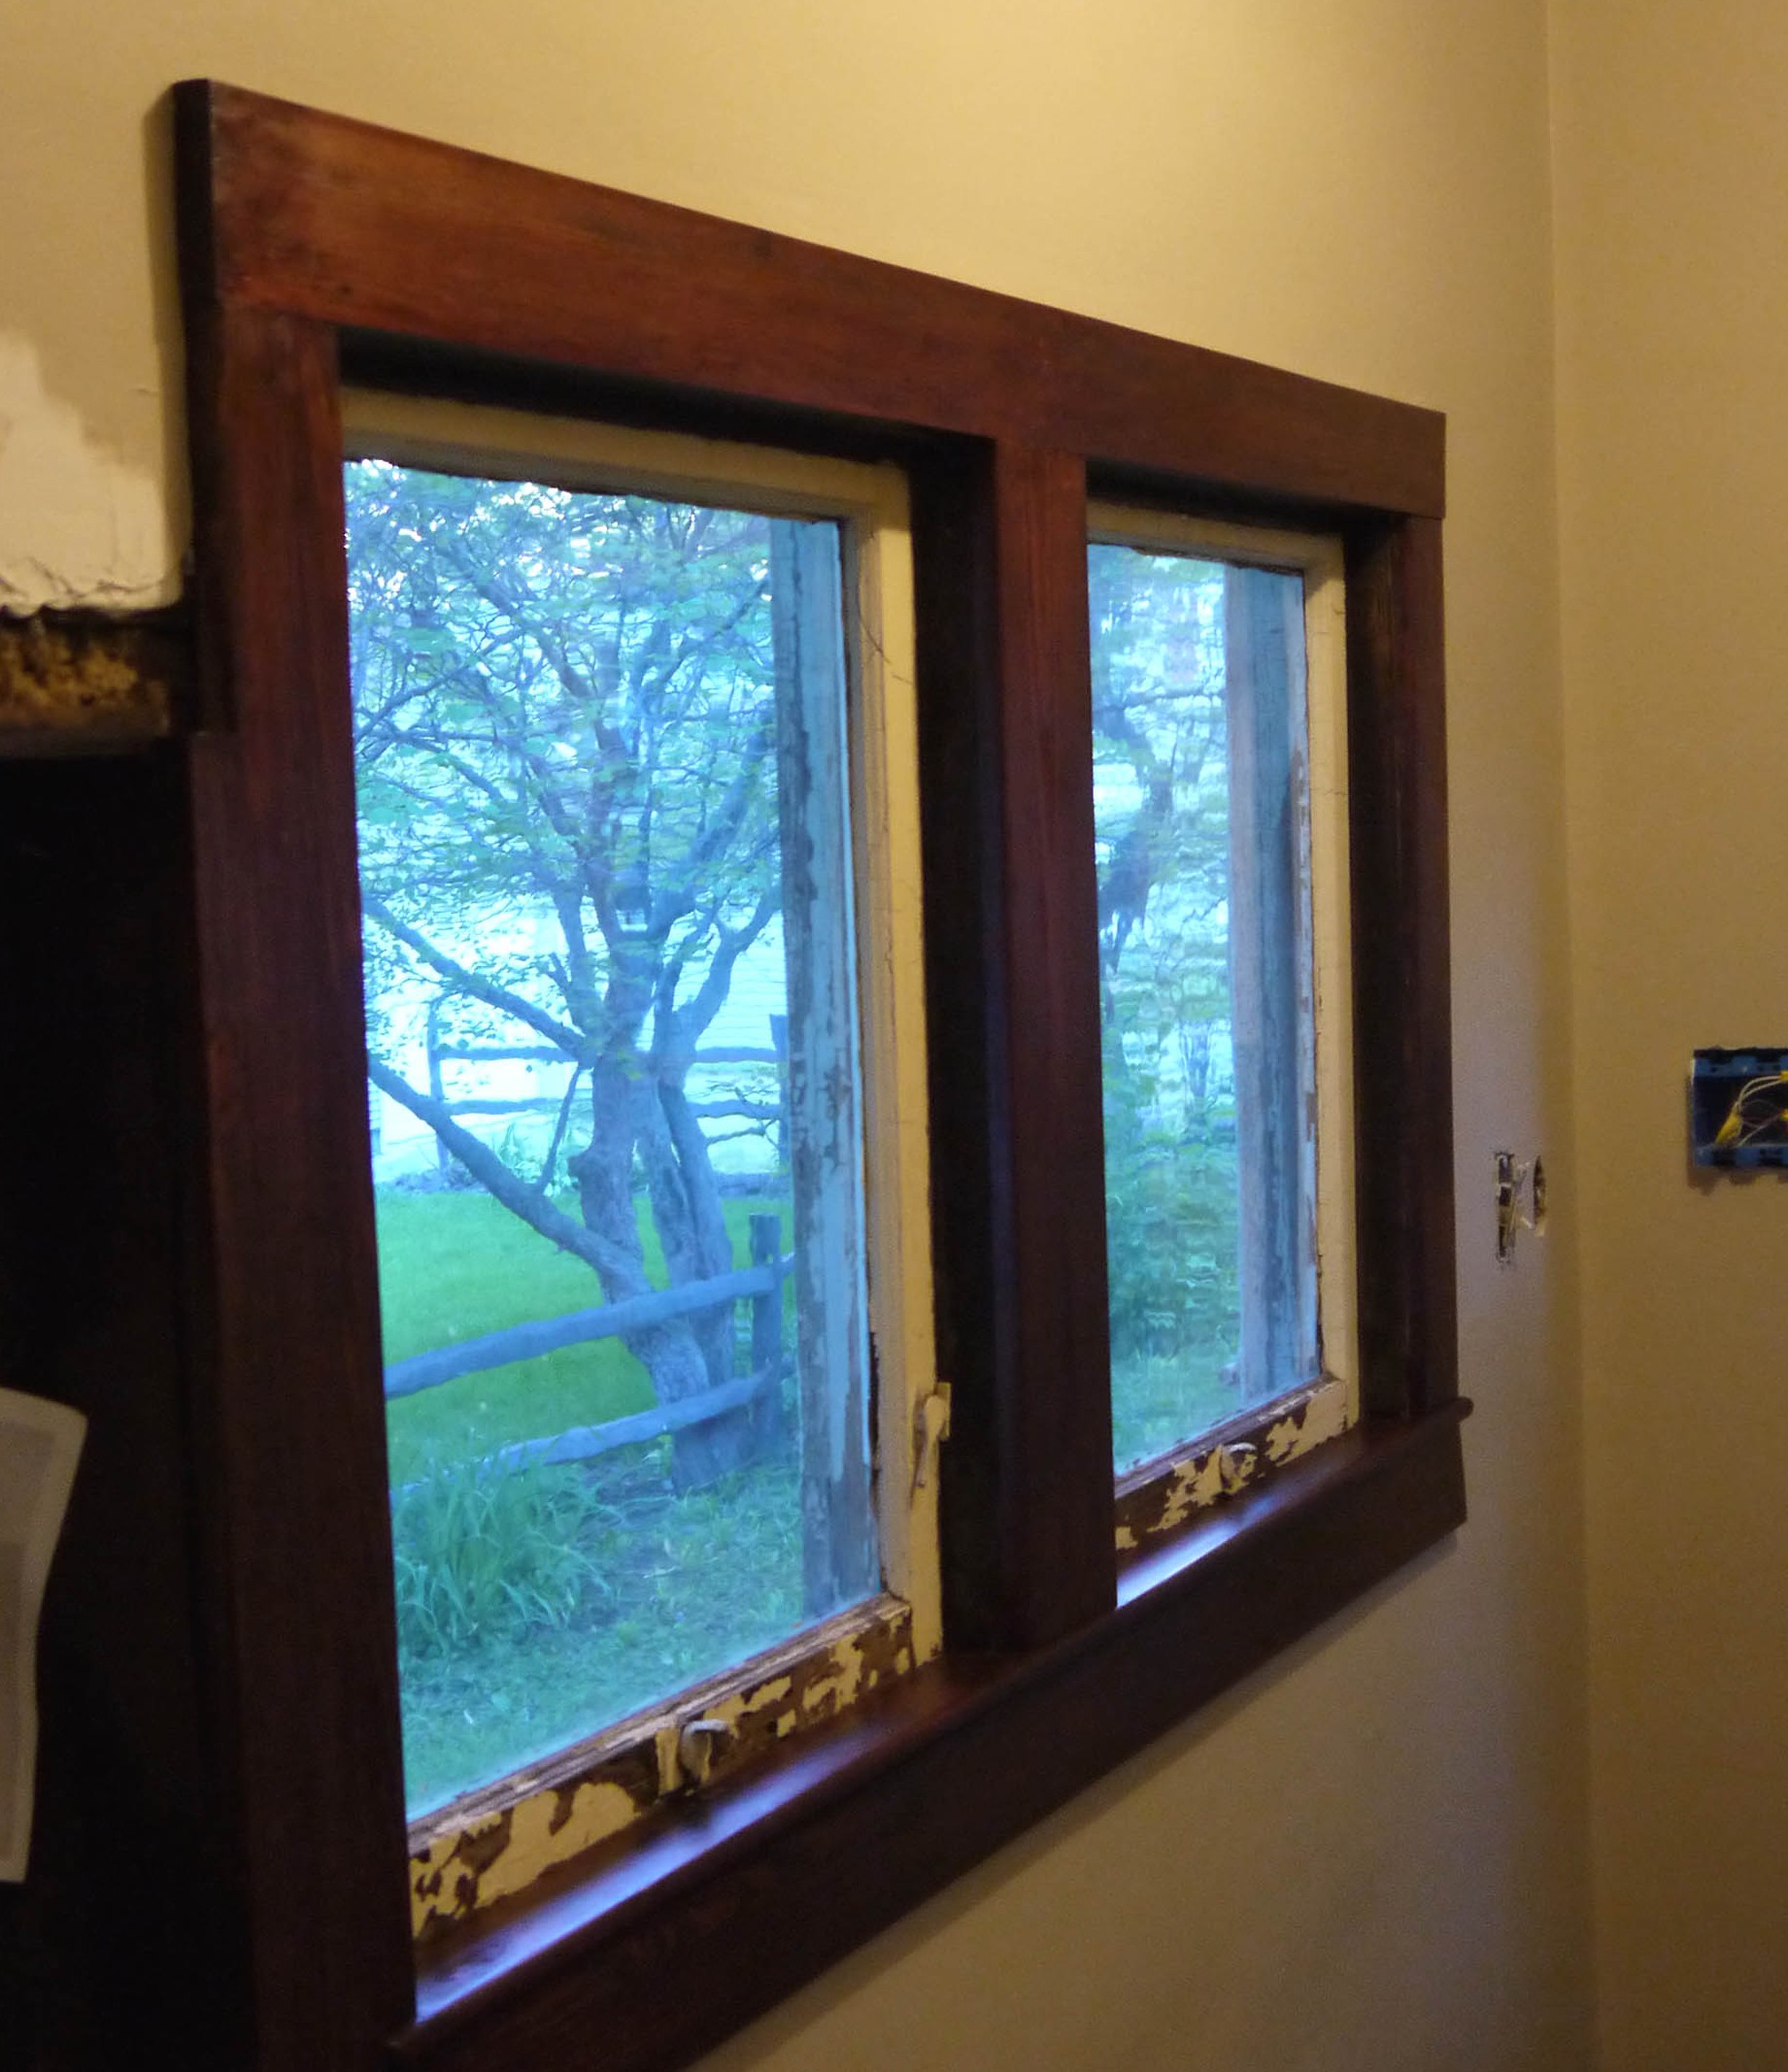
I intended Part III to be a step by step photograph process of removing, restoring, and reinstalling the double-wide laundry room windows. Unfortunately my computer decided to wreak havoc last weekend and my only resort was a complete hard drive reformatting & reinstalling the operating software. Thankfully I don’t keep files on my computer very long, I’ve learned to store most of my photographs & other important documents on my external hard drive. But for some reason, I had kept my house renovation photos saved on my pc and not yet moved to the external- it was easier and a few steps faster to edit photos & update blog posts. I lost the majority of my photos of house projects from this summer. Lesson learned the hard way. So Part III will switch to a different window in a different room of the house.
House Tour
Posted by Adam A. Ries in About Me, Home Improvement on May 5, 2014
I told myself the full house tour would be the first post about the new house. I took photos of every room the first week I had the keys. I even asked the realtor not to remove the “Sold” sign too early, until I could get a photo outside on a blue sky day. But then I got so excited about ripping out and tearing into the bathroom, that I never organized and posted the photos. So without further ado, won’t you please come in!
From the street, it has a nice size covered front porch, just begging for refreshed flooring, lush planters, and a porch swing.
The front door is probably not enticing. It’s old, yes, but the style doesn’t match the other Craftsman qualities about the house, especially because it is veneered. The door handle is pretty cool, but the latching mechanism or spring must be broken, and the inside handle is about to fall off.

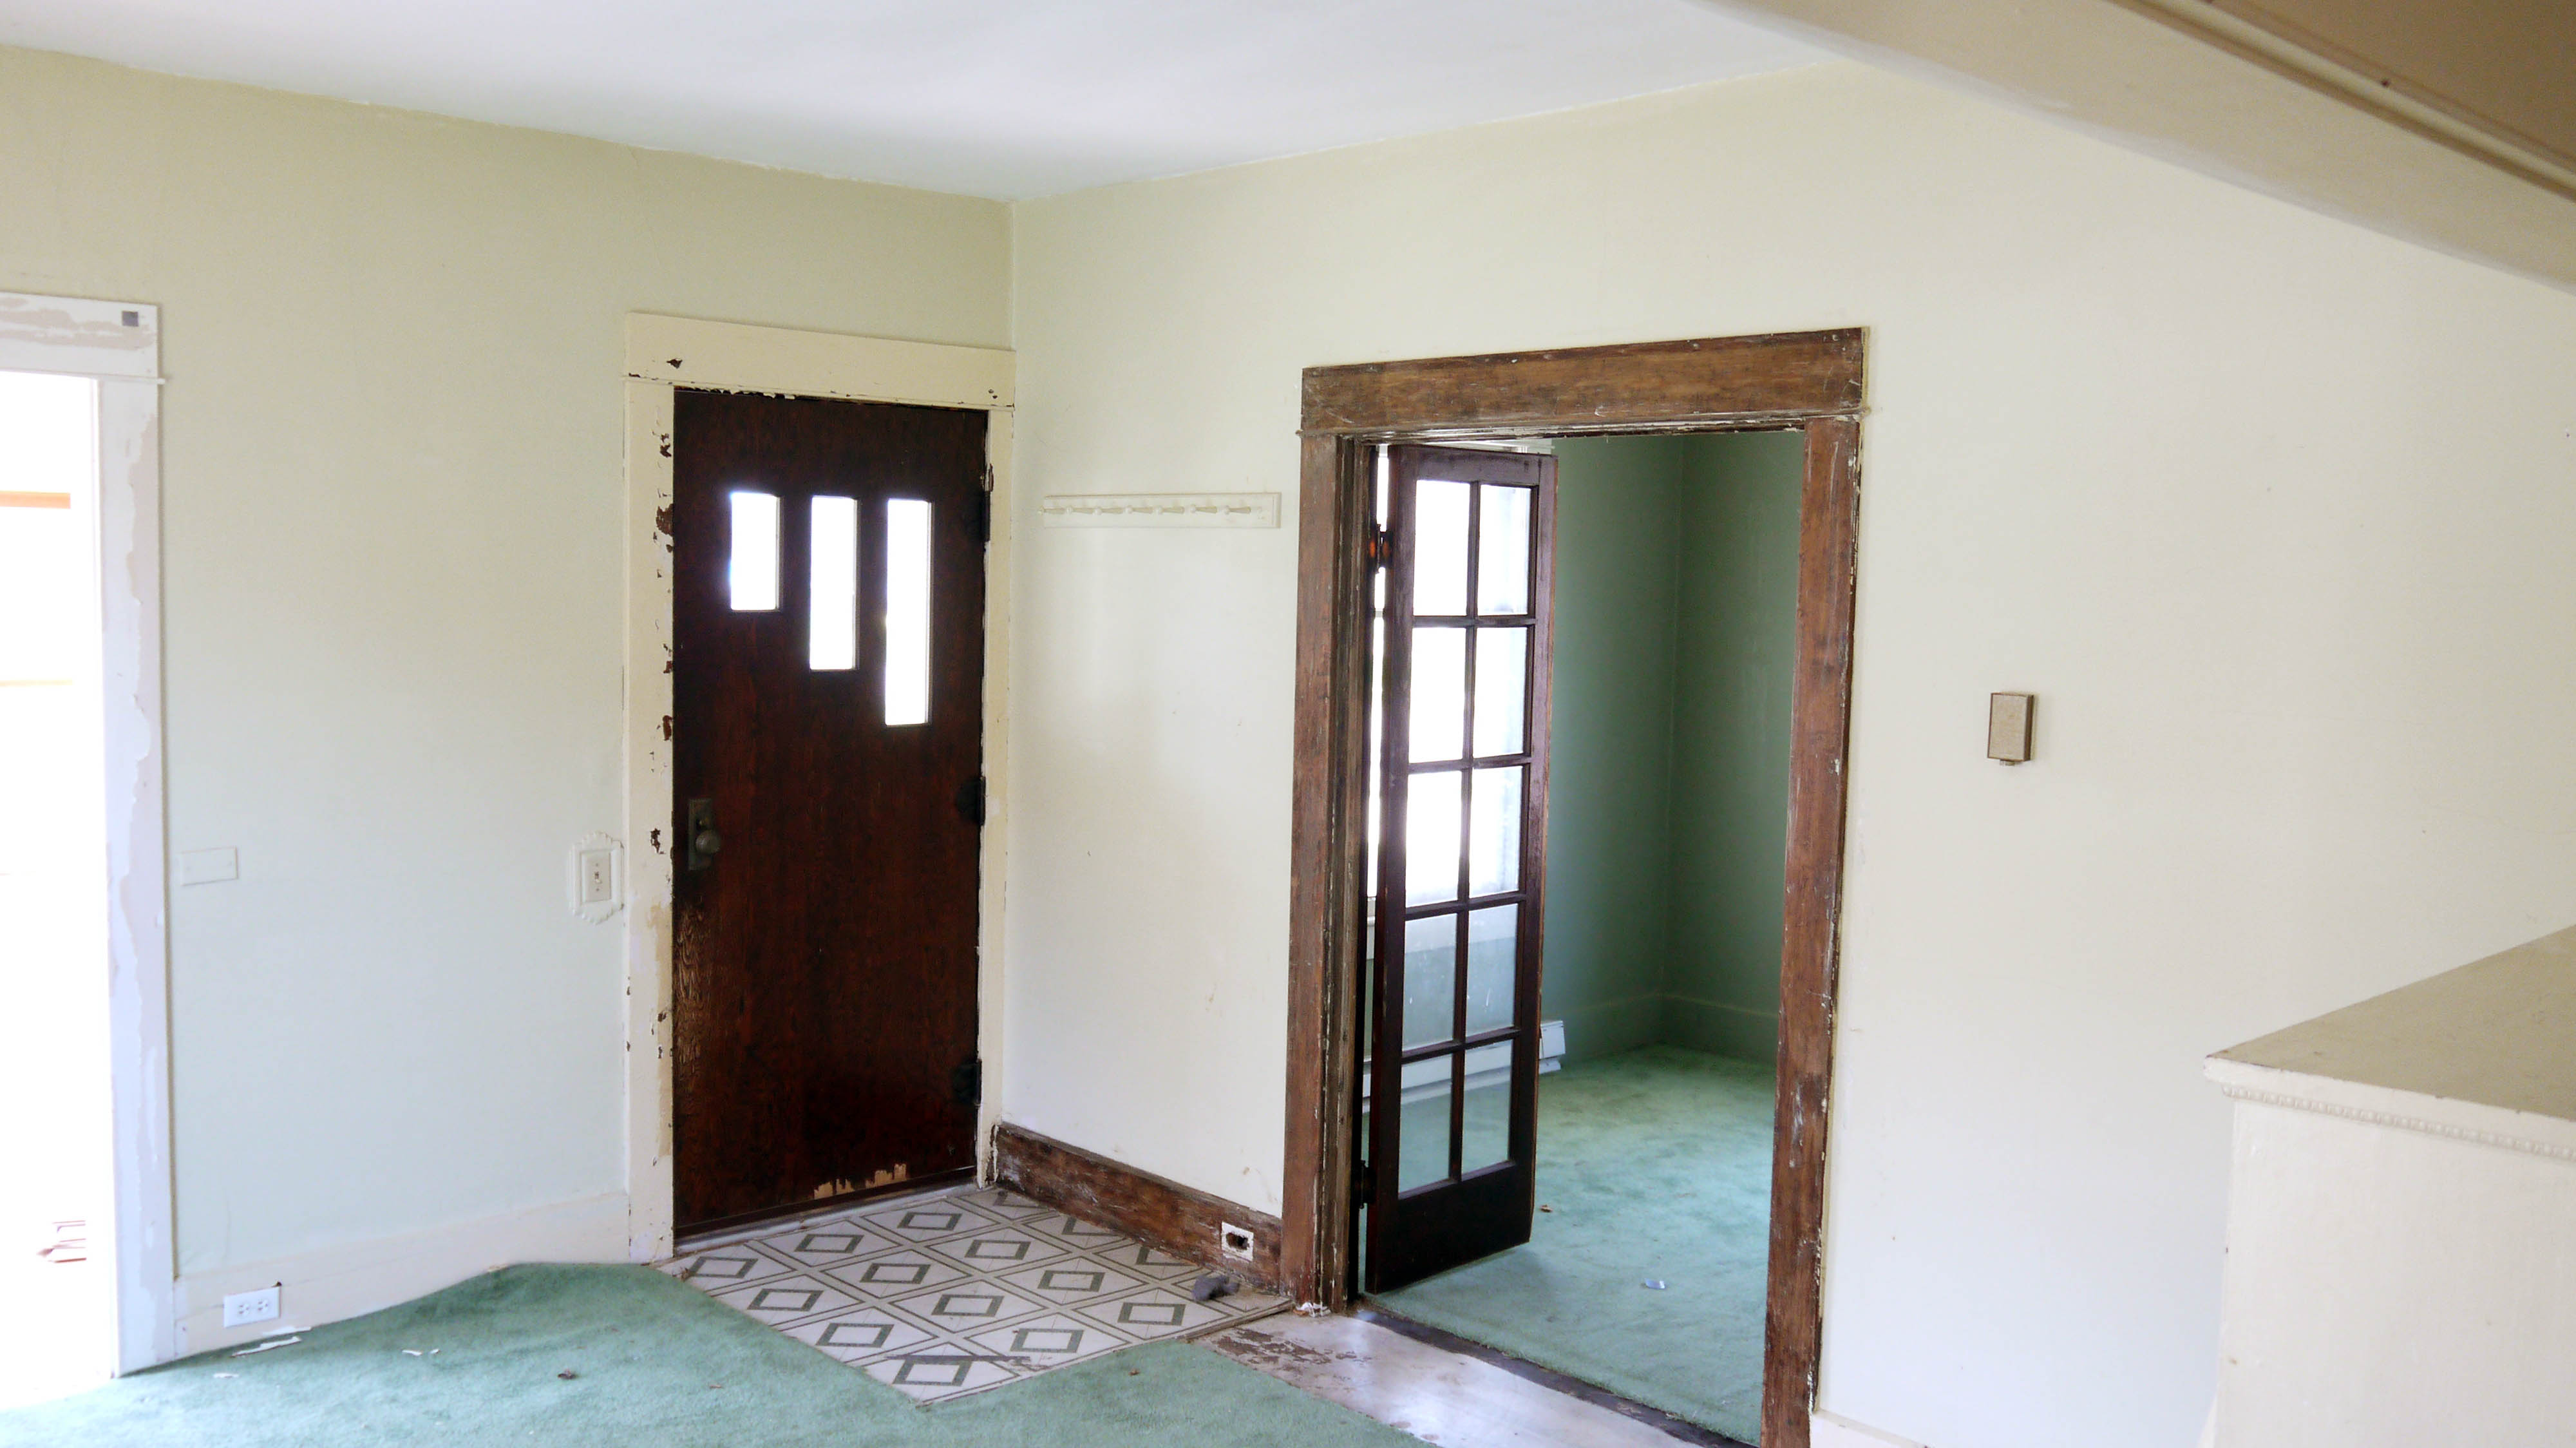
Through the front door is the living room. Very square, but with a nice large window looking east, and built-ins creating some separation from the dining room. As you can see, the woodwork is painted as far as the eye can see.

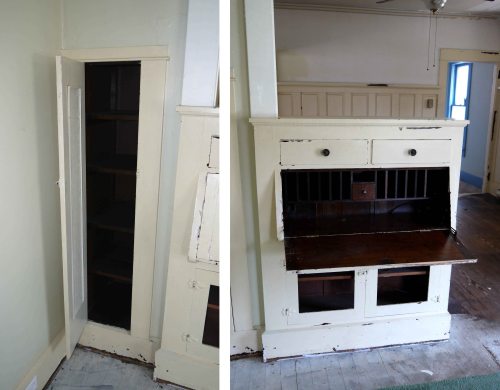
I especially love the little nook cabinet in the corner, and then this fold down secretary! How awesome that it is still in the house.
Decent size windows in the house fill nearly every room with ample sunlight. I didn’t yet have the electricity on when I took these photos, and it was super light inside. I’d like to say bright and cheerful, but I’ll stick with just bright. I’m gonna have to restore the cheerful.

From the living room is also the doorway into the closed-in side of the porch.

With lots of windows, this will be a great cozy space to drink coffee in the mornings and get some plants growing.
Back to the west, a set of double French doors open into the first bedroom.
From the inside, the door trim is just a little bit fancier: this is the only room where the woodwork above a door has this cornice or cap at the very top. My guess is every room had these at one time, and they either broke or they wanted to tone down the Victorian influence so they were removed.

Once again, it is the original details throughout that sold me on this house. Can I please have a full house of door handles & escutcheon plates to match this one?

Two large windows in this bedroom.

And some details I could do without, like this ceiling fan. The electrical box was probably not originally for a fan, which must be secured tighter. So what happens when the wiggling of the fan makes the plaster start to crumble? Just tape and staple up a piece of plastic, that will fix it.
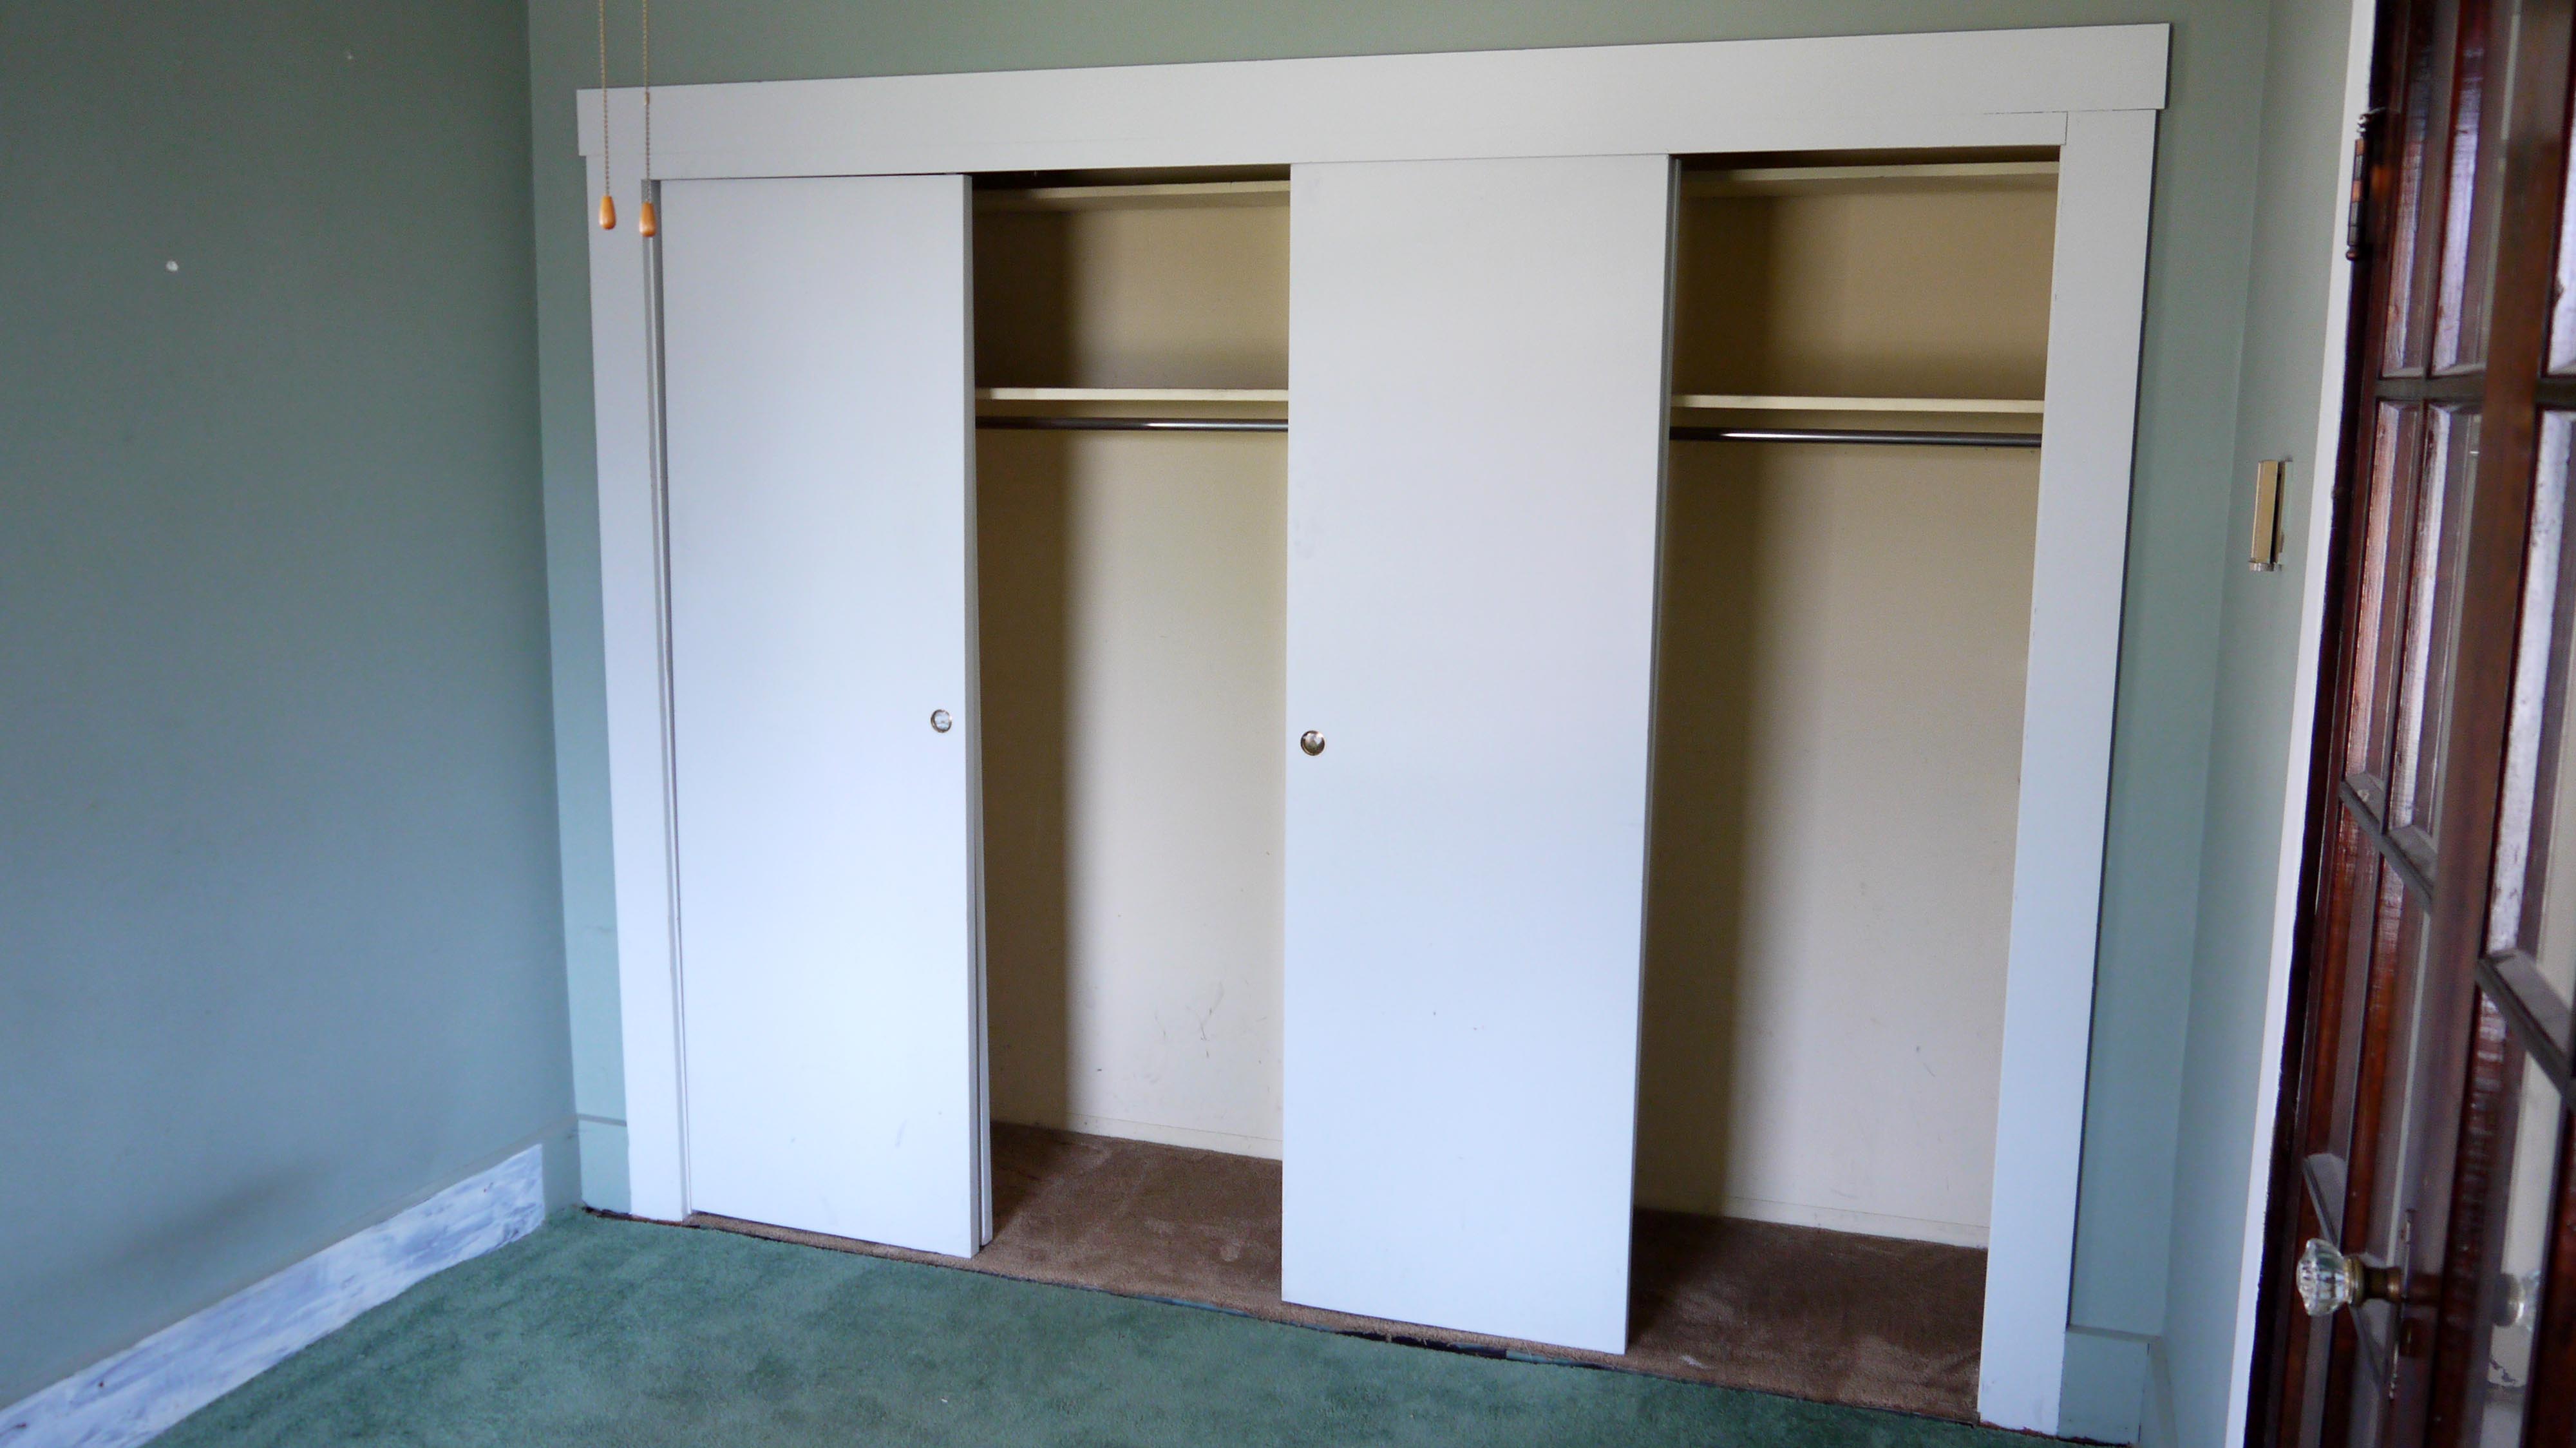
This bedroom does have a nice double wide closet. The trim suggests that it was added later, as they are just flat painted boards, along with the sliding hollow doors. I have a great idea to make this closet look more original, using salvaged trim and doors (that are nearly a perfect match!) from a commercial building that was demolished earlier this winter.
Back through the living area, we walk into the dining room. This is the room that sold me on the house. The cabinets, paneled walls, and built-in buffet are just screaming for me to strip them of their layers of paint. And now a glimpse of the wood floors too, which are in every room either under carpet or linoleum. And we also get a sense of how beautiful the woodwork is under the dingy carpet and paint.

Who would paint these paneled walls?

And what a nice air conditioner unit… not.
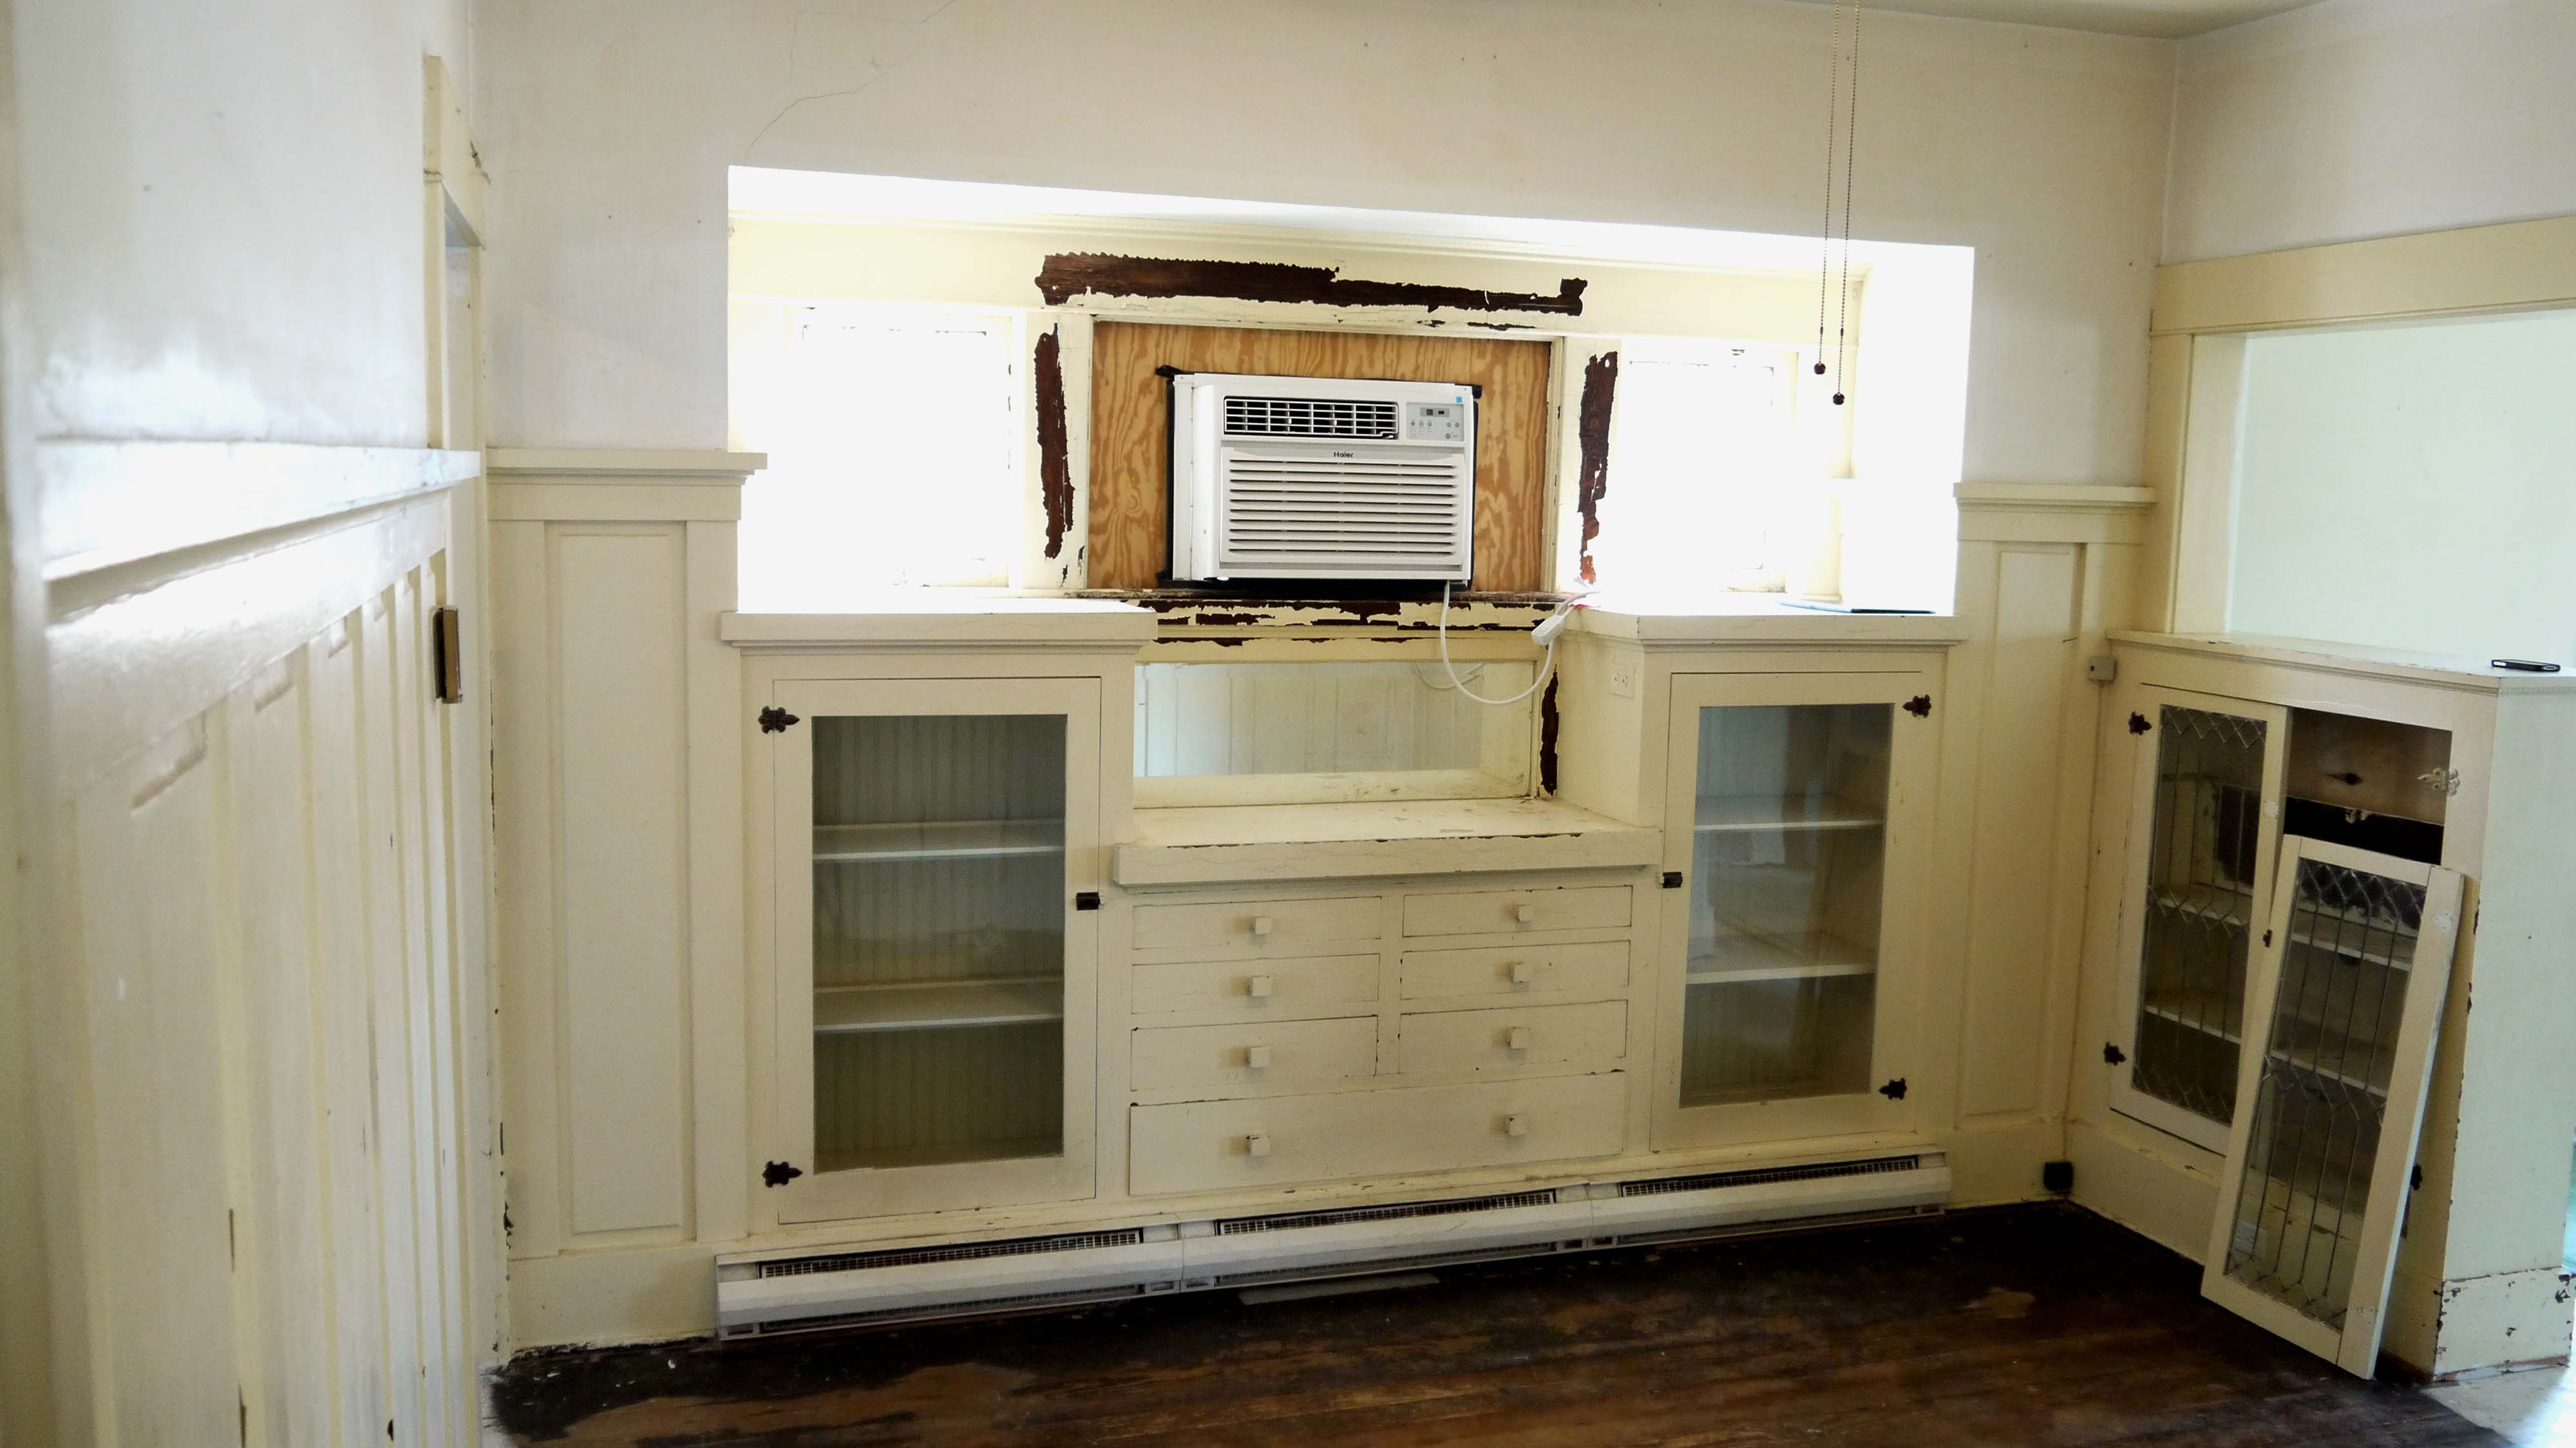
I can’t help but think that the center window must have been leaded glass like the two on the sides, and it was removed for an air conditioner. I’m still hoping to find the original window in the attic somewhere.

And the doors to the left bookcase are leaded glass too! The frame on the one is bad, it has come unglued and the glass became loose, which is why it is off of its hinges. But at least it is still there, and wasn’t trashed at some point. It’s easier to fix something broken than replace something not there.
The dining room leads first into the second bedroom, or as I have been calling it, the blue room. Overall, it feels a little more private than the first bedroom. Not only is it in the back of the house, but is has much smaller windows which makes it a little darker. There is no closet, but a built-in wardrobe from floor to ceiling.

The window to the back yard is half as tall as any others in the house. The large blank wall to the left will work as a space to center a large bed and headboard, with room for a nightstand on either side.

This window faces east and, although it is too bright to see out, actually shows the detached garage. Unfortunately, the cardboard piece covers a broken corner of the window. So terrible, because all of the windows in the house are original, and they show it. They are wavy and full of lines, bubbles, and those imperfections that show they are panels of hand blown glass. Made by hand. Not rolled on a glass machine and perfectly flat. They show the signs of how they were made, and looking through them they slightly distort the view outside. The light coming in is also refracted a bit, making neat patterns on the walls, like little sunbursts that move on the walls in each room.

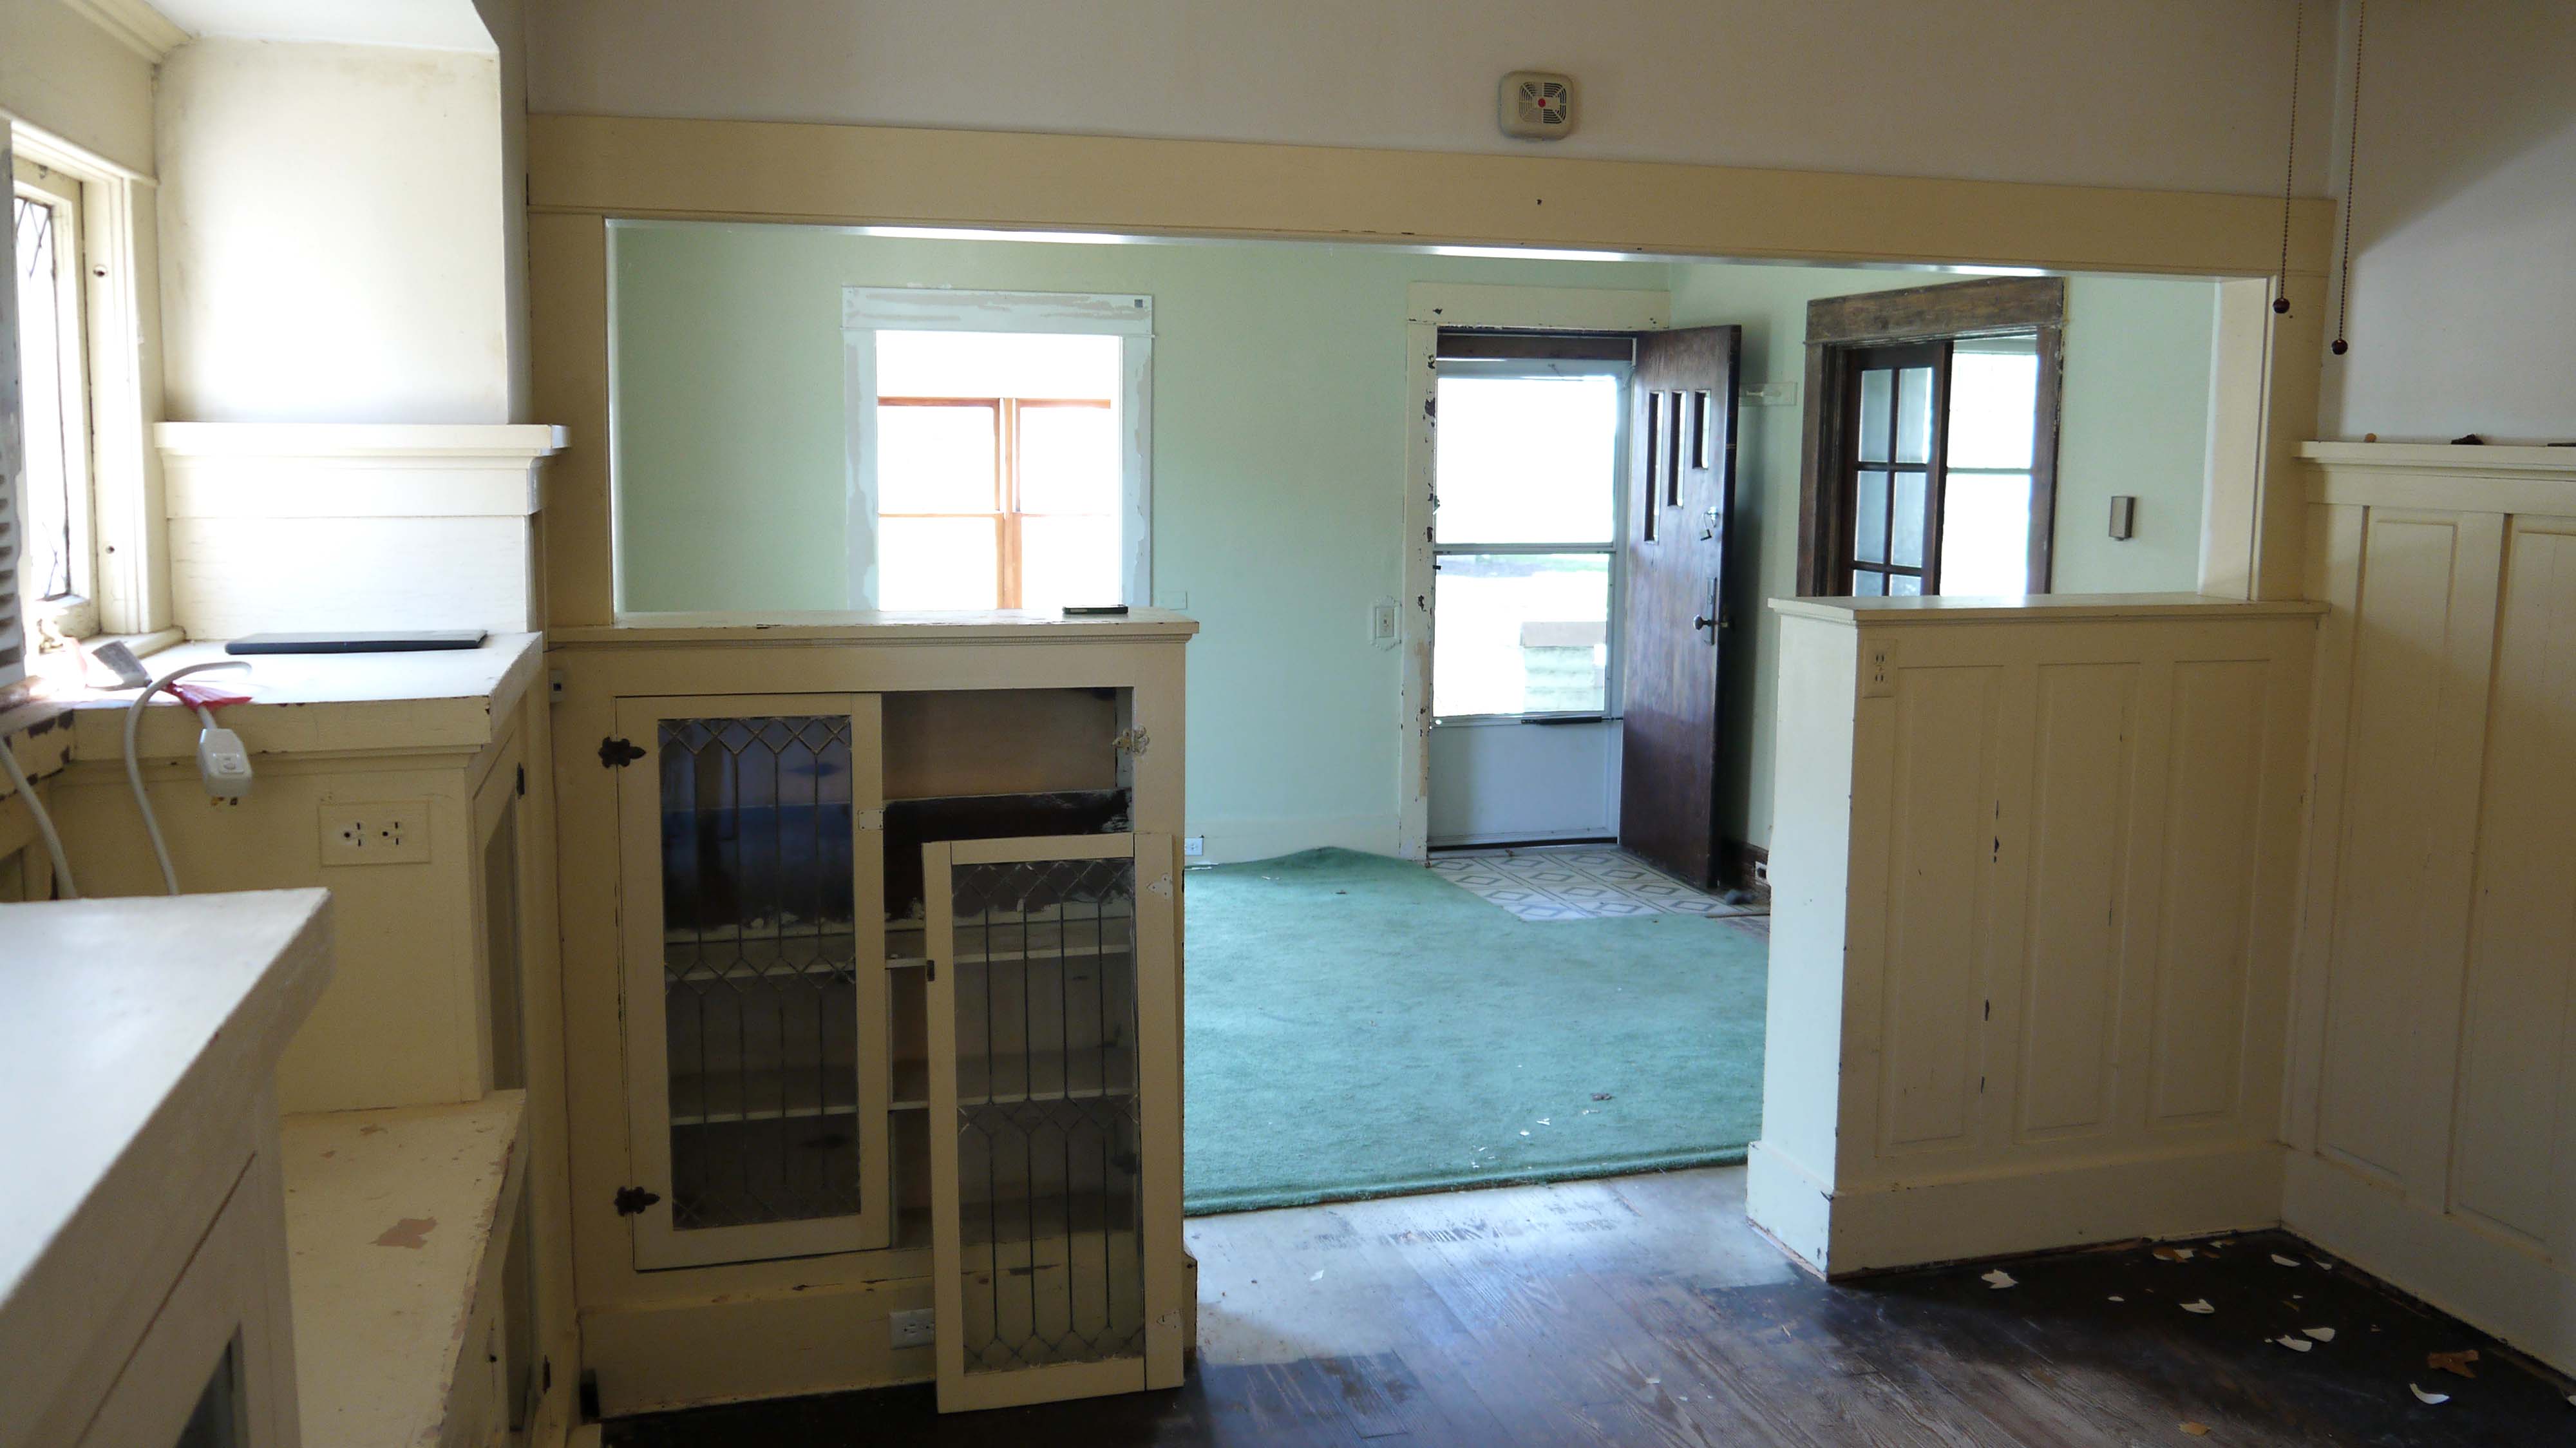
Walking back through the dining room, this doorway to the west leads into the kitchen. There are just a few spots on the ceilings where the paint is peeling like this. There doesn’t seem to be much evidence of water damage, so I have to believe the drastic temperature changes from no heat this past winter is what made the paint start to peel. This photo also gives you a sense of how tall the dining room paneling is.

It’s by far not a glamorous space yet, I will not be hosting any dinner parties in the near future at least. But it is a nice square room, and I’m hopeful that I can pull up the old linoleum and reveal wood floors to refinish.
In the mean time, it just needs a thorough scrub-down. The tall cabinets are a good start! And yes, as I mentioned before, you can see how the stove and fridge are on the left, and in there place is the underneath side of my tub.

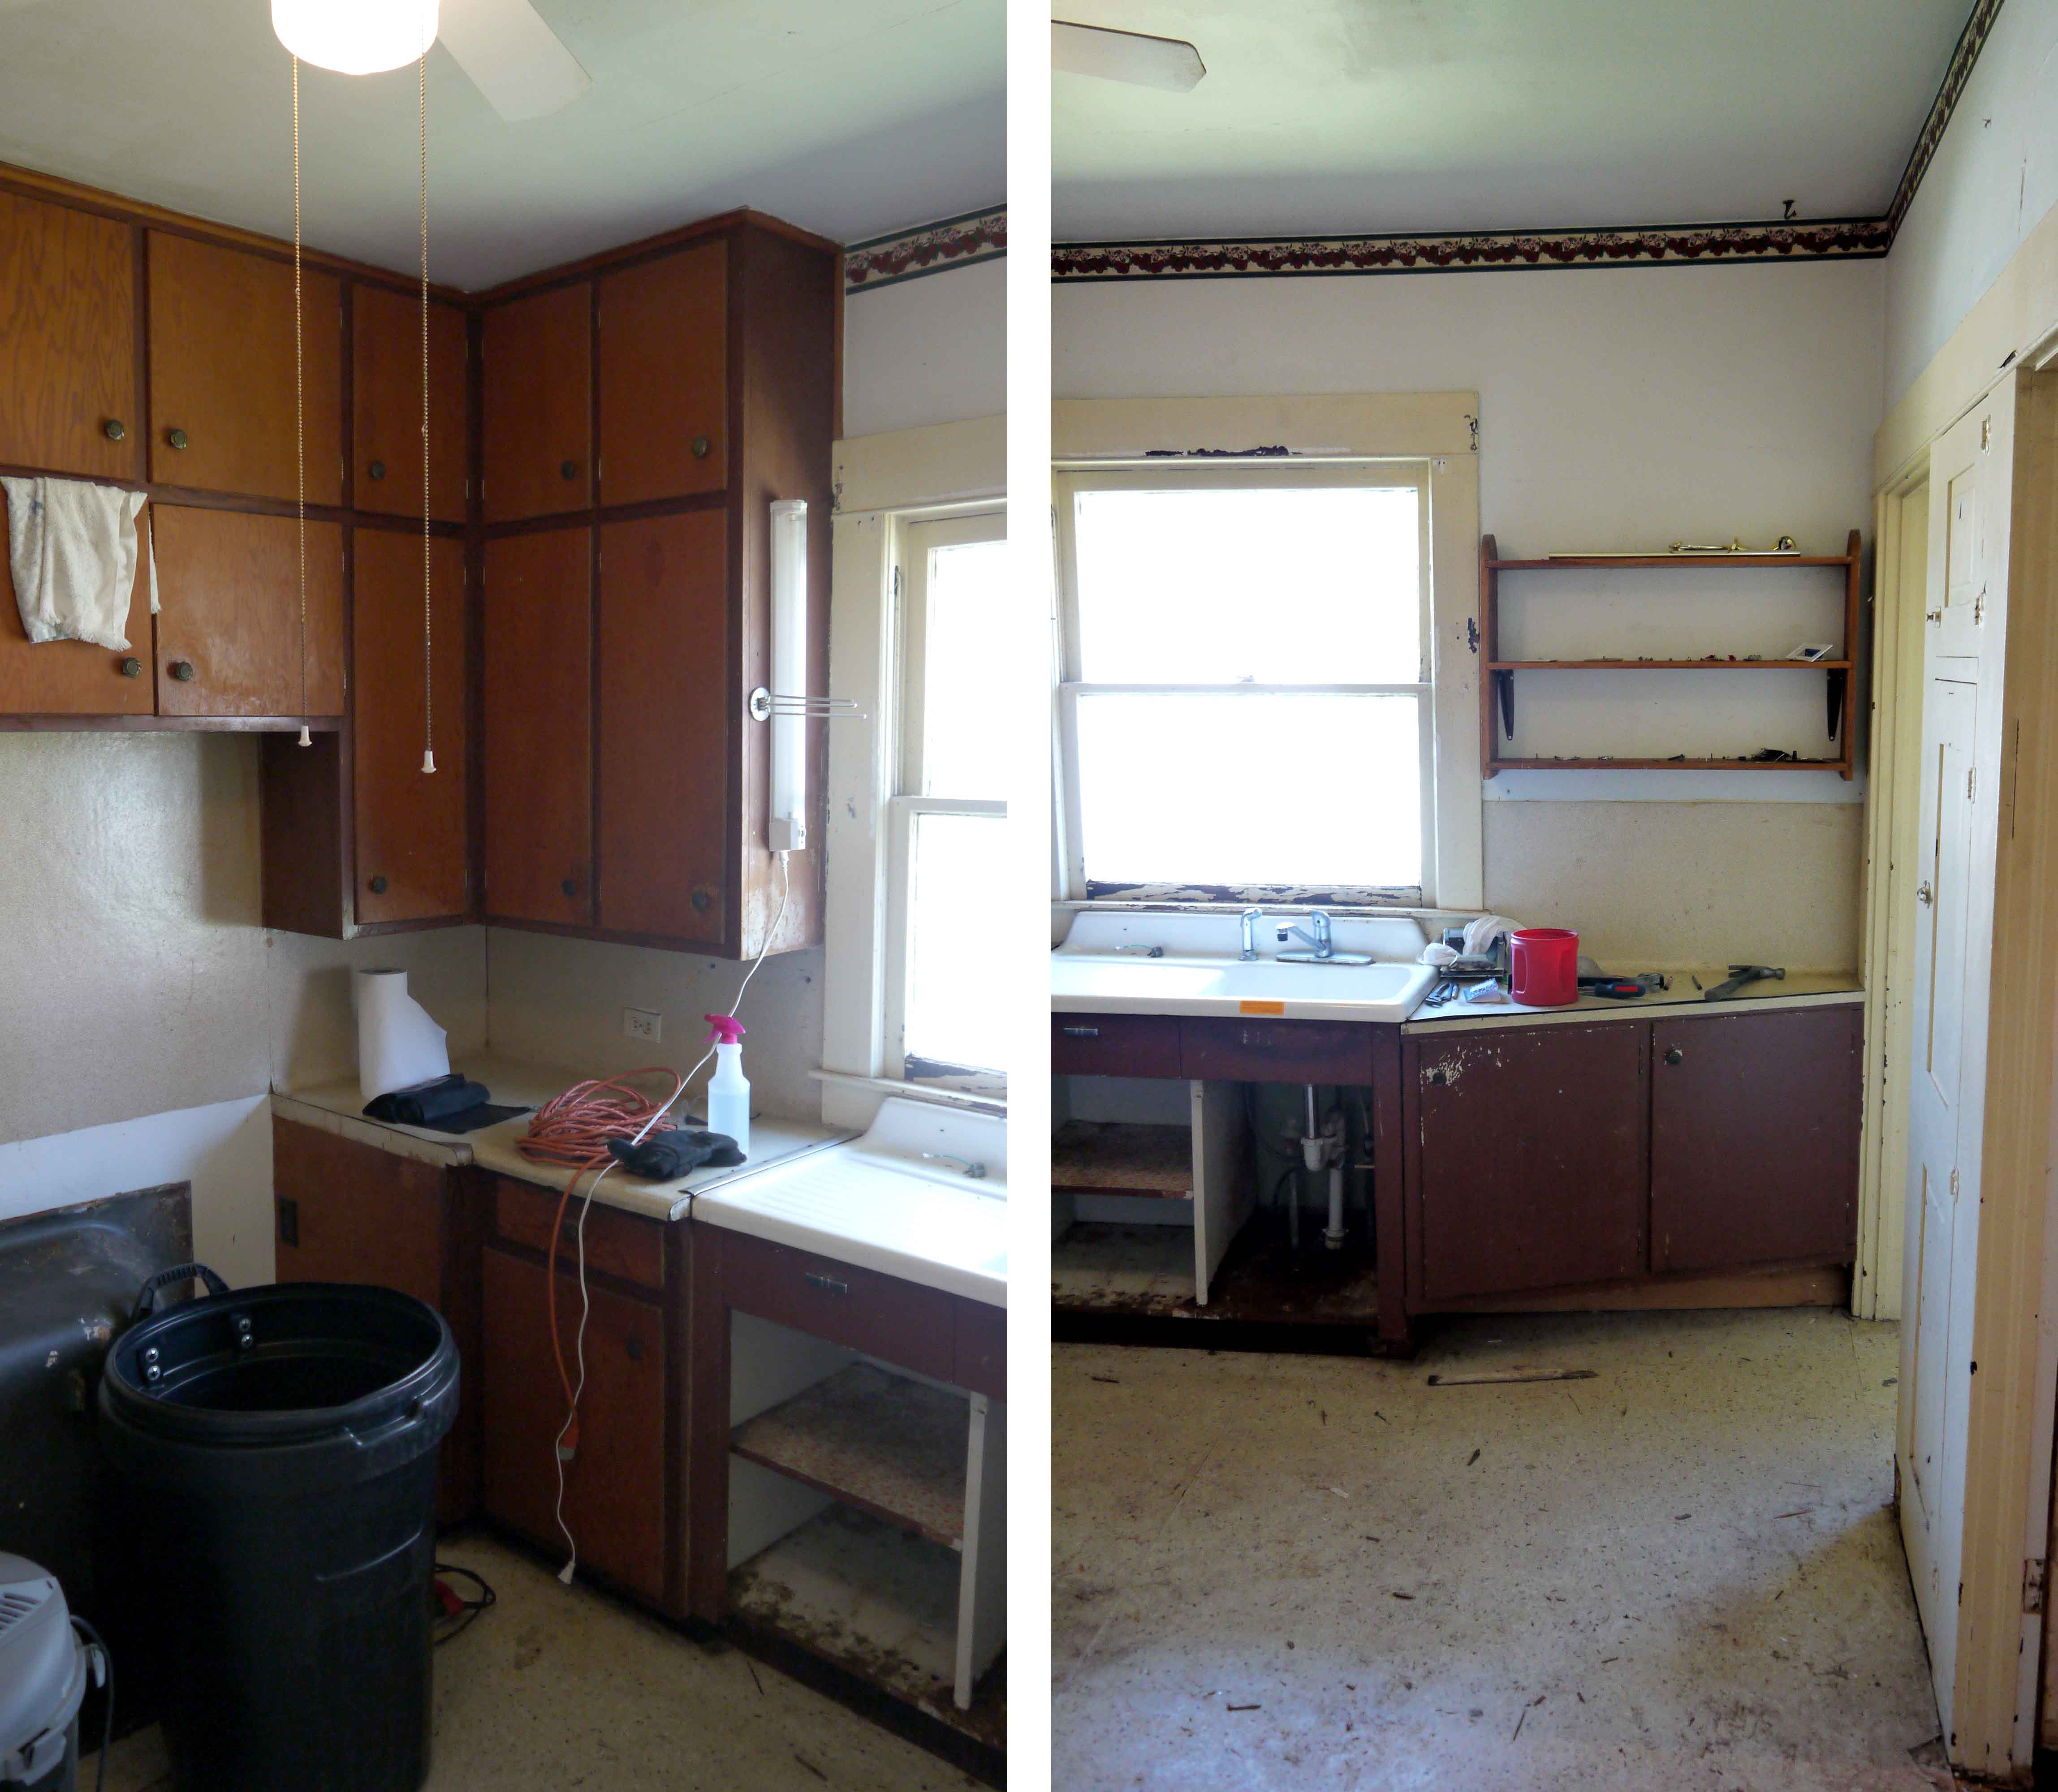
The best thing about the kitchen is the porcelain sink! What a statement piece, enormous for this size of kitchen, with its built in drain board. This is staying! Or, rather, it will get tore out, scrubbed top to bottom, and then put back in.

Standing with the sink at my left, this shot looks into both the laundry room and bathroom. I already detailed the bathroom “before” condition in this post. And in the space between them is another shallow wall cabinet, it looks as though it originally held a fold-down ironing board (like this one), but it’s been removed. I wonder if I could ever find one to replace it? Or perhaps build one to look original? Can you tell I love these little cubbies? These Craftsman home builders thought of everything. Why buy so much furniture; instead just build a house with a wardrobe, bookcases, buffet, and wall cabinets all as part of the design. Form meets function? I think so.
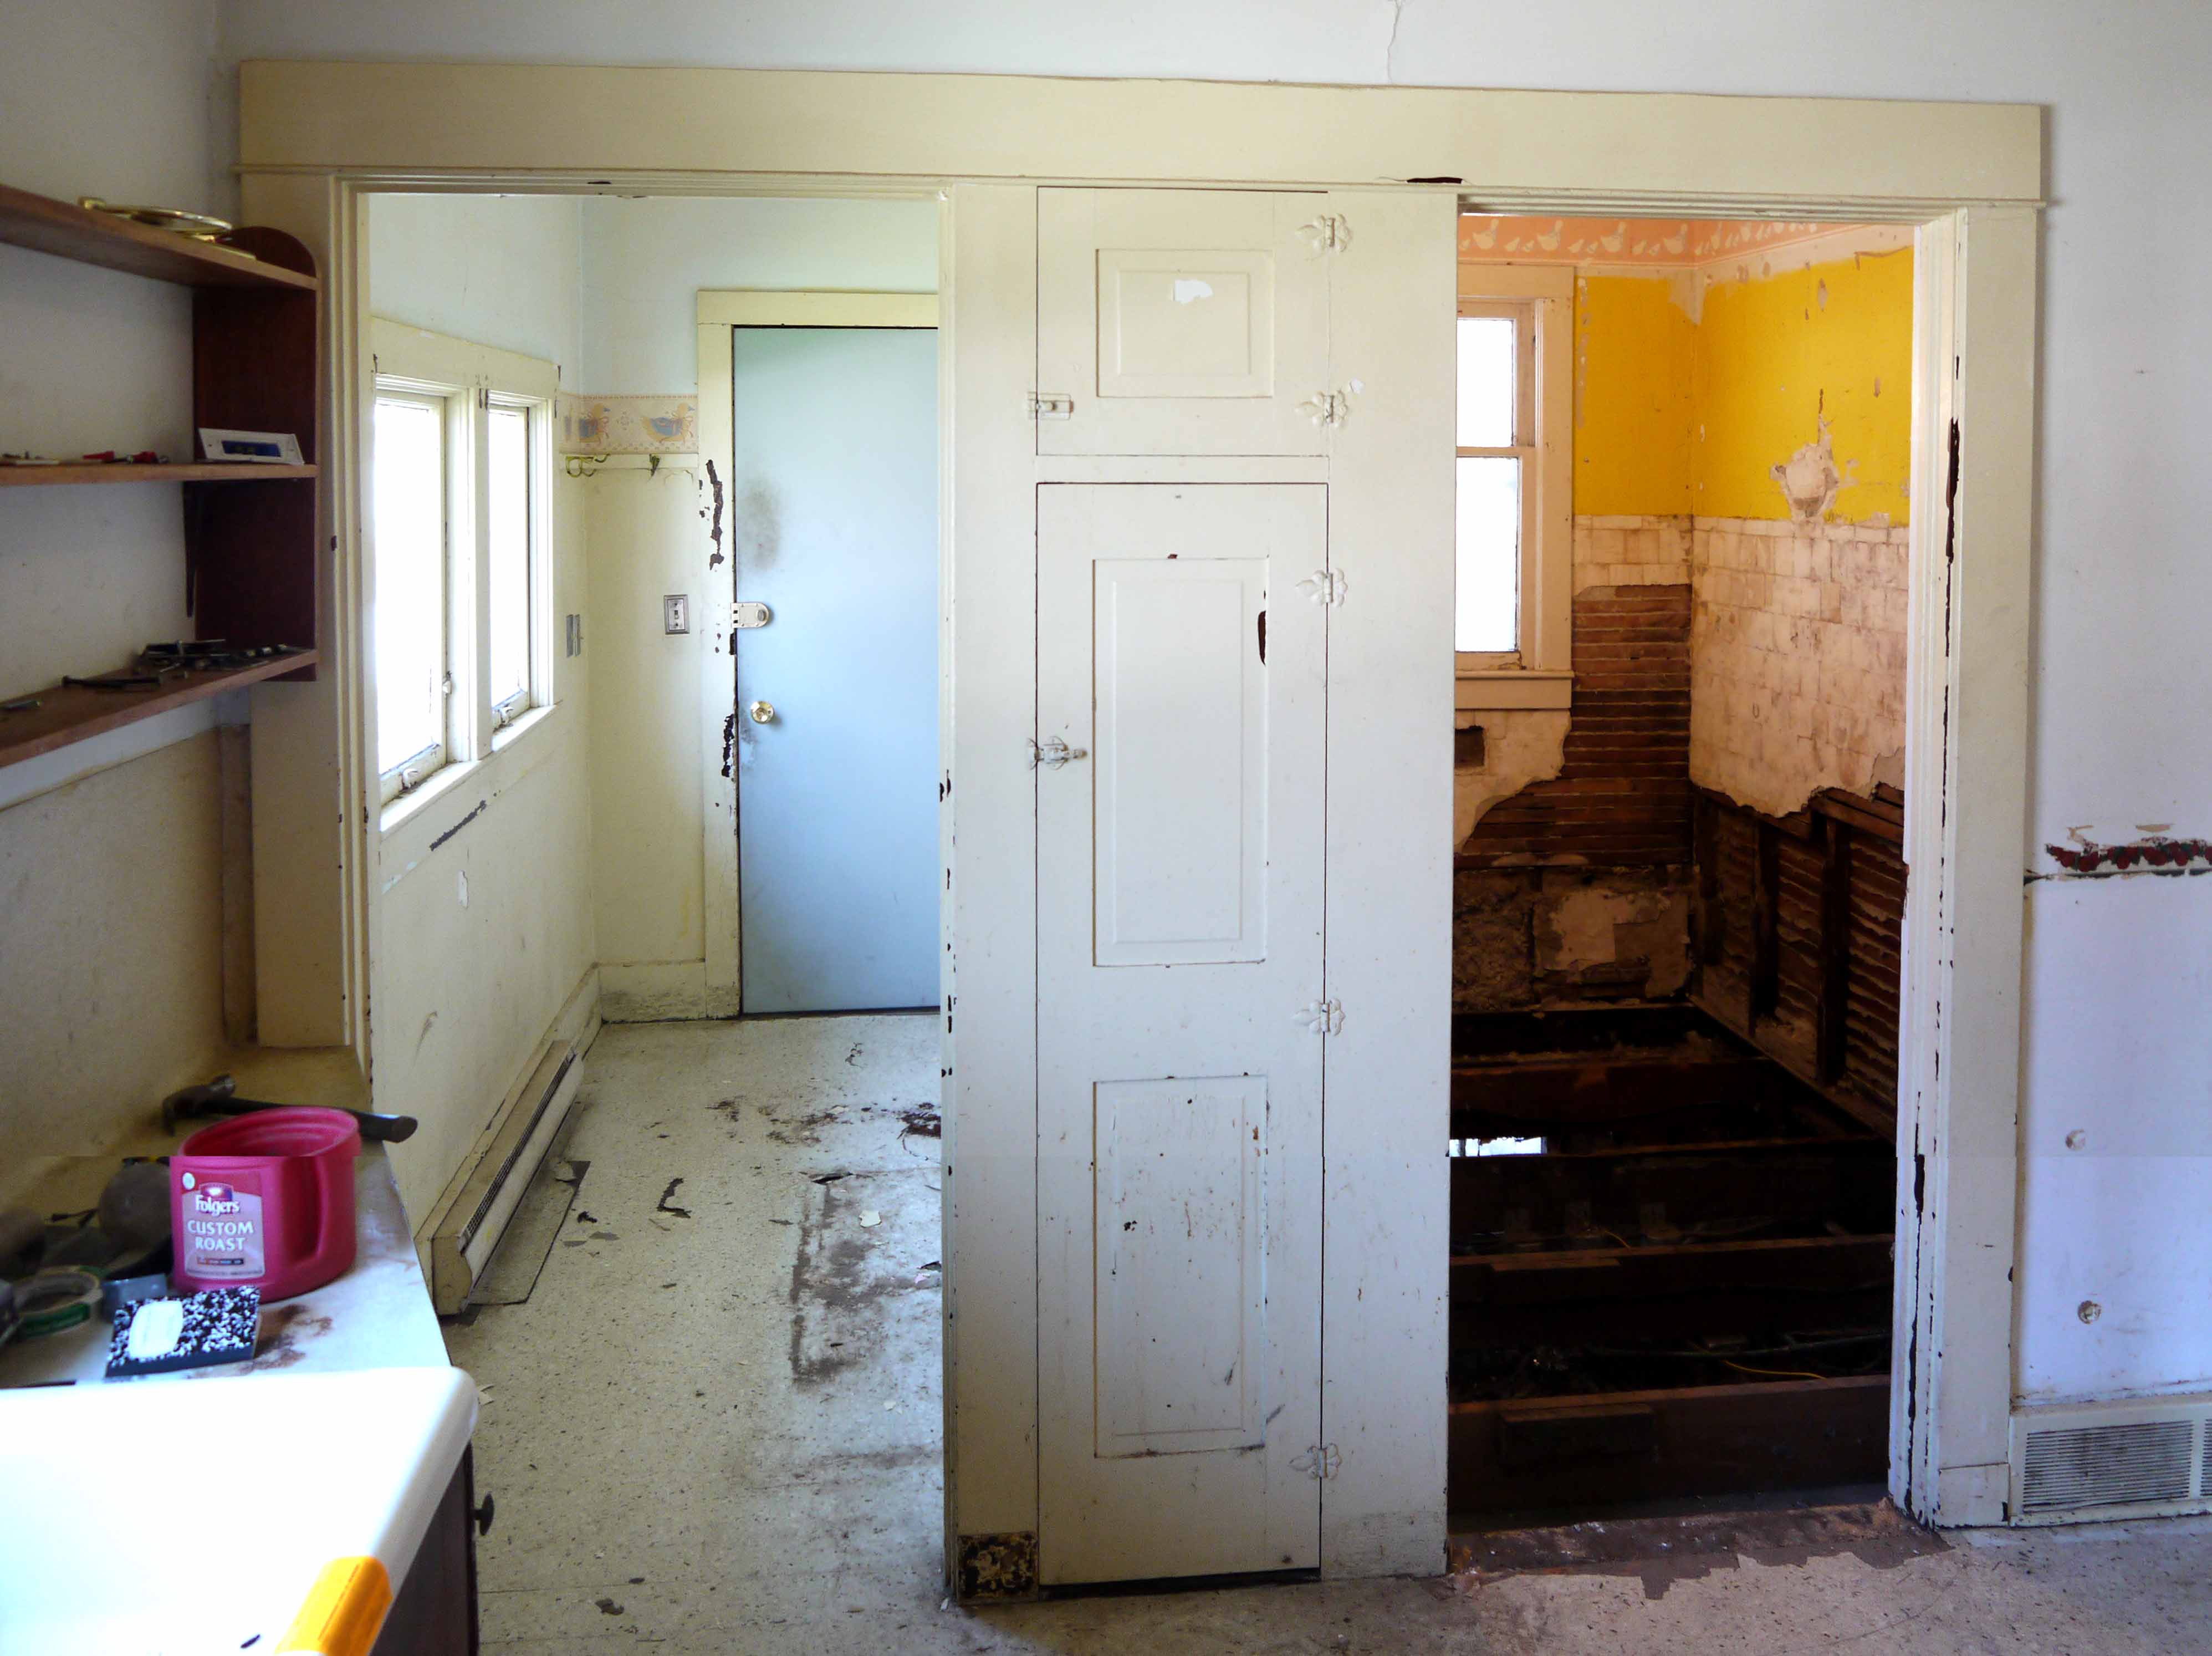
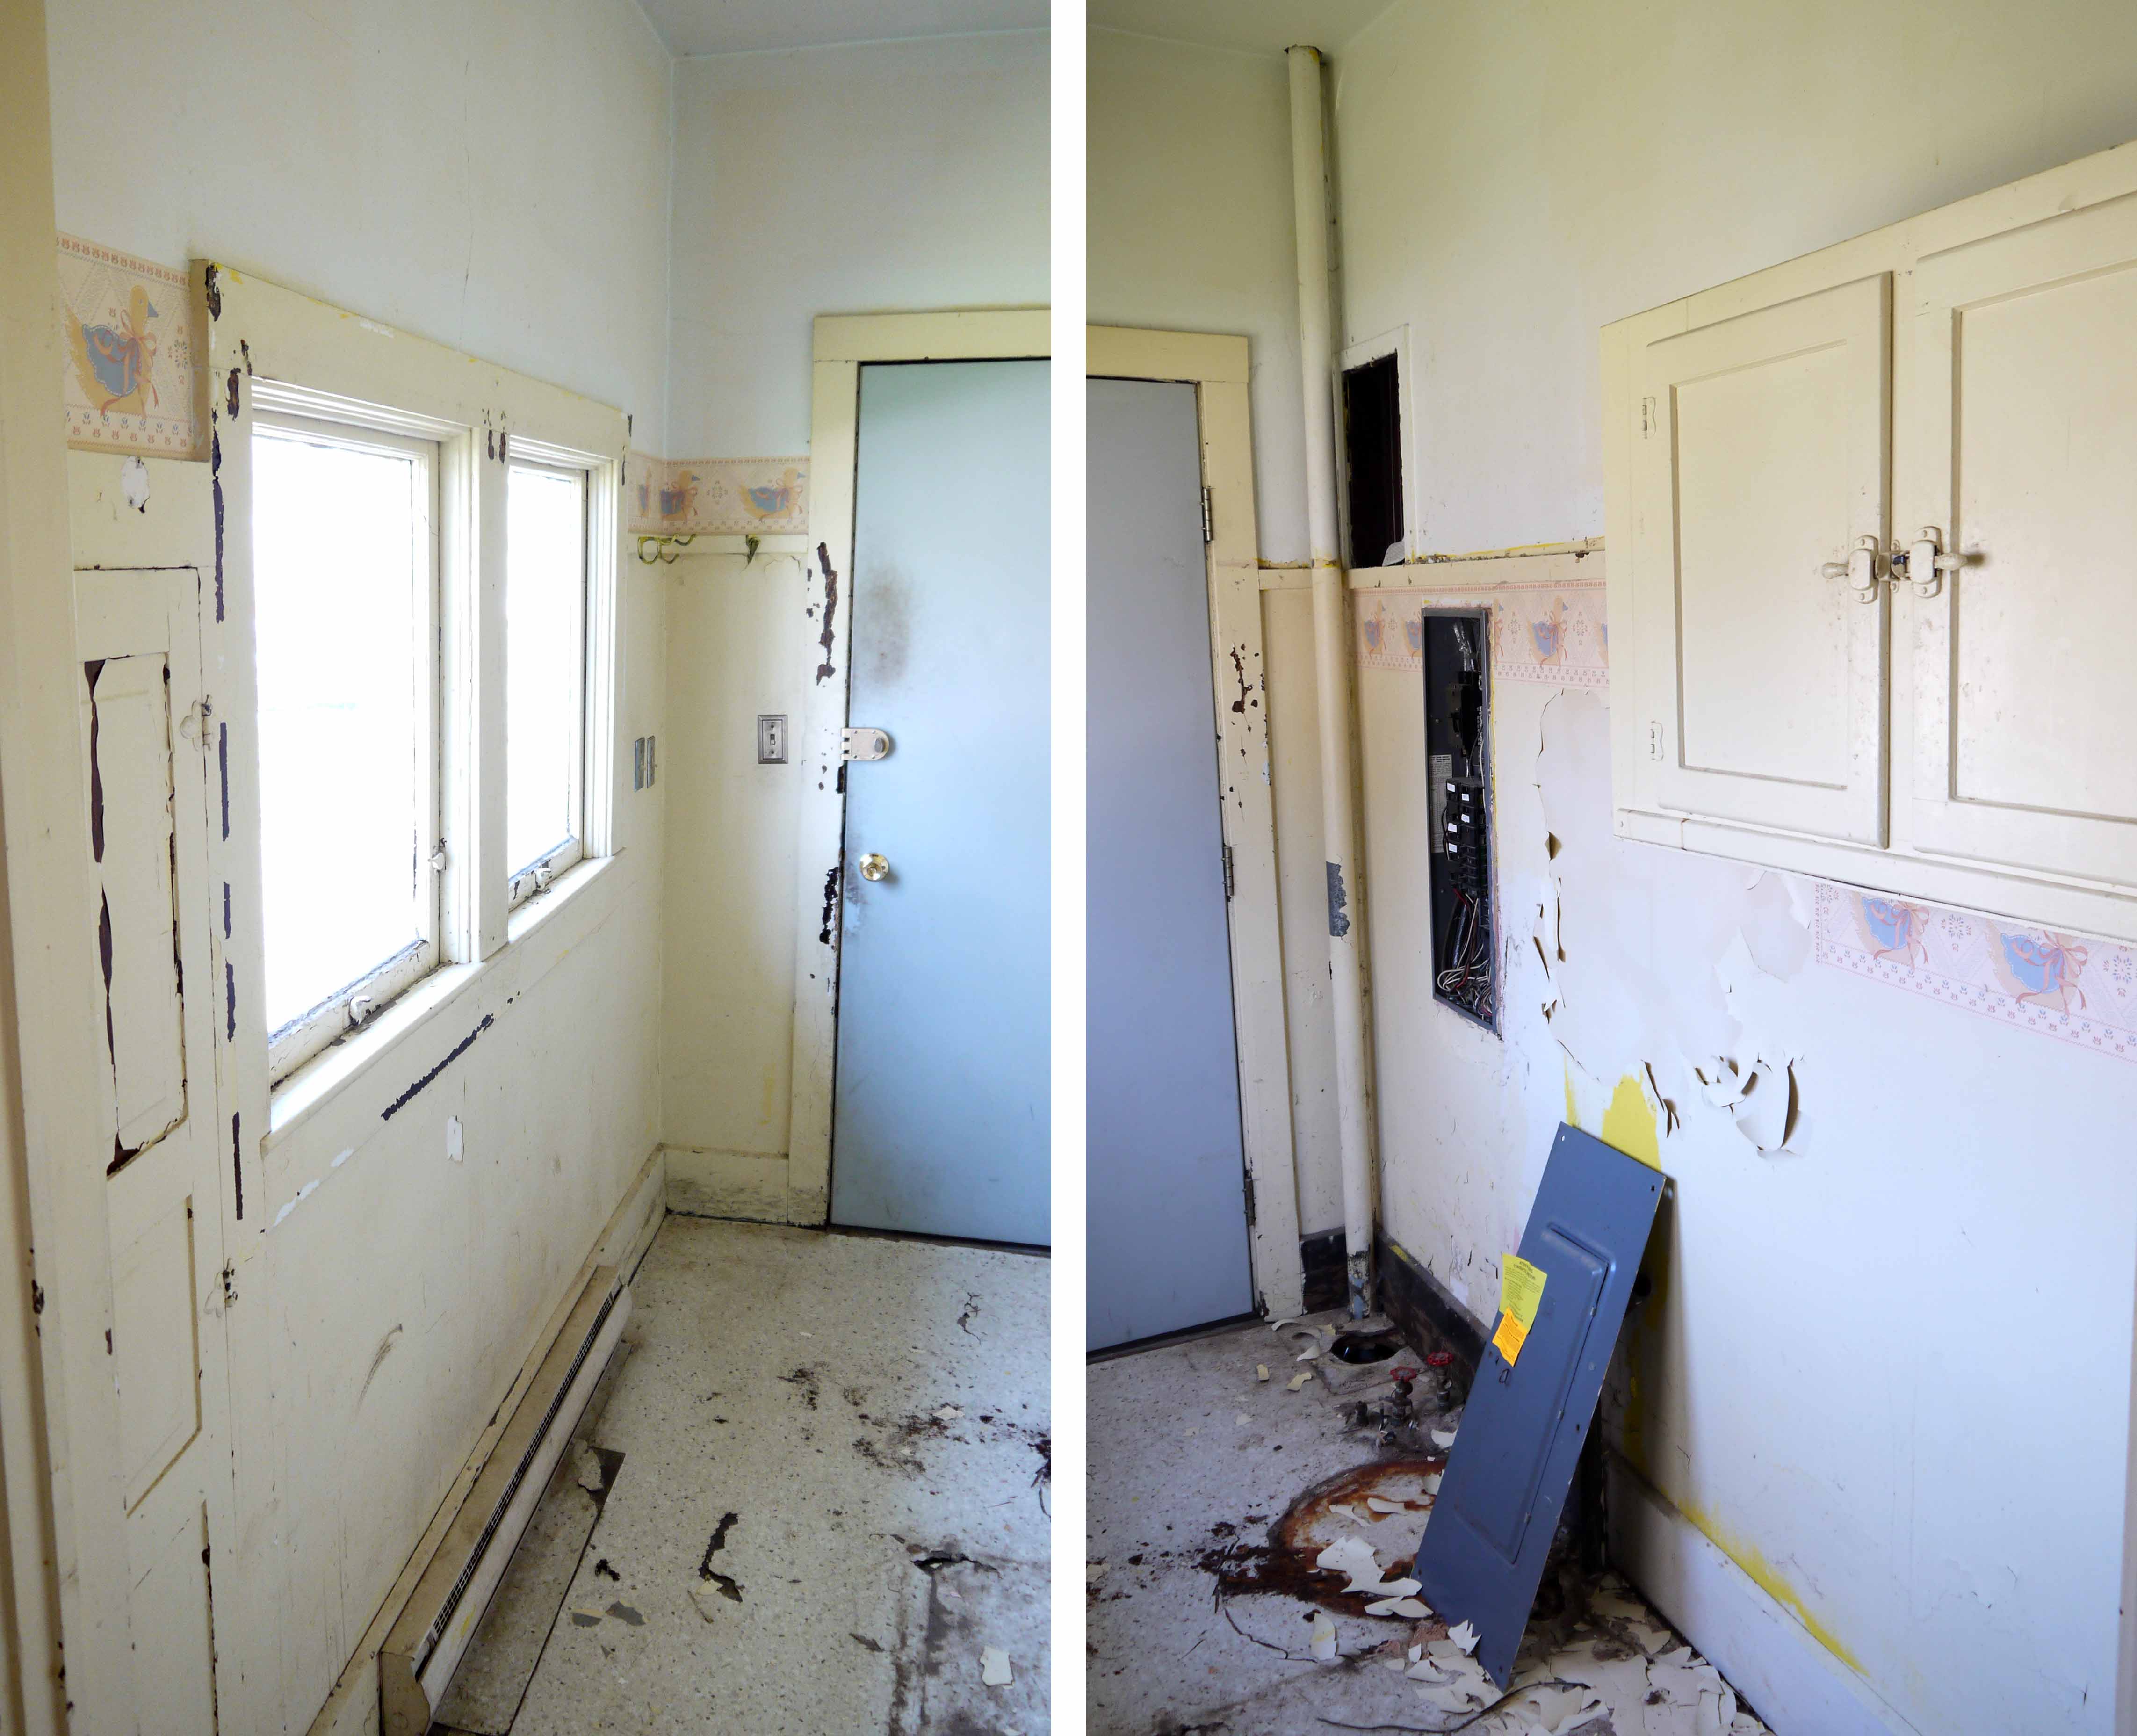
And then through the doorway, you see the narrow but bright laundry room. Another shallow wall cupboard on the left is perfect for a broom closet, and the double window floor floods the room with light. On the right is the drain plumbing vent and electrical panel (with door sitting on the floor). I hope to run the plumbing vent through the wall, but the breaker panel is staying. It’s 200 amp, and has empty breaker bays for expanding.
The rust circle on the floor shows where the water heater was, I carried that out the first week (and my hand went right through the bottom it was so rusted). I am researching tankless water heaters in hopes of saving that much floor space, as this is really a small room. Under the cabinet is where the washer and dryer go, and the steel door leads to the back yard.
So that’s the tour! I didn’t think to take photos of the outside of the house, including the garage and outbuilding, so that will be next. My family helped last weekend to do some yard clean-up, raking, planting a few perennials and trimming the overgrown shrubs.
Keys to Green Gables
Posted by Adam A. Ries in About Me, Exterior, Home Improvement on April 12, 2014
Well, it happened! This past Monday, to be exact. I drove to the bank right after work, signed 6 trees worth of paper, and they handed me the keys! The best part was my realtor bringing a 12 pack of one of my favorite beers with a big red bow, right into the banker’s office to congratulate me! What a surprise that was! Is it even legal to have beer in a bank? Oh well, my banker was good about it and laughed it off. I finished the paperwork and headed to my new place. I already had an ice cold beer in the car, ready to help me inaugurate the new place, and a camera in the other hand to make sure I could get a photo out front with the realtor’s SOLD sign.
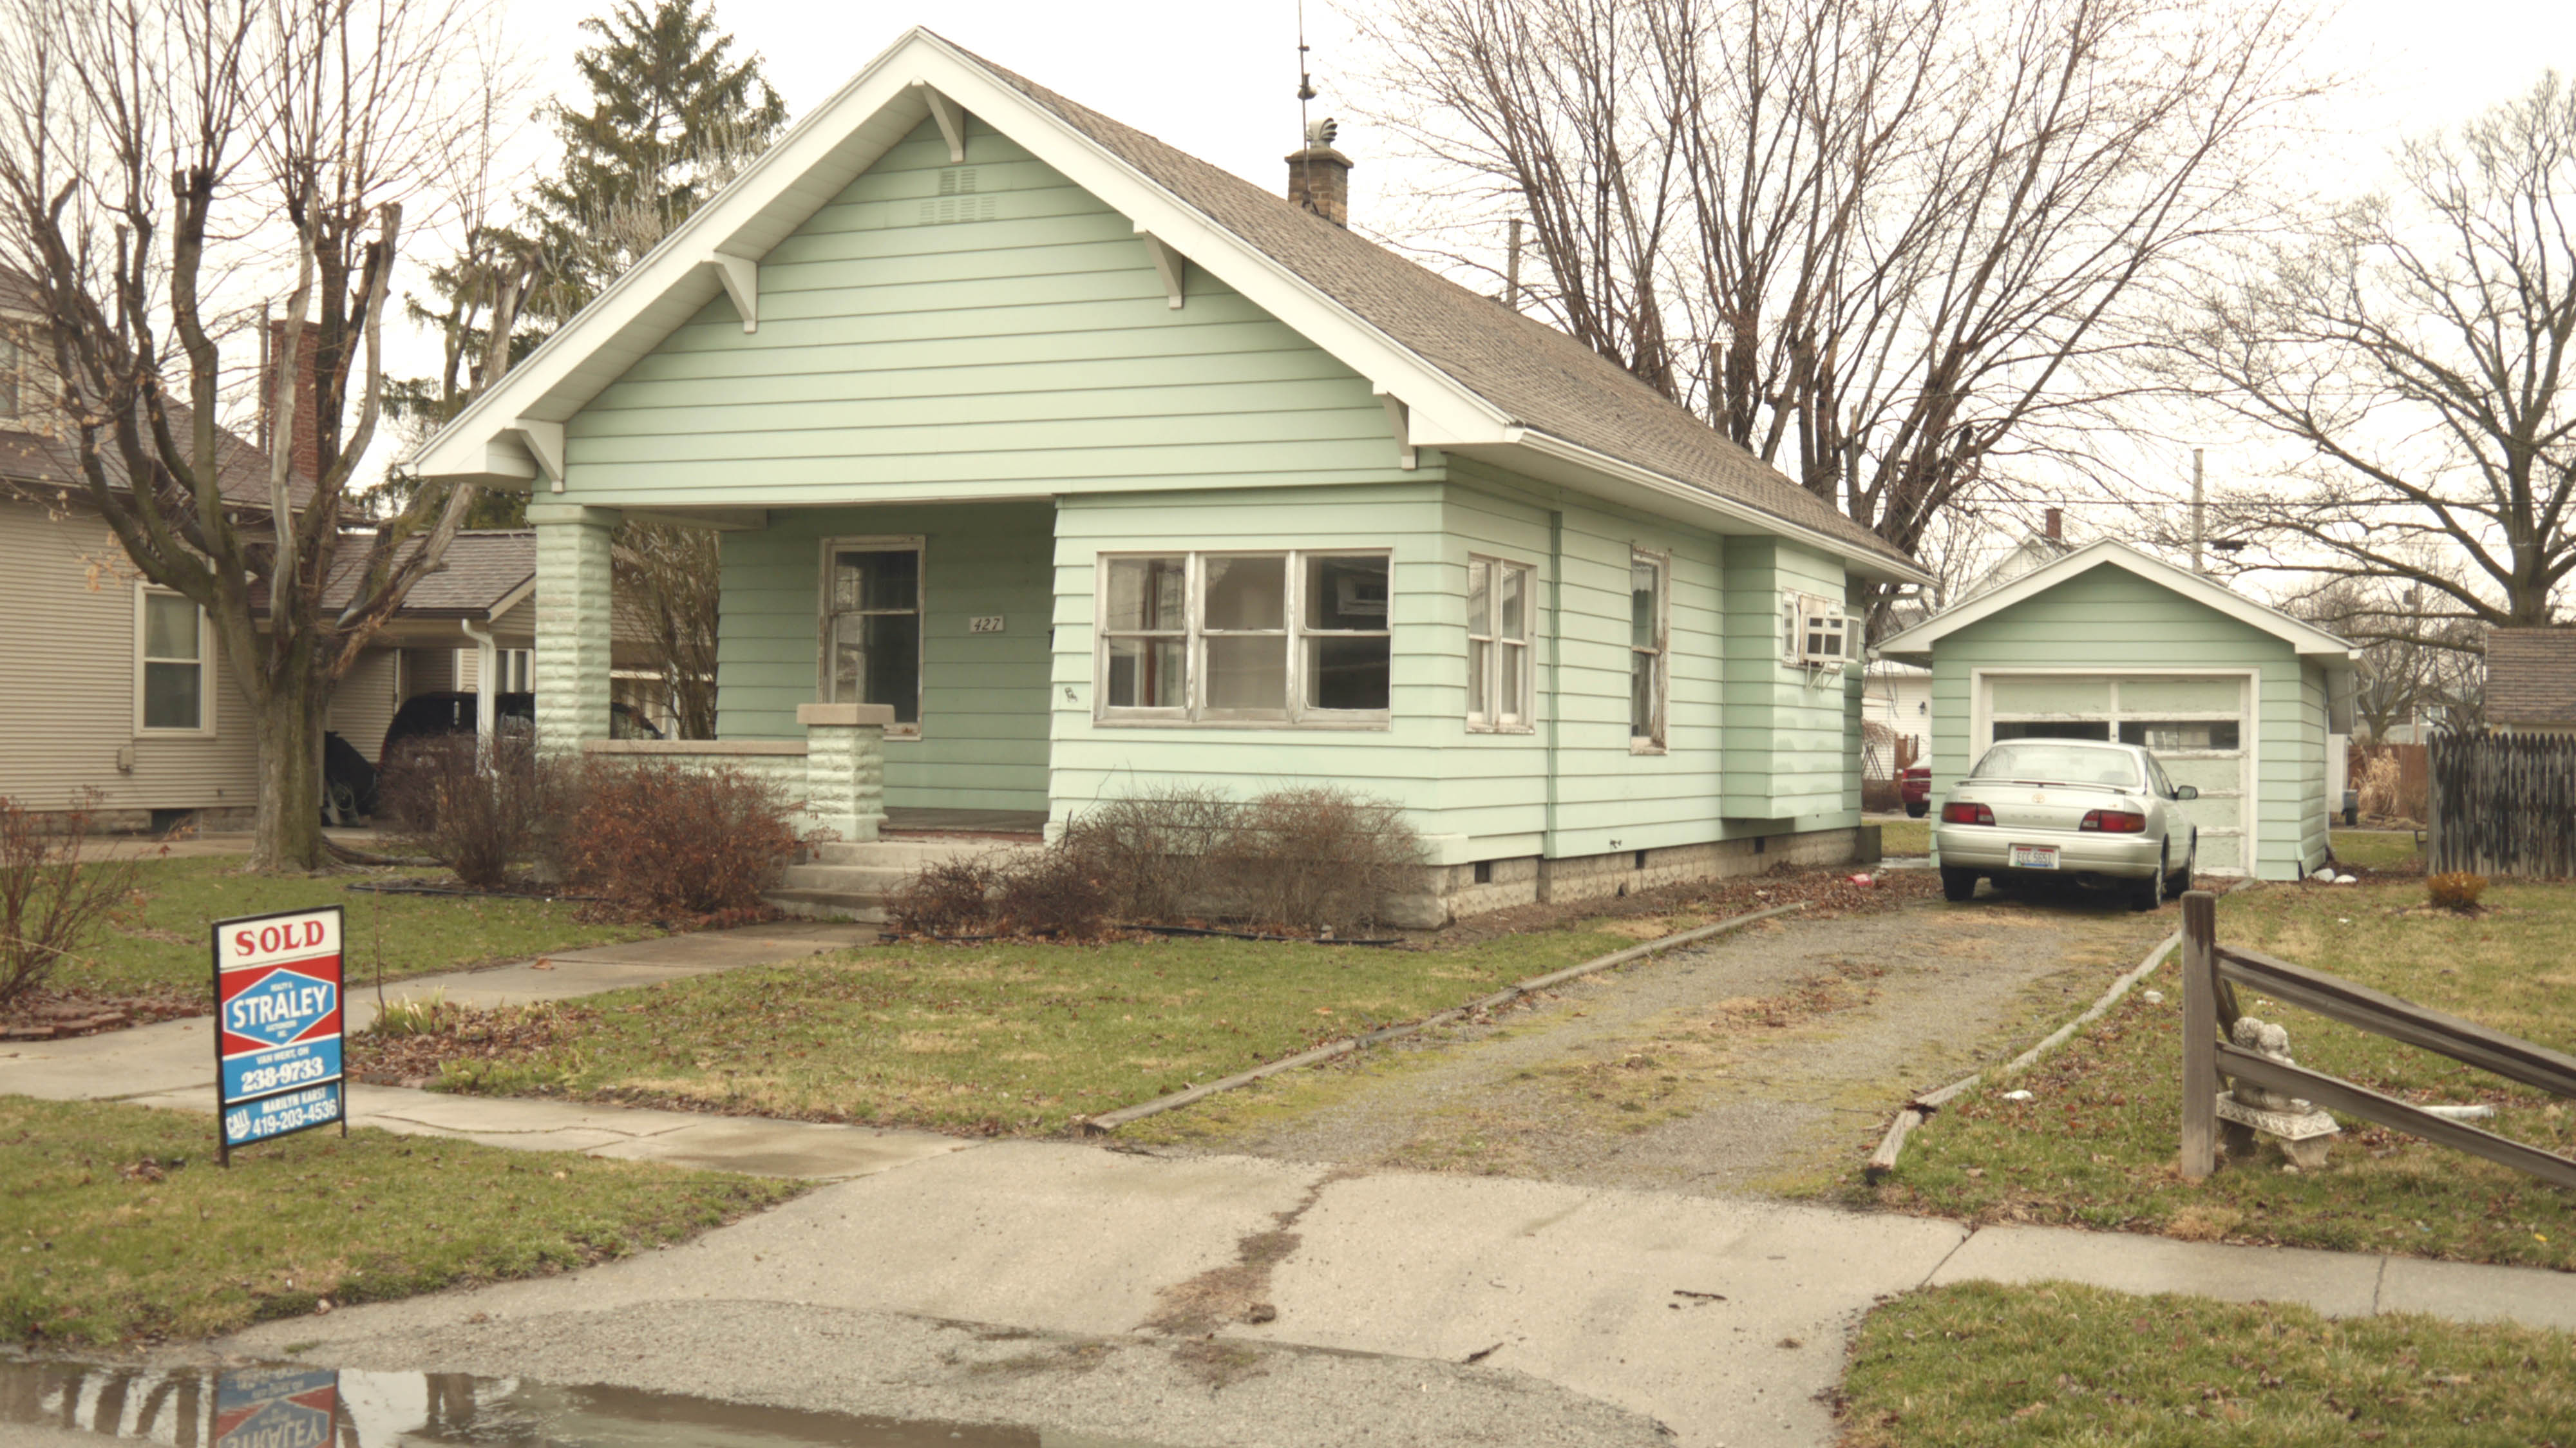
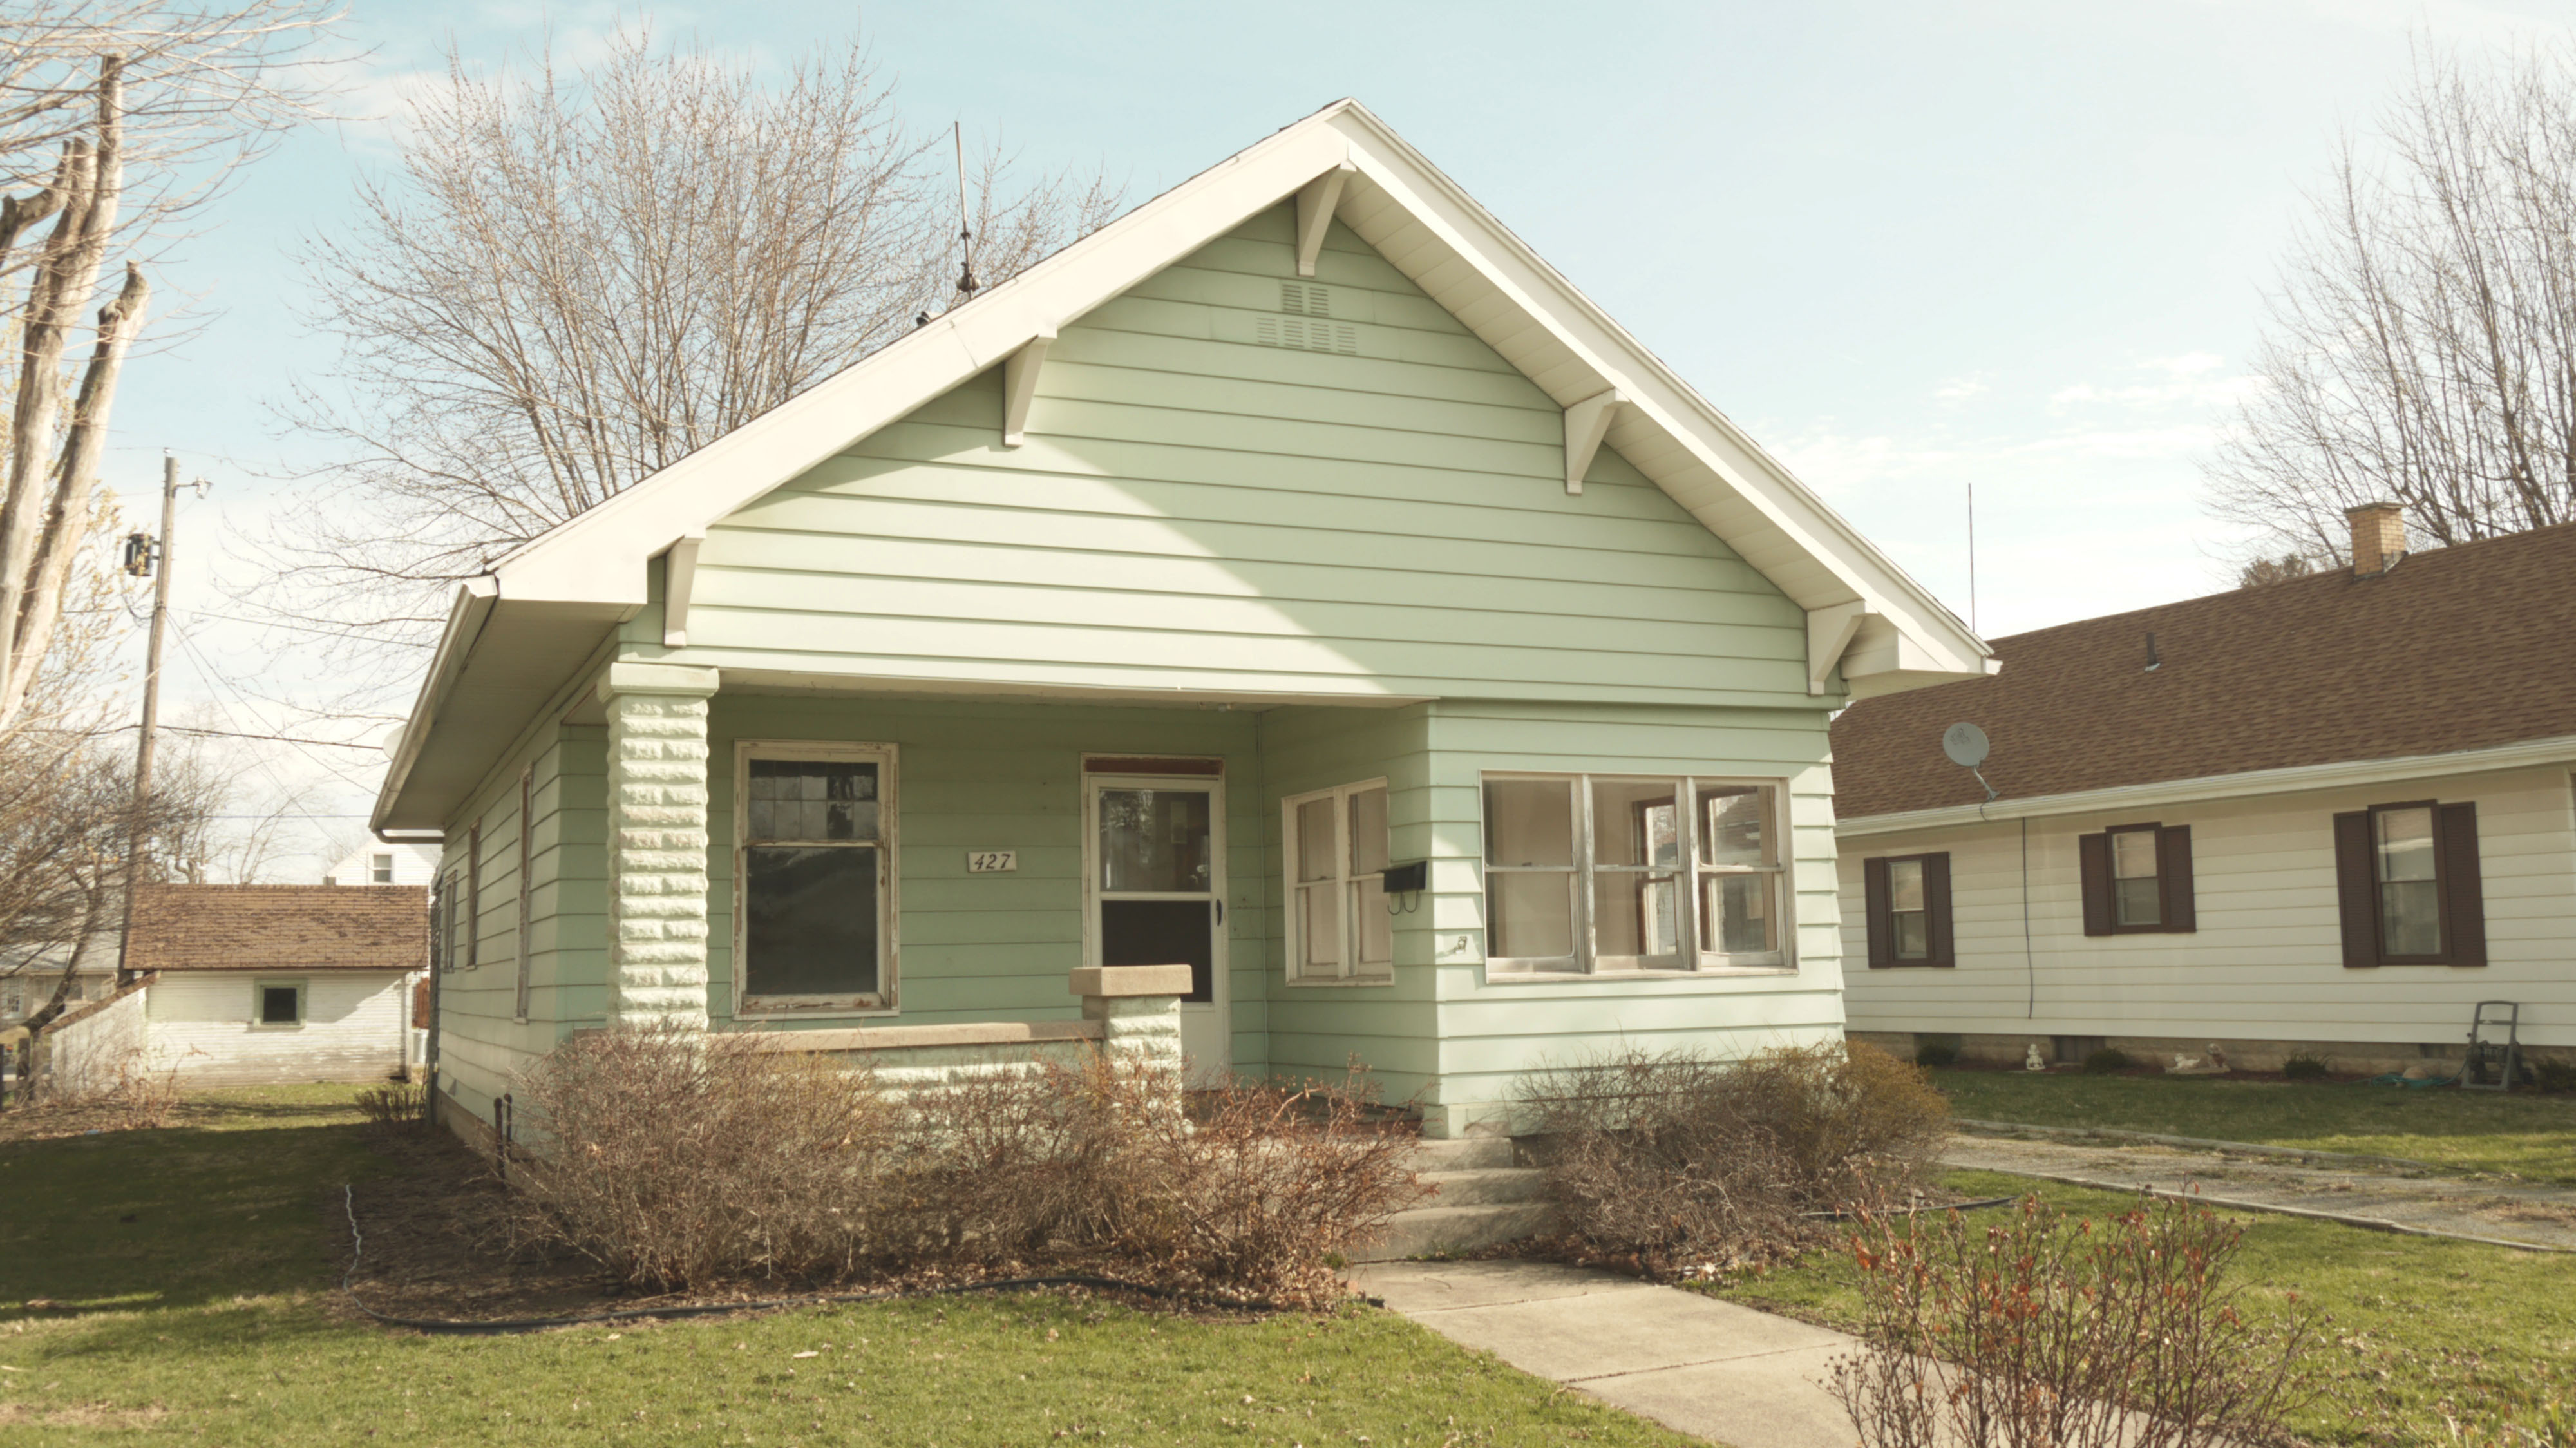
So there she is, in all her green gable goodness. Not a nice green either, but sea foam green. Or bright fresh spring vegetable green. Not a bad color by any means when a kid is excited about a brand new 48 pack of Crayola crayons, but on a house?? I drive down the street and barely notice the other run down homes, and then – BAM – like a jar of baby food smashed peas, there’s my little bungalow! It has a one car detached garage, stone driveway, and not a bad size front yard.
So what all does this house have going for it? Well, it’s entirely wrapped in aluminum siding. Not my favorite color, but it’s wrapped pretty well. Siding, soffit, and spouting all look to be in great shape. Upon closer inspection, the window trim was never wrapped in aluminum, so it either needs painted or covered. The concrete walkway to the front porch is in great shape, the steps are nice too. Being 3 steps, code requires it to have a handrail. The porch floor has taken a beating, looks just like a weather beaten deck. And the windows are reeeally bad. Loose glass, water damaged sashes, and cracked or missing glazing. And neither of these photos do justice to how bad the roof is, or just how many pieces of shingles I picked out of the yard the first afternoon.
I need to take “before” photos of several more rooms, and the nice back yard. But already I know what the first project will be: the bathroom. It’s dingy, moldy, rotting, and who knows what else. Looking in from the kitchen, it looks like this:
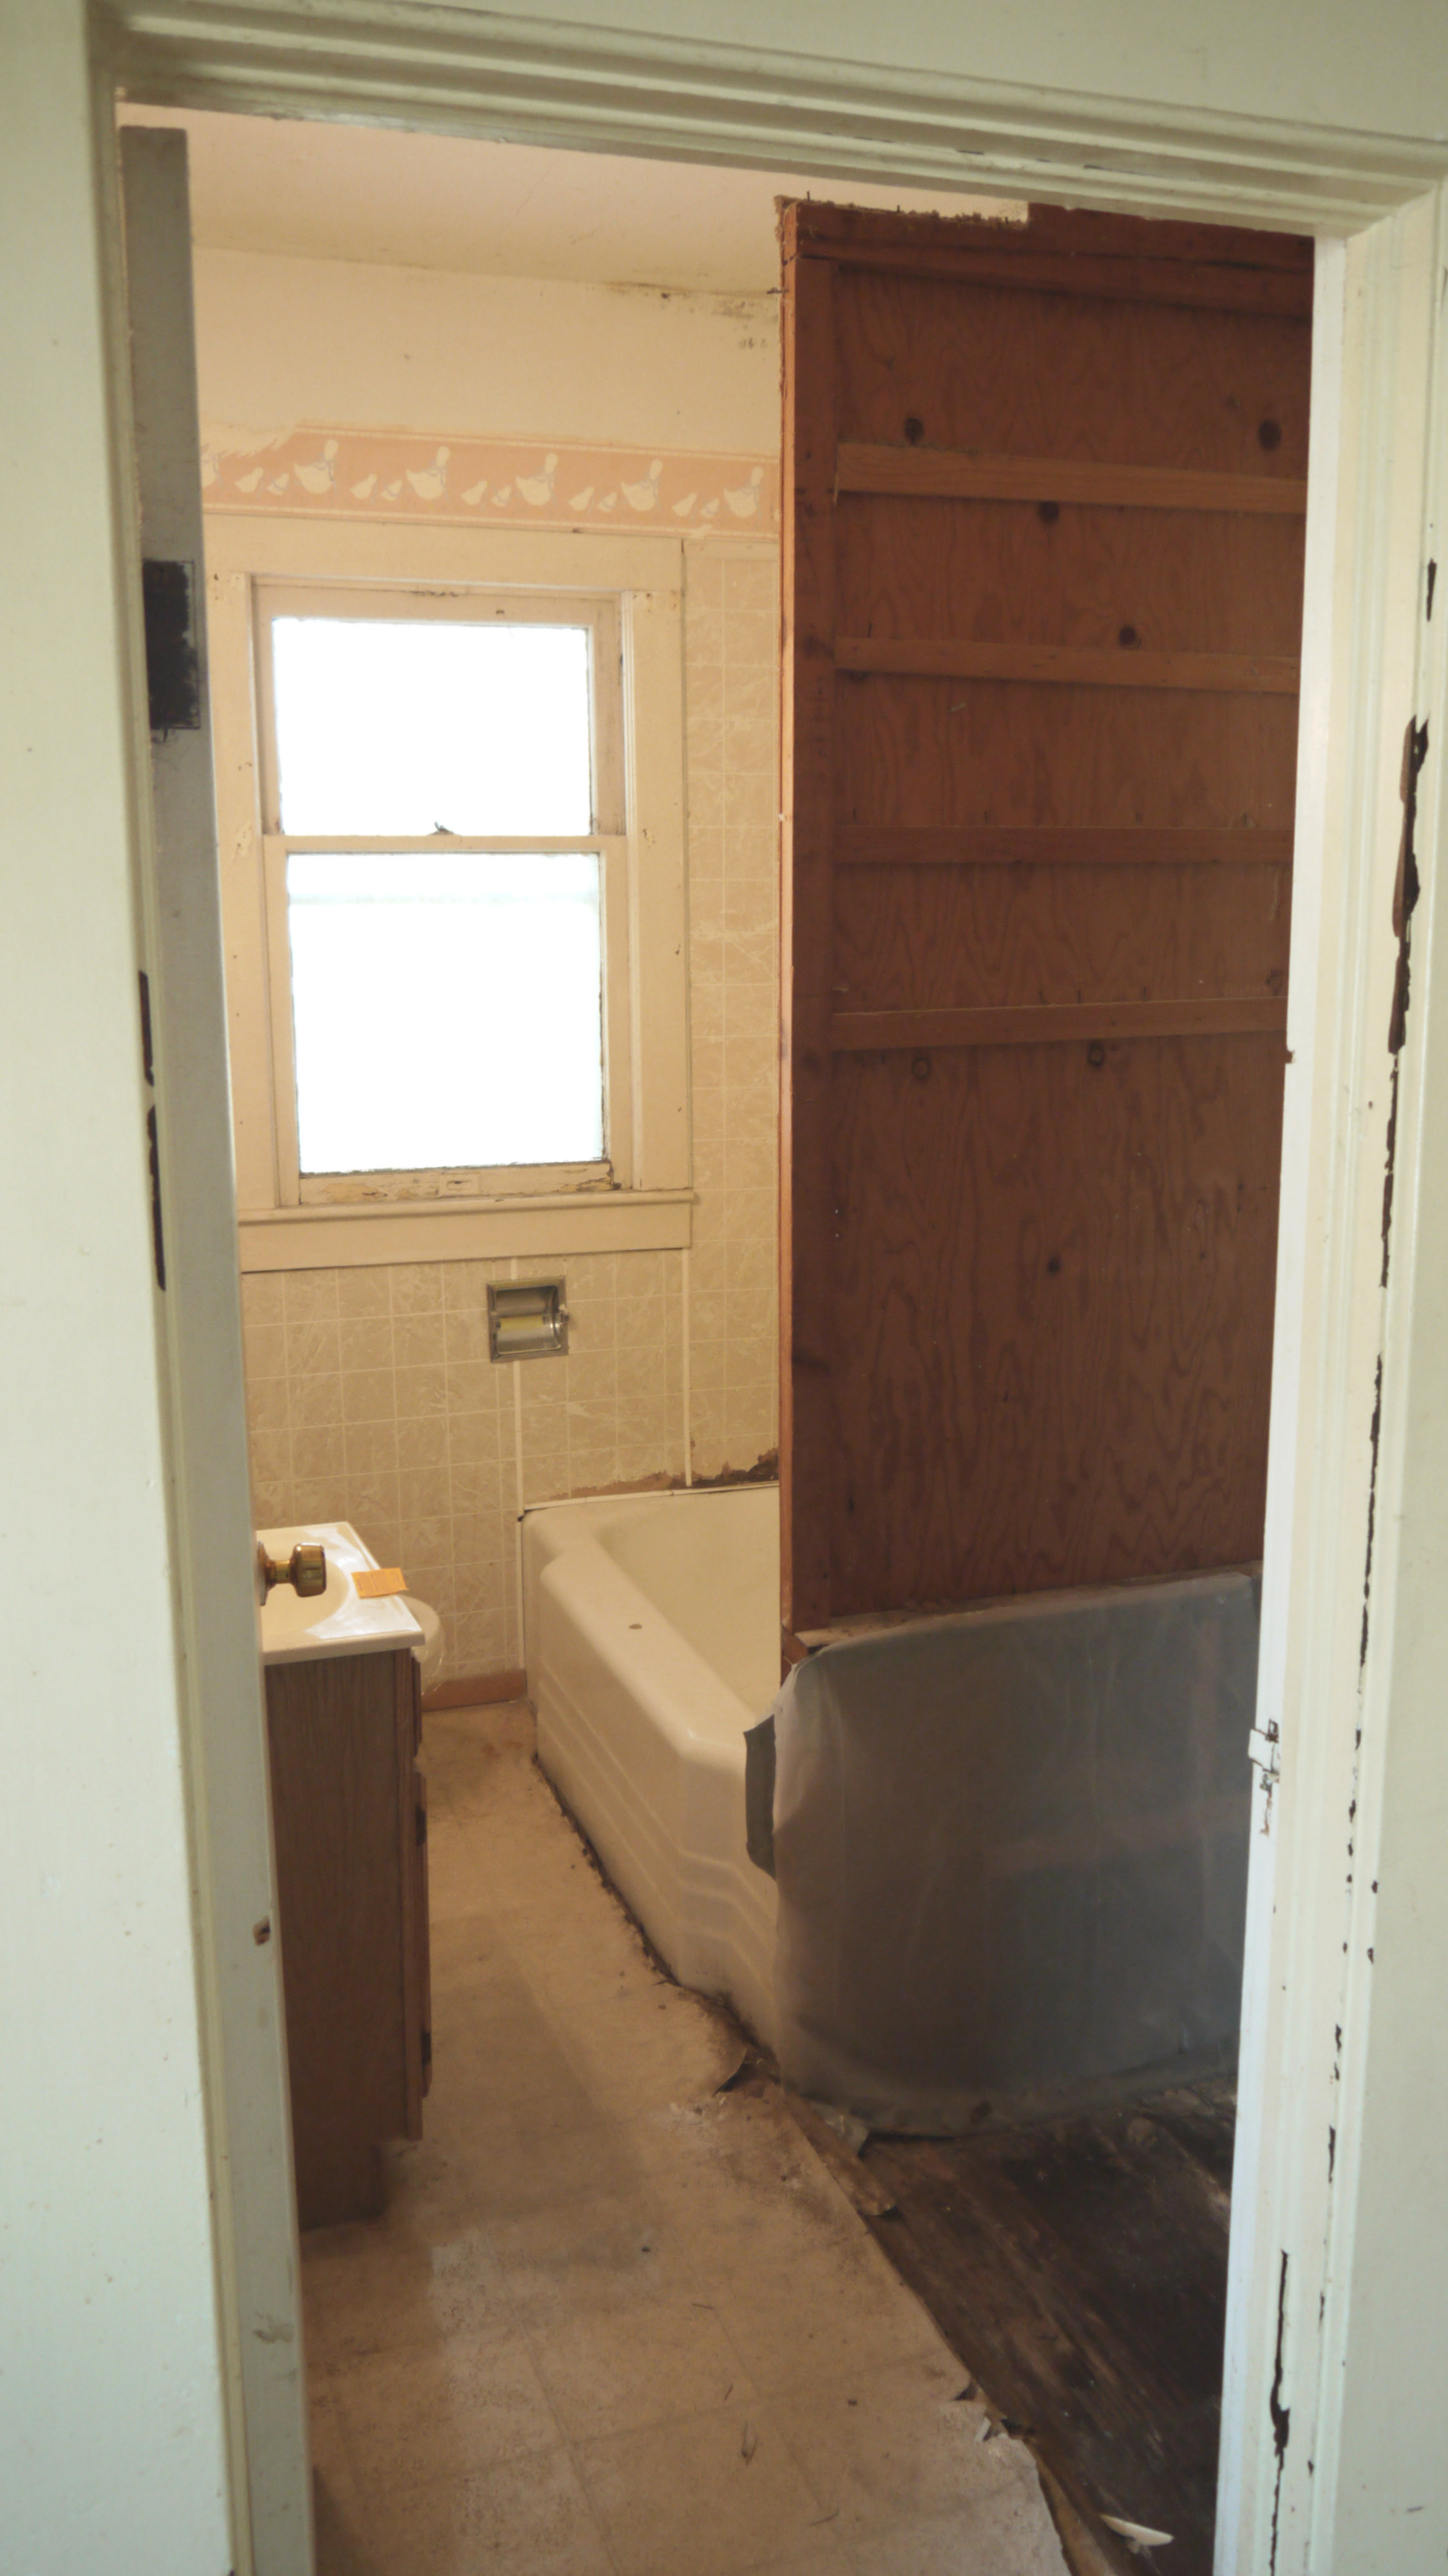
The nice large bathroom window floods the room with light. And that’s about where the amenities end. The walls are covered in bad paneling, the goose-themed wallpaper border is glaring, and the linoleum is peeling up all around the tub from water leaking.

Step through the doorway, and immediately to the left are the skinny skinny vanity, the room’s only light fixture, and the toilet. The yellow tags are reassuring, they were left by a property maintenance company to let the realtor and myself know that the drains were winterized with antifreeze. Although the toilet isn’t that old, neither of these fixtures are staying.

Standing just inside the doorway shows how close the front of the toilet bowl is to the tub. Cozy, to say the least. Notice all the seams in the paneling below the window, the installer used scraps which means more seams and more areas for water to get through.

Stepping inside and turning around, here is the tub. Yep, the paneling is deteriorating from water, the tub faucet and handles are so corroded, I don’t even know if they would work if the water was turned on. The tub itself isn’t in too bad of shape. At this point I’m hoping to save the tub, after going a little Nicole Curtis on it with gentle cleaner and a ton of elbow grease.

Here’s the plastic hose and hand-held shower head, and in the ceiling is the home’s only attic access. The yellow wall is a poorly built divider between the tub and this unfinished space which puzzles me.
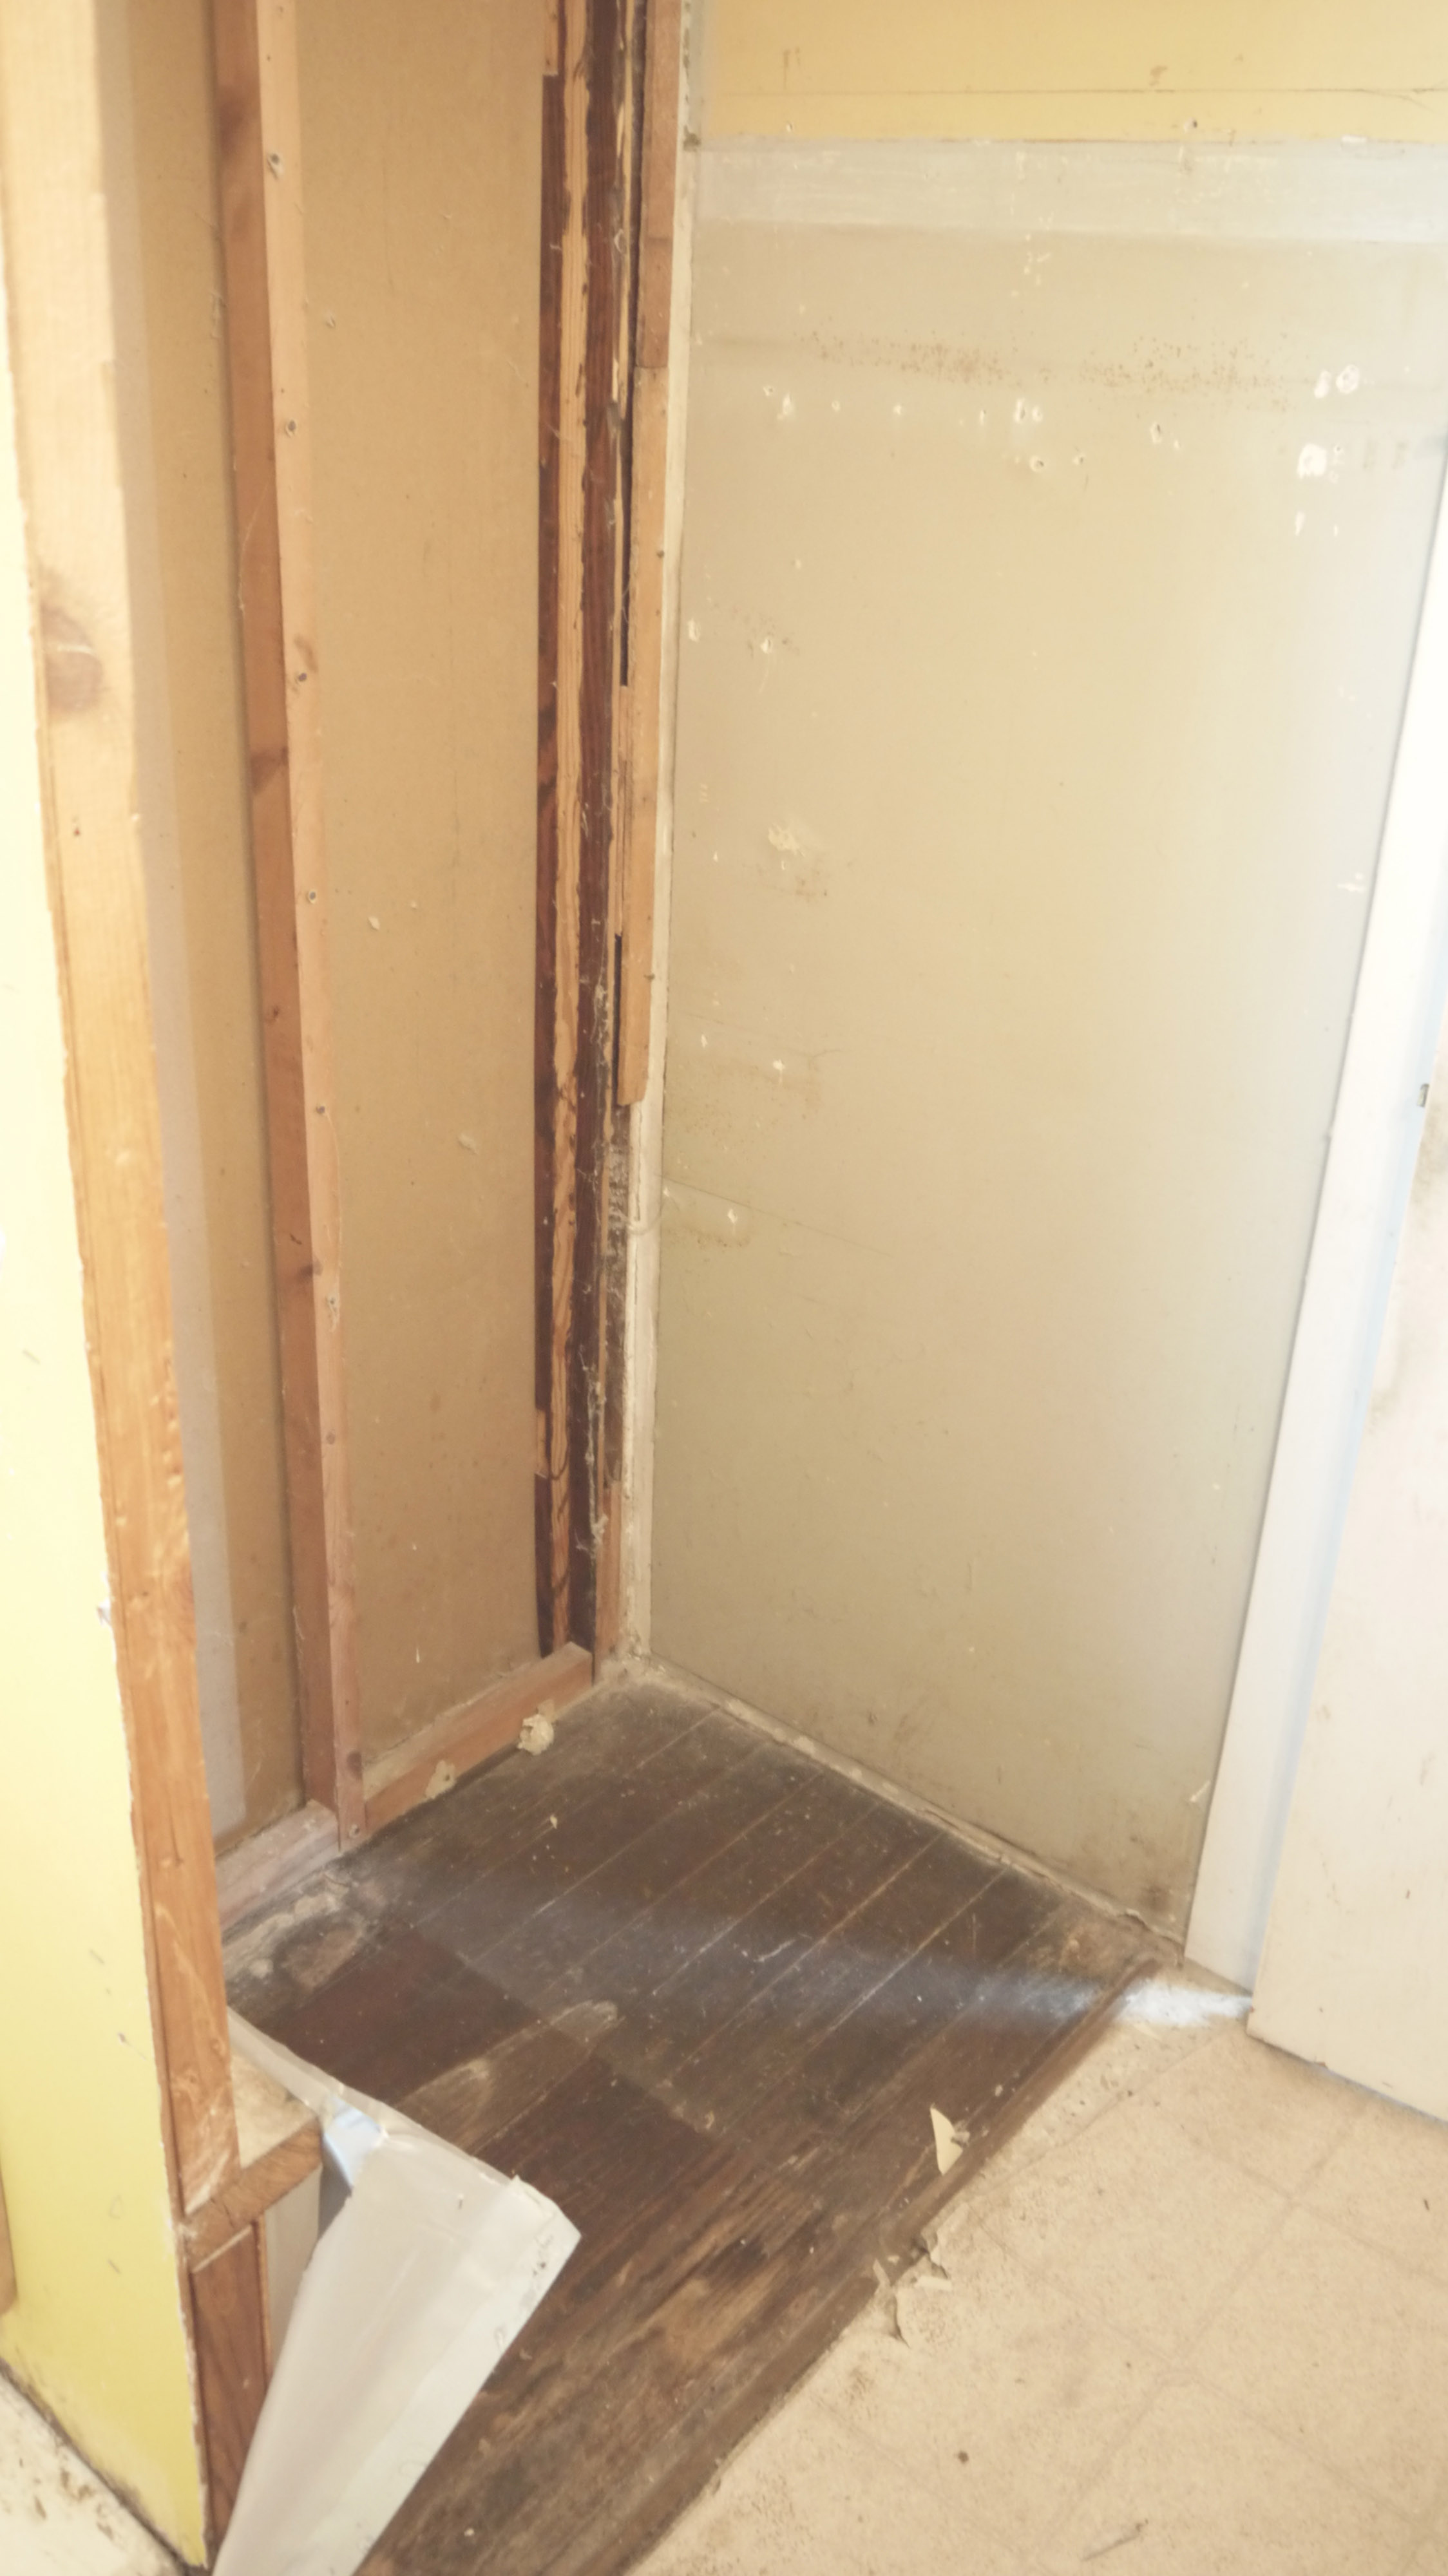
I can’t figure out what this area was. It is immediately to the right once inside the doorway. The linoleum has been tore up, exposing the original wood floor. The open wall looks like it used to be a doorway into one of the bedrooms. Part of me thinks there could have been a stand up shower here; its big enough, but there is no sign of plumbing, either supply or drain. So I figure this must have been a closet, and that would explain the door frame still in the wall. Perhaps the previous owner removed the closet in a first step to renovating the bath.

This is the same area, with the back of the tub faucet showing. This half-open wall was not constructed correctly and will be coming out. How about that great insulation job – aka- the opening in the sub-floor stuffed with an old towel. The entire room screams years of leaking without being repaired, and the quick-fixes I’ve found so far deserve some kind of award for stupidity. The sink, cabinet, toilet, and partition wall all need tore out, followed by the linoleum. I hope to find a solid floor underneath there somewhere. I’m also sketching a few ways to rearrange the bathroom fixtures in order to maximize space.
