Archive for April, 2014
Still gutting the bathroom
Posted by Adam A. Ries in DIY, Home Improvement on April 29, 2014
Well, following the last post, the bathroom looked like this:

By Sunday the entire wood floor was gone, as well as a little more of the plaster. So much for thinking I had knocked it all down. Now you can really see the mess in the crawlspace. And all of that mess needs to come out!

Because I know I will be doing some electrical work and need to maneuver all over for the plumbing, I want the crawlspace to be super easy to navigate and work in. No, it will never be on the cover of Better Homes & Garden magazine (I can see it now: “This Season’s Coolest Crawl Space”), but I don’t want it looking like a trash dump either. And apparently that’s exactly what a previous owner thought it was. Or was he hiding from the prohibitionists…
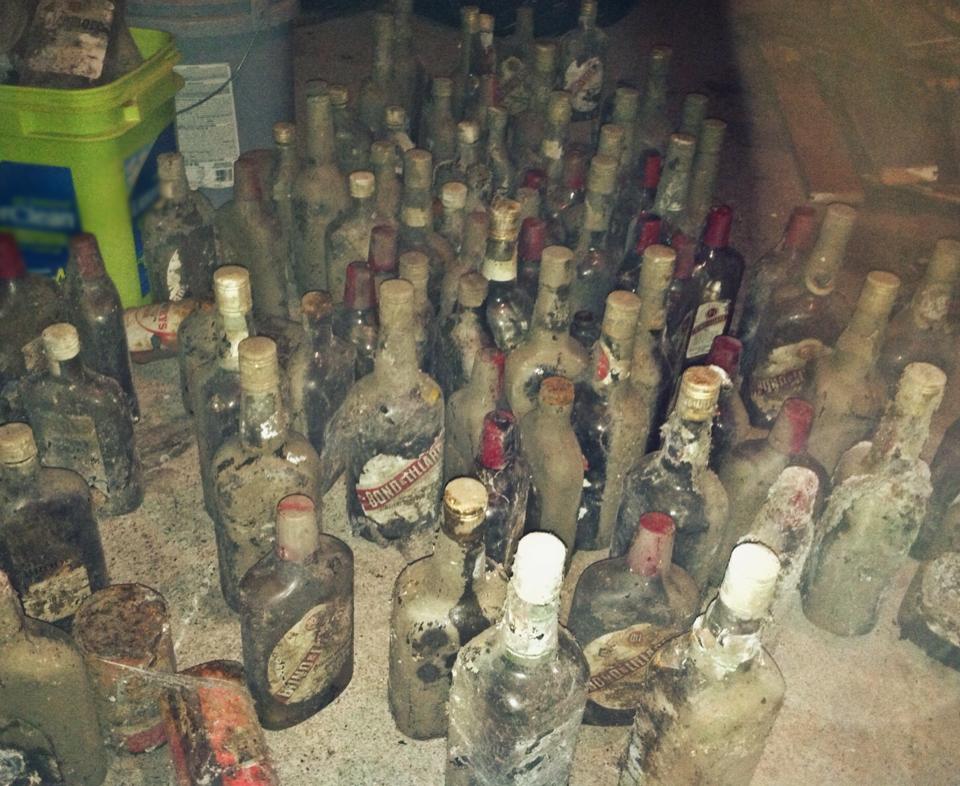
But seriously, that is most of the bottles I took out. Must be close to 100, almost all are Bond & Lillard whiskey, but along with buckets and buckets full of vintage beer cans (apparently not aluminum, because they are all but rusty pieces now – but I can tell he enjoyed Drewry’s), and a few other bottles of various sizes and proofs. I’m not tossing these all just yet, I see some future Pinterest projects down the road for the outdoor patio in my head.
The amount of crazy wiring under the bathroom floor had me concerned at first, but my contractor friend assured me it’s not uncommon. The amount this floor was leaking should have been a concern to the previous owner, but I plan to make sure the entire floor is watertight by using a waterproofing membrane before laying the tile finish floor. Upon heaving the 38th bucket of bottles and cans out of the crawlspace, I came to the conclusion that the previous owner MUST have been drinking whiskey while wiring. Most of the wiring is Romex, but it’s a crazy example of unorganized chaos – wires overlapping wires, hanging down between floor joists, wrapped around concrete support pillars, and not a straight line to be found. And was there a shortage of wire staples that year? Geesh! My OCD wants to tear it all out and start over, but I realize I cannot afford to do that and for the most part, its safe wiring, just confusing. I do plan to trace each wire to the corresponding room or piece of equipment, and then trace it to a breaker in the electrical panel. This is for two reasons; first, I want to know which breakers are responsible for which rooms/fixtures; second, I want to make sure there are not too many fixtures on one breaker. I’ve lived in a house where I might have on the tv, computer, and vacuum cleaner and then the heater kicks on and, click, the breaker trips. I’m gonna try to avoid that by calling in the the help of a friend who’s father is an electrician. And this book I picked up at a yard sale last fall. It might be vintage, but so is this house. And so much of the information in here still applies; the basics haven’t changed.

I also want the the trash out now because I need to begin running the new plumbing if I’m ever gonna get this bathroom finished. Even the nicest looking bathroom is no good without running and flushing water. And talk about metal scrap: the amount of galvanized metal, lengths of old copper, and cast iron is just stupid. And even the entire old steel furnace, which is a hulking piece of steel and cast iron (not used for what looks like decades). I’ll be keeping it all in a pile in the garage, and then hauling it to our local cash-for-scrap recycling center. I love when Earth friendly puts cash in the bank! But these steps aren’t so glamorous, and for fear of the dust in the camera, I probably won’t snap many photos of the trashing and plumbing steps. I do think it’s about time for a photo walk through of the entire house, to document the true “before” status.
Gutting the Bathroom
Posted by Adam A. Ries in DIY, Home Improvement, Interior Design on April 14, 2014
In a 1 bathroom house, it is no surprise the bathroom is about the number 1 priority before I can officially move in, especially since I knew it needed some major remodeling. Just from a simple peek into the bath cabinet, I had pretty much already made up my mind that I would be needing to run new plumbing. There were signs of prolonged leaking around every fixture in the house (water heater, washer, kitchen sink, toilet, tub… I think that’s nearly the whole house). And from peaking into the crawlspace, I could tell that much of the drainpipes were still cast iron or steel, which had me thinking new PVC drains for the whole house would just be good measure also.
So here is basically how I found the bathroom (for all the bath “before” photos, scroll down or click here).
Within just a few hours work, the bathroom was almost empty. I tried to loosen the bolts “holding” the toilet to the floor, but they were seriously rusted tight. So I tried to see how loose it might be to get a saw blade underneath to cut the bolts, and I nearly picked it right up off the floor, no kidding! It was only held on one side, and barely at that. The sink vanity, although not in bad shape (I plan to put it by the curb with a “FREE” sign) literally felt like a child’s sink in height. I can only imagine the neck and back pains trying to wash my hands or brush my teeth in that, not exactly chiropractor approved for my 6′-4″ tall self.
The flimsy paneling wasn’t glued at all, just a few nails into the plaster so it ripped off so quick. And then I started ripping up the flooring. I didn’t take photos of every layer, so let me describe it: imagine a sandwich of linoleum, 1/2″ thick plywood, linoleum, strangely soft and termite eaten panel board, and then another layer of linoleum on top of the home’s original wood floor. Each layer showed signs of being glued at one time, but thanks to the amount of water it survived and what looks like hungry termites, they simply peeled off like a freshly baked Pillsbury grands biscuit. Hungry? Me neither.
At first, I was super excited to see the wood floor peak out under all those layers of wet flooring. But the closer I got to the tub and toilet stack, the worse the wood got. Until eventually, I put accidentally put my foot right through the spot where the toilet bowl would have been. It just splintered apart. And the board broken at the front edge of the tub was rotted through, it came up like ripping apart a dry sponge. And trying not to fall through the floor was the cruelest game of hop-scotch.
I debated about whether or not to remove the tub. My debate lasted all but 10 seconds. The tub drain had signs of leaking, with every connection corroded. But I have never moved a cast iron tub before. Thank goodness for friends who are willing to come over and help lift a tub. Seriously, thanks Kyle!
Next came knocking down the loose plaster. I didn’t think this step through. I figured knock down what was loose, then take out the floor. Looking back, I should have simply cut out all the plaster and lath for the entire wall behind the tub and on the toilet wall right then. For the window wall, I don’t want the insulation to fall out, and I don’t plan to run any pipes or wires through that wall, so that lath can stay.
So now the tub is sitting in my kitchen, where a normal person would have a stove and refrigerator. But I am not a normal person, so I have a tub in mine. I love the look of the enameled cast iron, and it’s really very solid. I expect it to clean up really well with a ton of elbow grease after I get it reinstalled.
Where I left it on Saturday was beginning to cut out the wood floor. Yes, cried a little at this step, knowing how nice a dark and luxurious wood floor would be beautiful in an otherwise classic black and white tile bathroom. But the amount of rotted wood was just too much, the entire half of the room closest to the window would have needed replaced. I would have found boards to match, and by cutting out the floor I gain a larger access into the crawlspace for when its time to run new plumbing and add new electrical lines to a few other rooms. So attack it I did with the Sawzall, and there’s no looking back now. Plus, many homes of this age originally had marble or hex-tile bath floors, so my finished look should pass as age appropriate.
So what is getting me through the panic attack of not having a bathroom floor at the moment? Below is my bathroom inspiration:

White, lots of white. Except imagine a dark wood medicine cabinet built into the wall, as well as dark wood trim and door. I’m not too much a fan of painted woodwork (yes, this house will be the real test of my paint stripping abilities), and I think a black and white bathroom with just a little bit of deeply stained wood will make the room feel very rich. But in the mean time, I have got some major crawlspace work to do!
Keys to Green Gables
Posted by Adam A. Ries in About Me, Exterior, Home Improvement on April 12, 2014
Well, it happened! This past Monday, to be exact. I drove to the bank right after work, signed 6 trees worth of paper, and they handed me the keys! The best part was my realtor bringing a 12 pack of one of my favorite beers with a big red bow, right into the banker’s office to congratulate me! What a surprise that was! Is it even legal to have beer in a bank? Oh well, my banker was good about it and laughed it off. I finished the paperwork and headed to my new place. I already had an ice cold beer in the car, ready to help me inaugurate the new place, and a camera in the other hand to make sure I could get a photo out front with the realtor’s SOLD sign.
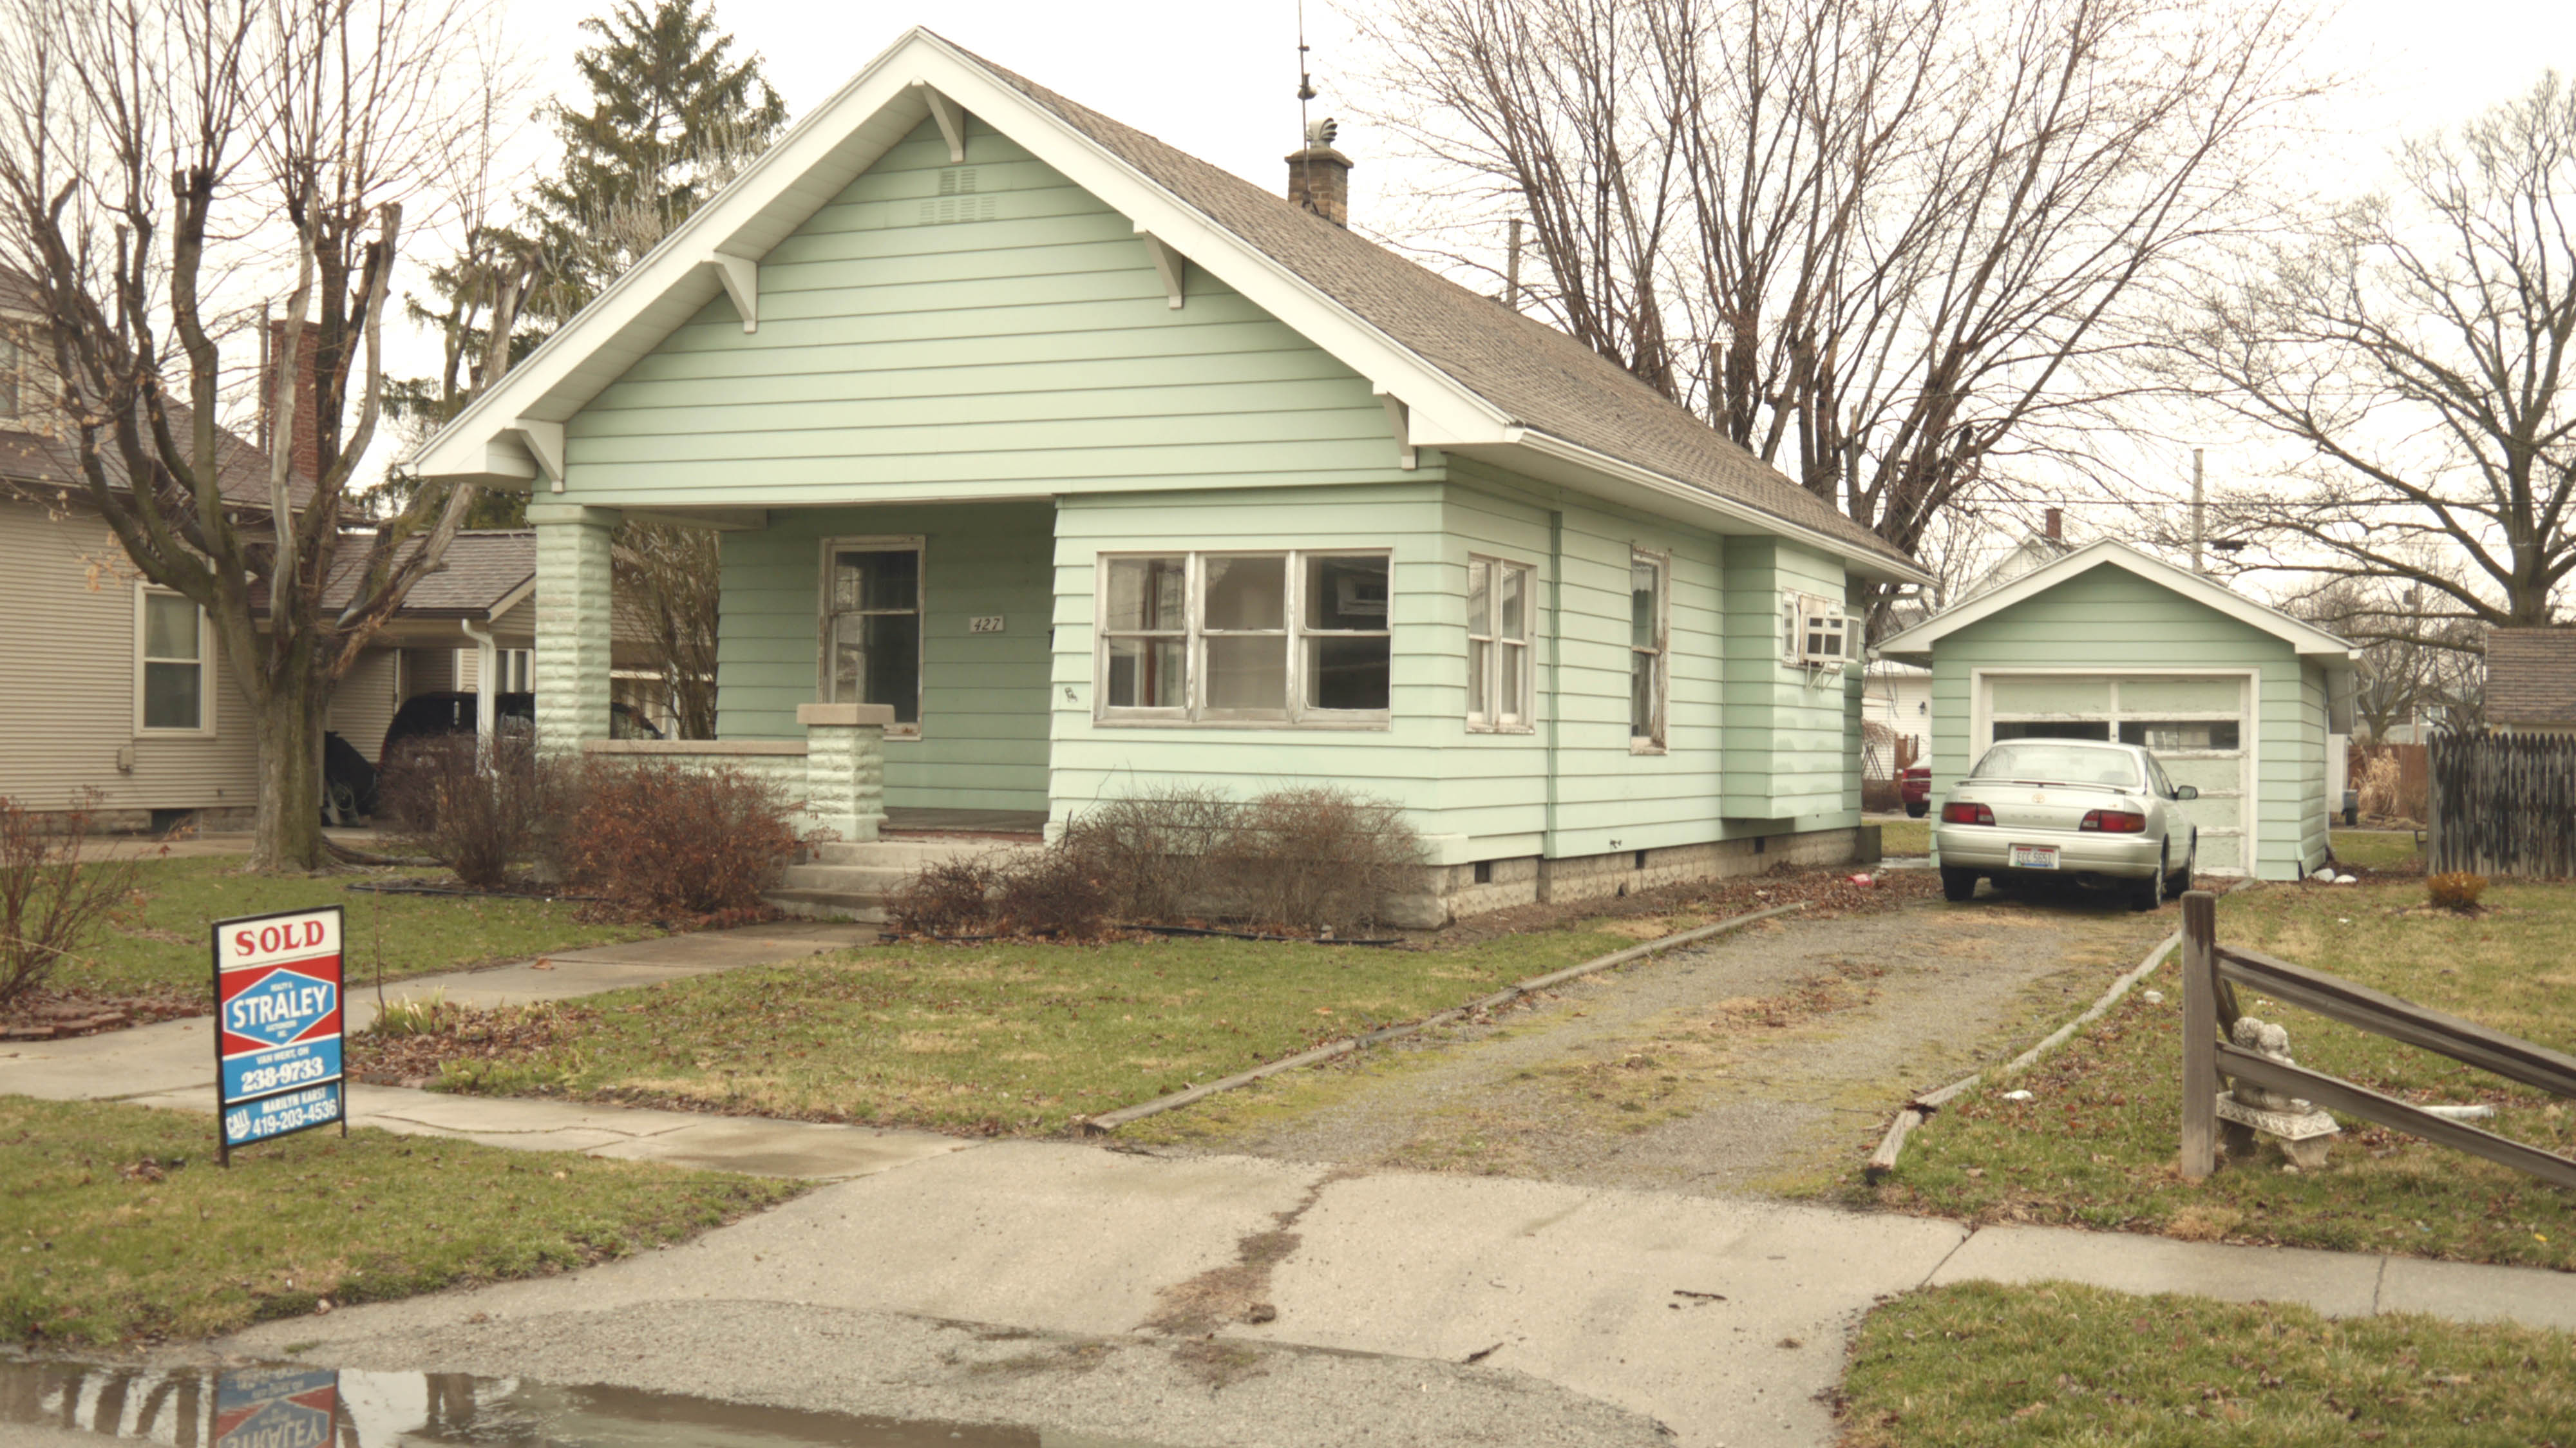
So there she is, in all her green gable goodness. Not a nice green either, but sea foam green. Or bright fresh spring vegetable green. Not a bad color by any means when a kid is excited about a brand new 48 pack of Crayola crayons, but on a house?? I drive down the street and barely notice the other run down homes, and then – BAM – like a jar of baby food smashed peas, there’s my little bungalow! It has a one car detached garage, stone driveway, and not a bad size front yard.
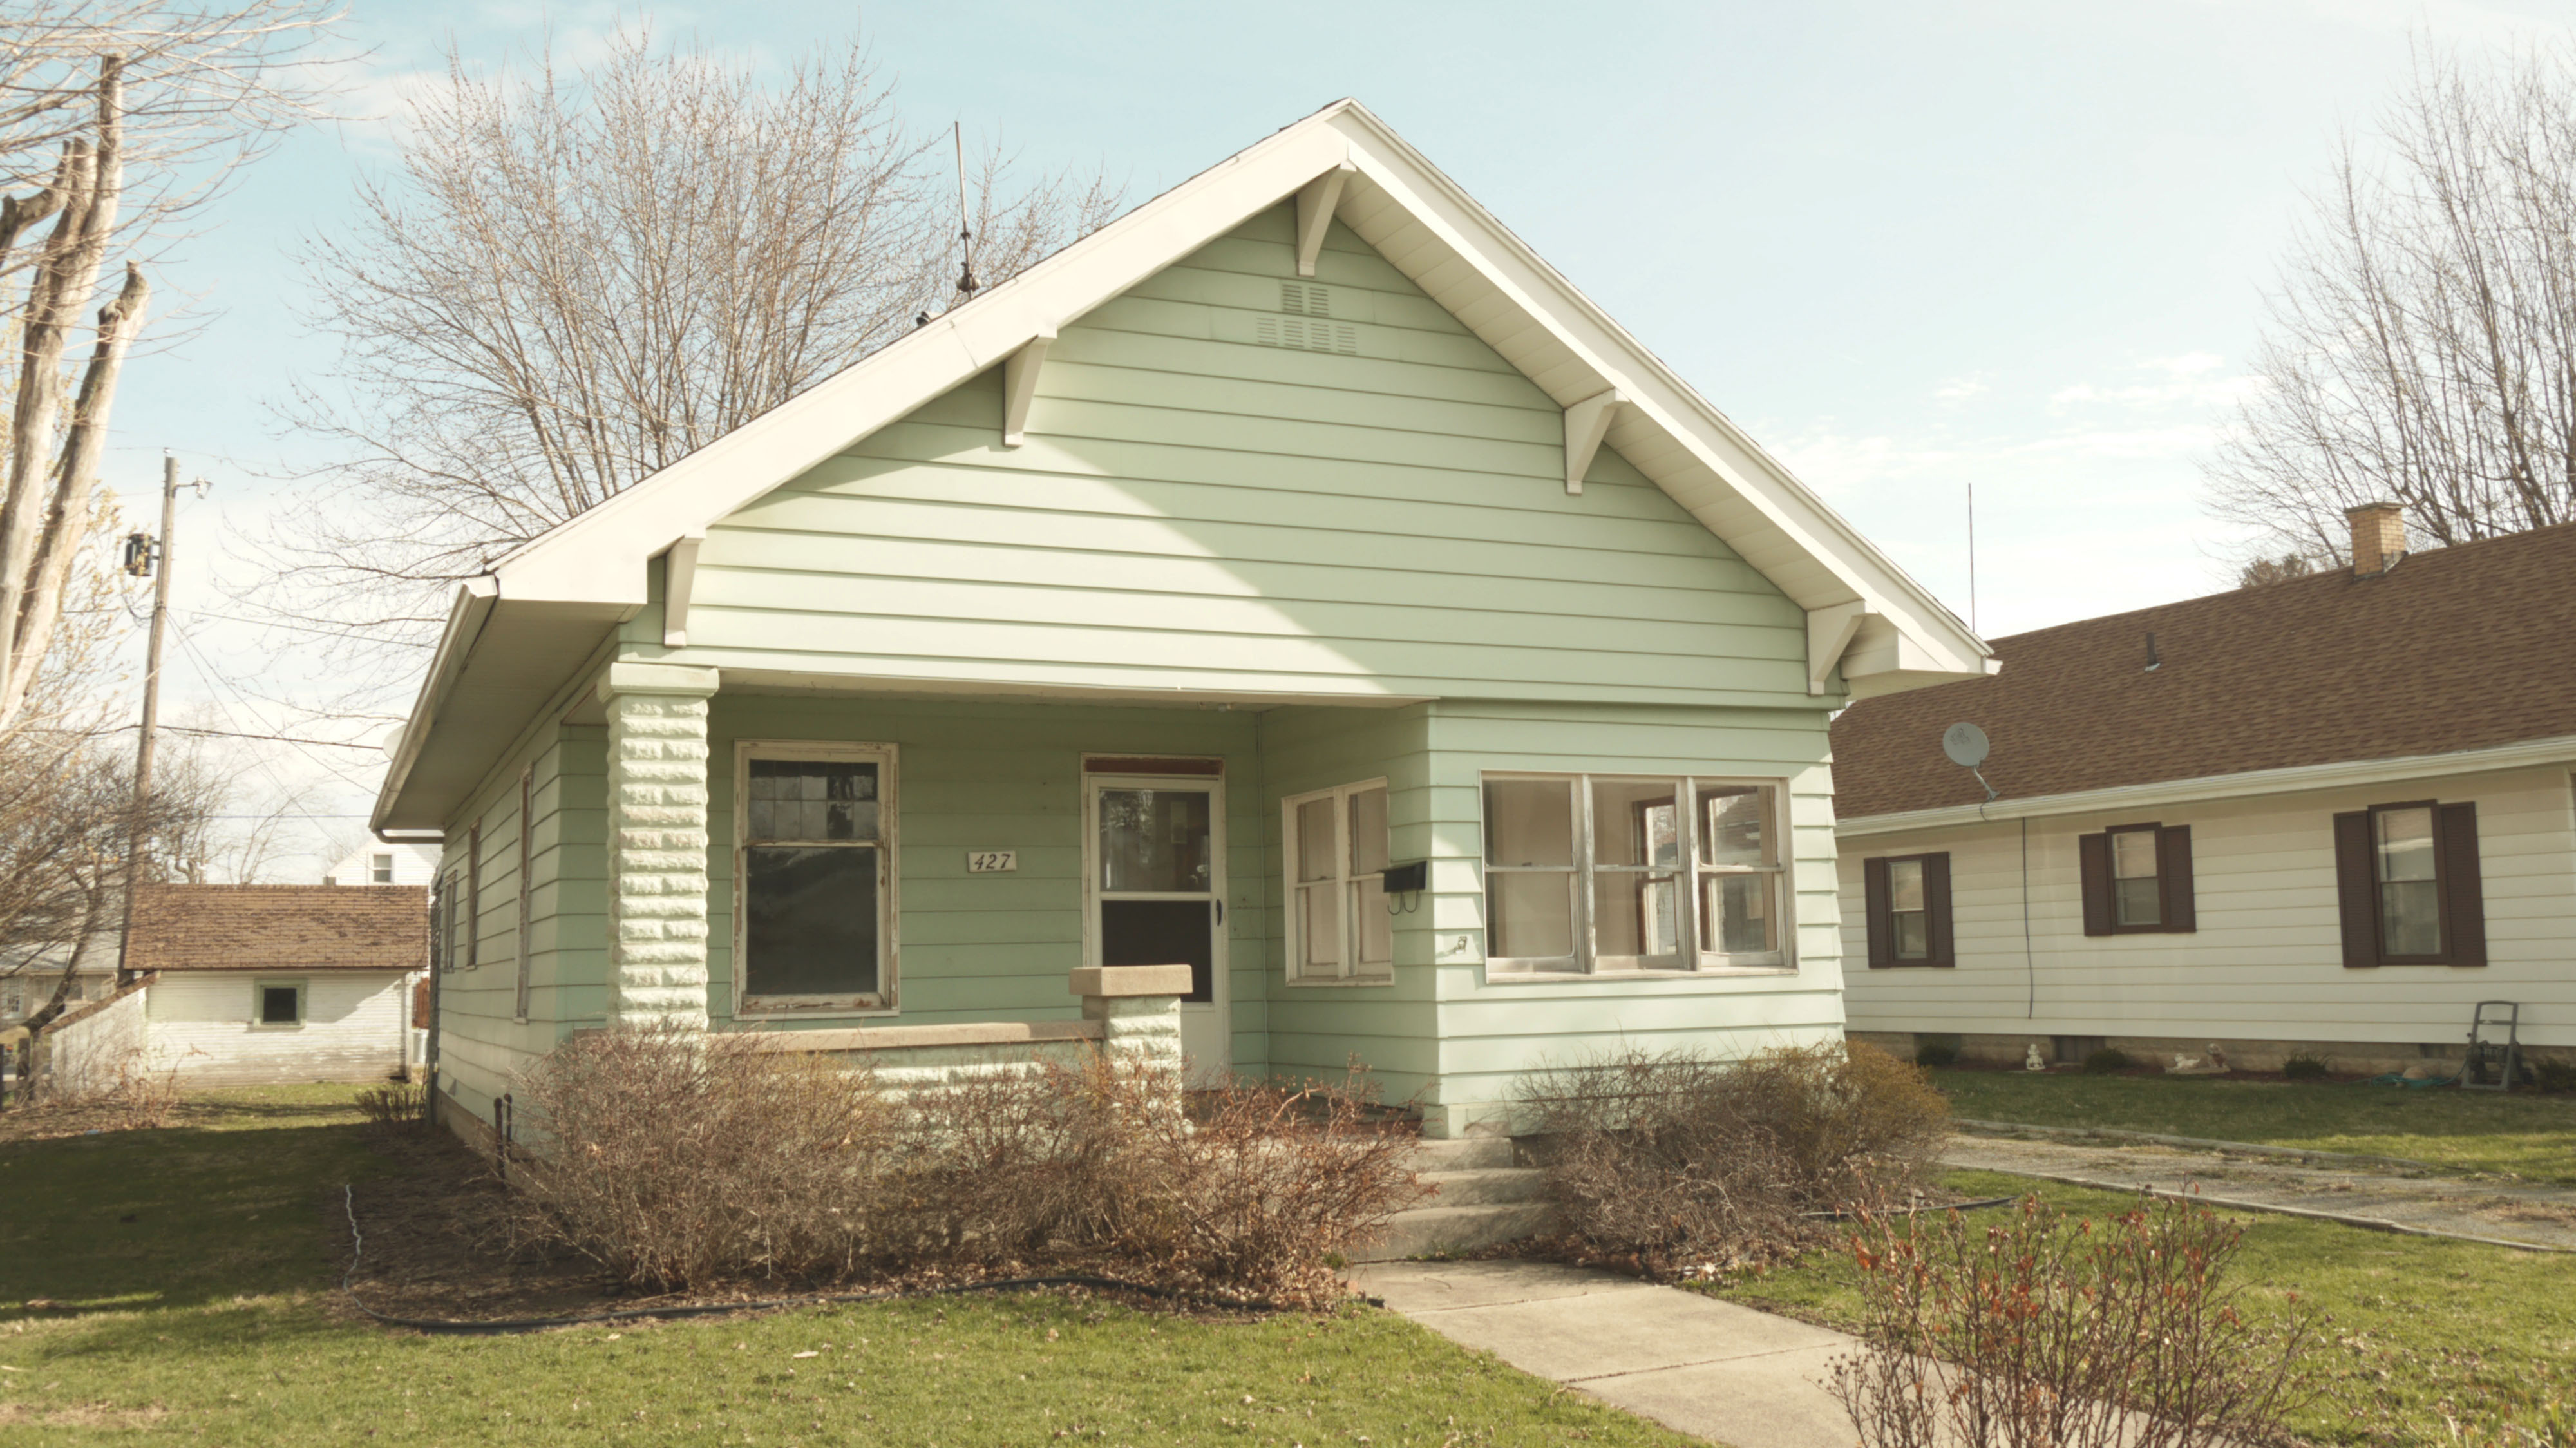
So what all does this house have going for it? Well, it’s entirely wrapped in aluminum siding. Not my favorite color, but it’s wrapped pretty well. Siding, soffit, and spouting all look to be in great shape. Upon closer inspection, the window trim was never wrapped in aluminum, so it either needs painted or covered. The concrete walkway to the front porch is in great shape, the steps are nice too. Being 3 steps, code requires it to have a handrail. The porch floor has taken a beating, looks just like a weather beaten deck. And the windows are reeeally bad. Loose glass, water damaged sashes, and cracked or missing glazing. And neither of these photos do justice to how bad the roof is, or just how many pieces of shingles I picked out of the yard the first afternoon.
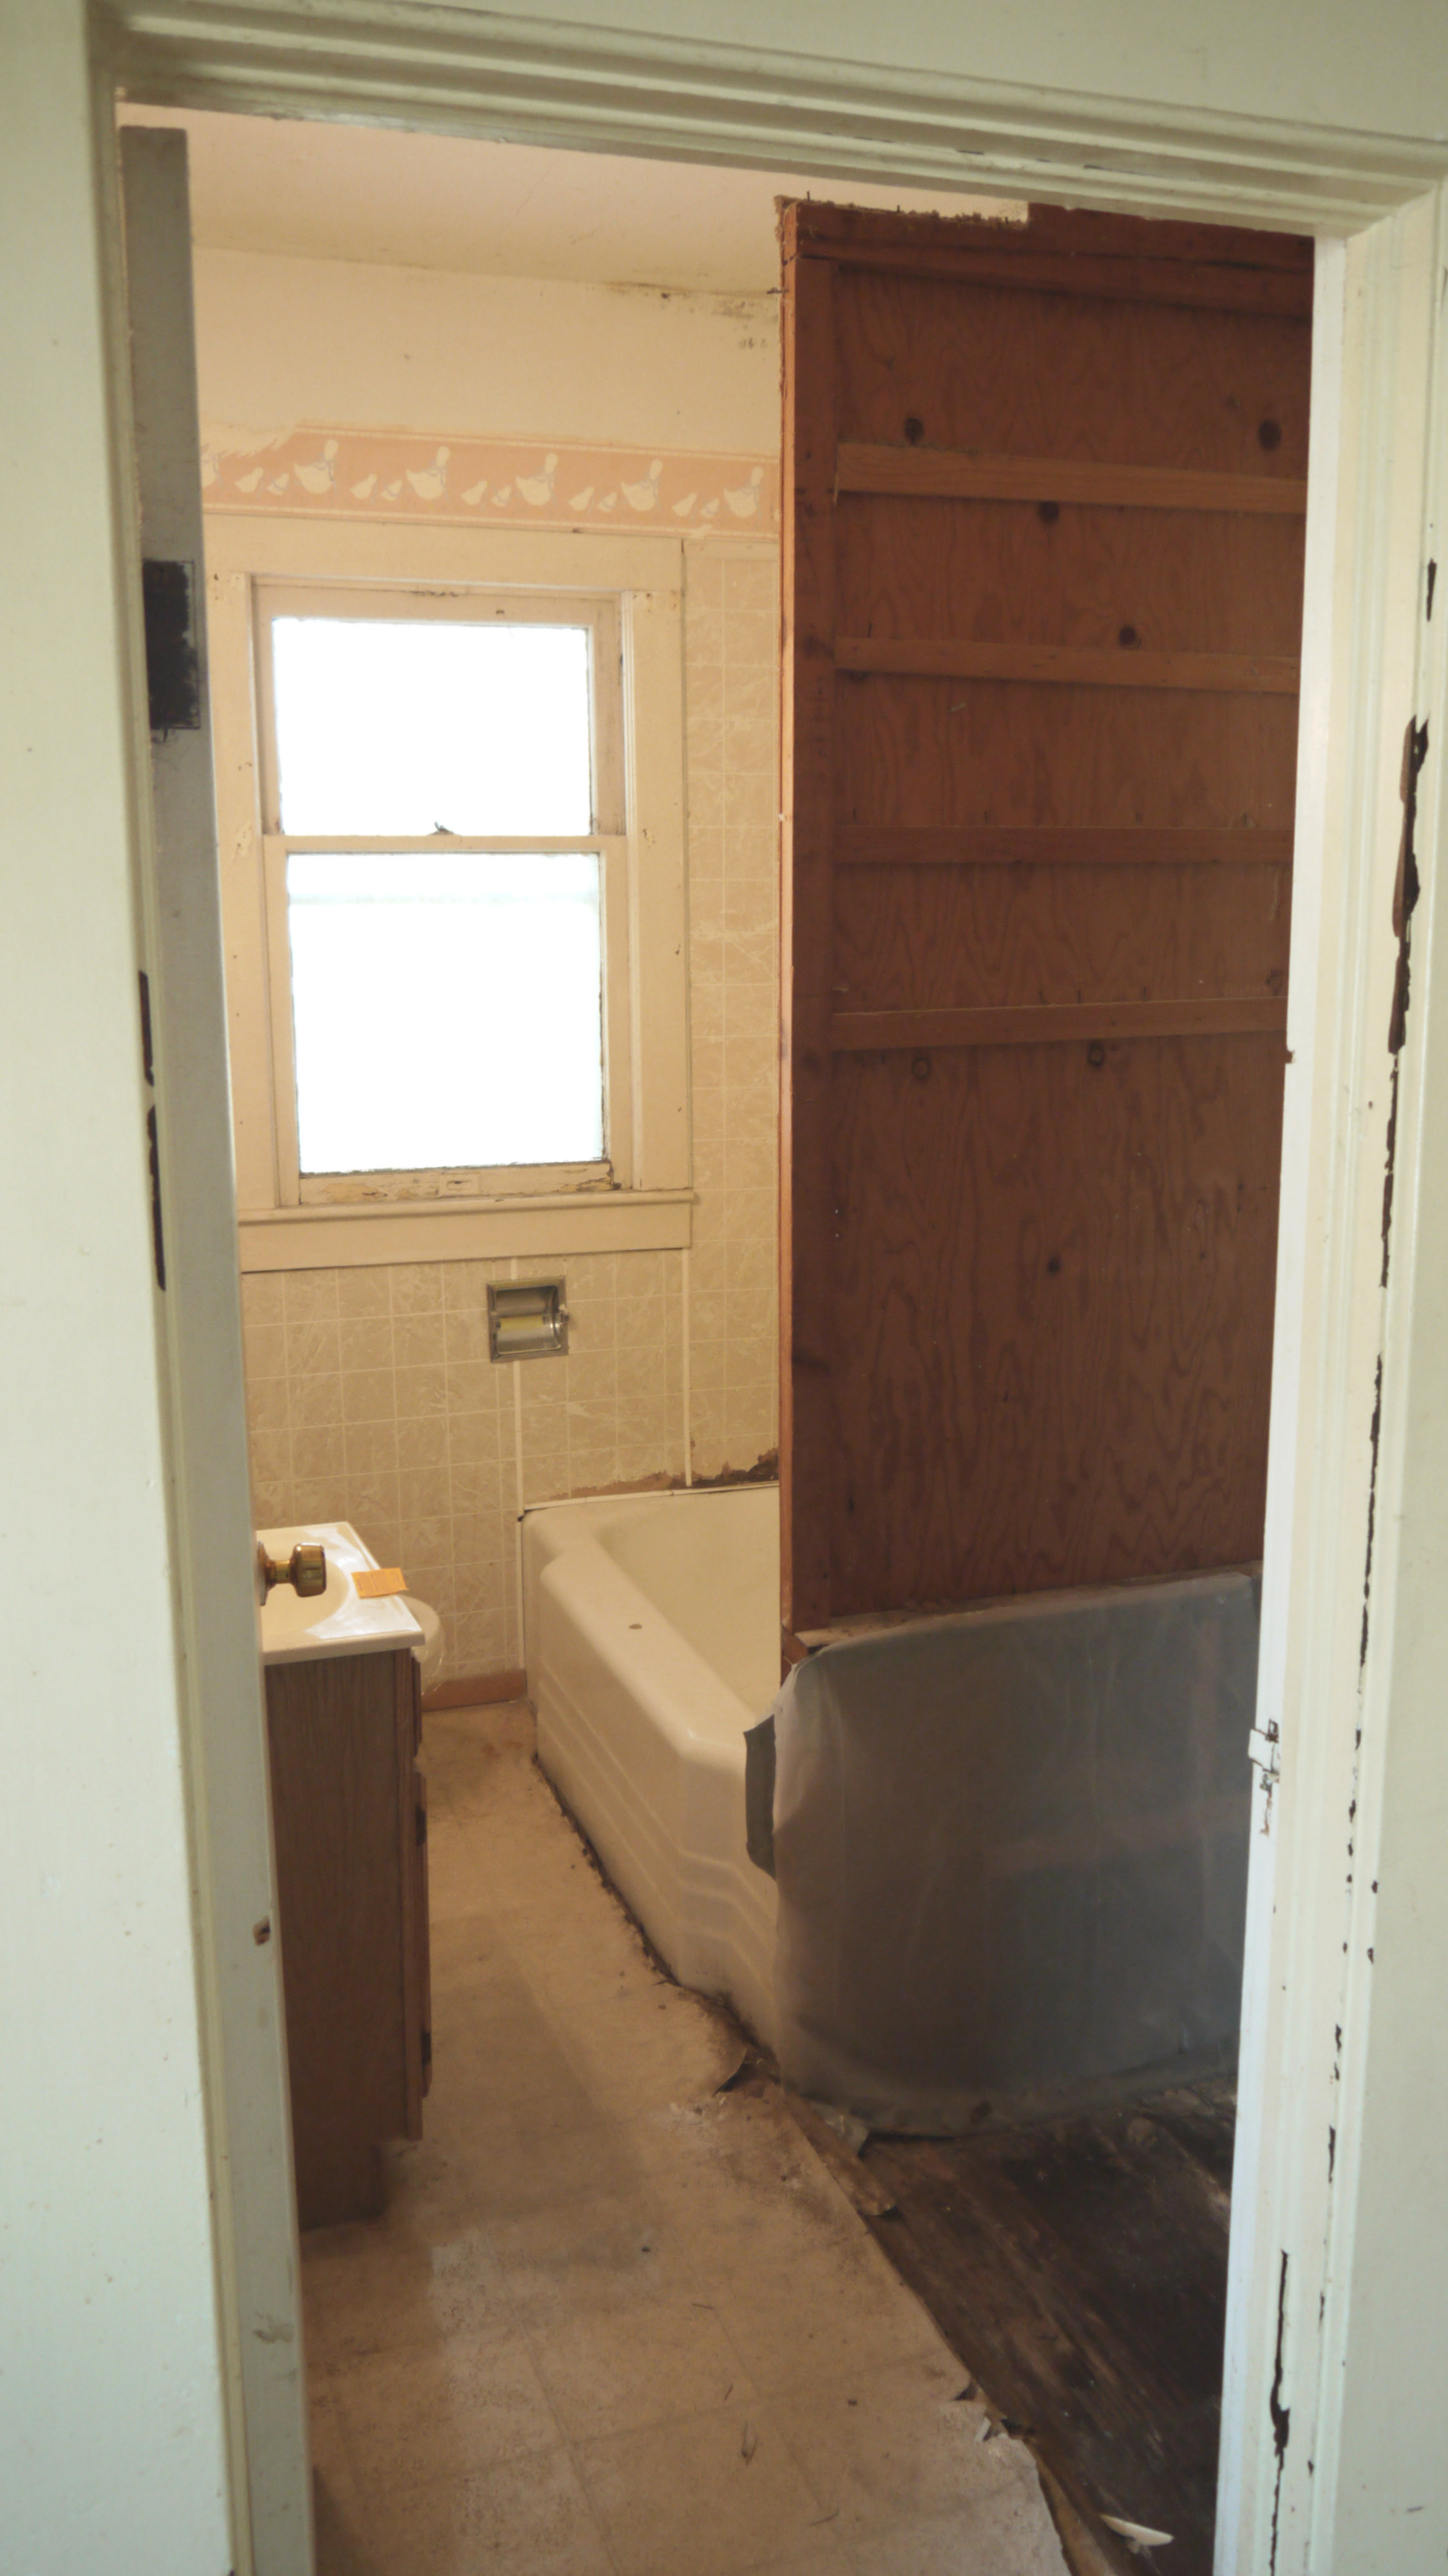
I need to take “before” photos of several more rooms, and the nice back yard. But already I know what the first project will be: the bathroom. It’s dingy, moldy, rotting, and who knows what else. Looking in from the kitchen, it looks like this:
The nice large bathroom window floods the room with light. And that’s about where the amenities end. The walls are covered in bad paneling, the goose-themed wallpaper border is glaring, and the linoleum is peeling up all around the tub from water leaking.

Step through the doorway, and immediately to the left are the skinny skinny vanity, the room’s only light fixture, and the toilet. The yellow tags are reassuring, they were left by a property maintenance company to let the realtor and myself know that the drains were winterized with antifreeze. Although the toilet isn’t that old, neither of these fixtures are staying.

Standing just inside the doorway shows how close the front of the toilet bowl is to the tub. Cozy, to say the least. Notice all the seams in the paneling below the window, the installer used scraps which means more seams and more areas for water to get through.

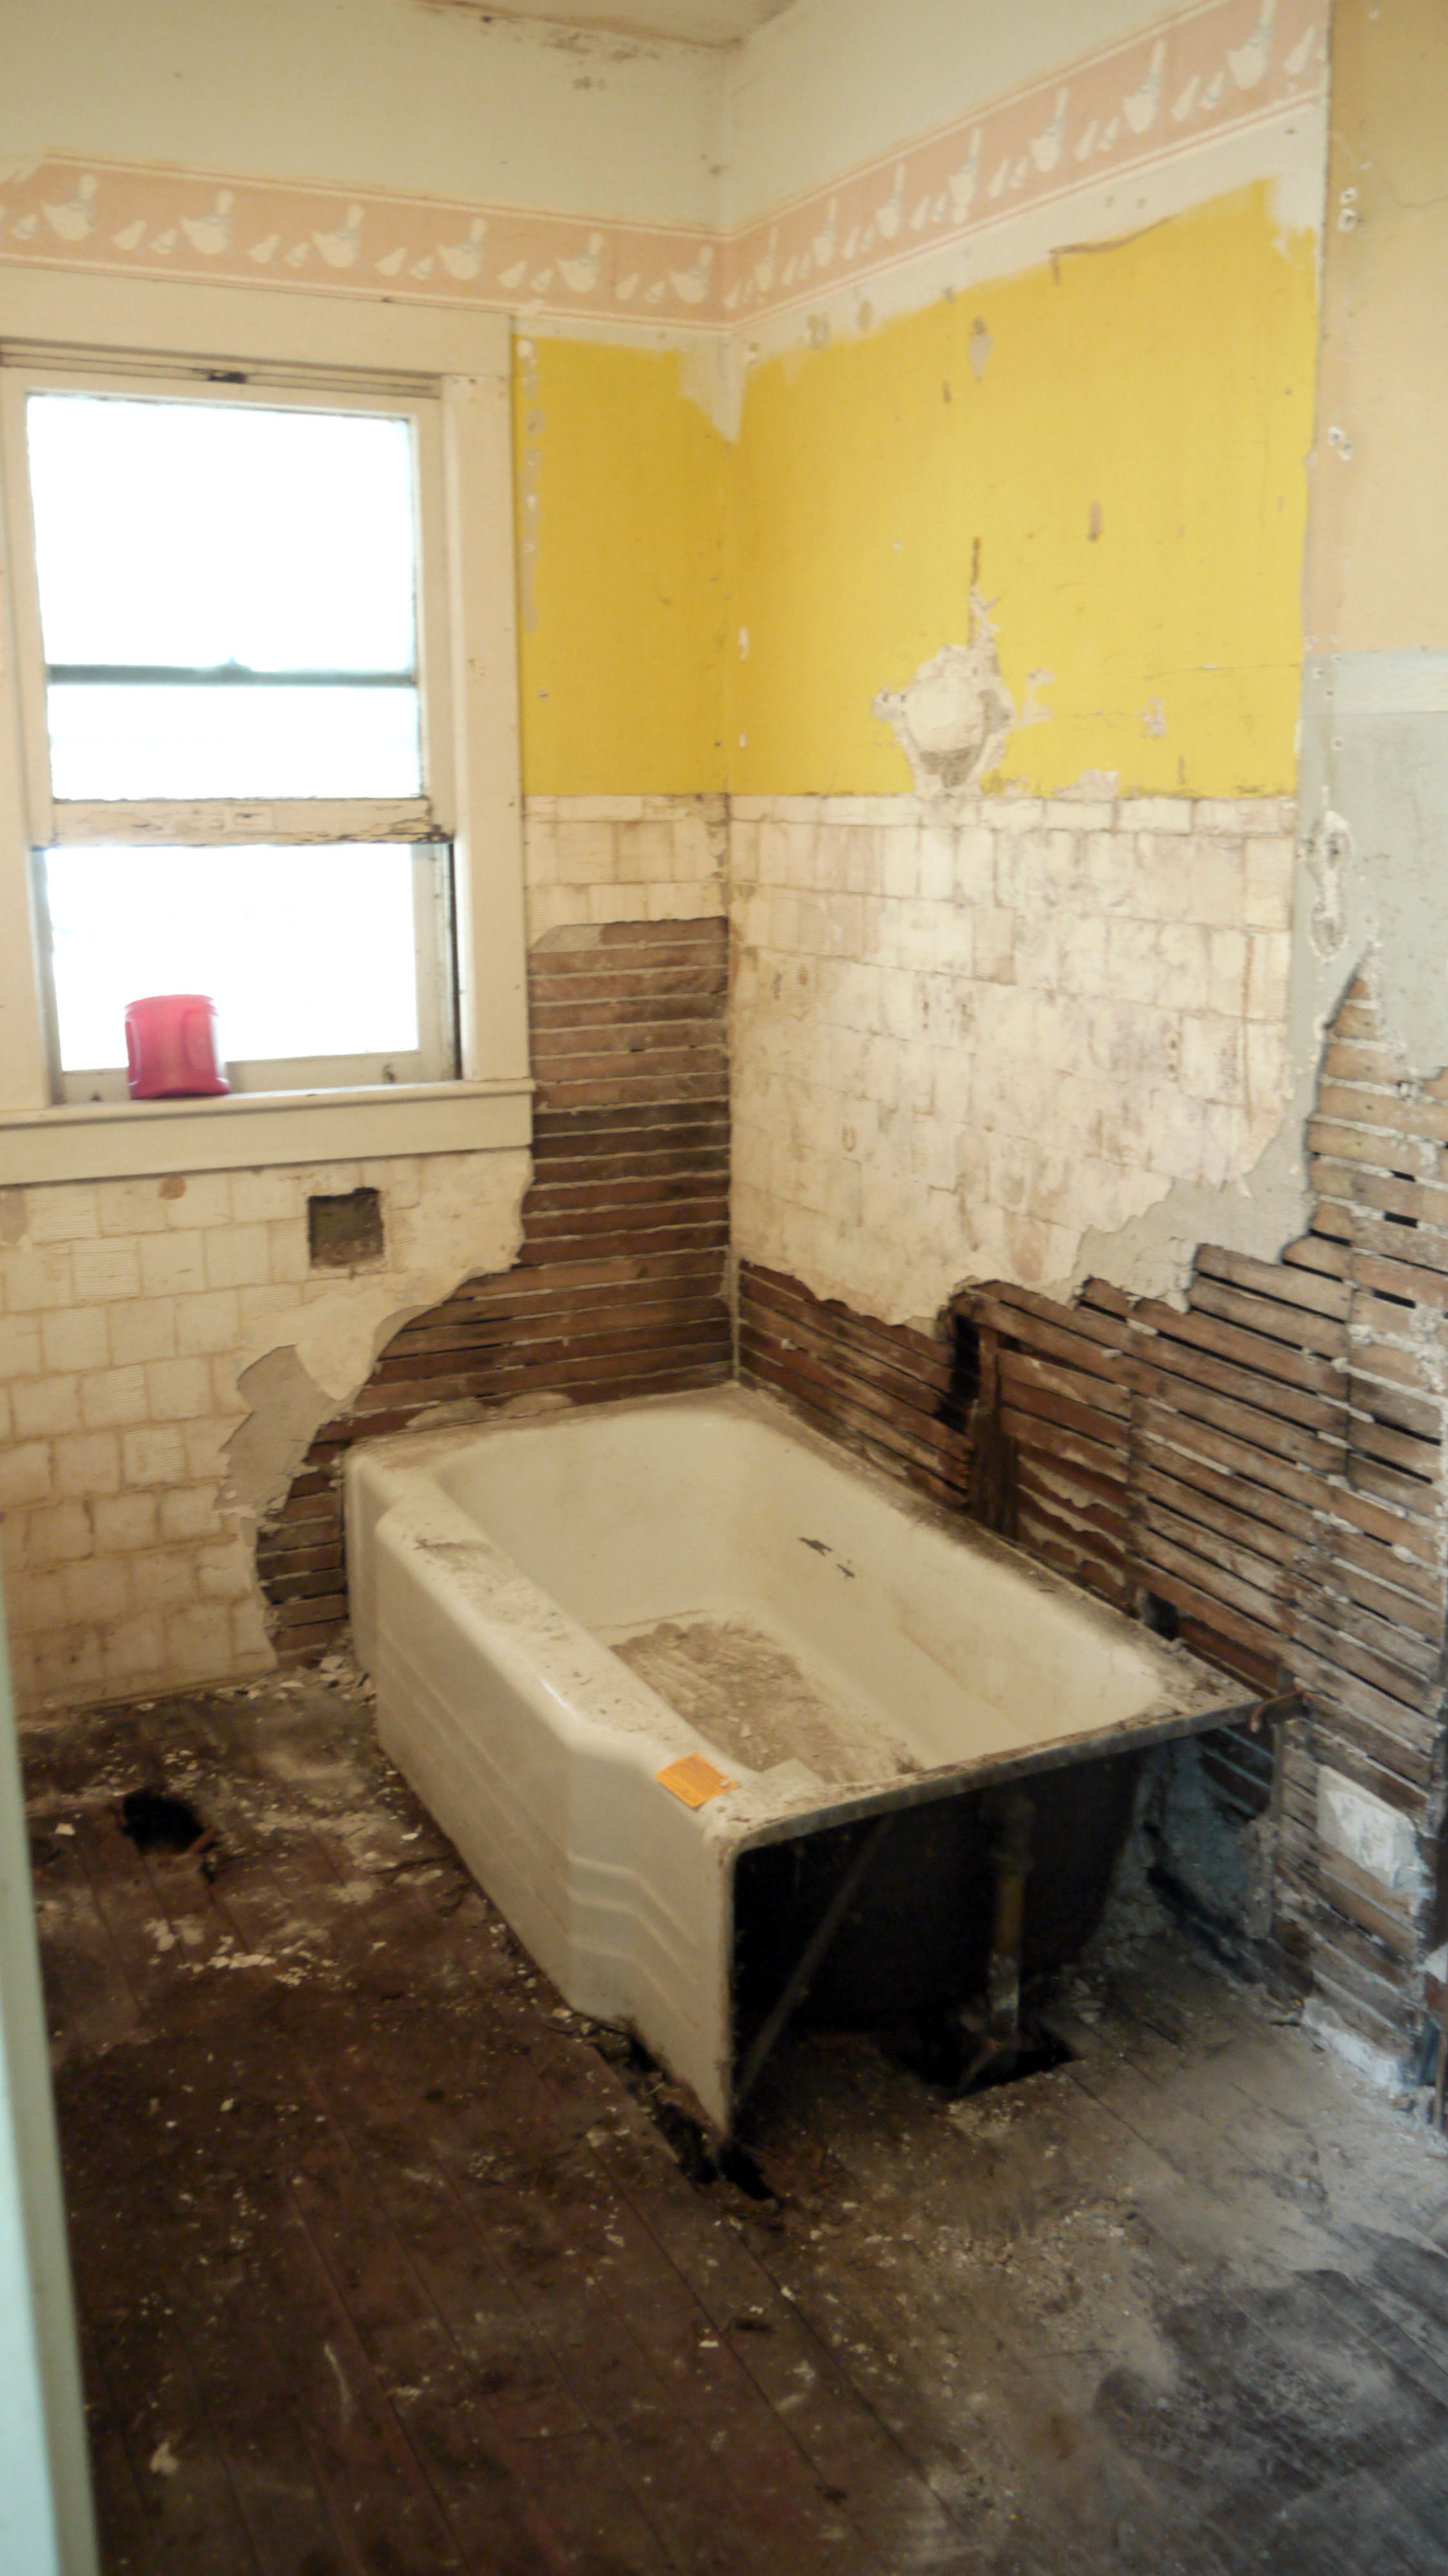
Stepping inside and turning around, here is the tub. Yep, the paneling is deteriorating from water, the tub faucet and handles are so corroded, I don’t even know if they would work if the water was turned on. The tub itself isn’t in too bad of shape. At this point I’m hoping to save the tub, after going a little Nicole Curtis on it with gentle cleaner and a ton of elbow grease.

Here’s the plastic hose and hand-held shower head, and in the ceiling is the home’s only attic access. The yellow wall is a poorly built divider between the tub and this unfinished space which puzzles me.
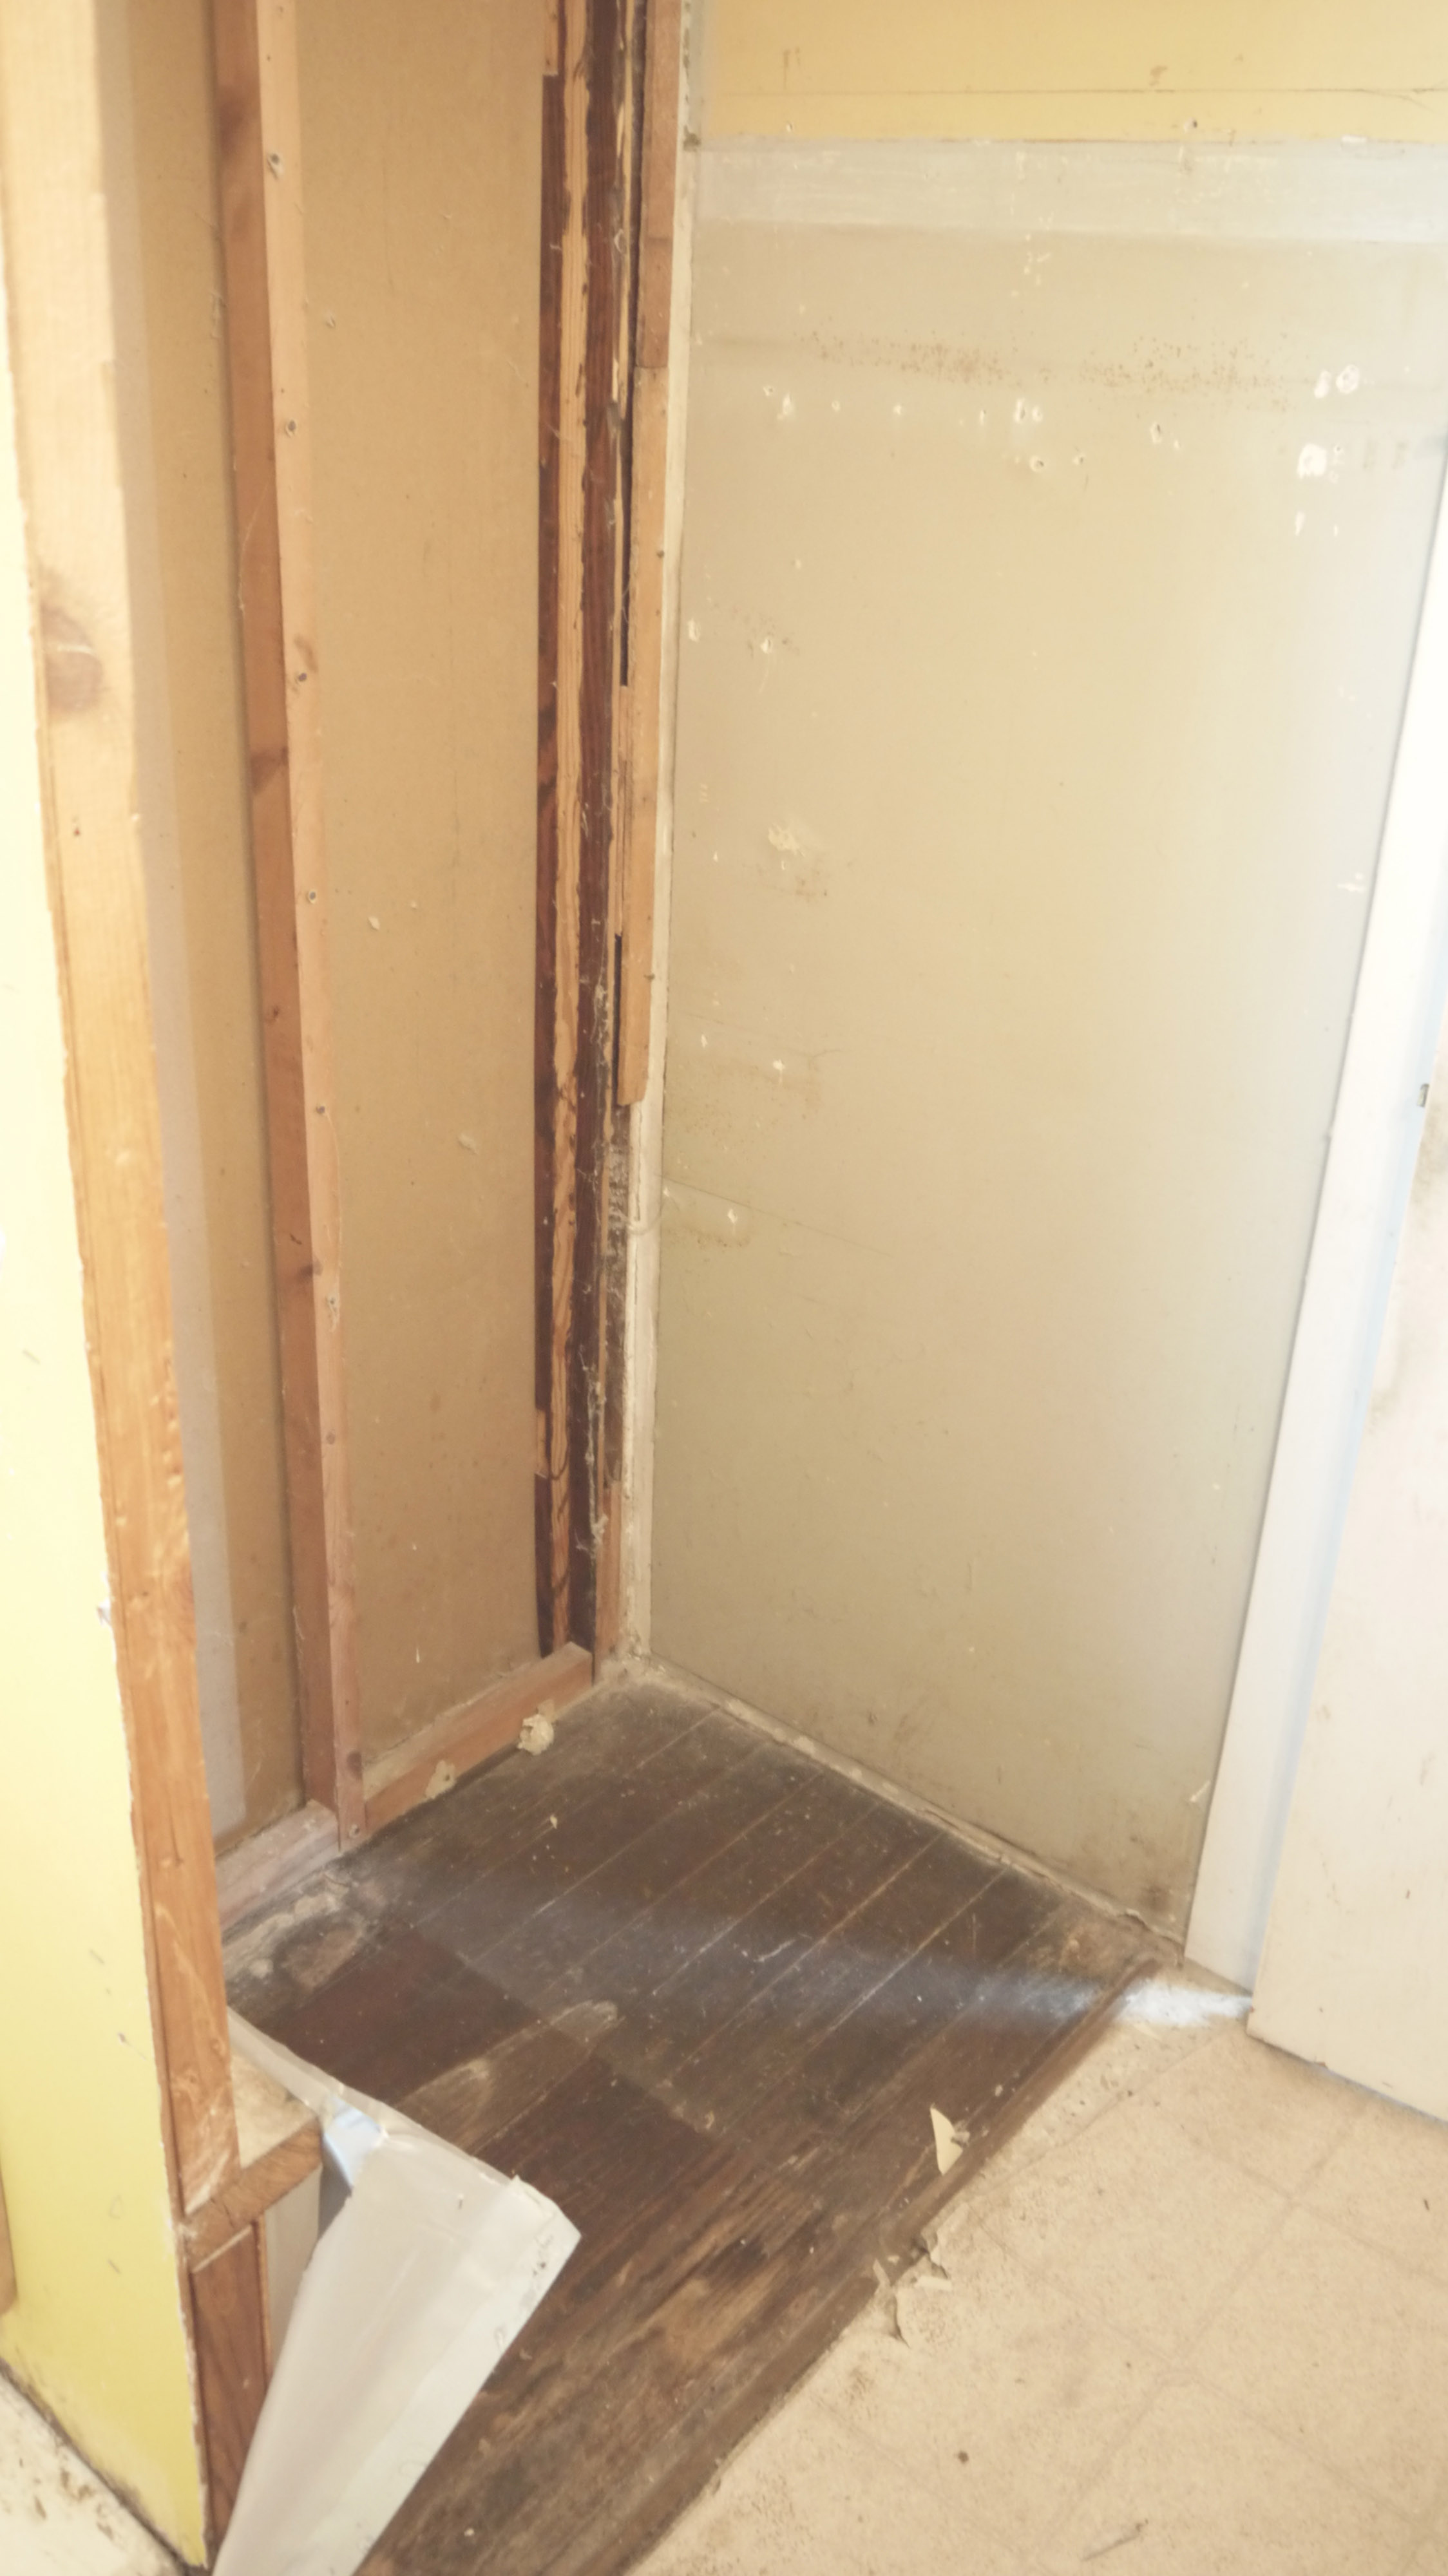
I can’t figure out what this area was. It is immediately to the right once inside the doorway. The linoleum has been tore up, exposing the original wood floor. The open wall looks like it used to be a doorway into one of the bedrooms. Part of me thinks there could have been a stand up shower here; its big enough, but there is no sign of plumbing, either supply or drain. So I figure this must have been a closet, and that would explain the door frame still in the wall. Perhaps the previous owner removed the closet in a first step to renovating the bath.

This is the same area, with the back of the tub faucet showing. This half-open wall was not constructed correctly and will be coming out. How about that great insulation job – aka- the opening in the sub-floor stuffed with an old towel. The entire room screams years of leaking without being repaired, and the quick-fixes I’ve found so far deserve some kind of award for stupidity. The sink, cabinet, toilet, and partition wall all need tore out, followed by the linoleum. I hope to find a solid floor underneath there somewhere. I’m also sketching a few ways to rearrange the bathroom fixtures in order to maximize space.
