Posts Tagged Window Restoration
Restoring Wood Windows – Putty, Prime, & Paint
Posted by Adam A. Ries in Home Improvement on January 10, 2016
Part 2 of restoring my home’s original wood windows. Part 1 is here.
Setting the glass means getting handsy with some glazing putty. Now some contractors say you can lay the glass into the rabbit using caulking or an adhesive. But I feel like that is a shortcut. The professionals who have been restoring windows for a while make a bed of the same putty that’s used on the outside of the glass, which is how wood windows would have been assembled originally 100 years ago. Recommended by all the pro’s, I use Sarco Glazing Putty, type M. I found it easy to work with, kind of like play dough. Working it like play dough for a minute or so with my hands makes it so much softer.

I lay an even thickness of putty along the rabbit on the inside the sash, using more than I need. I just move a ball of putty around the rabbit, pressing it in a few inches at a time with my palm. It’s a little messy, and it results in a lot of excess, but I wan’t squeeze out so that’s ok. Then I lay the glass on top. As carefully as I can, and often while holding my breath, I slowly work my hands around the perimeter of the glass, pressing firmly to set the glass into the putty. Also as carefully as I can, I use my glazing tool to press 2 or 3 glazing points into the groove on each side of the glass. I use these newer glazing points:

I think they are easier to set into place – and also because my first experience using the more original triangle glazier points resulted in slipping and cracking an original piece of glass, at which point I nearly gave up. (Instead I found an old glass window sash at a yard sale and was able to cut this piece of glass to fit.) The squeeze out putty can be scraped off and re-used, but using more than enough is important so that the glass makes a tight seal. Then I kind of repeat the process of pushing more putty into the rabbit with my palm, working my hand around the entire sash. I first use a glazing knife to simply push the putty tight into the groove, then it’s time time tool it smooth.
Tooling the putty is an art. Especially in the many videos online of professionals who can flawlessly tool an entire window in seconds. I spend a few minutes on each side of the glass, pressing the putty firmly into place while trying to achieve a smooth texture. Corners are a pain in the ass, I have yet to “master” a corner, but I’m getting better on each window.

Once the putty is tooled smooth – or as close as I can get it without losing my patience – I clean up the oily residue the putty leaves on the glass. This step is kind of fun, like painting only using a white powder called (what else), whiting. It’s the same whiting the professionals use, ordered online from the same company that sells the glazing putty. My understanding is that it’s pure limestone powder – it’s not cheap, but it goes a long way. With a very soft brush it really does clean the oil residue off of the glass that the putty leaves behind. It also skins the putty to encourage it to dry faster in prep for painting.
(I feel the need to insert here that yes, I have had to order many of these window restoration supplies and materials through the internet. The hardware stores around me don’t sell and can’t get many of these products. With as much time and energy I’m investing into these windows, I don’t want to substitute on inferior quality materials and take a chance of lessening how long these repairs last.)
Now onto painting – I’ve read a few different opinions, but the professionals I worked with said that using a good latex paint does not require priming the putty – the putty is manufactured to accept paint. For paint, I went by the recommendation of The Craftsman Blogger (an incredible resource for all things old house restoration!). Instead of a regular exterior latex, I went with Sherwin Williams’ Porch & Floor Enamel. It is a latex paint, but it is formulated to dry to a hard durable finish and unlike many latex paints, it doesn’t stick to other painted surfaces once cured.
I chose my paint colors for the outside of the window to stand out. Although I couldn’t tell the original color of the outside frames, while scraping paint from the sashes I could see that most original coat of paint was actually black. I love to see old houses with colorful window & frame combinations, and I really believe the “all white” or “all beige” window & trim combinations that plague so many homes is a negative result of the replacement window industry.

While scraping I found the original paint color to be black.
Although not black, I did choose a dark color for the sashes and a lighter color for the frames.
In my mind, I’m picturing a finished product something like this:
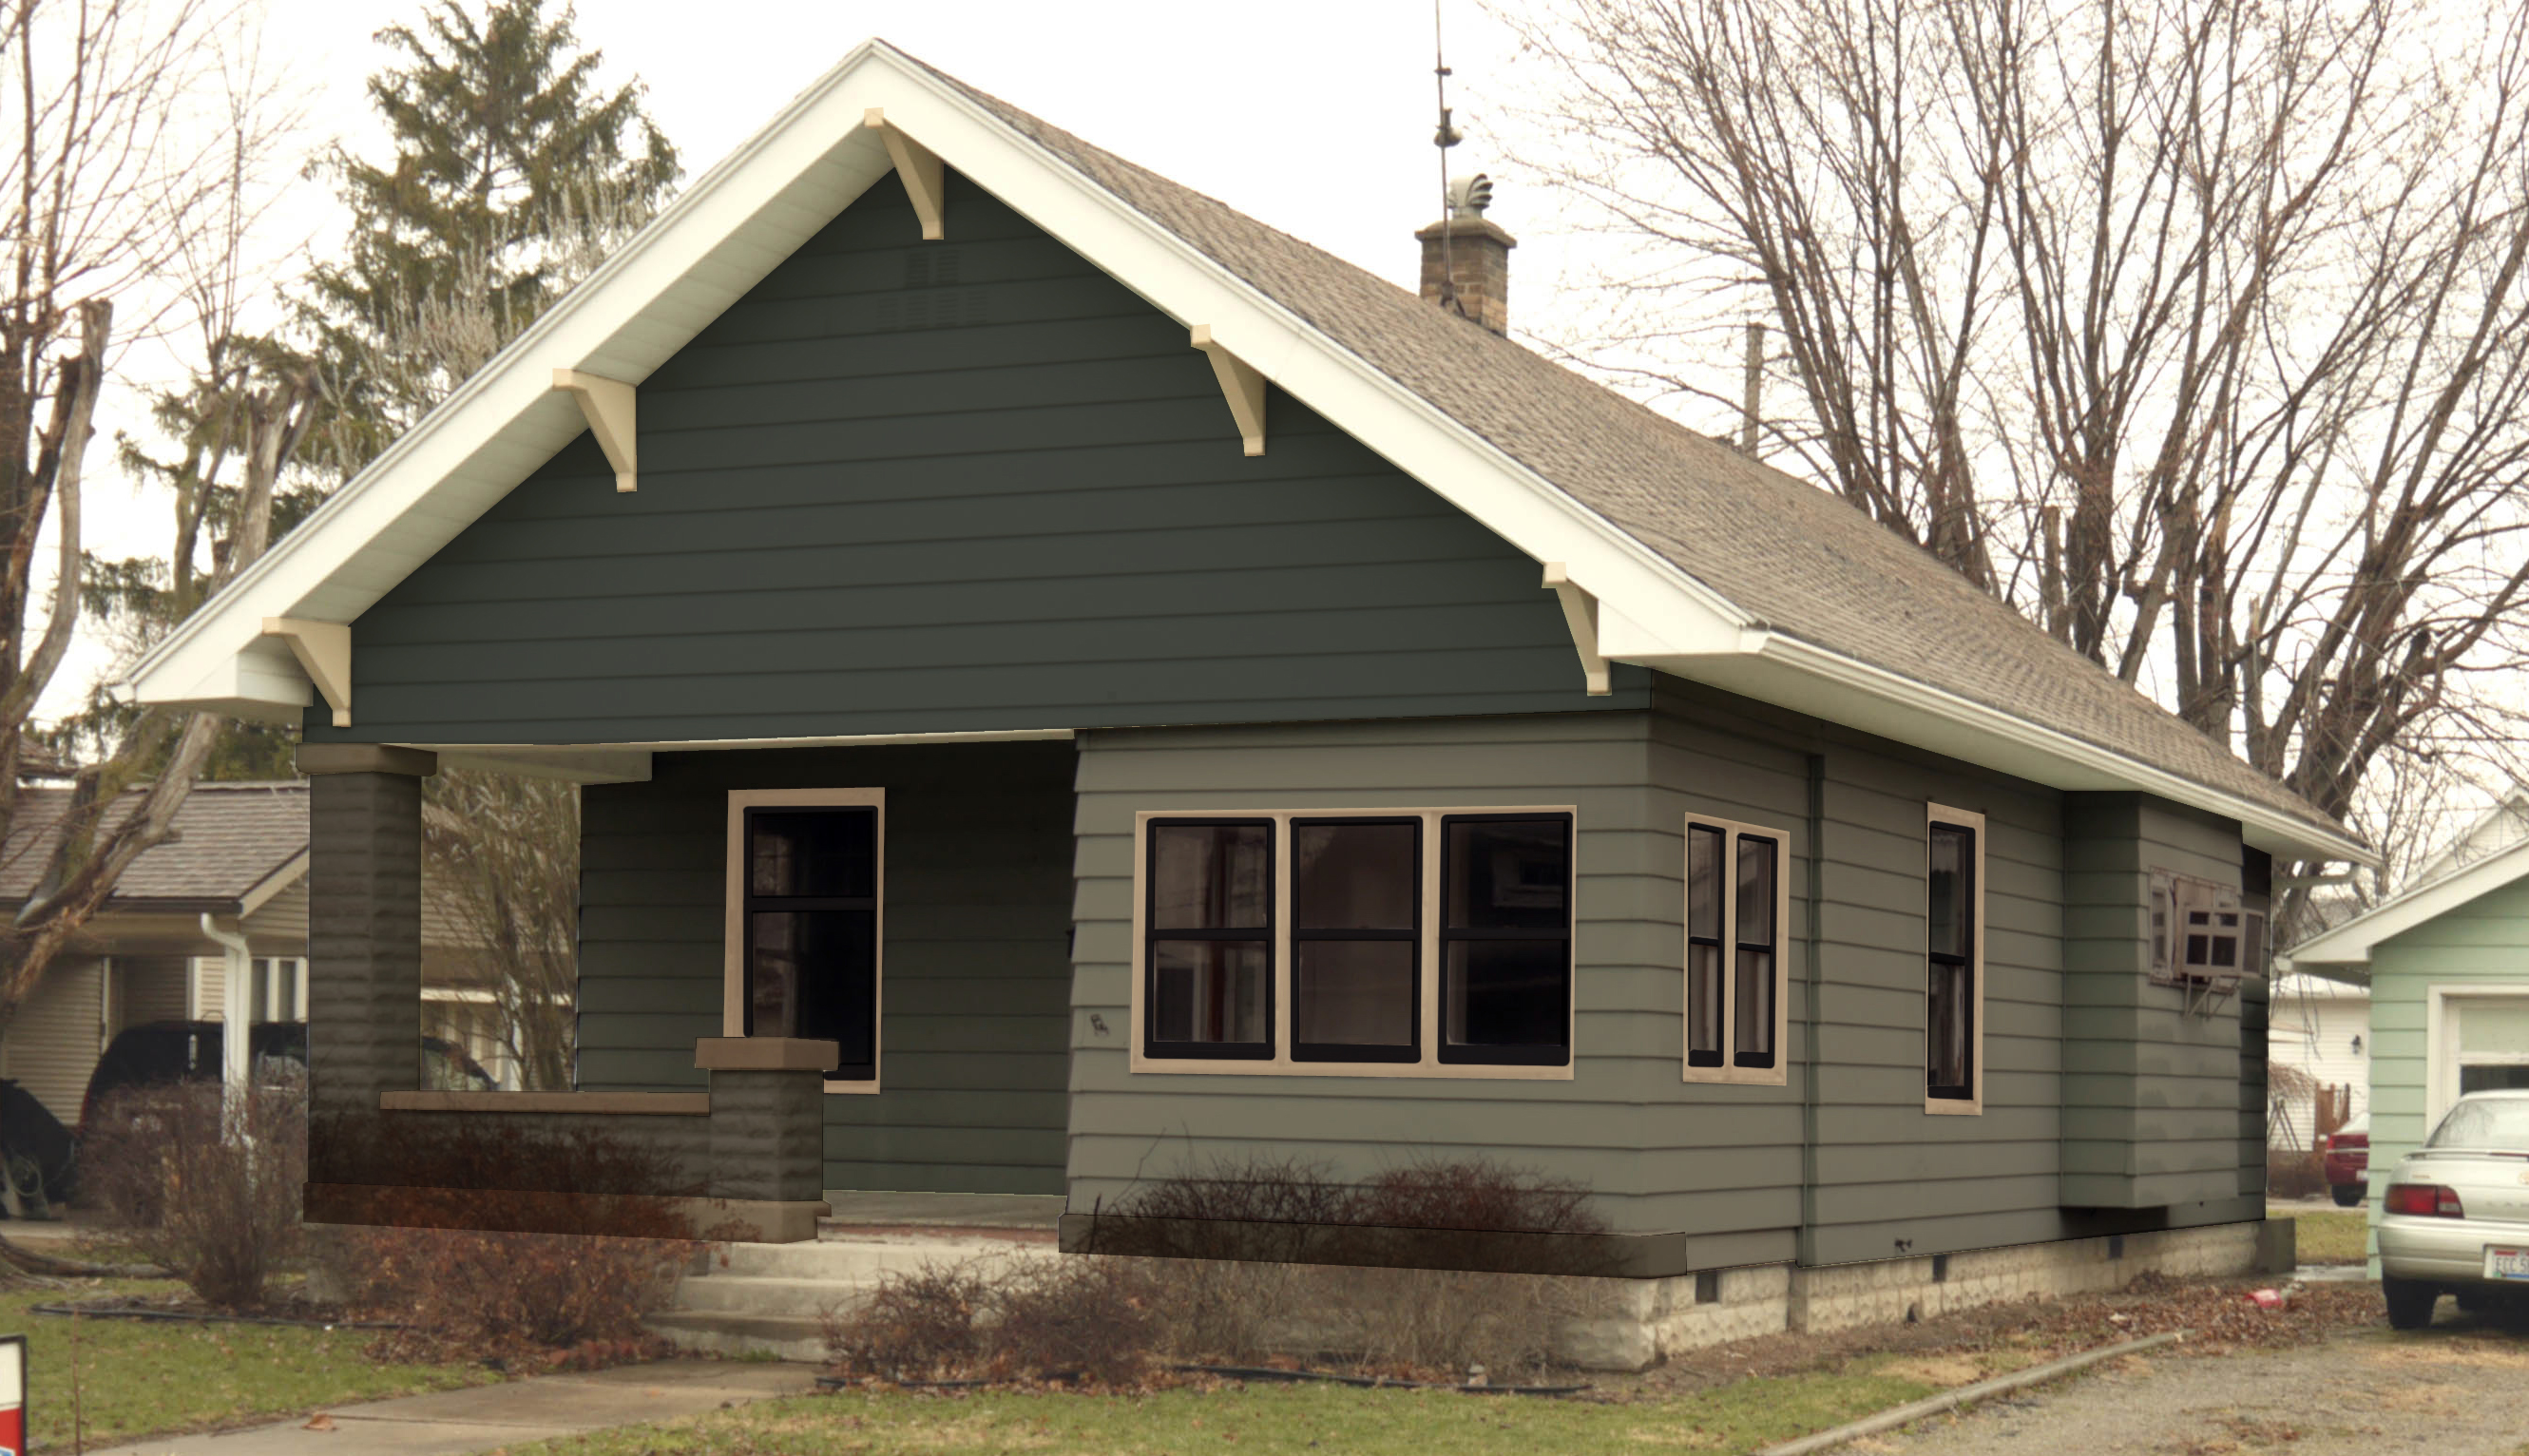
I had to work up an entire exterior color scheme before I could decide on paint colors, even though I’m quite awhile away from painting the outside of my house. But planning ahead, I was able to pinpoint the right colors for the outside of the windows. I decided on SW7069 Iron Ore for the sashes:

and SW 6105 Divine White for the window frames.

It looks more blue in this photo below, but in person its a deep navy/charcoal.

Now the secret to a long lasting window restoration? When painting the angled surface of the glazing putty, it is essential that the paint actually goes just a little bit onto the glass around the entire perimeter. Even if only 1/16 of an inch, lapping the paint onto the glass seals the putty to the glass and, from what I’ve read, makes the difference between a glazing job that lasts 5 years and one that lasts 25+ years. So many people finish their paint job with a glass scraper and scrape off the excess paint to make a perfectly clean line at the glazing putty. This ruins that seal the paint creates.
After 2 coats of paint, I wait a full week to make sure all the paint & putty is cured completely, then it’s time to put the windows back together. I bet I spent at least 3 weeks with each window tore apart. Like I said earlier, it’s all the waiting in between priming, glazing, and painting that takes the longest. Plus the fact that I get most of my work done on the weekends, so M-F of a full work week doesn’t see much progress either.
At this point I’m close to putting the window back together, but there are still a few more steps to ensure the window is air-tight. These include the original type of weatherstripping as well as 2 different types of modern weatherstripping.
Restoring Wood Windows – It Begins
Posted by Adam A. Ries in Home Improvement on January 7, 2016
I did quite a bit of research before I embarked on restoring the windows, including attending a hands-on workshop to learn the process step by step. I blogged my decision on replacing v restoring in 2 parts, Part I at this link, and then Part II here.
Restoring wood windows is a process. Although the total working hours are maybe 10 – 12 hours per window, its all the time in between that takes so long. I let a glue-up or epoxy repair sit overnight to cure completely. Oil primer takes several hours before it can be painted. The glazing putty takes a full week until it develops enough of a skin to be painted. And then 2 good coats of paint at that. And then another full week to let the paint fully cure before I put the window back together.
So let me document my process. I learned a lot at a window restoration workshop, I’ve watched a ton of YouTube videos, and I even purchased a book from the Window Preservation Alliance. I should admit I didn’t follow the preservationists instructions to a T, but my goal was longevity and durability. My house isn’t going to be a museum. I don’t feel like I cut corners, but rather I made adjustments based on my past experience with furniture building & repair.
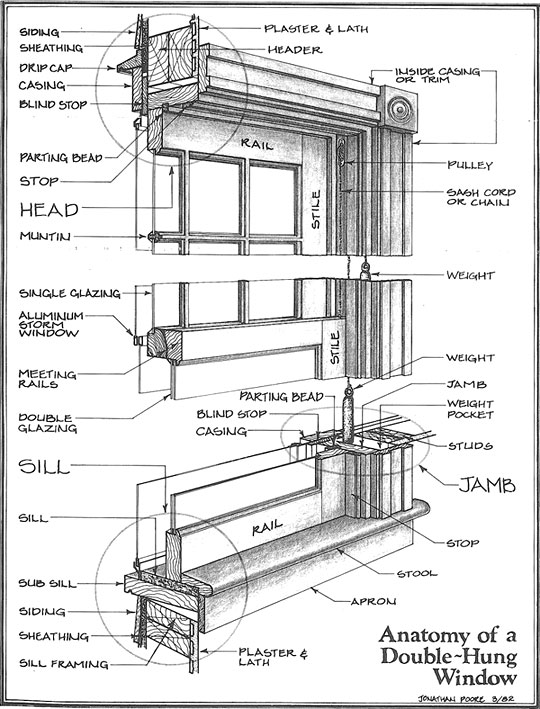
I’ll begin with an illustration that names the basic parts of a wood double hung window. This way I can document my process using the proper names for each piece, rather than my descripty thingy words I’m known for inventing. (Wordsmithing is a skill, after all.)
First steps first. I removed the interior stop, the trim pieces on either side of the window that keep the bottom sash from wobbling in & out. (Not defined above, the sash is the actual moving piece of the window that slides up and down. A double-hung window has 2 sashes, and upper and lower). The interior stops are basically the only 2 pieces that keep the bottom sash in place, other than being connected on each side to the sash cord – or not, because I found that more than half of my windows have the sash cords disconnected. They were either cut or the knots came undone. More on re-connecting those later.

The sash cords in my windows are only attached to the sash with a knot pressed tightly into a hole bored in the outside edge of each sash. Of the cords that were still connected, the knots pull out pretty easily, and I carefully let the weights pull the cord into the wall until stopped by the knot. If the knot was undone or too small, I pushed a nail through the cord to keep the cord from falling into the wall cavity. But I also removed the woodwork around several of my windows during the restoration process, either to better fix the already damaged plaster OR because the weight was already disconnected from the cord.
Reconnecting the weights later is so much easier with the interior woodwork removed, but that takes patience and skill to not completely ruin the plaster.
Next I carefully removed the parting bead, or as I call it parting stop. At first I was concerned about not breaking these pieces, but I later found that replacing this thin and pretty standard size piece of wood actually made my windows operate a lot better once reinstalled (I found new parting stop as a stock item at my local Ace Hardware). This piece is what separates the upper and lower sash as they slide up and down. Although they are supposed to be “tension fit” into place, I found most of mine had been nailed in place at some point, probably because they became loose over the decades. With the parting stop gone, the upper sash can now come out.
At this point it’s still fairly early in the morning on my typical “window Saturday,” so I would make a fresh cup of coffee and then begin scraping the paint on the outside of the window frame (but not drinking the coffee near the paint scraping – lead safety is a real thing). I haven’t restored any windows that have a storm in place, but otherwise these would have to be taken off at this point to fully scrape the outside trim. This way I could get the entire window frame scraped, removing nearly a 100 years worth of built up paint. I fill any major holes or cracks with wood epoxy, but I’ll worry with the small cracks and nail holes & sand right before I prime & paint. To secure my house, I simply cut a piece of plywood and screwed it into place to the outside of the window frame. For added “security” – I use that term loosely – I used star-bit screws so if someone tried to remove the plywood, they would have just a little more trouble trying to break in. Like, they’d have to make a trip to Ace Hardware to get the right bit and then come back to find I own very little worth stealing. So far I’ve worked on the windows at the back of my house, so they haven’t been very visible from the street. Next summer, however, I might work on a little better security so every car driving past doesn’t assume I’m an easy target.
I’m refinishing my woodwork to it’s original stained color on the inside of the house, so I spend the time scraping the paint on the inside woodwork as well. I am much more careful on the inside trim because I don’t sand it down to bare wood; scraping the paint mostly removes the original varnish, but the wood keeps a lot of the stain color underneath. If I would sand the color completely out, it would be more difficult to achieve an even rich mahogany color when I re-stain it. I find staining over whatever color is left in the woodwork achieves a beautiful color that is spot on to the woodwork’s original color (seen in the few spots where the woodwork was not already painted).
Then I focus on fixing each sash. The level of deterioration determines how much work the sash needs. I hear rumors that some window restorers only have to touch up missing glazing putty and then sand and repaint. Rumors, but not my story. I have windows where the glass is only held in place by the glazing points – almost no putty left. As carefully as I can I remove the remaining glazing putty with either a sharp chisel or another sharp tool. The glass becomes loose, but there are still metal glazing points holding it into the sash. I learned the hard way that missing even one of these little metal pieces will crack a window when you try to push the glass out. I remove each glazing point with a sharp pair of needle nose plyers, always pulling away from the glass and not putting pressure on the glass. The glass usually pushes out pretty easily, and I write on the exterior of the glass with a Sharpie so I know I reinstall it the exact same way. I’ve come up with a system:
04 Ext. ↓ ↑
04 is the window number (I numbered each window in my house, even with 2 windows tore apart it can get confusing). Ext means the exterior side of the glass. The first arrow (↓) tells me which sash (upper or lower), and the last arrow (↑) tells me “this side up,” meaning this is the top of the glass as it goes back into the sash. I know it’s old glass, but I find that Sharpie stays in place until I wash the glass with glass cleaner. It doesn’t accidentally rub off or fade while the sashes are being repaired & painted.
Now the wood sashes in my windows have not been in great condition. Very loose joints and even some rotted corners where some idiot before me used nails & screws to keep the frame together. Originally the sashes would not have had glued corner joints. Each corner was made from a very tight tongue and mortise join, with two small metal pins nailed into place.

But I use exterior wood glue and epoxy pretty liberally to make sure the joints are secure and the sash will last another century. In the sash above, I nailed 2 small brads to hold the joint along with the clamps, and then drilled a hole 3/4 of the way deep and glued a wood dowel into place. I haven’t yet had to do a “dutchman repair,” but there’s are several great online tutorials in case I find a spot rotted so badly that epoxy won’t cut it.
Then it’s more scraping paint on both sides of the sash. I fill any remaining nail holes or cracks I find, then sand it smooth.

Restore or Replace – Part 2
Posted by Adam A. Ries in About Me, DIY, Home Improvement on September 4, 2015
Part II of how I came about deciding to restore the wood windows in my house instead of simply tearing them out and installing new replacement windows. Part I at this link.
Of course, by this point I had decided replacement was not an option (except for the bathroom window, which I did replace with vinyl – I wouldn’t dream of building a shower with a wood window in the wall).
I learned about an organization in Columbus hosting a 2 day hands-on window restoration workshop, and I signed up right away. I even took my own tool belt so I wouldn’t look like such a novice. In reality, I did find I had a lot more knowledge than some of the others – a range of individuals who had never held a hammer, to a few woodworking professionals expanding their skills. Just a few hours in, and it felt like all the reading I had done about wood window restoration was coming to life in front of me. There is nothing better than learning by working alongside a seasoned professional craftsman.

I didn’t just learn the steps in the process, but I learned great tips from their years of experience; how to keep the sash cord from slipping into the wall cavity by accident; the right tool to carefully pry out the parting stop; how to remove brittle glazing without cracking the glass. And the right products such as glazing compound, sash chain v cord, and great online resources to order the correct replacement parts.
Beyond what I learned, the workshop took away my fear of doing a step wrong or getting in over my head.
I didn’t immediately drive home and tear every window apart – though I wanted to. But I did start ordering supplies and price checking half a dozen websites to find out which sold each product at the best price. Restoring windows on average is less expensive than replacing them, but that still doesn’t mean it is cheap – especially when the best price is ordering in bulk. So 1 gallon of this, 100 yards of that, 5 of these, 30 meters of this, and 300 copper nails. I was just about halfway through finishing the plaster repairs in the laundry room when I went to the workshop, and I made myself wait until I had the entire room painted & woodwork refinished. Then it was window time.
I intended Part III to be a step by step photograph process of removing, restoring, and reinstalling the double-wide laundry room windows. Unfortunately my computer decided to wreak havoc last weekend and my only resort was a complete hard drive reformatting & reinstalling the operating software. Thankfully I don’t keep files on my computer very long, I’ve learned to store most of my photographs & other important documents on my external hard drive. But for some reason, I had kept my house renovation photos saved on my pc and not yet moved to the external- it was easier and a few steps faster to edit photos & update blog posts. I lost the majority of my photos of house projects from this summer. Lesson learned the hard way. So Part III will switch to a different window in a different room of the house.
