Archive for category Interior Design
On the Up and Up
Posted by Adam A. Ries in DIY, Home Improvement, Interior Design on July 9, 2014
Meaning, drywall and cement board! Although most of the bathroom was ready to accept wallboard once the plaster was torn off, I did have to do a little framing at what would be the back of the tub/shower. As you can see in this 3D model, the bathroom is about 5′-8″ wide, and a tub is only 5 feet.

That leaves me with a 8 in gap between the tub and the existing bath wall. So I framed in a full height wall to have a support to build a shower wall. In the end, I’m planning to trim it out with little cubbie cabinets to look very similar to this (only I will continue it all the way to the ceiling).

I used 2×2 lumber as the main section, and a 2×4 on the outside for strength (non-weight bearing walls can be constructed of 2×2 lumber – it’s how thin walls and even walls that house a pocket door are constructed).

I added lots of cross-supports between the studs and the wall behind. Although it was very strong on it’s own, this will be a tiled shower wall, and I don’t want any flexing to crack tiles or cause them to break off. The 1×4 sections between the studs are flush to the front of the framing studs. Just like the ones you can see along the top edge of the tub, these were a recommendation from a how-to video I found very informative on YouTube (Seriously, TileMasterGA: I have learned so much from his many videos documenting each thorough step of a quality and long-lasting bathroom renovation). These boards he recommended are to provide additional support to secure the wallboard as strong as possible, minimizing flexing. I just used scrap boards for these pieces. I also put them at the height where 2 sections of wall board will meet, to make sure the joint has this strong support as well.
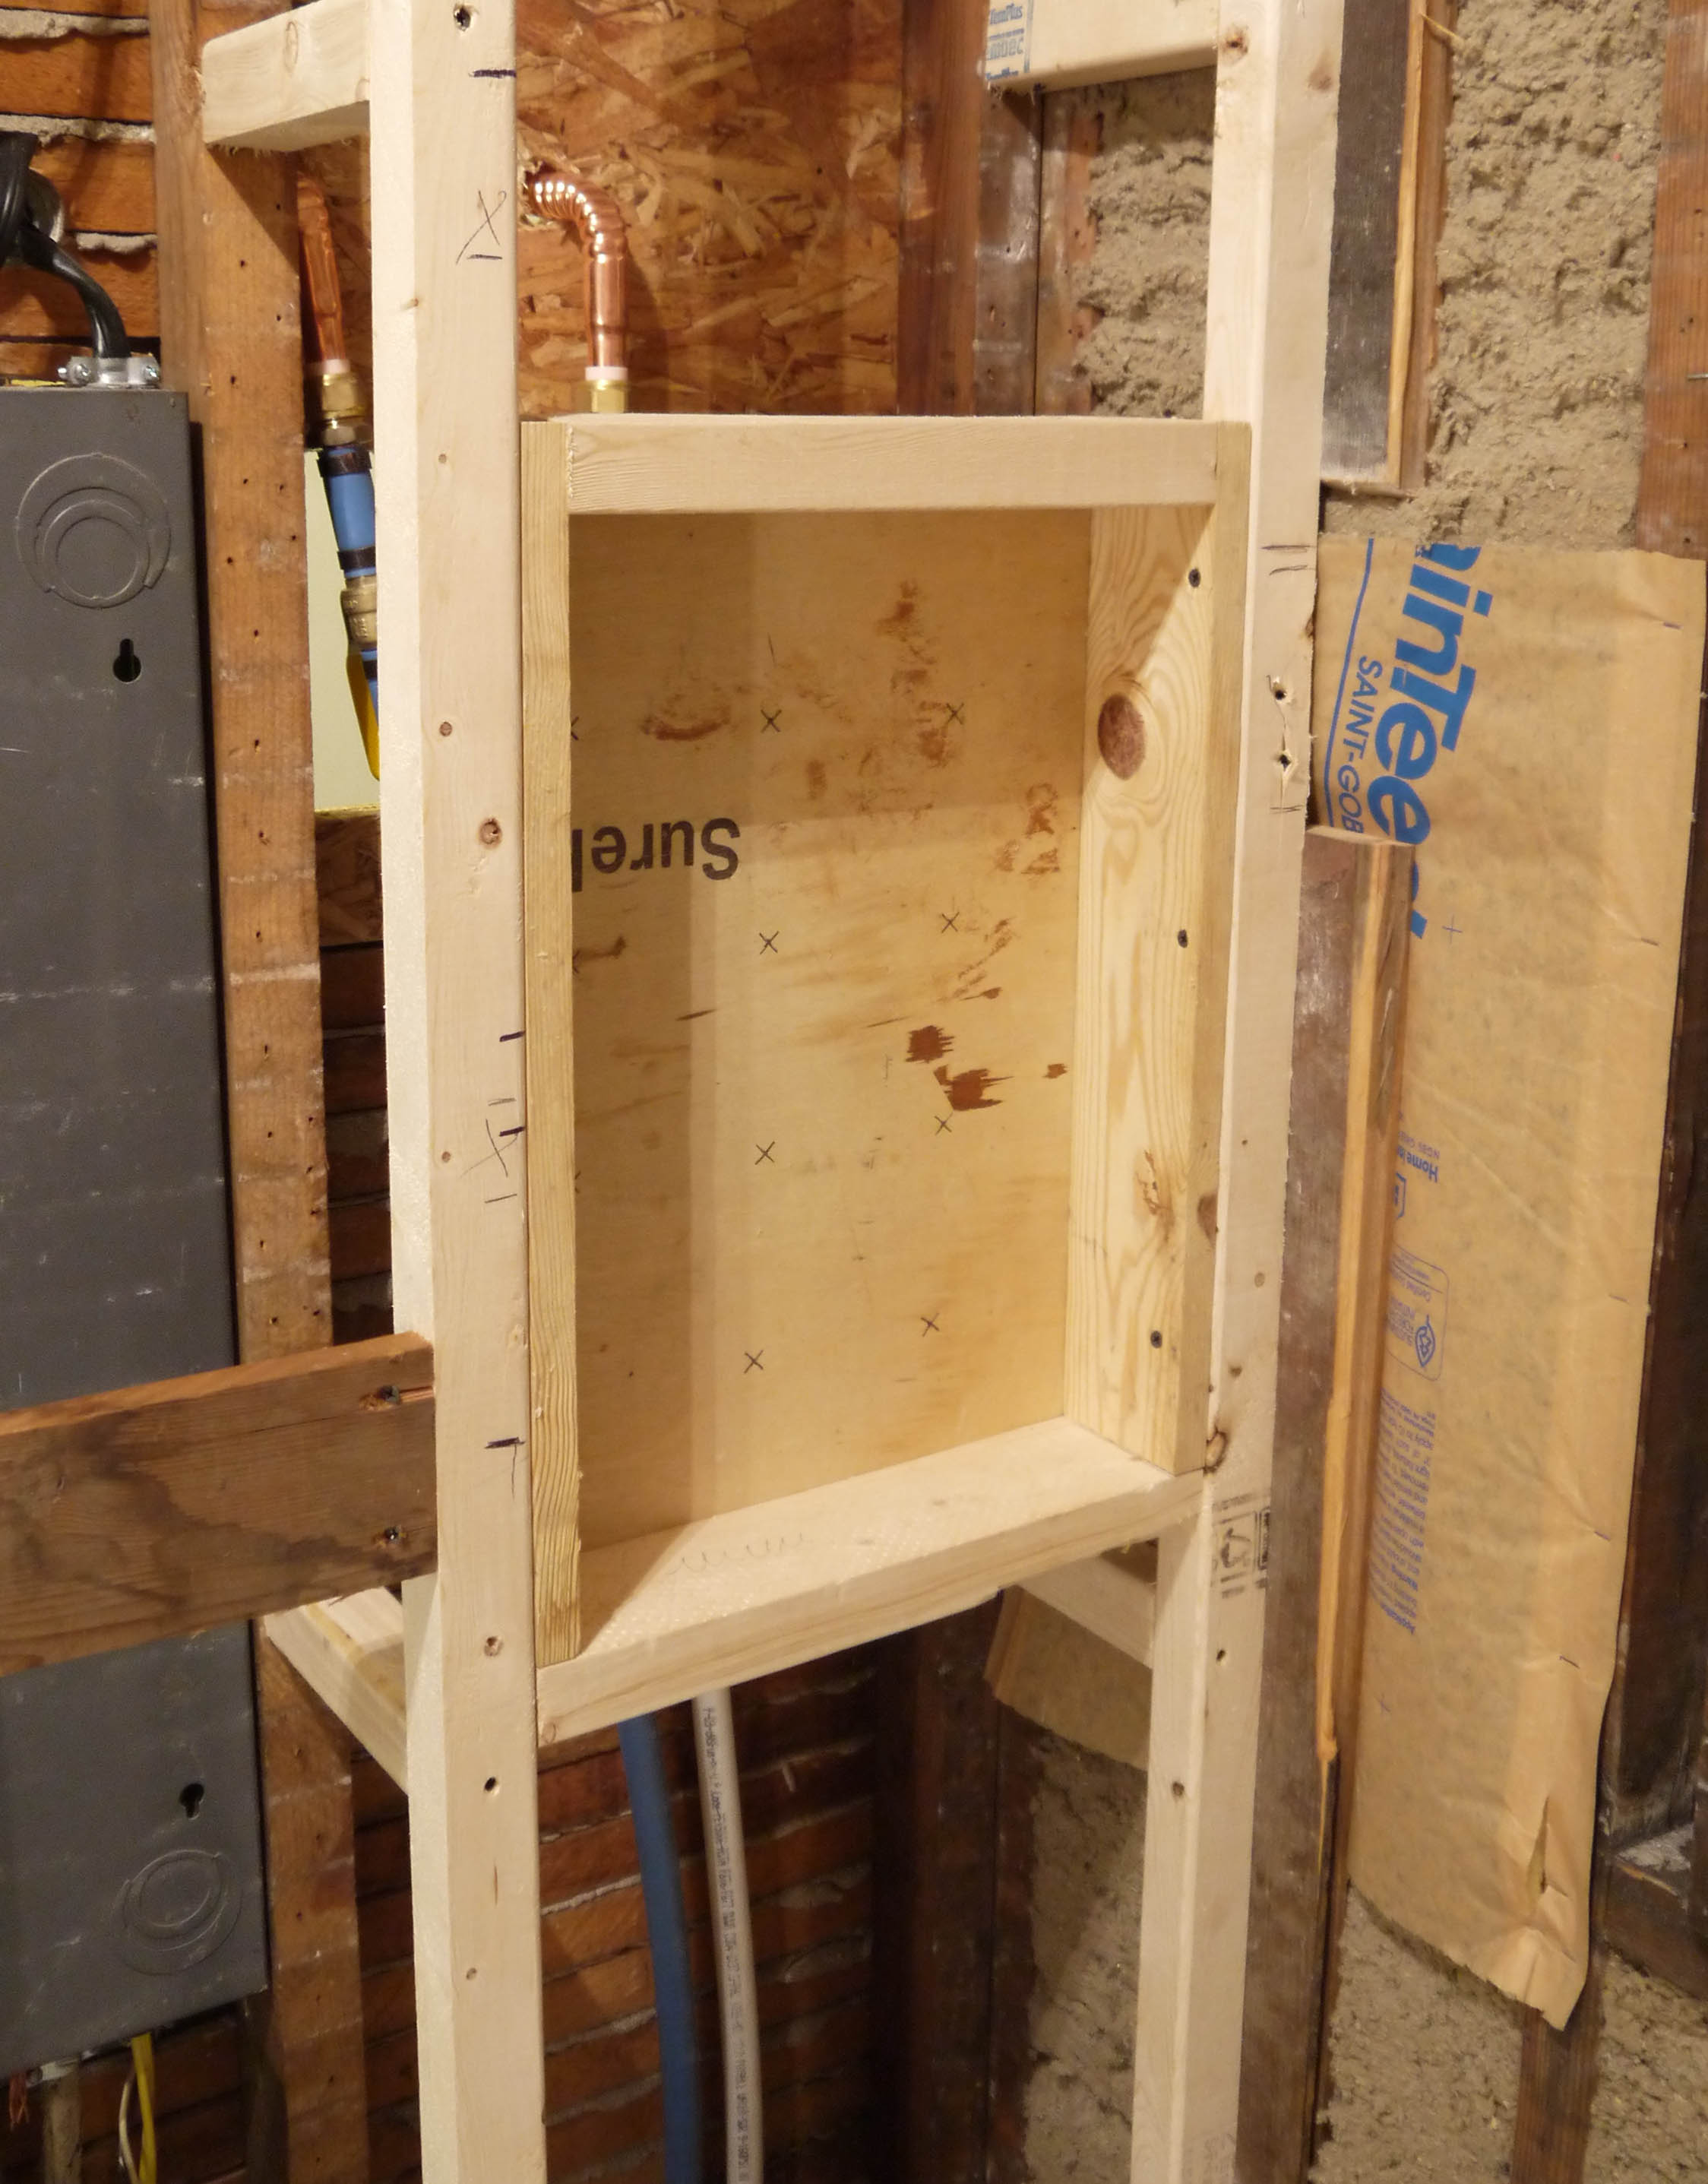
This is what I’m super excited about. It’s my shower soap & shampoo niche. I’m not a big fan of these old metal shower soap trays (although they are very appropriate for the time period look I’m going for – pretty sure I tore 1 or 2 out in the beginning). Instead, I wanted a built in niche, so I basically built a window frame and secured it into this wall space. It will get covered in cement board just like the shower walls, then tiled to look seamless like this:

Only I don’t like how far apart the two niches are, I’m going for more like this, with just a thin shelf for small bottles and a bar of soap:

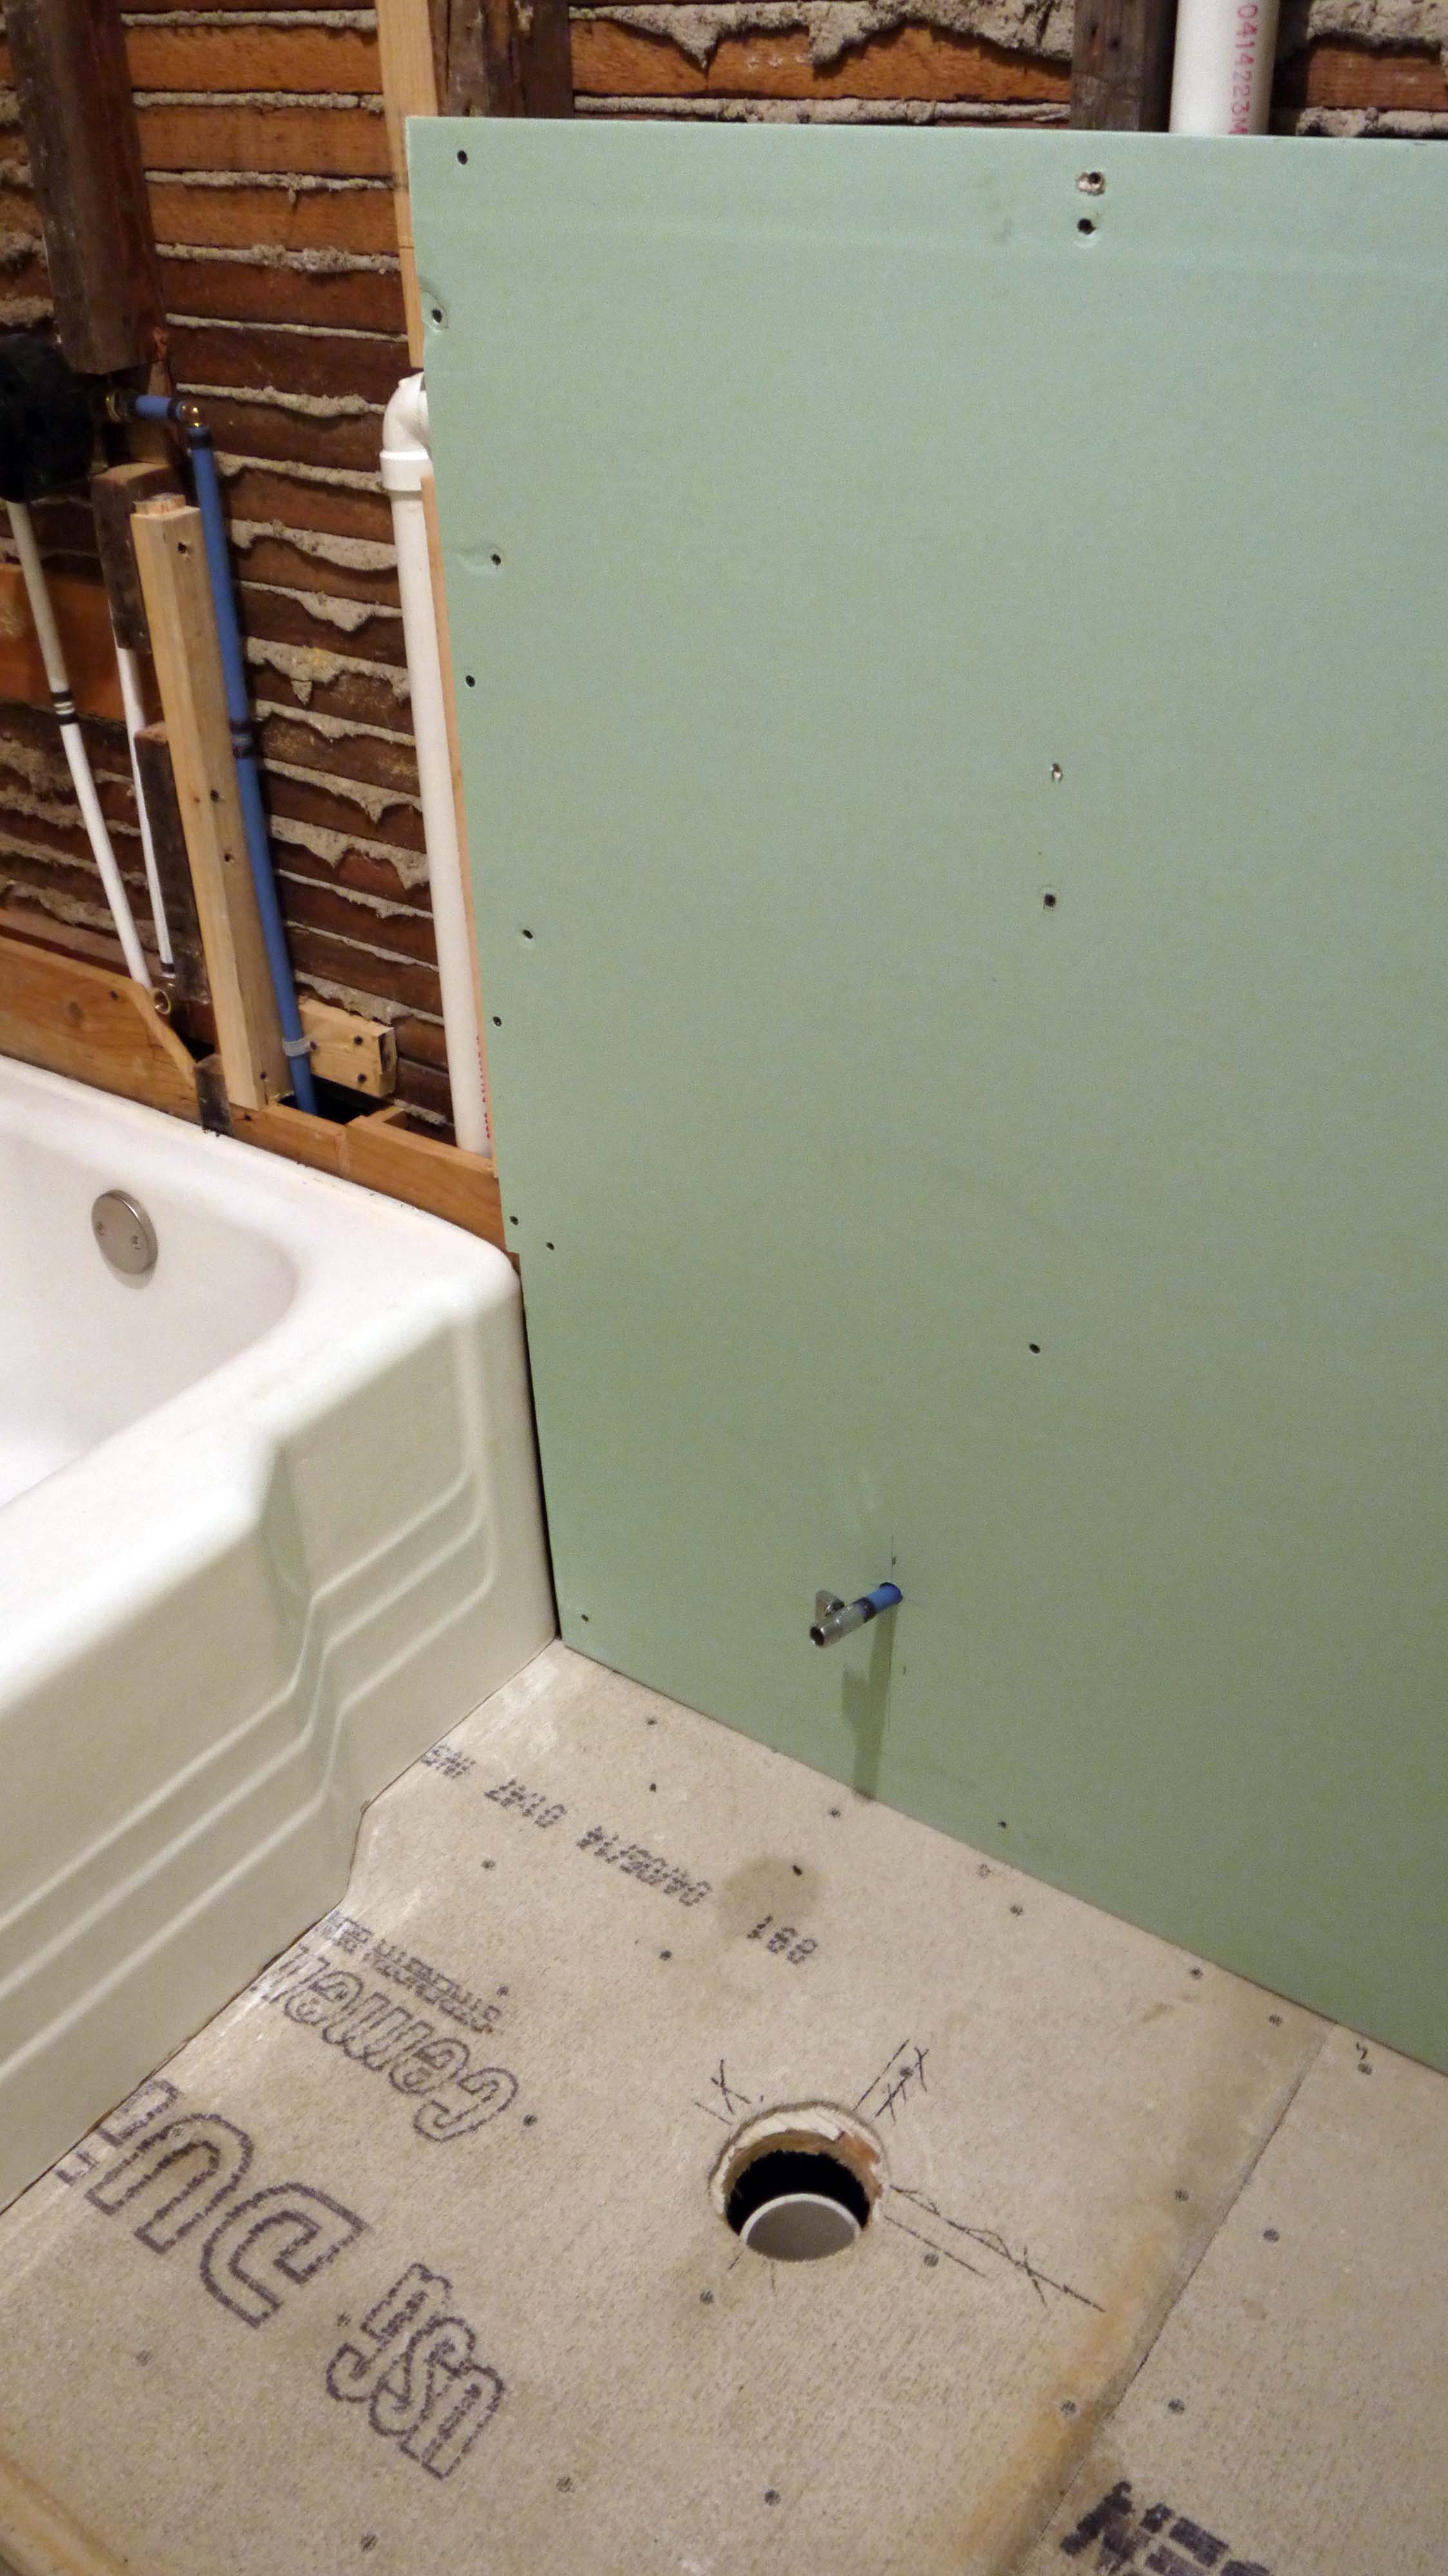
So back to reality. Wall board goes up pretty quick, and relatively easy. The only bad part is lifting the 2nd sheet up to the ceiling and holding it while driving the first couple screws to secure it.

Oh, and don’t forget to pre-measure & mark the location of outlets, light fixtures, or pipes. That meant taking the one sheet back down to measure, and then lifting it up and securing it all over again. Marking the location takes a lot of the guesswork out of using a RotoZip to cut out for the opening.
The cement board went pretty easy too. It comes in slightly smaller pieces (3’x5′ instead of a regular drywall 4’x8′), so it’s easier to handle and lift on and off of sawhorses.
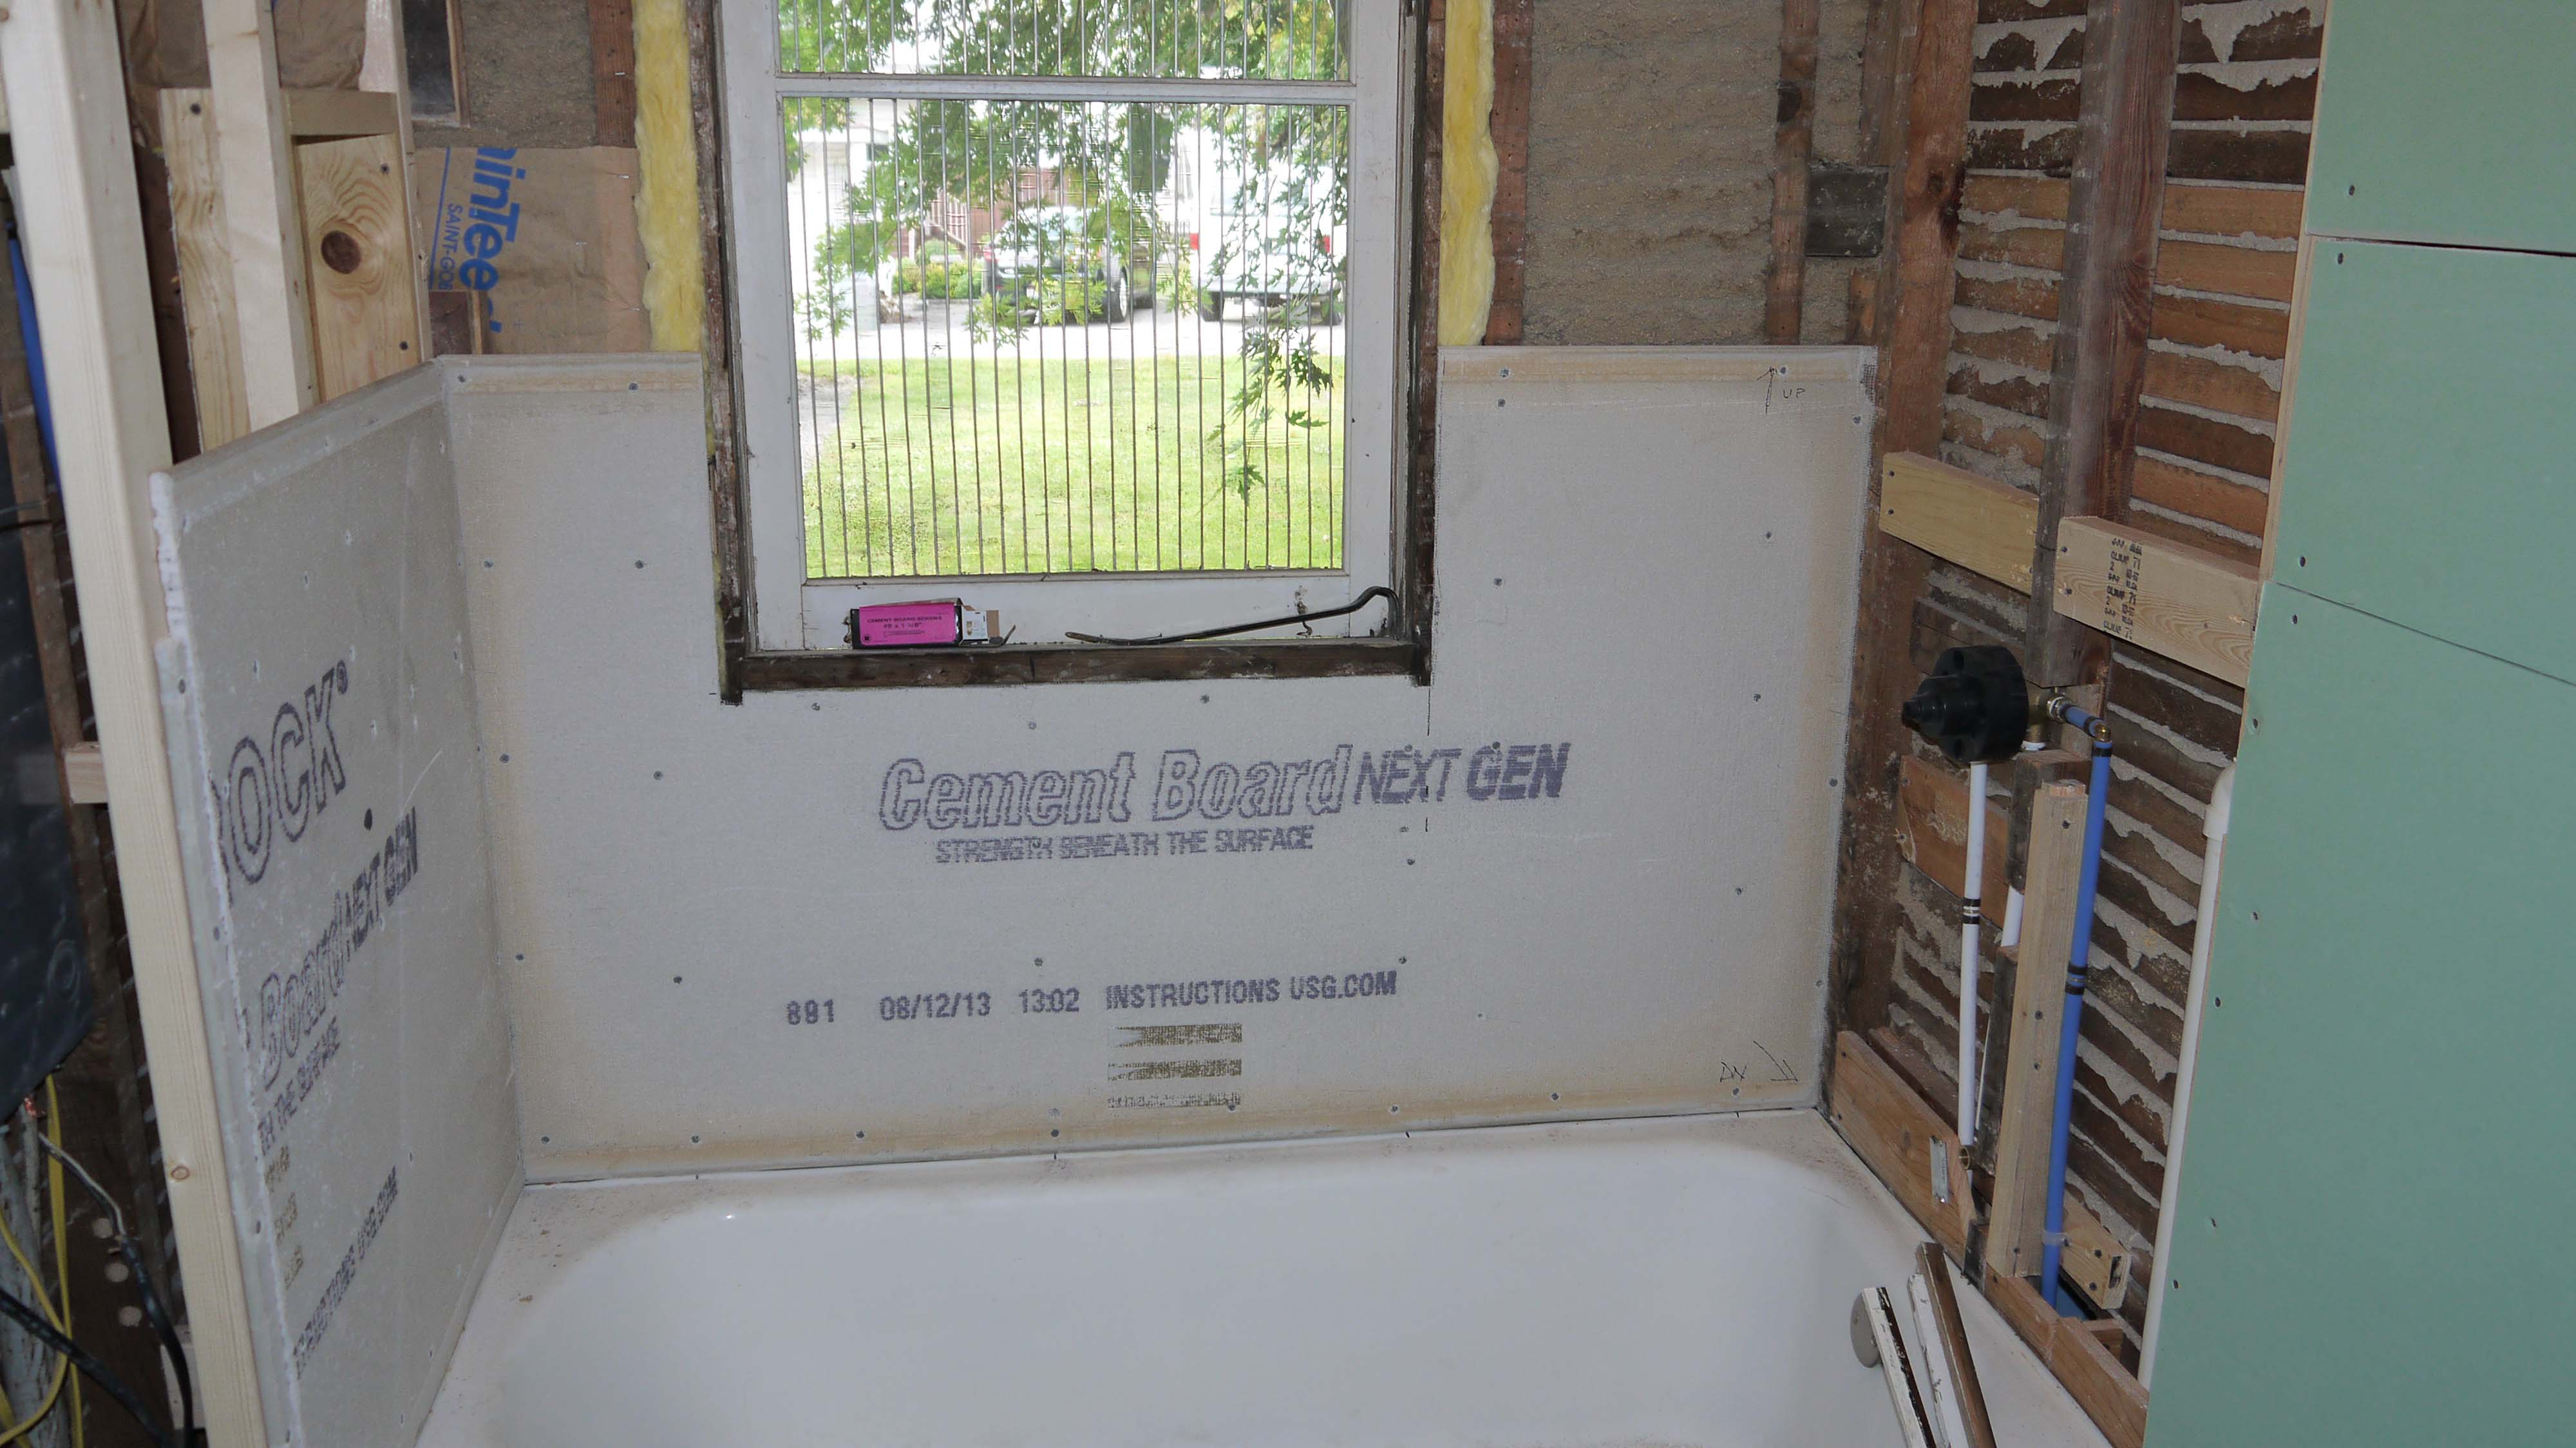
Cutting the cement board is not as easy as cutting drywall. Instead of scoring with a utility knife and snapping it apart, I used a metal cutting blade in my handheld jigsaw. It did a little tearing out along my cut line line (after all, there are pieces of aggregate compressed into the board just like in cement), but it’s a raw edge so that’s ok. I didn’t have any trouble drilling holes for the tub and shower faucet or the mixer valve. I just used the matching size hole saw bit and it went through just fine. For attaching the cement board, the lumberyard sold me special ‘cement board’ screws that are recommended. They have different threads than drywall screws and a larger head, which prevents them from pulling through the surface too far. They barely countersink themselves and that holds the cement board tightly against the wall studs. Same as the floor, the shower walls are super string and rigid, and just about ready for tile!
And here’s the bathroom all boarded up:

I can’t even begin to express how good it feels simply to have walls again!
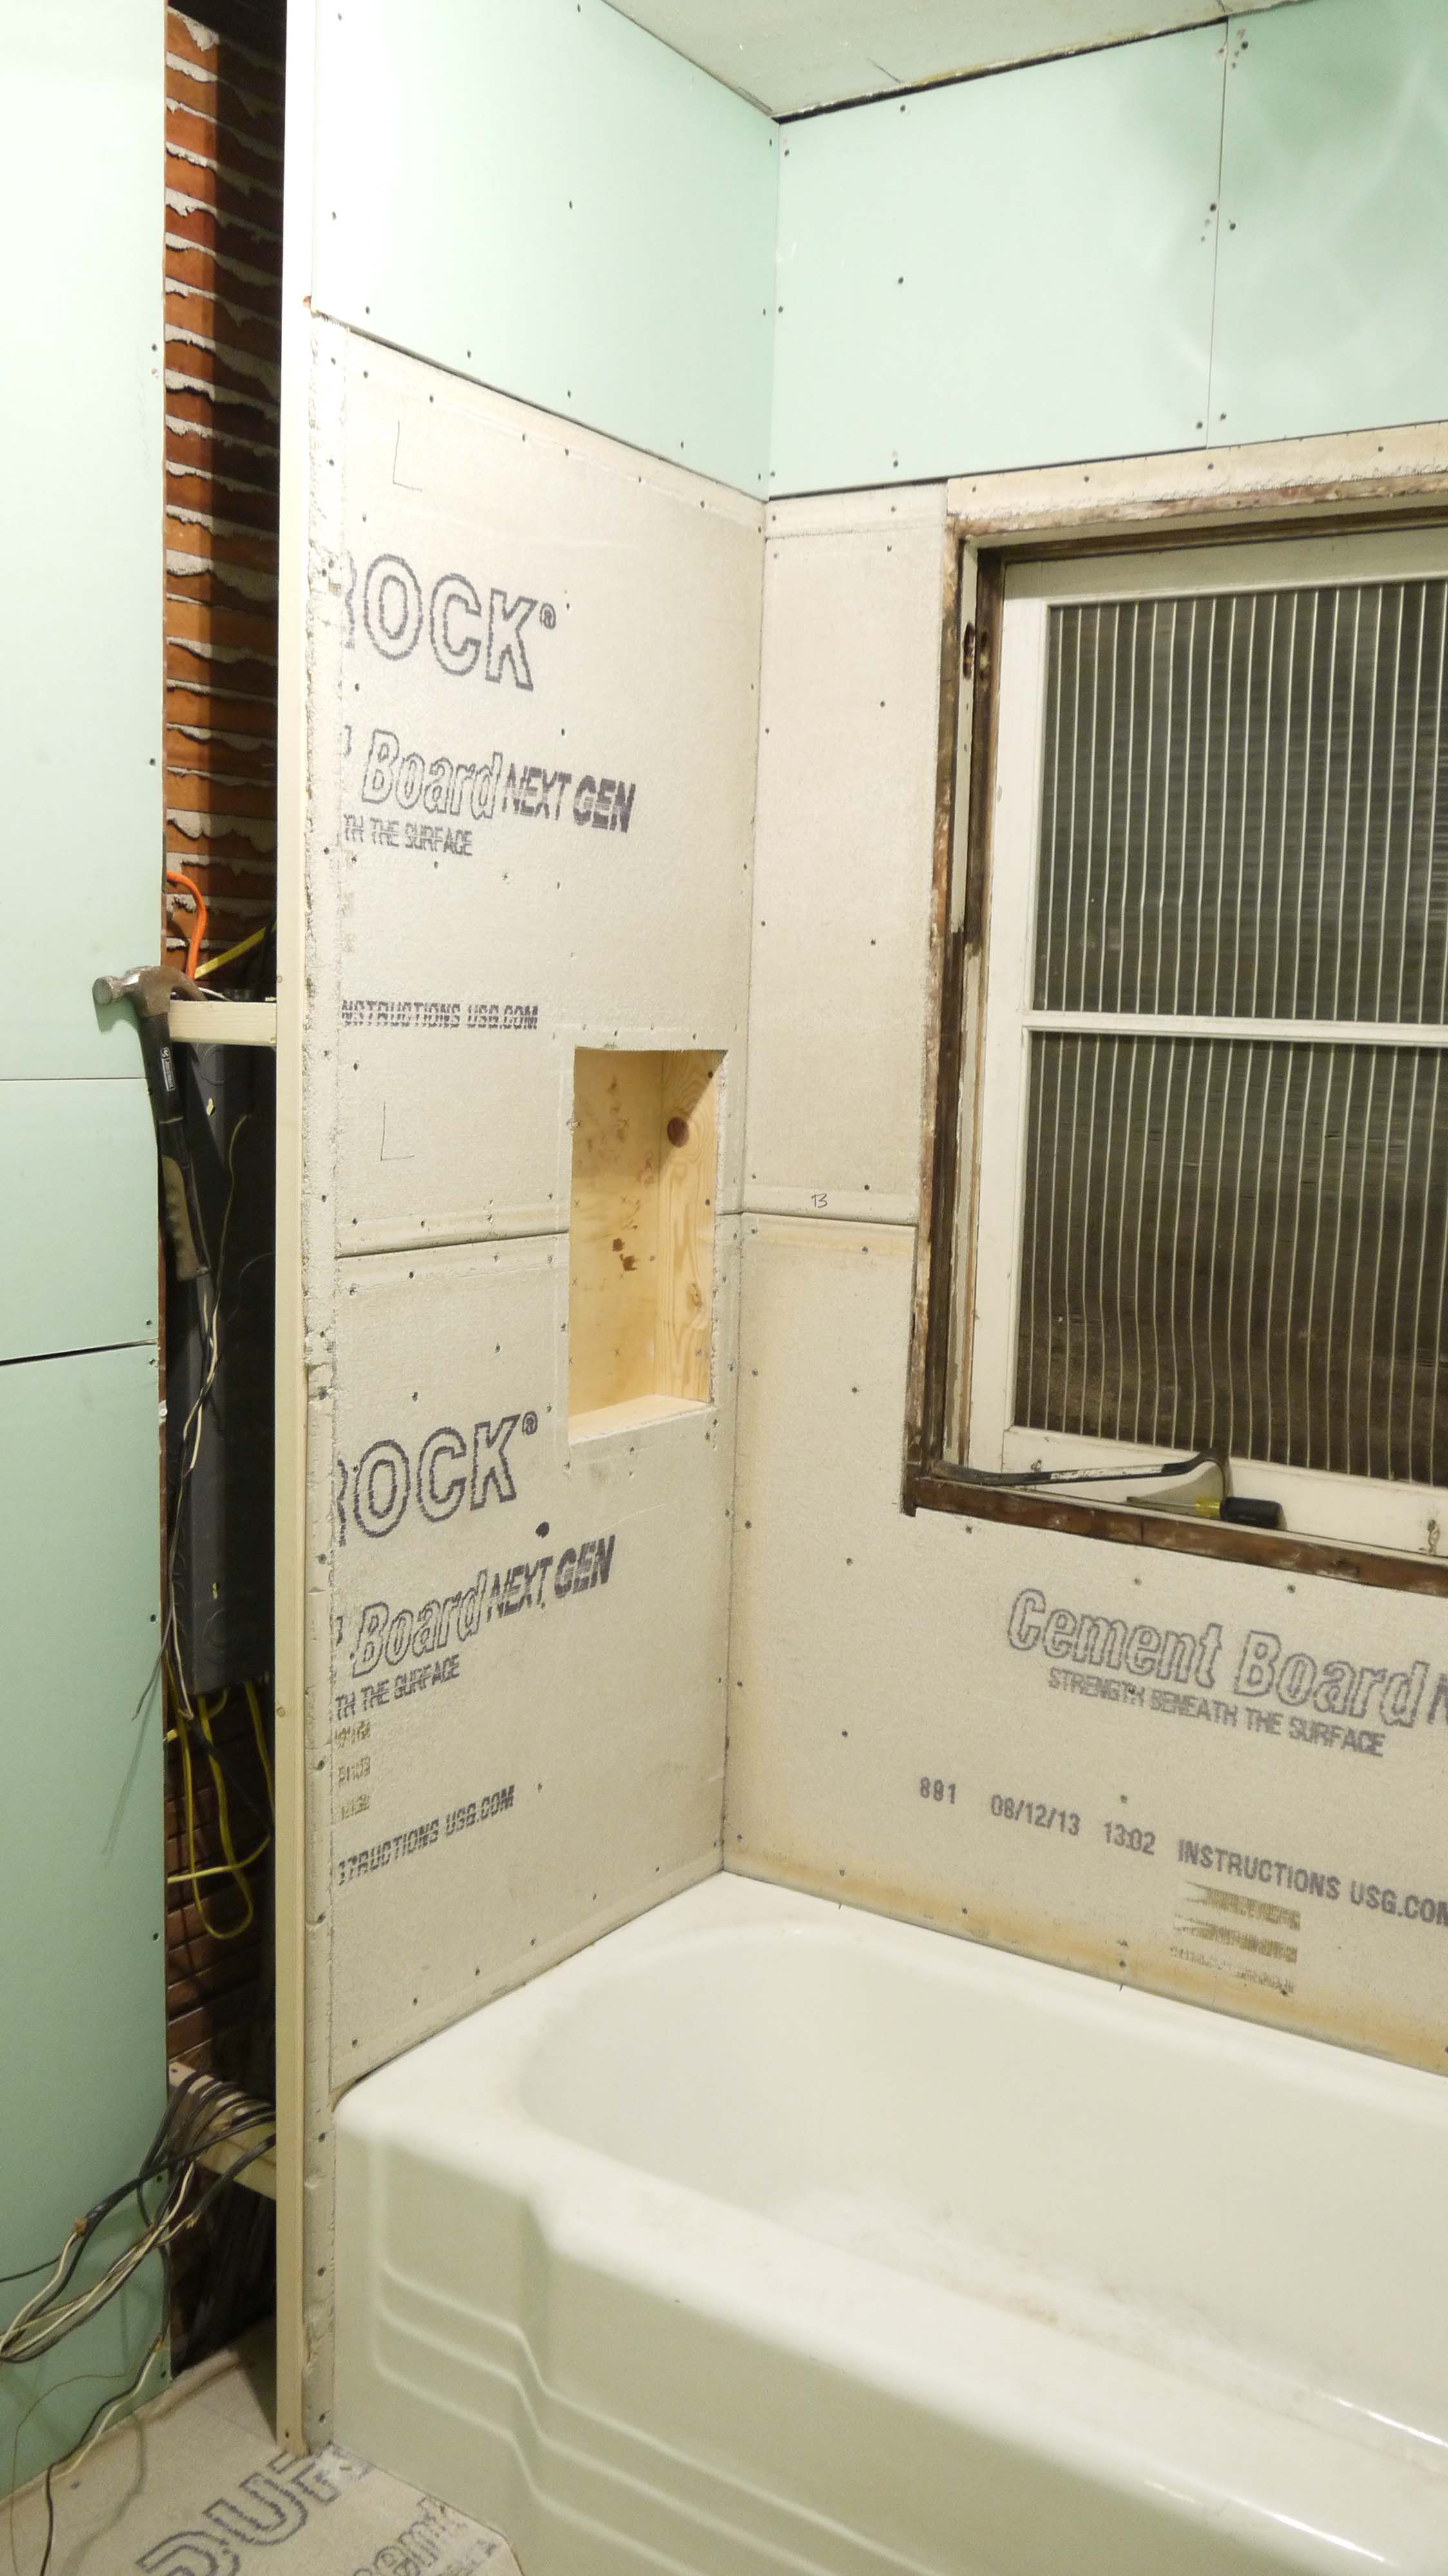
Oh, except the niche. I still have to cut the smaller pieces to fit inside that area.

Don’t look for regularity in the screws. There isn’t any. I put a screw wherever I felt it needed one. And especially don’t count how many holes there are without screws. Screw guns are so finicky + extremely hard old-growth lumber wall studs = a lot of stripped out screws. But the next step should fill and cover all of those. Bring on the mud!
Getting A Little Wired
Posted by Adam A. Ries in DIY, Home Improvement, Interior Design on June 25, 2014
Although I do admit to keeping cold beer in the fridge, no, this post is not about my social drinking habits. I’m referring to the work at the house over the last few weeks. It started like this:
I have 2 great friends who had previously committed to helping with any renovation-related tasks; “just ask,” they kept saying. Up until this point, I mostly knew what I was doing or was able to watch instructional videos through YouTube or This Old House to learn what I needed. But it was getting time to wire up new light fixtures and outlets in the bathroom. So I called in the big guns, aka Paul and Dennis. Paul is a former trade electrician, and now part of the maintenance department at a local manufacturing company. Dennis has every construction tool known in the industry, along with knowing all there is to know about construction and especially electricity; he now owns a printer supply store here in town. They both showed up the Saturday before last, toolboxes in hand, and scratched their heads simultaneously at the sight of the existing electrical panel.
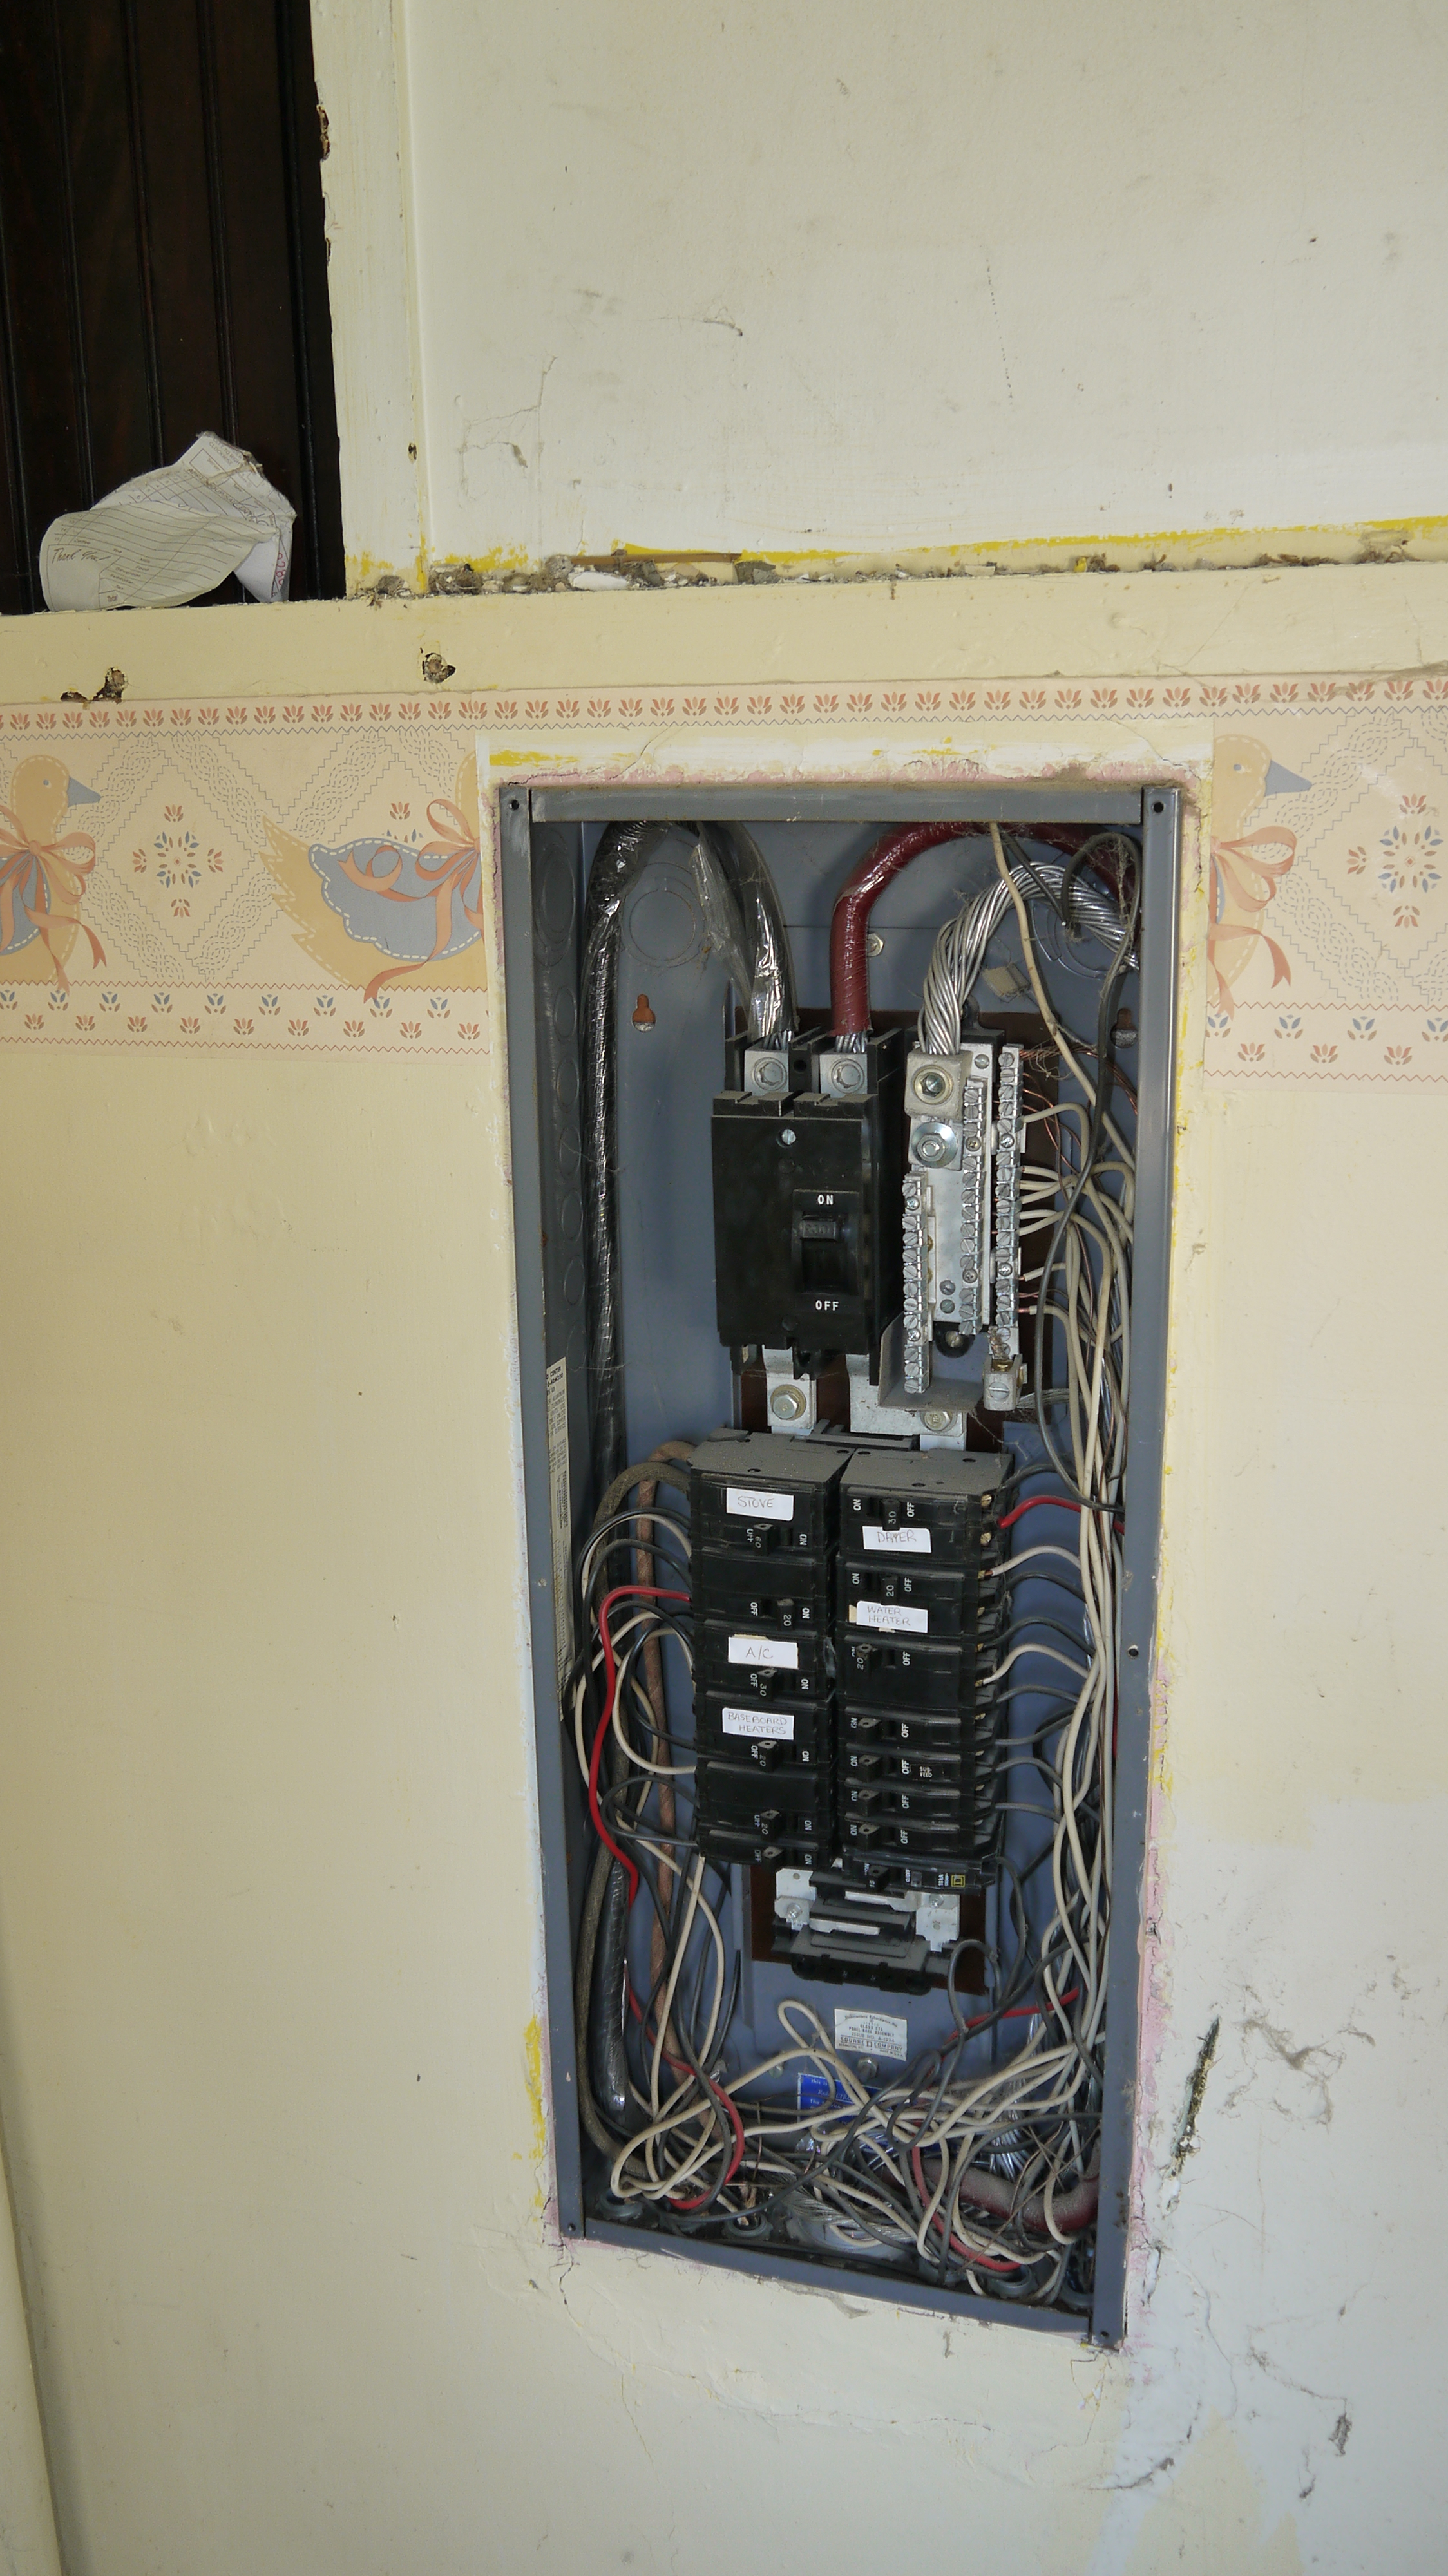
The rats nest of wires was enough to make me dizzy, and they felt the same. Now here’s the interesting part: only 1 breaker in this entire panel is in the “on” position, yet throughout the entire house every outlet and light fixture is working – including the garage and outbuilding. Other than the range, dryer, and heaters, I have no idea where or what the remaining 7 breakers must serve.
So while Paul taught me how to install outlet boxes and the tricks of the trade for running Romex wire, Dennis went to town stripping out the panel box. They both agreed the 200 amp service box is in good shape and enough space to serve the house, they wanted to organize the wire maze and distribute power in the house onto multiple breakers, the way a new house would be wired.
In the bathroom, I thought I had a reasonable electrical layout planned (2 outlets near the light switch), but both of Dennis & Paul’s wives and another female friend agreed that I should plan on additional outlets for all of the crazy hair and beauty products women use everyday and apparently need a half-dozen outlets to power. I settled on a double outlet box on either side of the vanity mirror, a straight line down from where I had already planned for light sconces flanking the mirror.
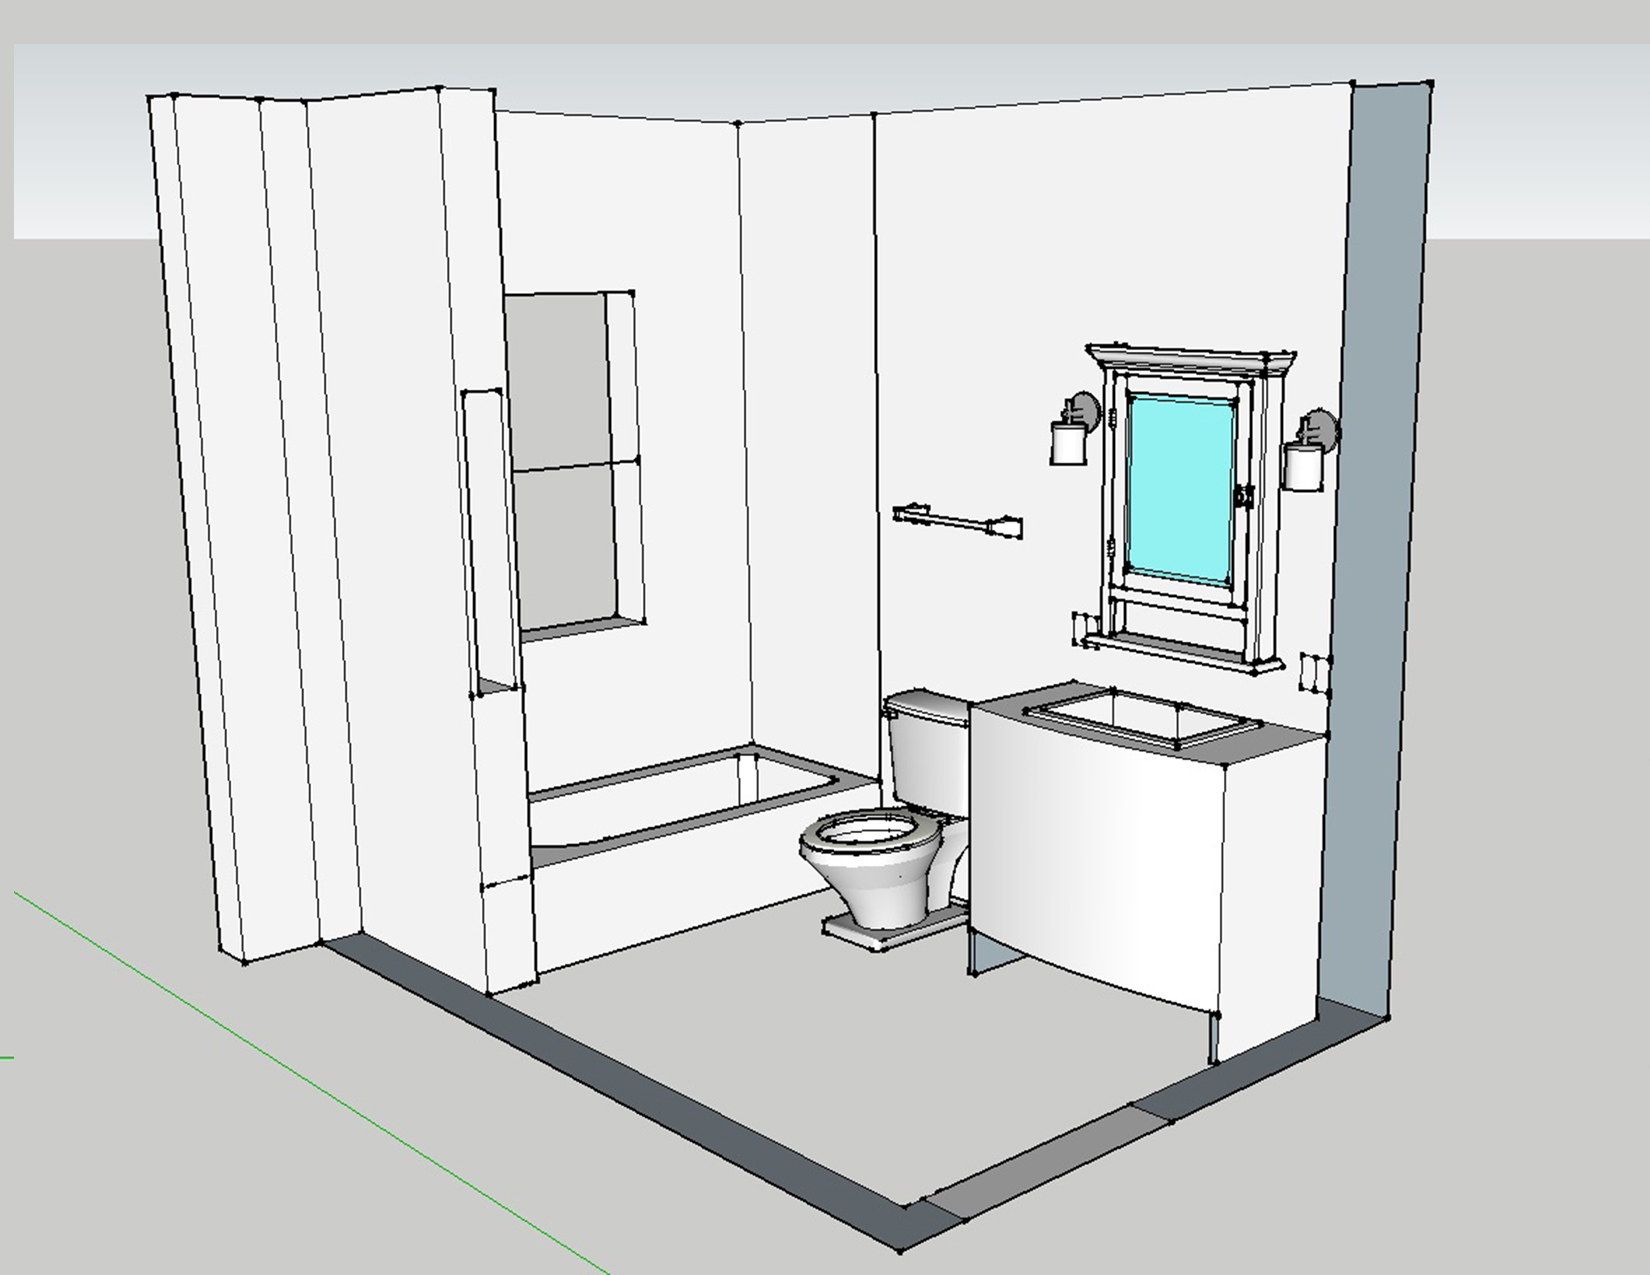
This quick 3D model was made in SketchUp, a great tool for quick rendering to plan out a space or construction detail.

This photo shows the double sets of outlets, with the light fixture boxes above each one, and the light switches on the wall to the right. One switch will control the light sconces beside the mirror, the other is 2 small switches so I can independently turn on and off the ceiling exhaust fan & light. The bathroom did not previously have an exhaust fan. Putting one in was just a matter of finding the center of the room and then finding the nearest ceiling joist. I drilled a hole from up above so I knew where the edge of the joist was, then used that as my starting point for drawing a square on the ceiling the size of the fan housing box. A jigsaw cut the plaster and lathe, and the box dropped right into place from above the ceiling. Paul held the box flush with the plaster ceiling down below while I used drywall screws up above to secure it to the ceiling joist. Once it was wired, I left it go until just yesterday when I finally drilled a 4″ hole in the gable end of the house and vented the fan outside using a dryer vent cover and 4″ flexible dryer hose.
Opposite of the bathroom in the laundry/utility room, we wired a GFCI outlet for the washing machine, a 220 volt dryer outlet, and rewired the laundry room ceiling light using 3-way light switches. I can turn the light on from the kitchen doorway like before, but now I can also turn on the light as soon as I come into the house from the back door. In the same bay at the back door, we left space for additional switches for a new back porch light, outdoor light, and outlet for the utility room. Having all the switches in one box will look so much more organized than 1 beside the door and 2 others on the adjacent wall, all at different heights currently.

In the process, Dennis made sure everything was split onto appropriate amount of breakers in the electrical panel, and even labeled each breaker space! And did I mention that we are using outlet boxes? As in, every outlet or switch is housed correctly in a box. Why do I emphasize that? Of the entire house, we have only found 3 or less receptacles boxes. All the other switches or outlets are simply a hole cut in the wall, bare wires touches plaster, lath, wood paneling, baseboard, etc. That’s perfectly safe, right? NO! Even our local Fire Chief remarked that he isn’t sure how the place didn’t catch fire at some point. I know why: because this house was waiting on me.

And here is how the breaker panel looks now – complete with hand-drawn breaker diagram on the plaster wall to the right. Each wire has a purpose and a home. Don’t ask me where those additional wires at the bottom must lead, because the whole house still has power even though those have been pulled out of the box. They are probably individual baseboard heaters, but I still need to trace each one. Eventually, Paul and Dennis assure me they are going to help me get the entire house re-wired. From what they’ve taught me so far, it shouldn’t be too bad; the majority of it seems finished with the bathroom and laundry out of the way. The rest of the rooms will just have regular outlets, light switches, and ceiling lights – replacing what’s already there – and adding all necessary receptacle boxes!
Getting Drained
Posted by Adam A. Ries in DIY, Interior Design on May 27, 2014
Not physically myself, no. In fact, I couldn’t be more excited to leave work each evening and throw on dingy clothes to continue playing home renovation. No, getting drained in the sense that any flowing water can now find its way safely out of the house. Which, as Martha would say, is a good thing.
I started with the kitchen sink, worked my way to the washer drain, and then to the existing soil stack. It already had an arm coming off from the old washer drain, so I made the connection between existing cast iron and new PVC pipe with a rubber flexible coupling (often called by the brand name Fernco). This was a pretty easy drain line. The kitchen sink will have a trap above the floor, so it meant installing a trap for the laundry drain, and then basically 2 straight stretches of pipe.
Then this past weekend I tackled the bathroom drains. The worst part was ambiguously cutting pipes and assembling fittings when I didn’t have exact measurements down in the crawlspace where I was working. I mean, I have the bathroom planned out down to the inch, but without a floor, its just a space between the rafters. But if I laid the floor down now, then it is twice as much work to squeeze in and out of the crawlspace from the outside. (I never realized how convenient it is to have a hole in your floor!) So I did rough measurements, then fine tuned them until everything lined up both above and below the floor. It feels so nice to have pipes glued and sticking up through the floor. I still need to finish the PVC drain vents running up into the wall cavity, connect the three individual vents (sink, toilet, and tub), and run the main vent up through the roof.
 Basically, this photo shows what I am trying to accomplish. The red highlighter shows the bathtub drain; the yellow is the toilet drain; the blue is the bathroom sink drain, and the purple is where the drains all connect and go to the sewer line. The green highlights the drain waste vents, which allow air into the pipes as the water drains out of each fixture. These vents prevent a vacuum when a sink or tub is draining, and eliminates slow draining tubs or gurgling noises when draining a full sink (tigers in the drain, as I’ve heard it called).
These vent lines should be easier, I think. The measurements don’t have to be perfect to align with a fixture, and they will be hidden inside the wall and then up through the roof. Then its subfloor time, how exciting!
From my research, everything I’ve read recommends a subfloor thickness of 1 1/4″ before laying tile. This is so the floor is strong enough not to flex and crack the finish tile or grout. And if I’m spending money on a nice tile floor, there will be no flexing going on. I decided on 3/4″ osb as the subfloor structure, and then 1/2″ cement backer board to to apply mortar and tile onto. The cement board is also very strong and sturdy, and will help support the floor but also give me a ready surface to lay down tile. The only down side is that the kitchen and bathroom floors will not be a smooth transition, but instead a 1/2″ higher on the bathroom floor. This is the minimum height allowable for most ADA floor transitions, so I think it will be rather unnoticeable with a nice transition piece.
