Archive for category Interior Design
Not yet floored
Posted by Adam A. Ries in DIY, Home Improvement, Interior Design on May 10, 2014
Finished the last of the plumbing supply lines today, but no, the bathroom still does not have a floor. Because I spent all morning loading and hauling 2 truck loads full of scrap metal and old pipes to the local metals recycling center. The new company that opened a few years ago is much more competitive on price than another local company, and they have much better customer service when I called to get metal prices over the phone. That better customer service was experienced in person, too.
All together there was galvanized steel duct, cast iron pipes, steel pipes, copper pipes, brass fittings, aluminum cans, steel cans, buckets of scrap metal (pulled nails, screws, other small parts & pieces), sheet aluminum, the old steel furnace housing, and the cast iron furnace heater.
Two trips and one small cut on the forearm later, I walked out with cash in hand. Not to shabby, considering half of what I scrapped in was just laying under the house. FREE. All I had to do was carry it out and load it onto a truck. In total, the cash I got was close to half of the amount I’ve invested in PEX hoses & fittings for the new supply lines. Nothing like tearing out old plumbing to pay for the new! (Whoa: imagine if every DIY project was like that… what you tore out would pay for half of the new project?)
Now it’s onto choosing and installing a water heater, but also installing the drain lines. The only portion that concerns me is the home’s original cast iron sewer drain. I’m not sure how to connect the new PVC drains into that, to end up with a leak-free drain that will last. So I need to make friends with a plumber and ask for help.
So now for a peak at the new bathroom layout!
Below is the original layout, with the tub and toilet so close together, sitting on the stool meant soaking your feet for a bath.

Here is how I am planning the new bathroom. I love Google SketchUp for quick floor-planning and 3-D modeling. Its quick to learn, but if you want to spend more time you can actually create a very detailed 3-D rendered model of a space or object. I literally drew out 12 different plans of how to move the 3 bath fixtures around in this space, and this naturally came out as the best solution.

You can see the door through the wall at the right, and the window above the tub on the left. Overall, I think this floor-plan of the bath feels so much more open. All the bathroom drains will be along one wall, which I hope will be easy to connect.

The bathroom is 68″ wide, and the tub is only 60″ long. This leaves a 8″ space between the tub and the finished wall. I tried several different versions of shelves, skinny cabinets, or other storage in this narrow nook, but decided on a knee wall to act as a ledge for bath bottles and such. The ledge doesn’t go directly to the window wall. Instead, there is a small chase to run the drain vent up though the ceiling and out the roof.
There will still be room on the wall opposite the toilet for a narrow storage cabinet if I need one. And although I didn’t show all the detail here, I am planning on a built-in mirrored medicine cabinet above the vanity, and another shallow in the wall to the right of the sink.
While drawing out this plan, I took some criticism for the idea of keeping the window. In this layout, the window will be in the shower area. I found several answers online on how to install a water-tight shower window, and they were all nearly the same. This instructional page & photo is what I will be following.
I just think natural daylight and ventilation is too important to close-in the window, no matter the room. Secondly, the window opens to the backyard, more than 50 feet from an alley, and another 50 feet to a neighboring house. If I really feel concerned about privacy, I can order the new window with opaque glass.
Gutting the Bathroom
Posted by Adam A. Ries in DIY, Home Improvement, Interior Design on April 14, 2014
In a 1 bathroom house, it is no surprise the bathroom is about the number 1 priority before I can officially move in, especially since I knew it needed some major remodeling. Just from a simple peek into the bath cabinet, I had pretty much already made up my mind that I would be needing to run new plumbing. There were signs of prolonged leaking around every fixture in the house (water heater, washer, kitchen sink, toilet, tub… I think that’s nearly the whole house). And from peaking into the crawlspace, I could tell that much of the drainpipes were still cast iron or steel, which had me thinking new PVC drains for the whole house would just be good measure also.
So here is basically how I found the bathroom (for all the bath “before” photos, scroll down or click here).
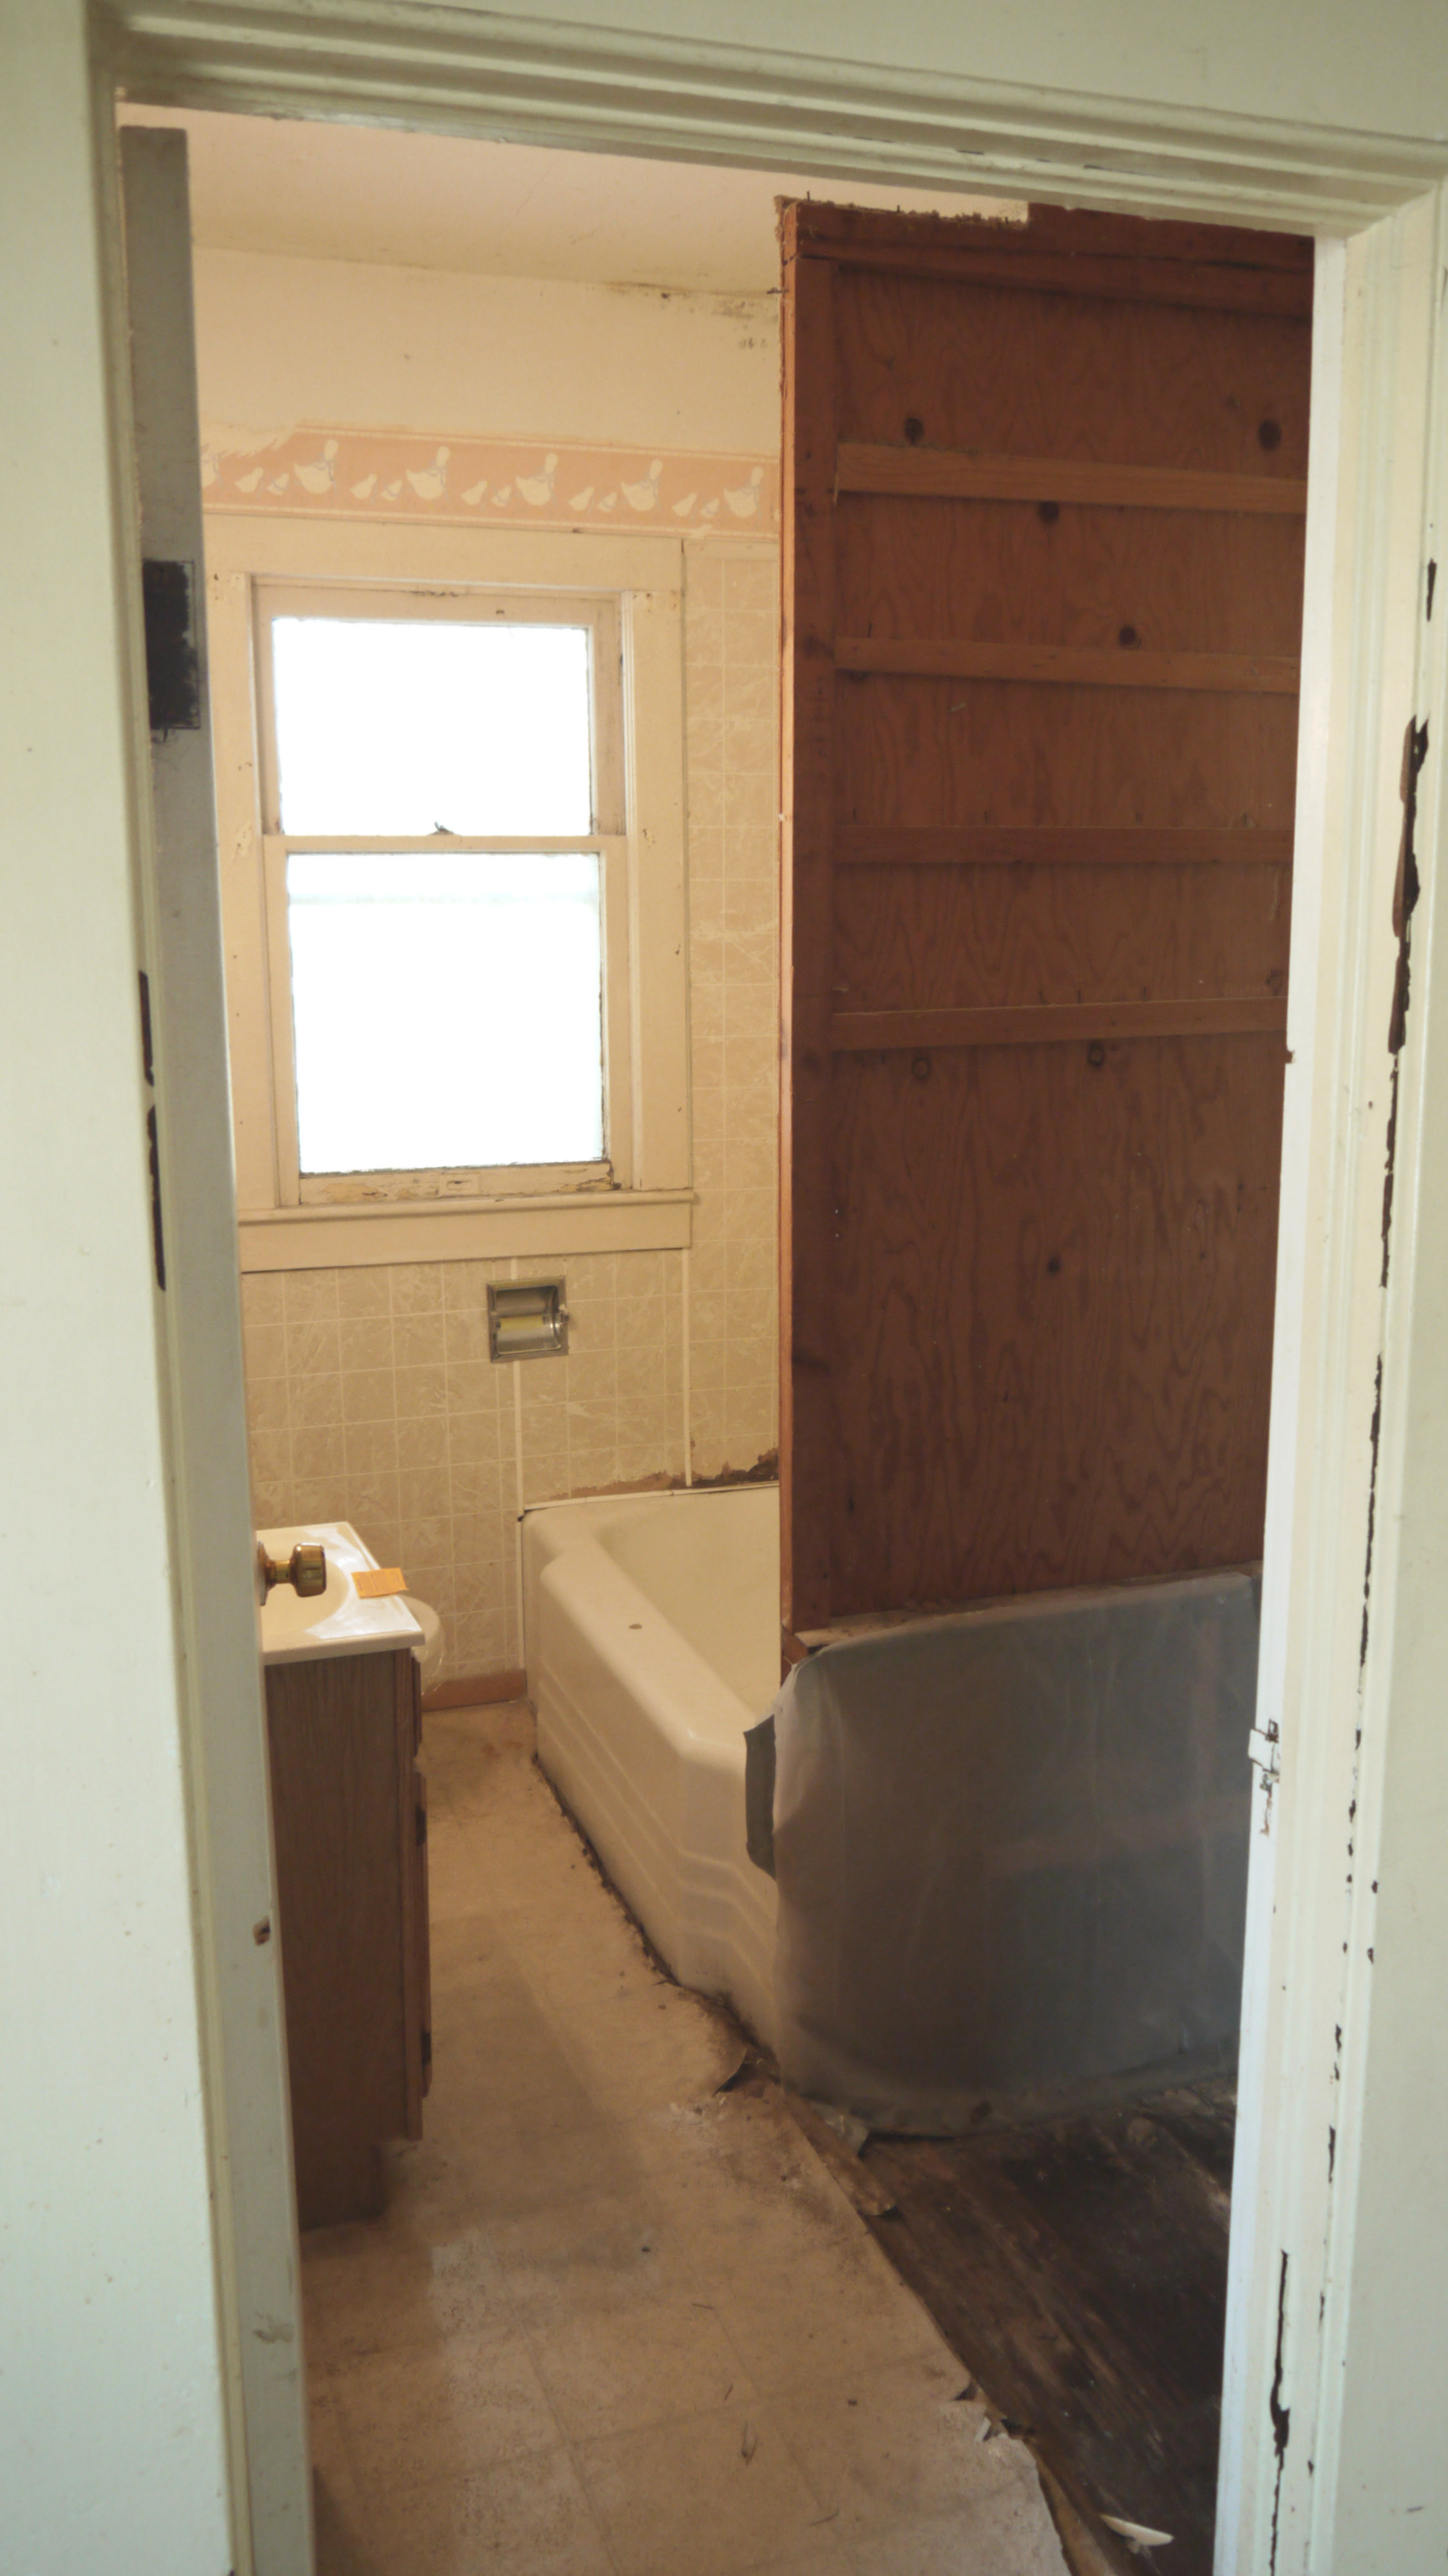
Within just a few hours work, the bathroom was almost empty. I tried to loosen the bolts “holding” the toilet to the floor, but they were seriously rusted tight. So I tried to see how loose it might be to get a saw blade underneath to cut the bolts, and I nearly picked it right up off the floor, no kidding! It was only held on one side, and barely at that. The sink vanity, although not in bad shape (I plan to put it by the curb with a “FREE” sign) literally felt like a child’s sink in height. I can only imagine the neck and back pains trying to wash my hands or brush my teeth in that, not exactly chiropractor approved for my 6′-4″ tall self.
The flimsy paneling wasn’t glued at all, just a few nails into the plaster so it ripped off so quick. And then I started ripping up the flooring. I didn’t take photos of every layer, so let me describe it: imagine a sandwich of linoleum, 1/2″ thick plywood, linoleum, strangely soft and termite eaten panel board, and then another layer of linoleum on top of the home’s original wood floor. Each layer showed signs of being glued at one time, but thanks to the amount of water it survived and what looks like hungry termites, they simply peeled off like a freshly baked Pillsbury grands biscuit. Hungry? Me neither.
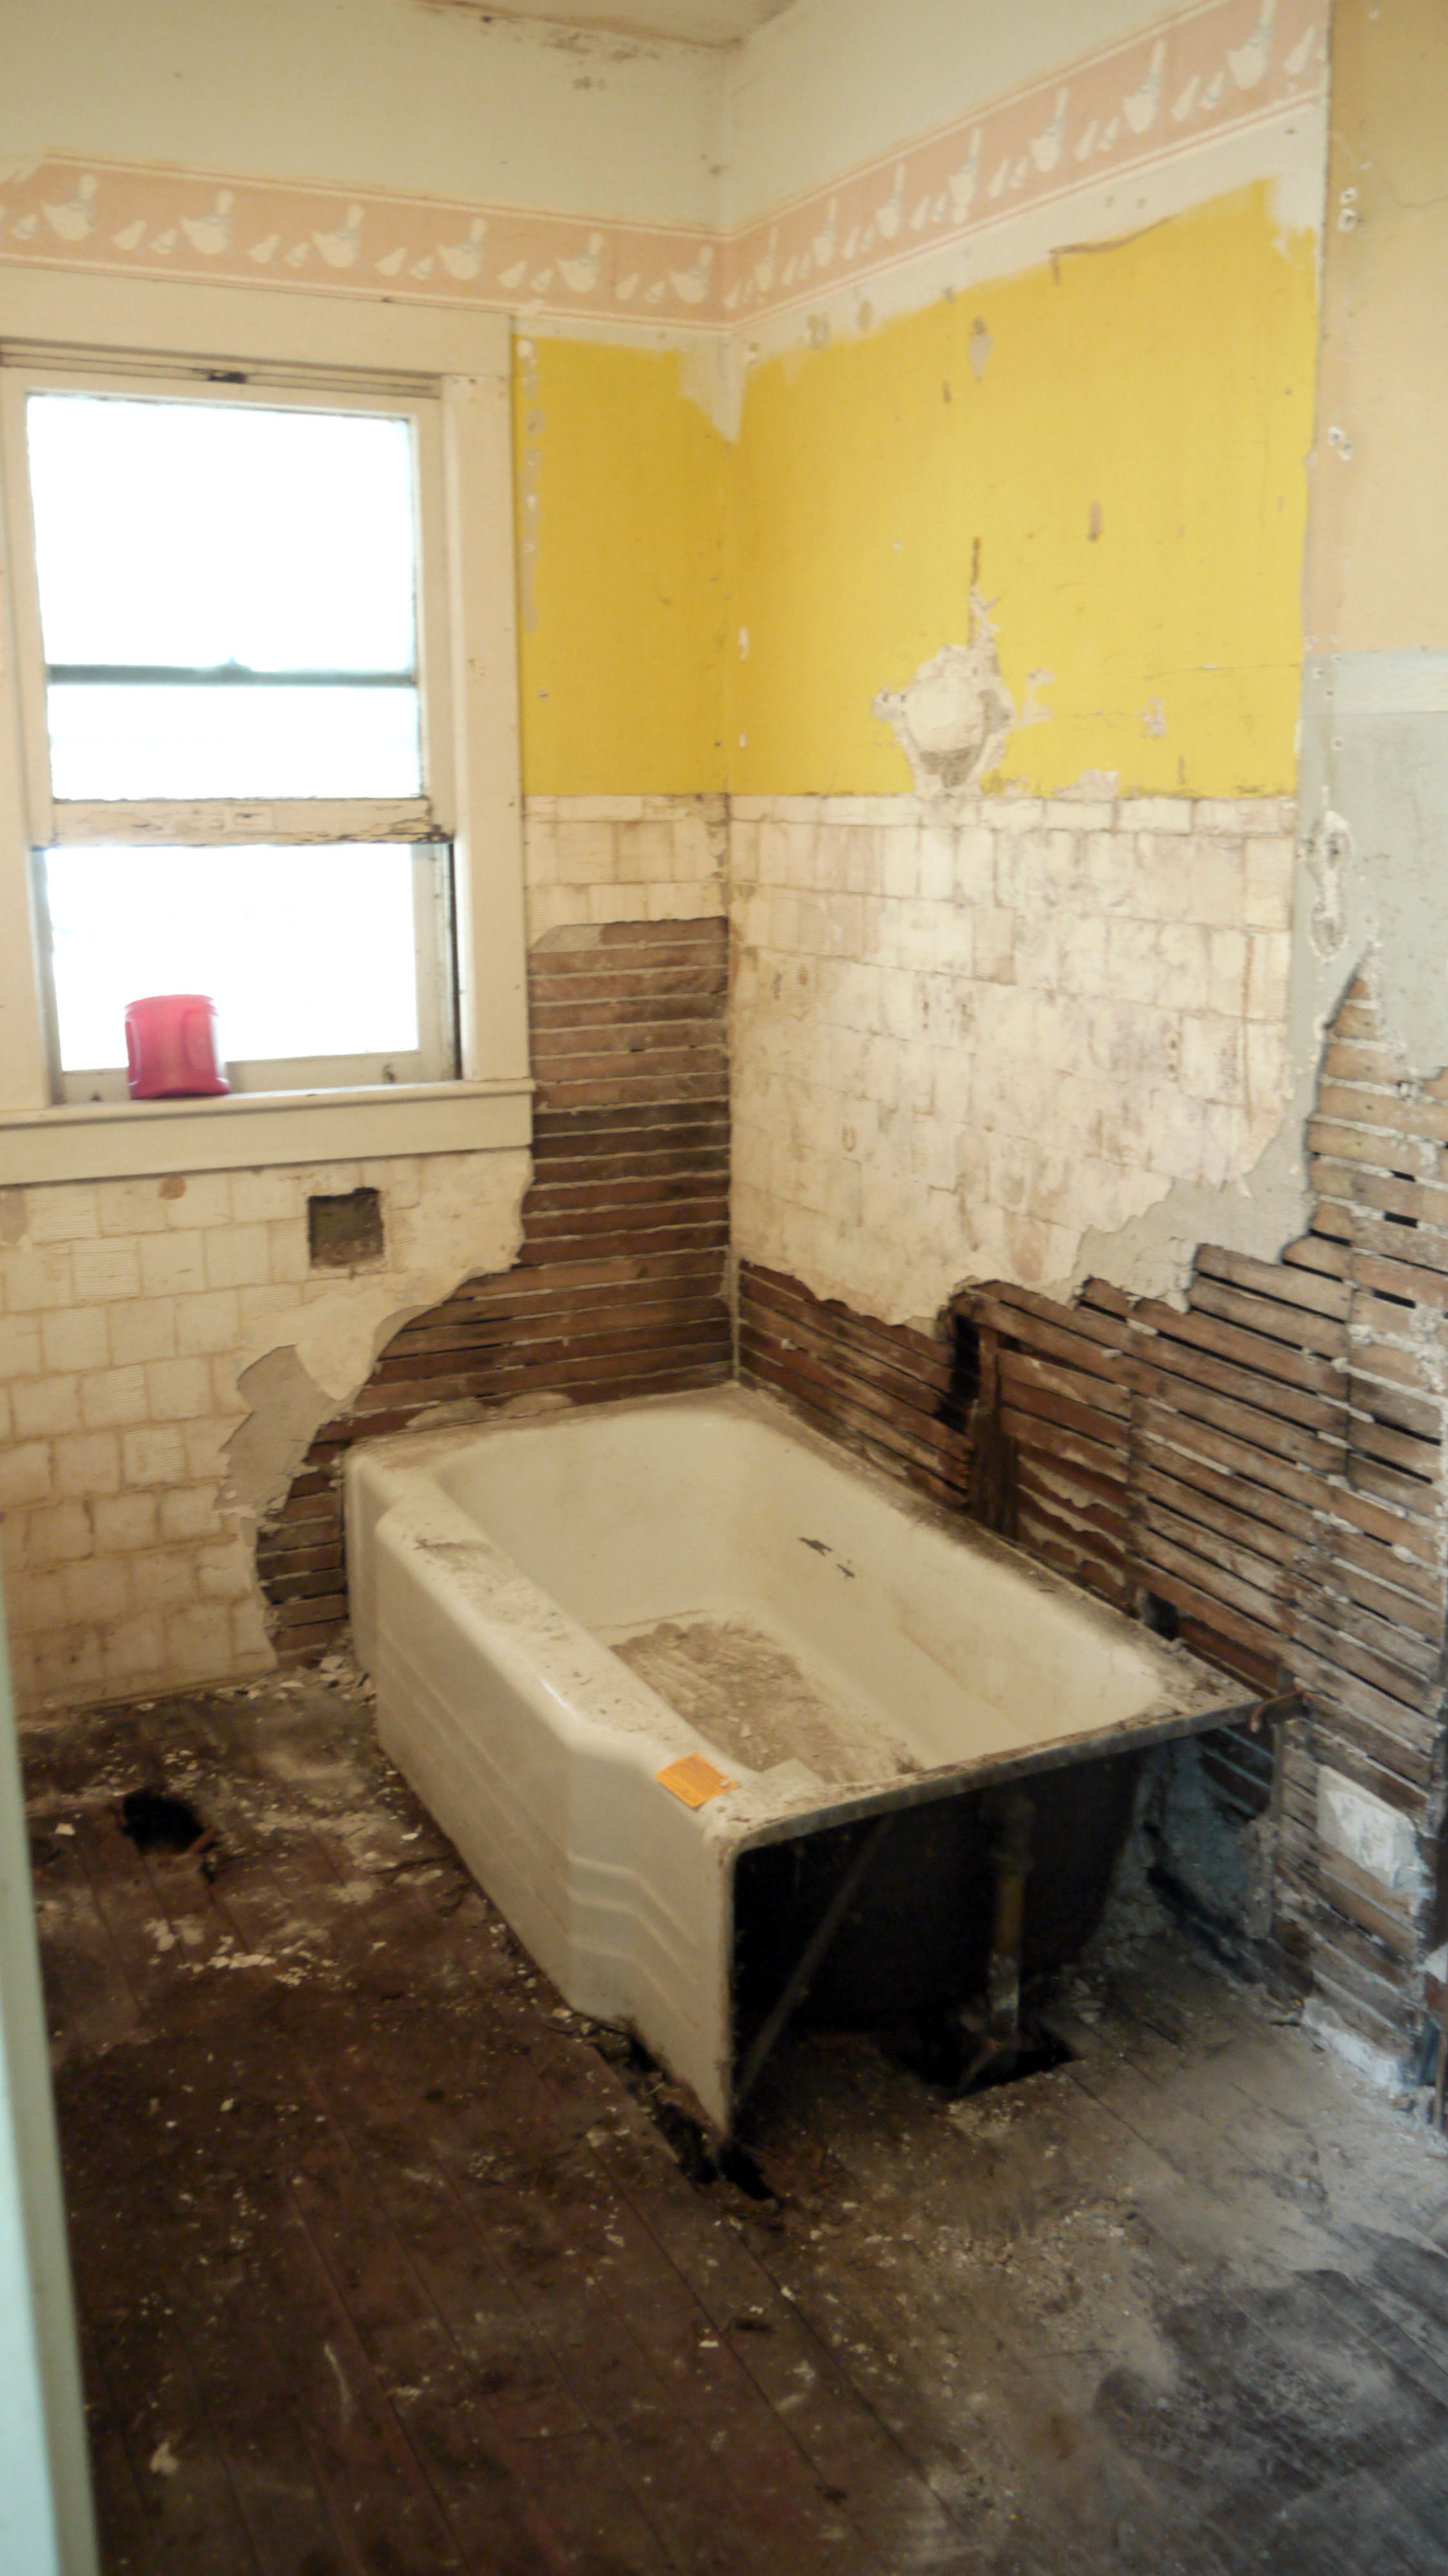
At first, I was super excited to see the wood floor peak out under all those layers of wet flooring. But the closer I got to the tub and toilet stack, the worse the wood got. Until eventually, I put accidentally put my foot right through the spot where the toilet bowl would have been. It just splintered apart. And the board broken at the front edge of the tub was rotted through, it came up like ripping apart a dry sponge. And trying not to fall through the floor was the cruelest game of hop-scotch.
I debated about whether or not to remove the tub. My debate lasted all but 10 seconds. The tub drain had signs of leaking, with every connection corroded. But I have never moved a cast iron tub before. Thank goodness for friends who are willing to come over and help lift a tub. Seriously, thanks Kyle!
Next came knocking down the loose plaster. I didn’t think this step through. I figured knock down what was loose, then take out the floor. Looking back, I should have simply cut out all the plaster and lath for the entire wall behind the tub and on the toilet wall right then. For the window wall, I don’t want the insulation to fall out, and I don’t plan to run any pipes or wires through that wall, so that lath can stay.

So now the tub is sitting in my kitchen, where a normal person would have a stove and refrigerator. But I am not a normal person, so I have a tub in mine. I love the look of the enameled cast iron, and it’s really very solid. I expect it to clean up really well with a ton of elbow grease after I get it reinstalled.
Where I left it on Saturday was beginning to cut out the wood floor. Yes, cried a little at this step, knowing how nice a dark and luxurious wood floor would be beautiful in an otherwise classic black and white tile bathroom. But the amount of rotted wood was just too much, the entire half of the room closest to the window would have needed replaced. I would have found boards to match, and by cutting out the floor I gain a larger access into the crawlspace for when its time to run new plumbing and add new electrical lines to a few other rooms. So attack it I did with the Sawzall, and there’s no looking back now. Plus, many homes of this age originally had marble or hex-tile bath floors, so my finished look should pass as age appropriate.
So what is getting me through the panic attack of not having a bathroom floor at the moment? Below is my bathroom inspiration:

White, lots of white. Except imagine a dark wood medicine cabinet built into the wall, as well as dark wood trim and door. I’m not too much a fan of painted woodwork (yes, this house will be the real test of my paint stripping abilities), and I think a black and white bathroom with just a little bit of deeply stained wood will make the room feel very rich. But in the mean time, I have got some major crawlspace work to do!
Mad Men Chair – Part 2
Posted by Adam A. Ries in DIY, Furniture, Interior Design on March 4, 2014
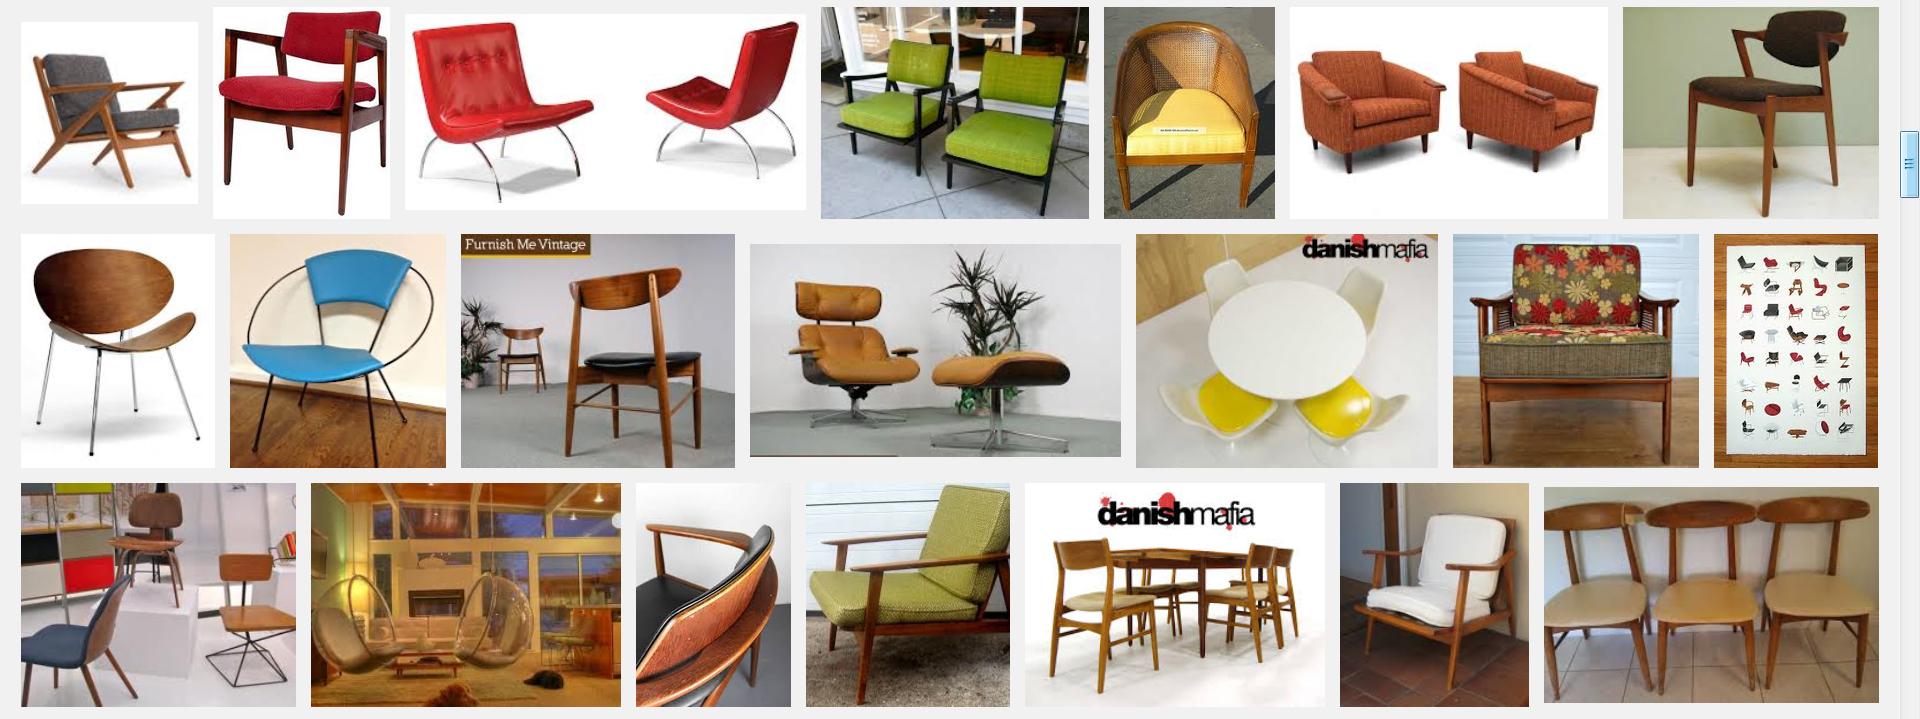
I finished this chair a few weeks ago, but I’ve forgotten to take photos of the finished product. But first, let me define mid-century modern. For me, mid-century modern (or mcm) is hard to describe, but I know it when I see it. The term can apply to homes, furniture, architecture, even graphic design and fashion, popular among designers and cities across the globe from the mid 1930’s to late 1960’s. Mcm furniture can be described as crisp, with sweeping lines and sharp, geometric shapes. Before the 1950s, furniture was more elaborate and involved complicated lines and adornments, mostly adopted from common European furniture styles that were still being used centuries later. Mid-century designers were modernists, and their furniture embodied their ideas of the world and society. They valued simplicity and streamlined their pieces accordingly. Their designs were high-quality, often using materials that were uncommon for fine furniture such as teak, stainless steel, chrome, and bright bold colors. Want to see more styles? A quick Google search and you’ll see the most popular designs of Charles and Ray Eames, Arne Jacobsen, Mies van der Rohe, and Eero Saarinen. I’ll bet you recognize them, and you never realized the enormous impact their furniture has had on home and office design.
But back to my Mad Men chair. This blog post from yesterday showed the before, during, and even my inspiration photo for the finished chair. The hardest part was the upholstery. I tried to stay as true to the original upholstery style as possible, including making the cording around the top edge of the seat cushion and small pieces on each arm. Aside from a little simple sewing, it was a learning experience in how simple folding and a ton of staples in the right place can make anyone a professional in upholstery. The result? A really sleek and finished look.

The color is Varathane Dark Walnut gel stain, the first time I’ve used a gel stain. It didn’t get as dark as I hoped for, so I built the color up by reapplying 3 additional coats. Still a bit more wood grain showing than I hoped for, but I couldn’t get it any darker without losing the chocolate color. Then 3 coats of polyurethane in semi-gloss. Typically mid-century modern wood furniture has a matte or satin finish, but I used what I had on hand. And I knew I wanted it to have a strong finish to resist wear, so the step up in level of shine will be ok for me. Can you see the stitching on the seat cushion and back? It’s subtle, but the lines are there. It might be barely noticeable, but it breaks up the large surface of the seat and back.

The fabric was in the clearance bin at Joanne’s, I bought all that was left. It’s a tweed of some sort, reminds me of ground black pepper. It’s actually a bit darker in person than these photos show.

Seven (7) nail head brads just like the original also. Except they were gold/brass originally, but that color didn’t look right with the gray fabric. I found them in silver at a big box home store and I really like how they came out. You can see the seam on the back of the cushion in the photo above, but that’s exactly how the old one was done also. So that’s what I tried to replicate.

Of the 4 casters, they don’t all match. They are 2 and 2 of the same. You can also see in this photo that each leg has a dark brown cap, originally plastic, which I believe is meant to protect the legs when you set your feet on them. Two (2) were cracked and looked terrible, so I removed them during the tear-apart. I knew I would never find anything to replace them with, so I made new ones out of walnut stained with leather dye. They match is uncanny. You can see above one remaining that has the corner slightly broken off, but I chalk that up as character.
So here is where I started (almost, I forgot a true “before” photo).

And below is my new desk chair. You can see the stitched lines on the seat and back really well in this photo. And its comfortable, oh my is it comfortable. It wobbles a little bit because of the metal structure (which I did nothing but clean really well), and it squeaks a little, but overall its a very sturdy piece.

So let me add up my expenses.
$10 Chair purchase
$16 Fabric
$ 9 Stain
$ 5 Upholstery trim
$40 Total, and probably 10 total hours.
Not bad when other similar Paoli chairs are listed for $250, $275, $365, and up on such sites as Ebay, Etsy, and Apartment Therapy. Not bad at all.
