Posts Tagged Refinishing
Mad Men Chair – Part 1
Posted by Adam A. Ries in DIY, Furniture, Interior Design on March 2, 2014
That’s what I call it, because I am enamored with mid-century modern furniture as so often seen on the popular AMC television series Mad Men, set in New York City in the 1960’s. The fashion, the furniture, and the social context they build in this series had me hooked. And now I have my own Mad Men chair.
It was probably over a year ago, shopping with a friend at a nearby independent furniture store that I first saw it. The store was having a “retirement & going out of business sale.” Lots of new beautiful furniture, but even on sale it was all a bit out of my budget. First floor, upper floor, full of wonderful items to draw inspiration and future wants. But then the basement is where I saw it. A mid-century upholstered office chair, low to the ground and on casters. It just had “that look.” But it was broken, in the corner, and probably not supposed to be out where the shoppers could see it.
So I found the owner and asked her about it. She laughed. In a store full of deeply discounted new furniture, I wanted the broken old chair in the corner that was probably supposed to be in the trash a week ago and someone forgot about it. “Yep, that’s what I want!” I offered her $10, and the owner declared, “sold!”
Turns out once I got it home, it was a pretty popular chair made by the furniture company Paoli out of Indiana. The Paoli Chair (turns out they made lots of similar styles, all now very popular on Ebay). My chair even had the original label stapled underneath, dated 1963!
Unfortunately, I started taking it apart before thinking to take photos. Can you tell I’m not a professional blogger? Anyway, below is another chair just like it I found on Etsy (with a price tag of over $250!), but in much nicer shape.

Just imagine it all scratched up, with the armrests almost entirely worn of their color, and the upholstery so dirty you want to wash your hands after just touching it. And not yellow. The chair I bought is green, not yellow like the one above.
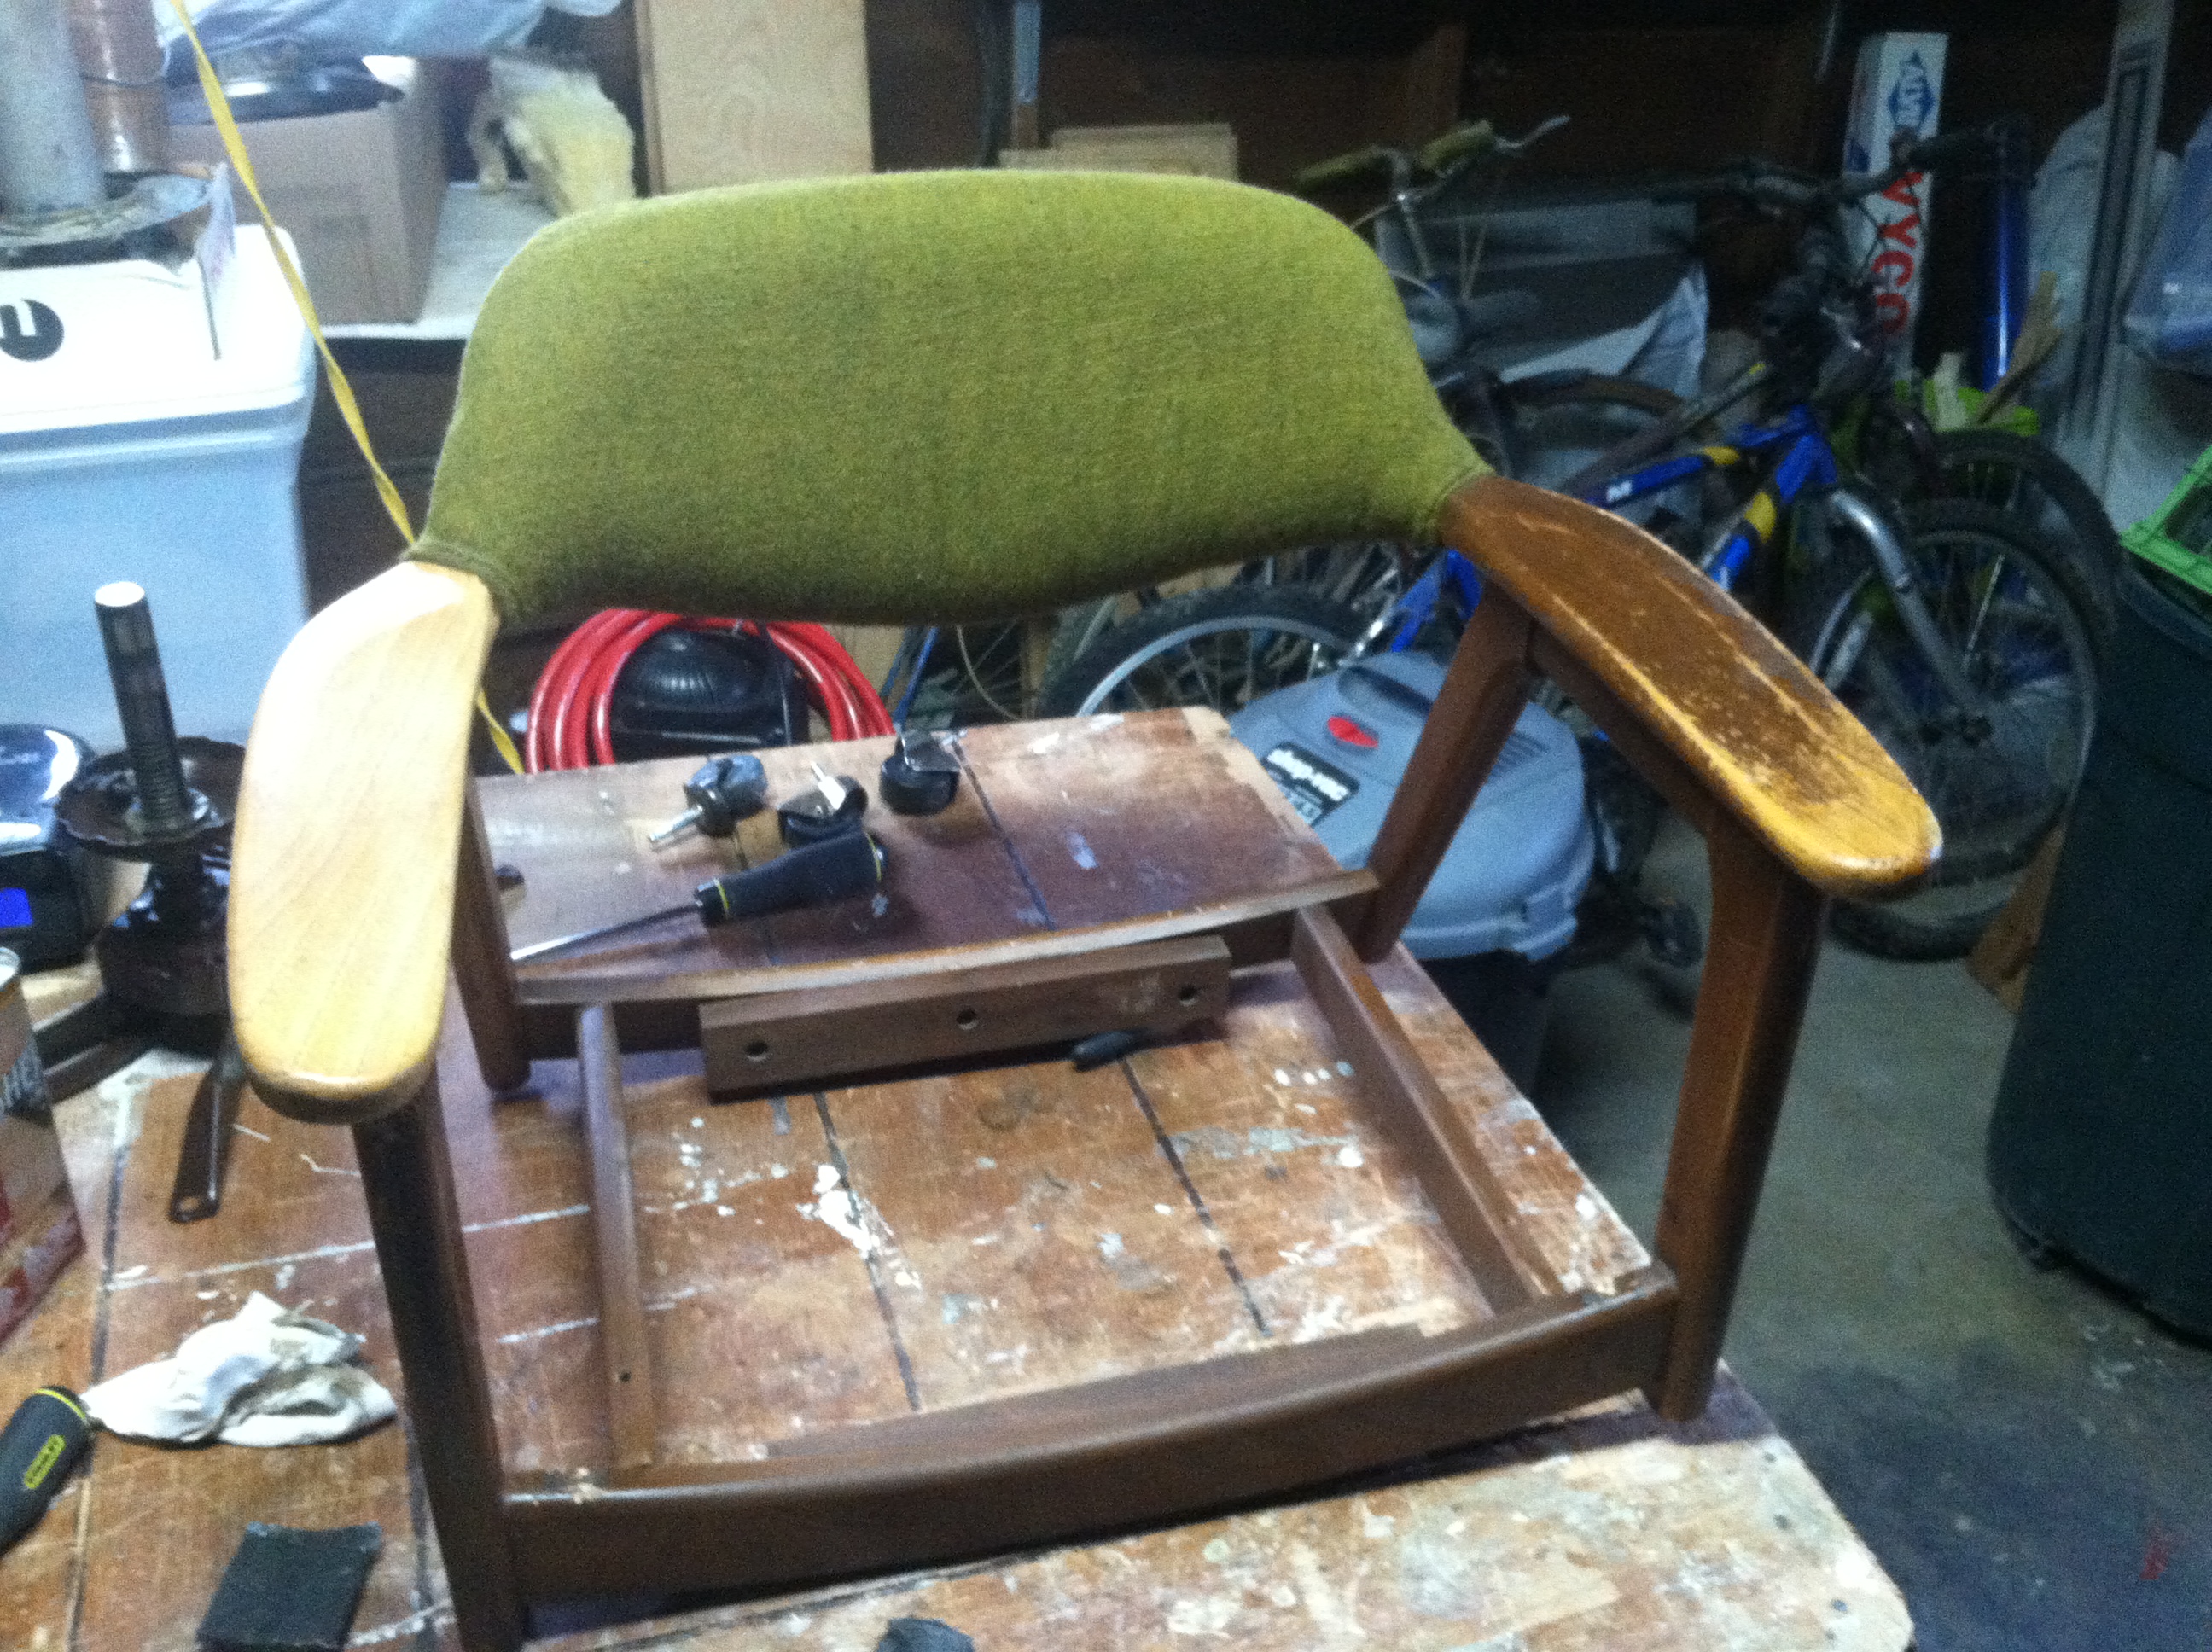
So here is the main body of the chair, seat removed, and starting to strip the finish.
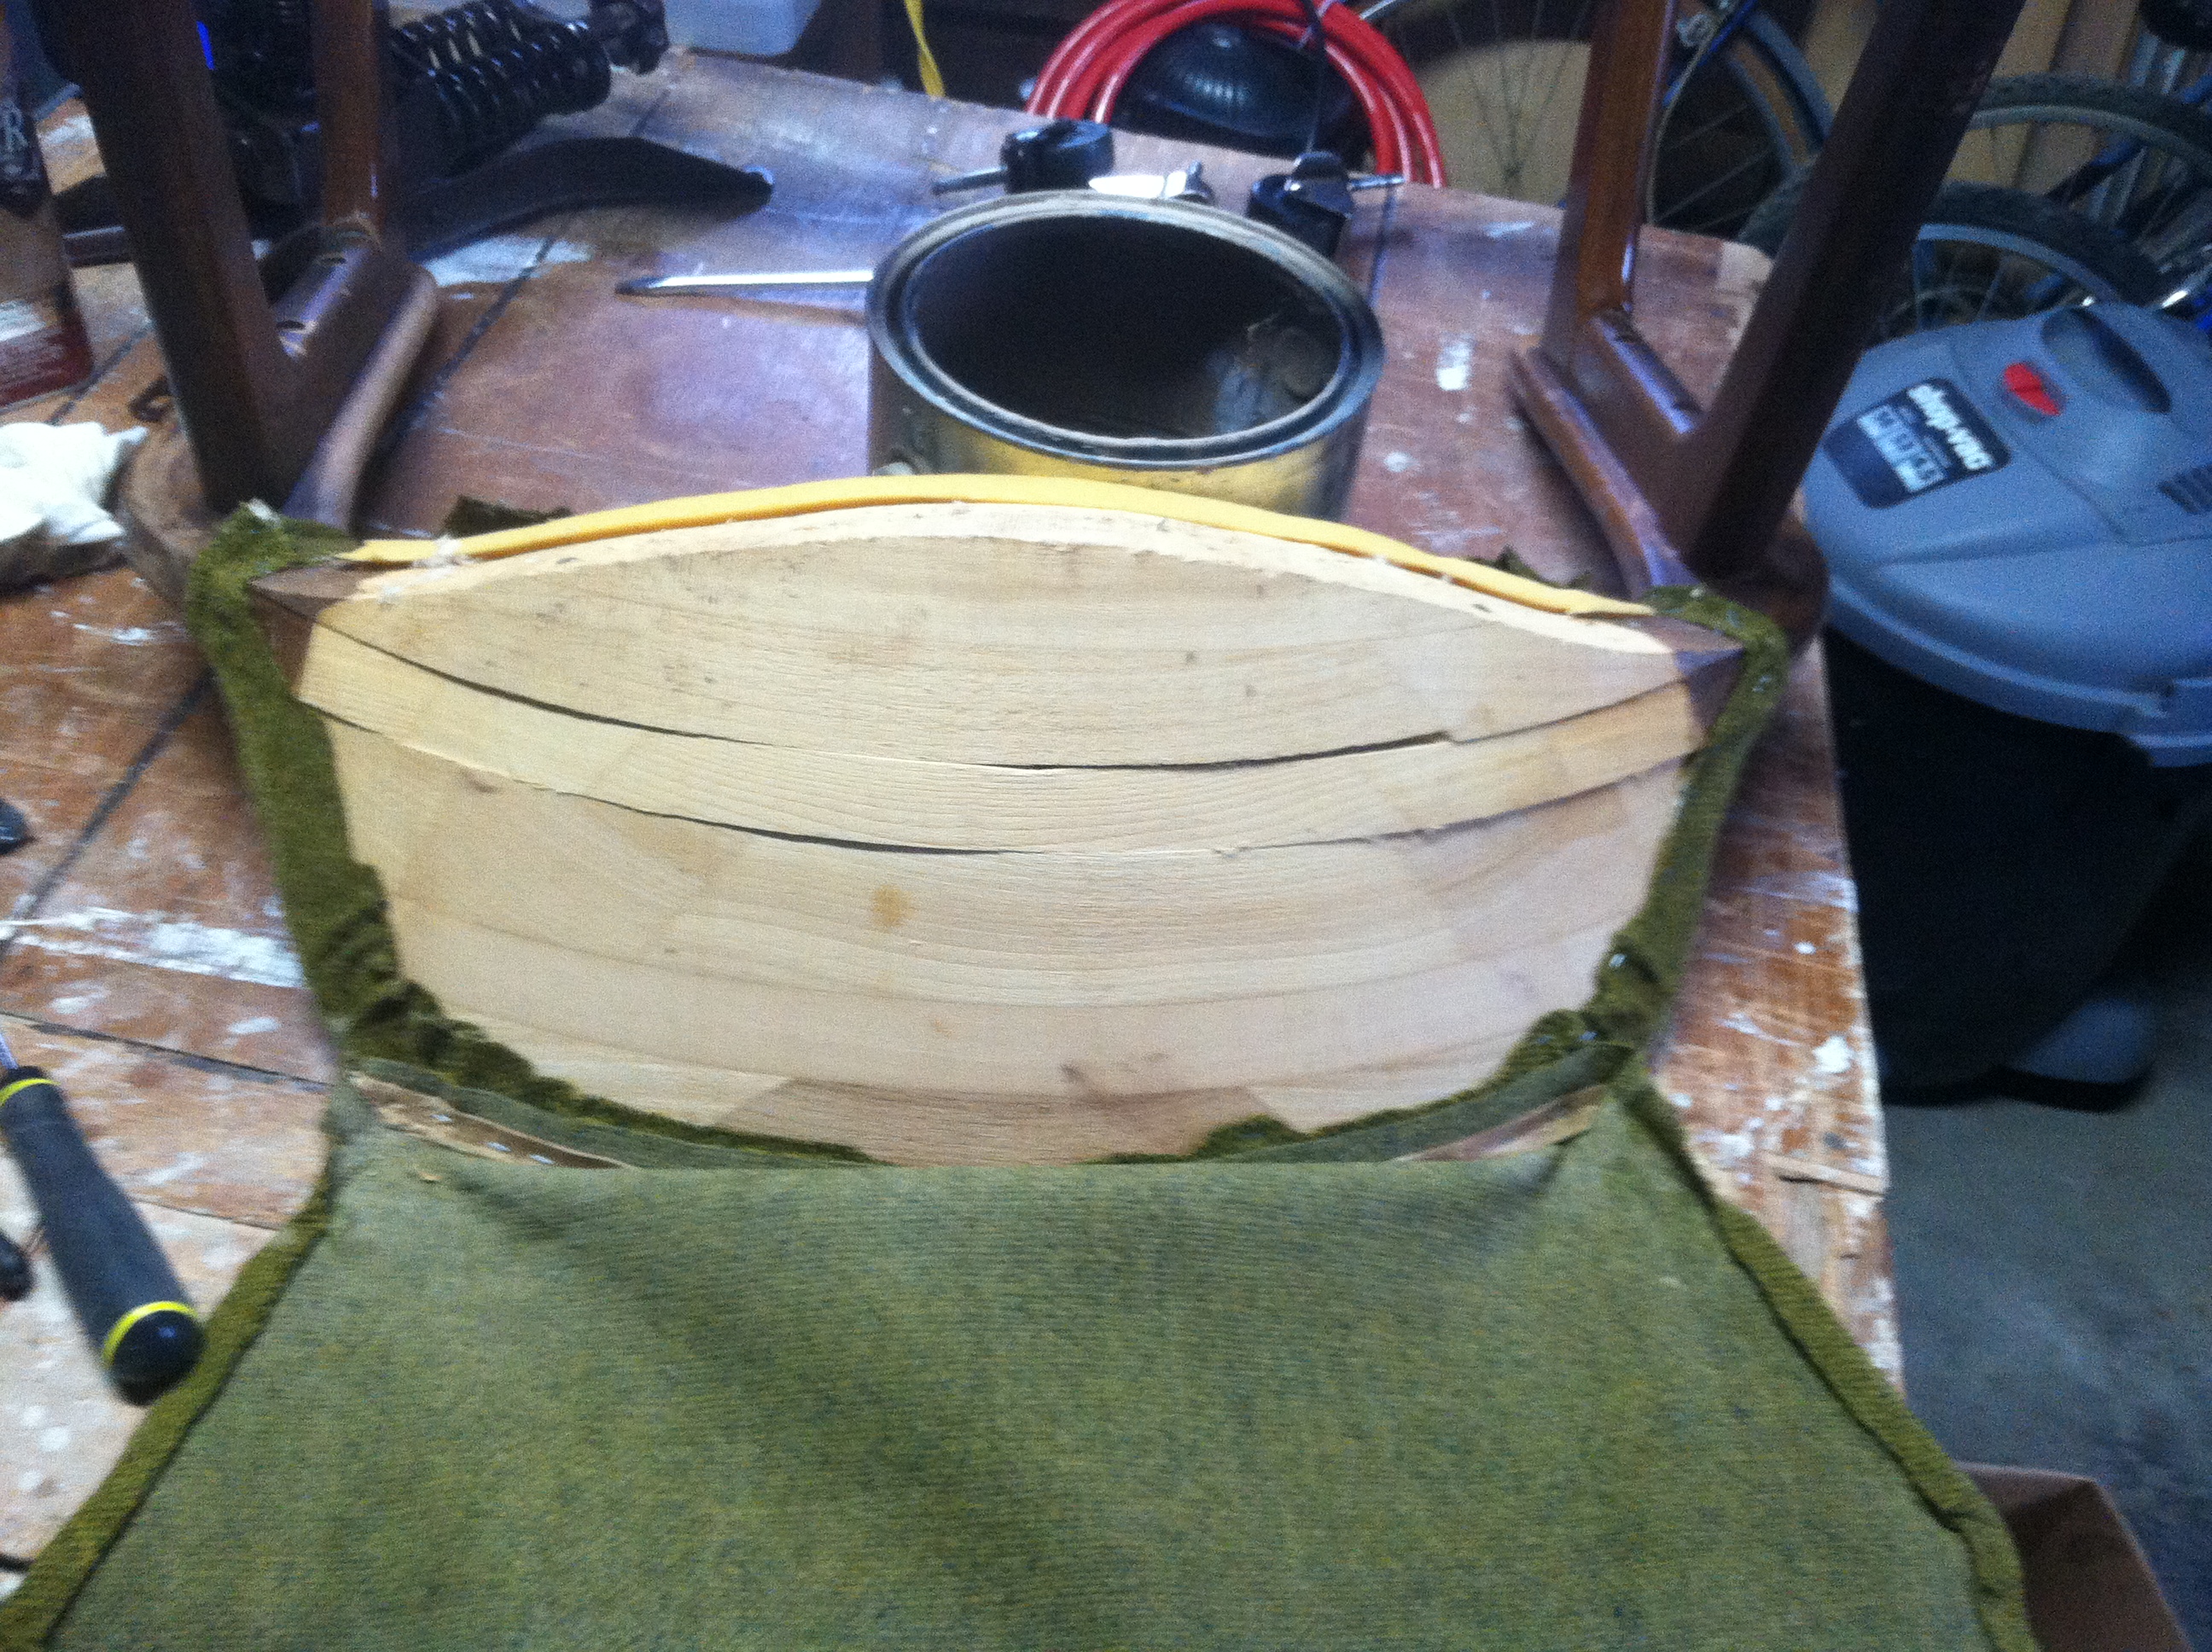
I even took photos of removing the upholstery, to make sure I could re-upholster it the same way and get it looking as professional as possible.

I also saved the fabric. Why? I knew I wasn’t going to re-use it on the chair, but by saving the pieces I have an exact pattern of each piece to use when cutting the new fabric I plan to use.
Once the fabric and all of those staples were removed, I used a liquid furniture refinisher to strip all of the stain off of the chair Then I wiped the wood clean with mineral spirits and a clean rag. This cleans any remaining refinishing liquid off the wood. Then I let the wood dry completely.
Next comes sanding. You could tell where the old chair had constantly banged up against a desk or wall, it almost looked as if a dog had chewed on it. I knew I couldn’t sand those spots out completely without altering the shape of the chair, but I smoothed the spots over best I could. The rest of the chair needed just light sanding. A few spots will still show a little when it is re-stained, but that gives the chair character. It shows the piece of furniture has been used and loved before I came along. When refinishing furniture, I’m not trying to make a piece look brand new, but rather respect the craftsmanship and give it another life.
I’ll reveal the finished chair in the next post. But below is a very similar chair by the same company that I used as inspiration for the finished product.

I’ve always been a fan of monochromatic gray, and I think gray together with wood tones results in a masculine look. The gray fabric on this one is a little light, but I really like how the back rest and seat are upholstered with the stitched lines to give it a little interest. I’m not entirely sure how to obtain that effect, especially since I’ve never done anything more than a simple fabric covered board for a seat. But I strive for perfection, and I’ll post photos of the finished chair here soon, because it turned out great!
Finally, a Finish!
Posted by Adam A. Ries in DIY, Furniture on December 2, 2010
This is Part 3 (but actually Post 4) and the final post in the Roadside Redo Cabinet series. Wanna see how it all began? Click here. Learn how I selected and applied the stain here. Or read Post 2.5 about installing metal drawer slides here.
It has been several weeks now that I have been working on this Roadside Redo cabinet. What is left to do? Apply the finish, put the glass in the doors, hang the doors on hinges, and install drawer pulls and door knobs. Four important things in one post. I will try my best to keep it short and to the point. First was applying the finish.
I chose an oil based polyurethane for two reasons: it is very easy to apply and after a few coats you are left with an extremely durable finish (oil polyurethane is more scratch, heat, and water-resistant than varnish). Plus it isn’t known to “yellow” over time like traditional varnish. Although you can use a soft cloth or bristle brush, I applied the poly with a medium foam brush. This cabinet has a lot of vast surfaces and I felt a foam brush would give me a very even application. Hand rubbing with a cloth gets tiring over large areas, and brushes tend to lose bristles or leave brushstrokes. Now make sure the piece and your working area is free of dust. I use a tack cloth on the furniture and spray down the floor where I will be walking with water and a spray bottle (this minimizes dust from the floor from floating up when walking around a workbench).
Now apply the finish. I applied a thin, even coat to the entire piece, inside and out, as well as to both the front and back of the doors. The poly I chose is Varathane Oil Based, and on previous projects it has done a great job of self- leveling as it dries if you keep the workpiece horizontal. After about 4 hours I moved the cabinet to do another surface, careful not to touch the sides which are still tacky. It definitely takes more time to do only one surface at a time, but the results are worth it.
The product stated you can apply a 2nd coat after 24 hours, but since my garage isn’t insulated and only heated with a portable heater, I waited a full 48 hours to make sure the first coat was thoroughly dry. Although some professionals use a high grit sandpaper to sand between coats, I find it can result in uneven sanding. I found a nylon scratch pad made just for sanding between coats of finish, and really like how evenly it works. Rub down the sheen of the varnish evenly in the direction of the grain.
 Nylon scratch pad for sanding between coats of polyurethane.
Once again I used a tack cloth to remove all the dust from the piece and began applying a second coat. I was not concerned about multiple coats of poly inside the cabinet, so I only applied the 2nd coat to the exterior of the cabinet. Another 48 hours later, I was almost satisfied with the finish. I like table tops (or cabinet tops, like this one) to really have a thick looking, glass-top like finish. That meant lightly sanding the top and applying yet a 3rd coat of poly.

Now the doors. This cabinet came with a square sheet of glass in each door, though I can’t brag about how they were secured. Whoever put the glass in used some sort of silicone or gunk that never dried, it stayed thick and sticky almost like tacky glue. Since there isn’t much stress on these glass doors, I decided to simply use clear silicone adhesive to secure the glass inside the rabbit groove on the inside of the doors. It applies white and is clear when completely dry. First I applied a thin bead right in the corner of the groove, carefully placed the glass, and secured it by pushing in glazing points on all 4 sides.

I then applied another bead of the silicone and used my finger to flatten it into the groove so it looked clean. According to the instructions, I waited until the silicone dried clear before hanging the doors.
Hanging the doors on hinges was pretty simple. I have a quick rule of thumb for cabinet door hinges. For large doors, space the hinges 2.5″ from the edge. For medium to small doors, I space hinges either 2″ or 1.5″ from the door’s edge. I always mark the holes for the screws and drill a fine pilot hole first; this will prevent the wood from splitting for the screw closest to the outside edge of the door. Then I secure the hinges with the provided screws.

On a previous kitchen I took all the precious time of measuring and marking out exactly where each hinge should attach to the cabinet face frame… only to realize that although the hinges were exactly where I measured, the tops of the doors weren’t perfectly straight or lined up with one another. My new method? Have one person hold the door tight against the frame and eyeball it. I still measure and put a piece of tape to help line up the hinges, but I have a helper move the door up, and then left, – left some more, NO, LEFT! – until it is in the perfect place, then I put in the screws. I find this method of being flexible doesn’t often result in removing the door and having to reposition it.
The holes for the drawer pulls were already made; I simply purchased new pulls with the same distance between the screws and tightened them in place.
 Securing the handles & knobs with a screwdriver.
All in all, here is the completed cabinet!. I waited to make sure the poly had cured completely before bringing it into the house to keep the smell and evaporating chemicals outside. Far to anxious to wait (and because I already had things I wanted to store in it), the pictures below give away how my I intend to use the cabinet. Perhaps later I will photograph it again once all the Christmas decorations are up!
")
I was simply thrilled with how this cabinet turned out. Now let me give you the rundown of all my costs involved:
cabinet (lumber)……. free
sandpaper…………….. already had
wood glue………………already had
wood stain……………..$7.99
polyurethane………… $10.99
finish sanding pad……$1.86
drawer glides………….$9.49
glazing points………… $3.29
clear silicone…………. $2.99
new hardware…………$14.10
For a whopping total of (drum roll please?):
$50.71
Not bad. Not bad at all. And cue the feeling of accomplishment; and the excitement of beginning a new project soon!
If you’re gonna do it,
Posted by Adam A. Ries in DIY, Furniture on November 3, 2010
DO IT RIGHT!
That is my mantra. I like to see the end results just as much as anyone else, but a hurried project will look hurried. That being said, this is Post 2.5 of a 3 post series of the Roadside Redo cabinet project Click here to read Part 1 in this series, or here to read Part 2.
When this cabinet was originally built, the top wide drawer was made to slide on wooden rails inside the cabinet walls. This is a very simple solution for a drawer slide but by far not the best solution for such a wide, heavy drawer such as this cabinet features. On its original slides the drawer would not have extended from the cabinet very easily; it would have torqued from one side to the other when pulled out or pushed in. Also, once extended more than halfway, the drawer would have begun to fall out of its opening, potentially falling onto the floor (or someones feet) if pulled out all the way. Below is a SketchUp model of what the left cabinet slide looked like originally, highlighted in red.

With all the time I have invested in refinishing this cabinet I wanted a smooth sliding drawer that would operate easily even when weighted down by objects stored inside. For this purpose I purchased drawer slides from my local hardware store. Simple drawer slides come in various lengths; my local hardware store had them in even numbered lengths from 14″ to 24″. My cabinet is just over 17″ deep, so I chose a set of 16″ drawer slides. They came with 2 drawer rails, 2 cabinet rails, all required screws, and detailed instructions (in multiple languages).

Because I had already assembled the cabinet face frame, I would have to make a slight adjustment for the new drawer slides. The instructions call for the drawer opening to be between 1″ and 1 + 1/16″ wider than the drawer width. The width of my drawer was already 38 + 3/4″, and making it narrower would be far too much work. Instead I chose to make notches out of the face frame to allow for the metal drawer slides to operate.
The opening in the cabinet face for the drawer was 39 + 1/16″, and I needed to make it 39 + 3/4″. This meant cutting a 3/8″ notch out of each side of the face frame. Once the drawer is in place, these notches would be practically unnoticeable as they would be hidden by the perimeter of the drawer face. Below is the left of the cabinet opening showing in red where I needed to cut out the notch.

I cut these notches very carefully with a handheld jigsaw, trying to keep them as square as possible; the notches will be noticeable when the drawer is opened and I want them to look very clean. I made the notches just taller than the height of the metal slides. You can see how these notches allow for the metal slides in the photo below.

And in the next photo, the drawer is in! It slides quite well, but is a bit difficult to lift in and out; I don’t plan on removing the drawer very often so it will work fine for me.

Ignore how bright the wood looks in these photos, I was working in a poorly lit garage and the flash seems to think the wood is much lighter and uglier in color than it really is. But you will see that in the Final Reveal in the last post of this series, where I will explain what finish I chose and how to apply it, secure the glass in the doors, and put on all the hardware.
