Posts Tagged Woodworking
Getting Hinged
Posted by Adam A. Ries in DIY, Home Improvement on March 3, 2015
So one of the last minor details to finish in the bathroom was installing a door. I say minor, but apparently a few friends that have been over seem to think it’s a big deal. And I’ll admit, having the cat watch me every time I visit the bathroom is a little uncomfortable.
I salvaged several doors before an old brick building was torn down early last year. They spent the first winter in my mom’s garage until I moved them here, and I knew I’d be able to use a few of them. Sure enough, only 1 is a 5-panel wood door and it’s the perfect width for my existing bathroom door frame. I trimmed an equal amount off the top and bottom of the door (about 1.5 inch total) and it now is the perfect height.
Unfortunately the hinges on the existing door frame and the salvaged door don’t line up. I figured it would be best to change the hinge placement on the door since it’s in the garage resting on saw horses, and easier to conceal the old hinge mortices. Plus this way they are equally spaced from the top and bottom of the door frame.
However, it’s been a little cold in NW Ohio, so I ended up with the door on my dining room table instead of in the garage.

I used small blocks of wood to fill in the old hinge mortices, cutting them slightly thicker and glued them into place. Once dried, I planed them down flat with the edge of the door.

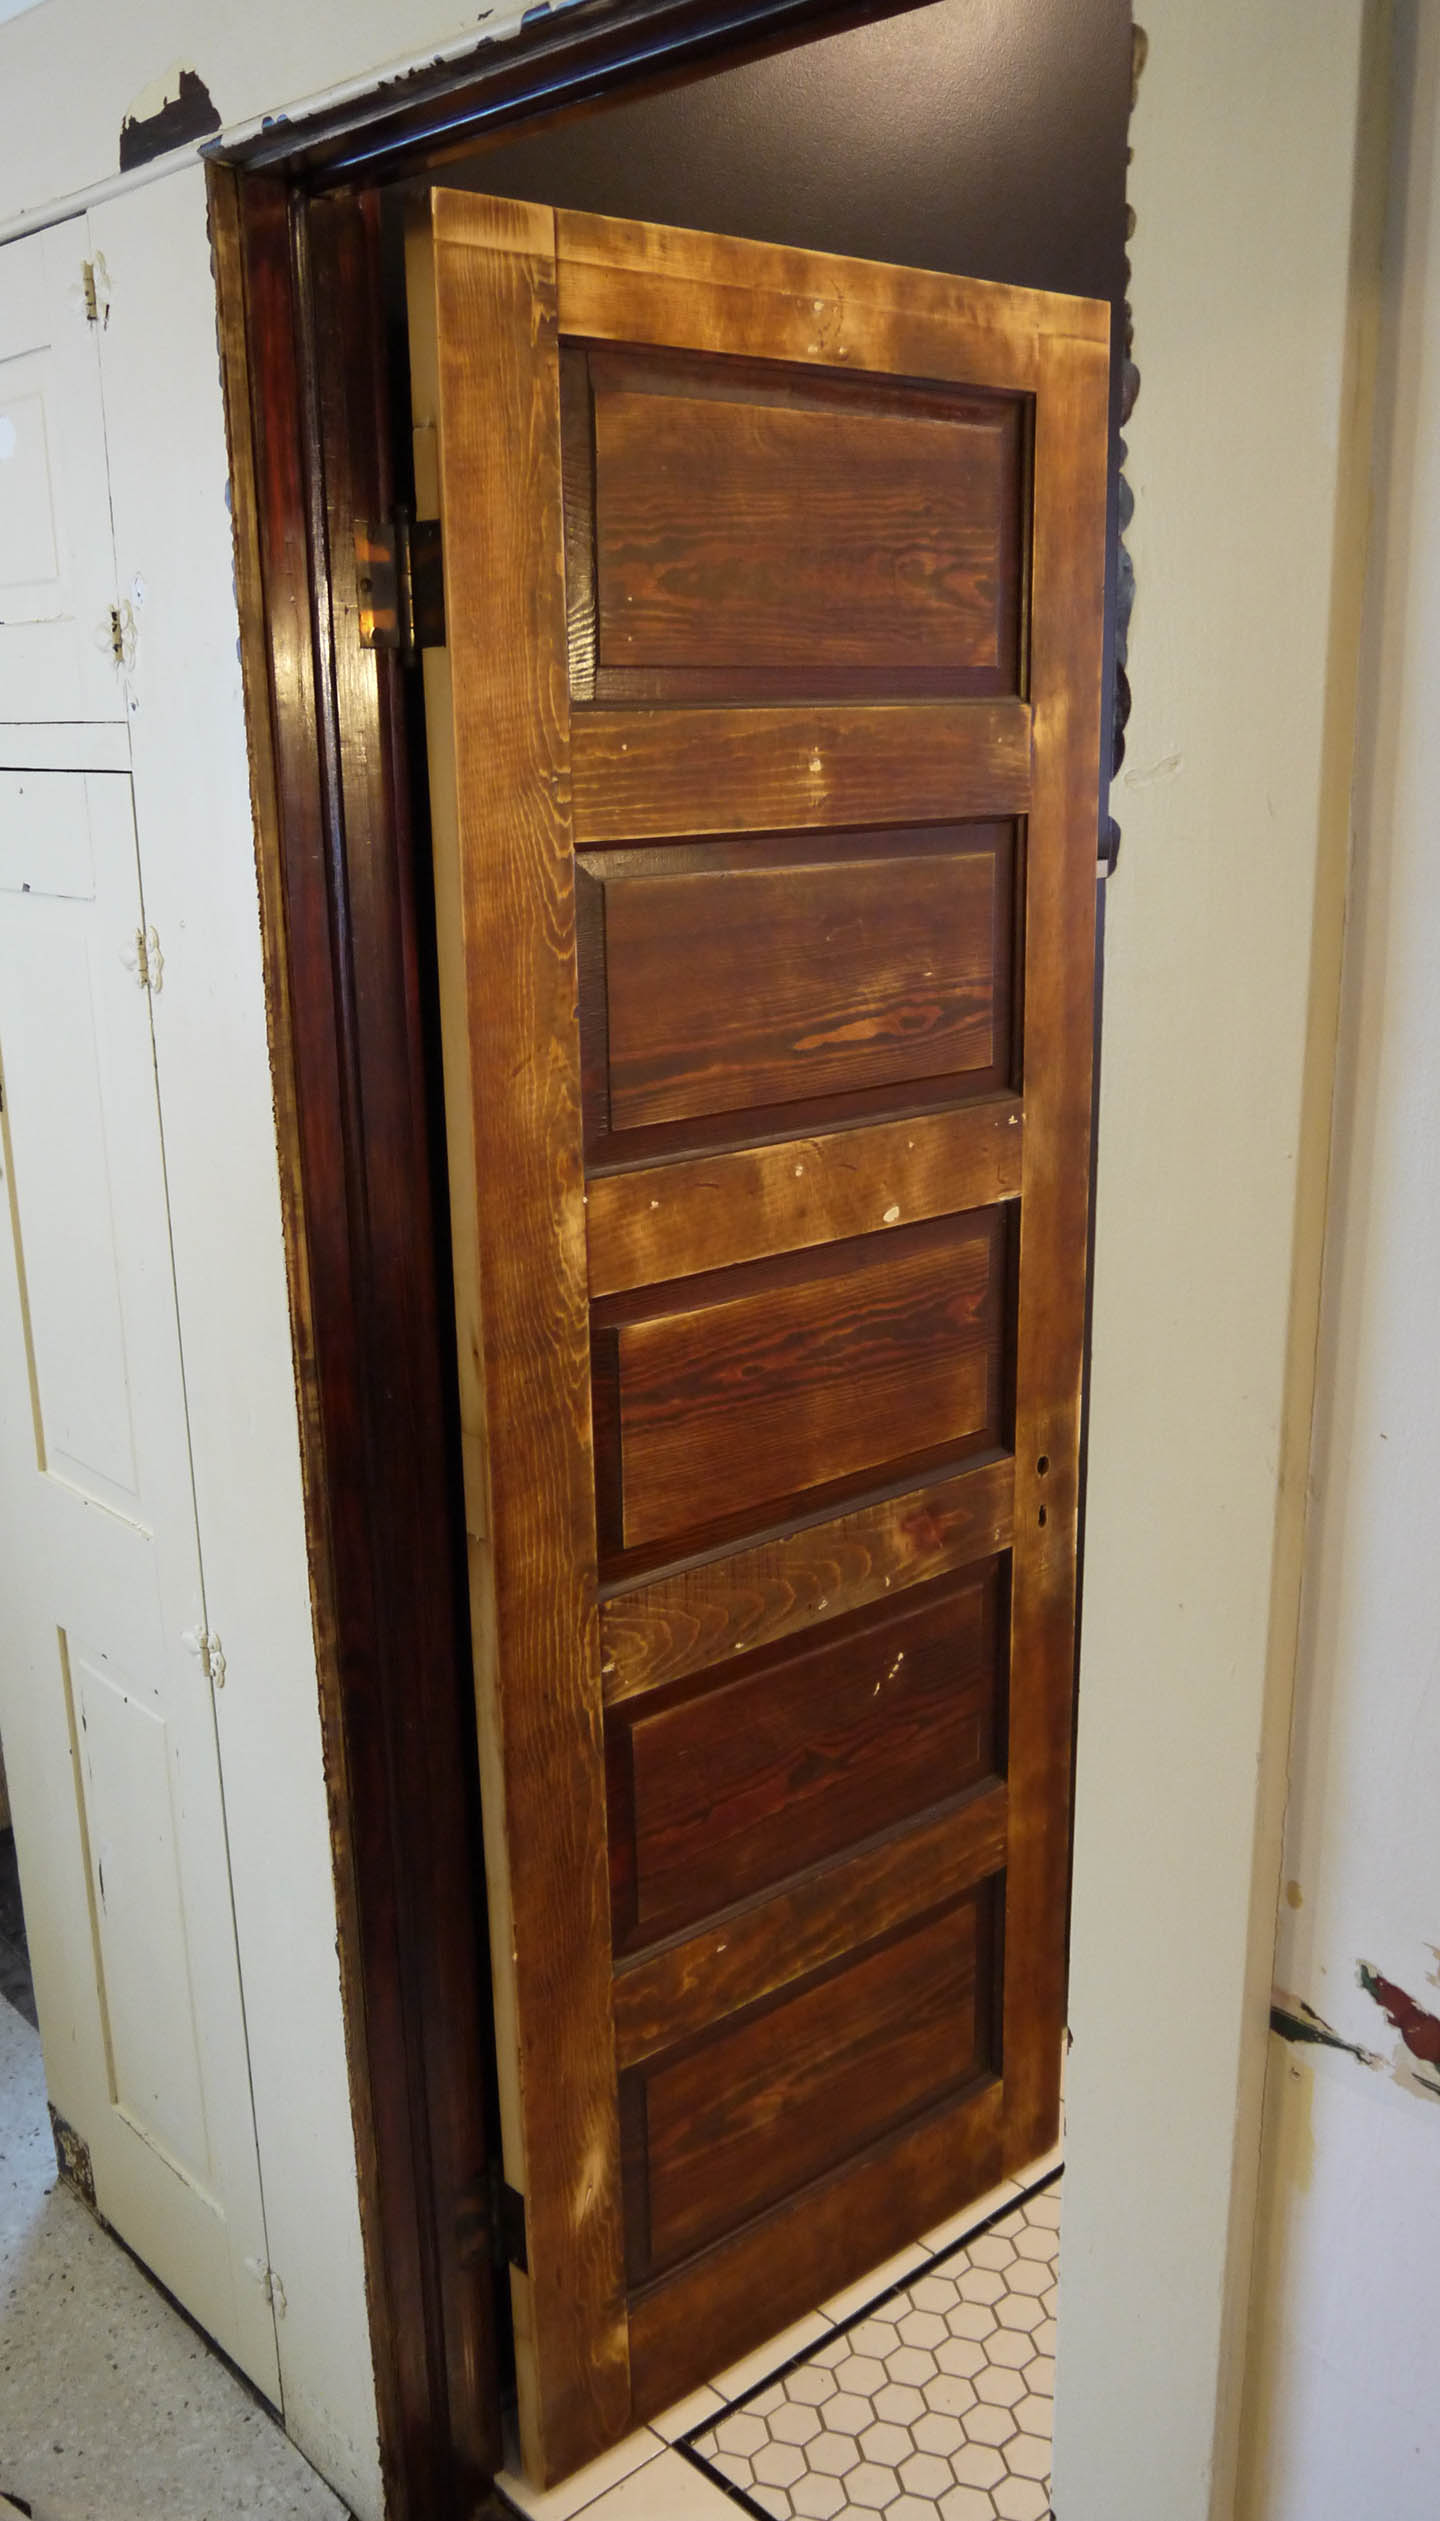
Then it was filler time. The door had some pretty nasty dings, dents, and a dozen holes. I filled every spot I could find with wood filler, and gave it ample time to dry. I moved the door back into the garage and sanded until my hands were frozen. The original stain color was a good match to begin, but the varnish was bubbled and scratched all over. I sanded down to remove the varnish and smoothed out the filled spots, trying not to remove the color underneath. Once sanded, I measured the spaces for the hinges using the existing door frame and carefully chiseled out these spots. Then came the moment of truth, hanging the door on the hinges:

It was a little snug in a few spots, but it fit! This photo looks like there is a large gap under the door, but it’s because the door hides the transition from the existing kitchen floor to the 1/2″ higher bathroom tile floor. When the door opens into the bathroom, it’s a very natural space between the door and floor, probably about 1/4″ or so.
I took the door off the hinges again and carried it into the garage for one more round of sanding, hitting the tight spots and making sure all the wood filled spots were smooth. In total, I think I carried the door in and out of the house more than a dozen times.
By re-inserting the handle mechanism, I marked on the door frame where the strike plate would need to go. It took me a little longer to chisel out this space, because the strike plate needs to be flush with the wood and the center needs to be chiseled deeper to make room for the latch to spring out.
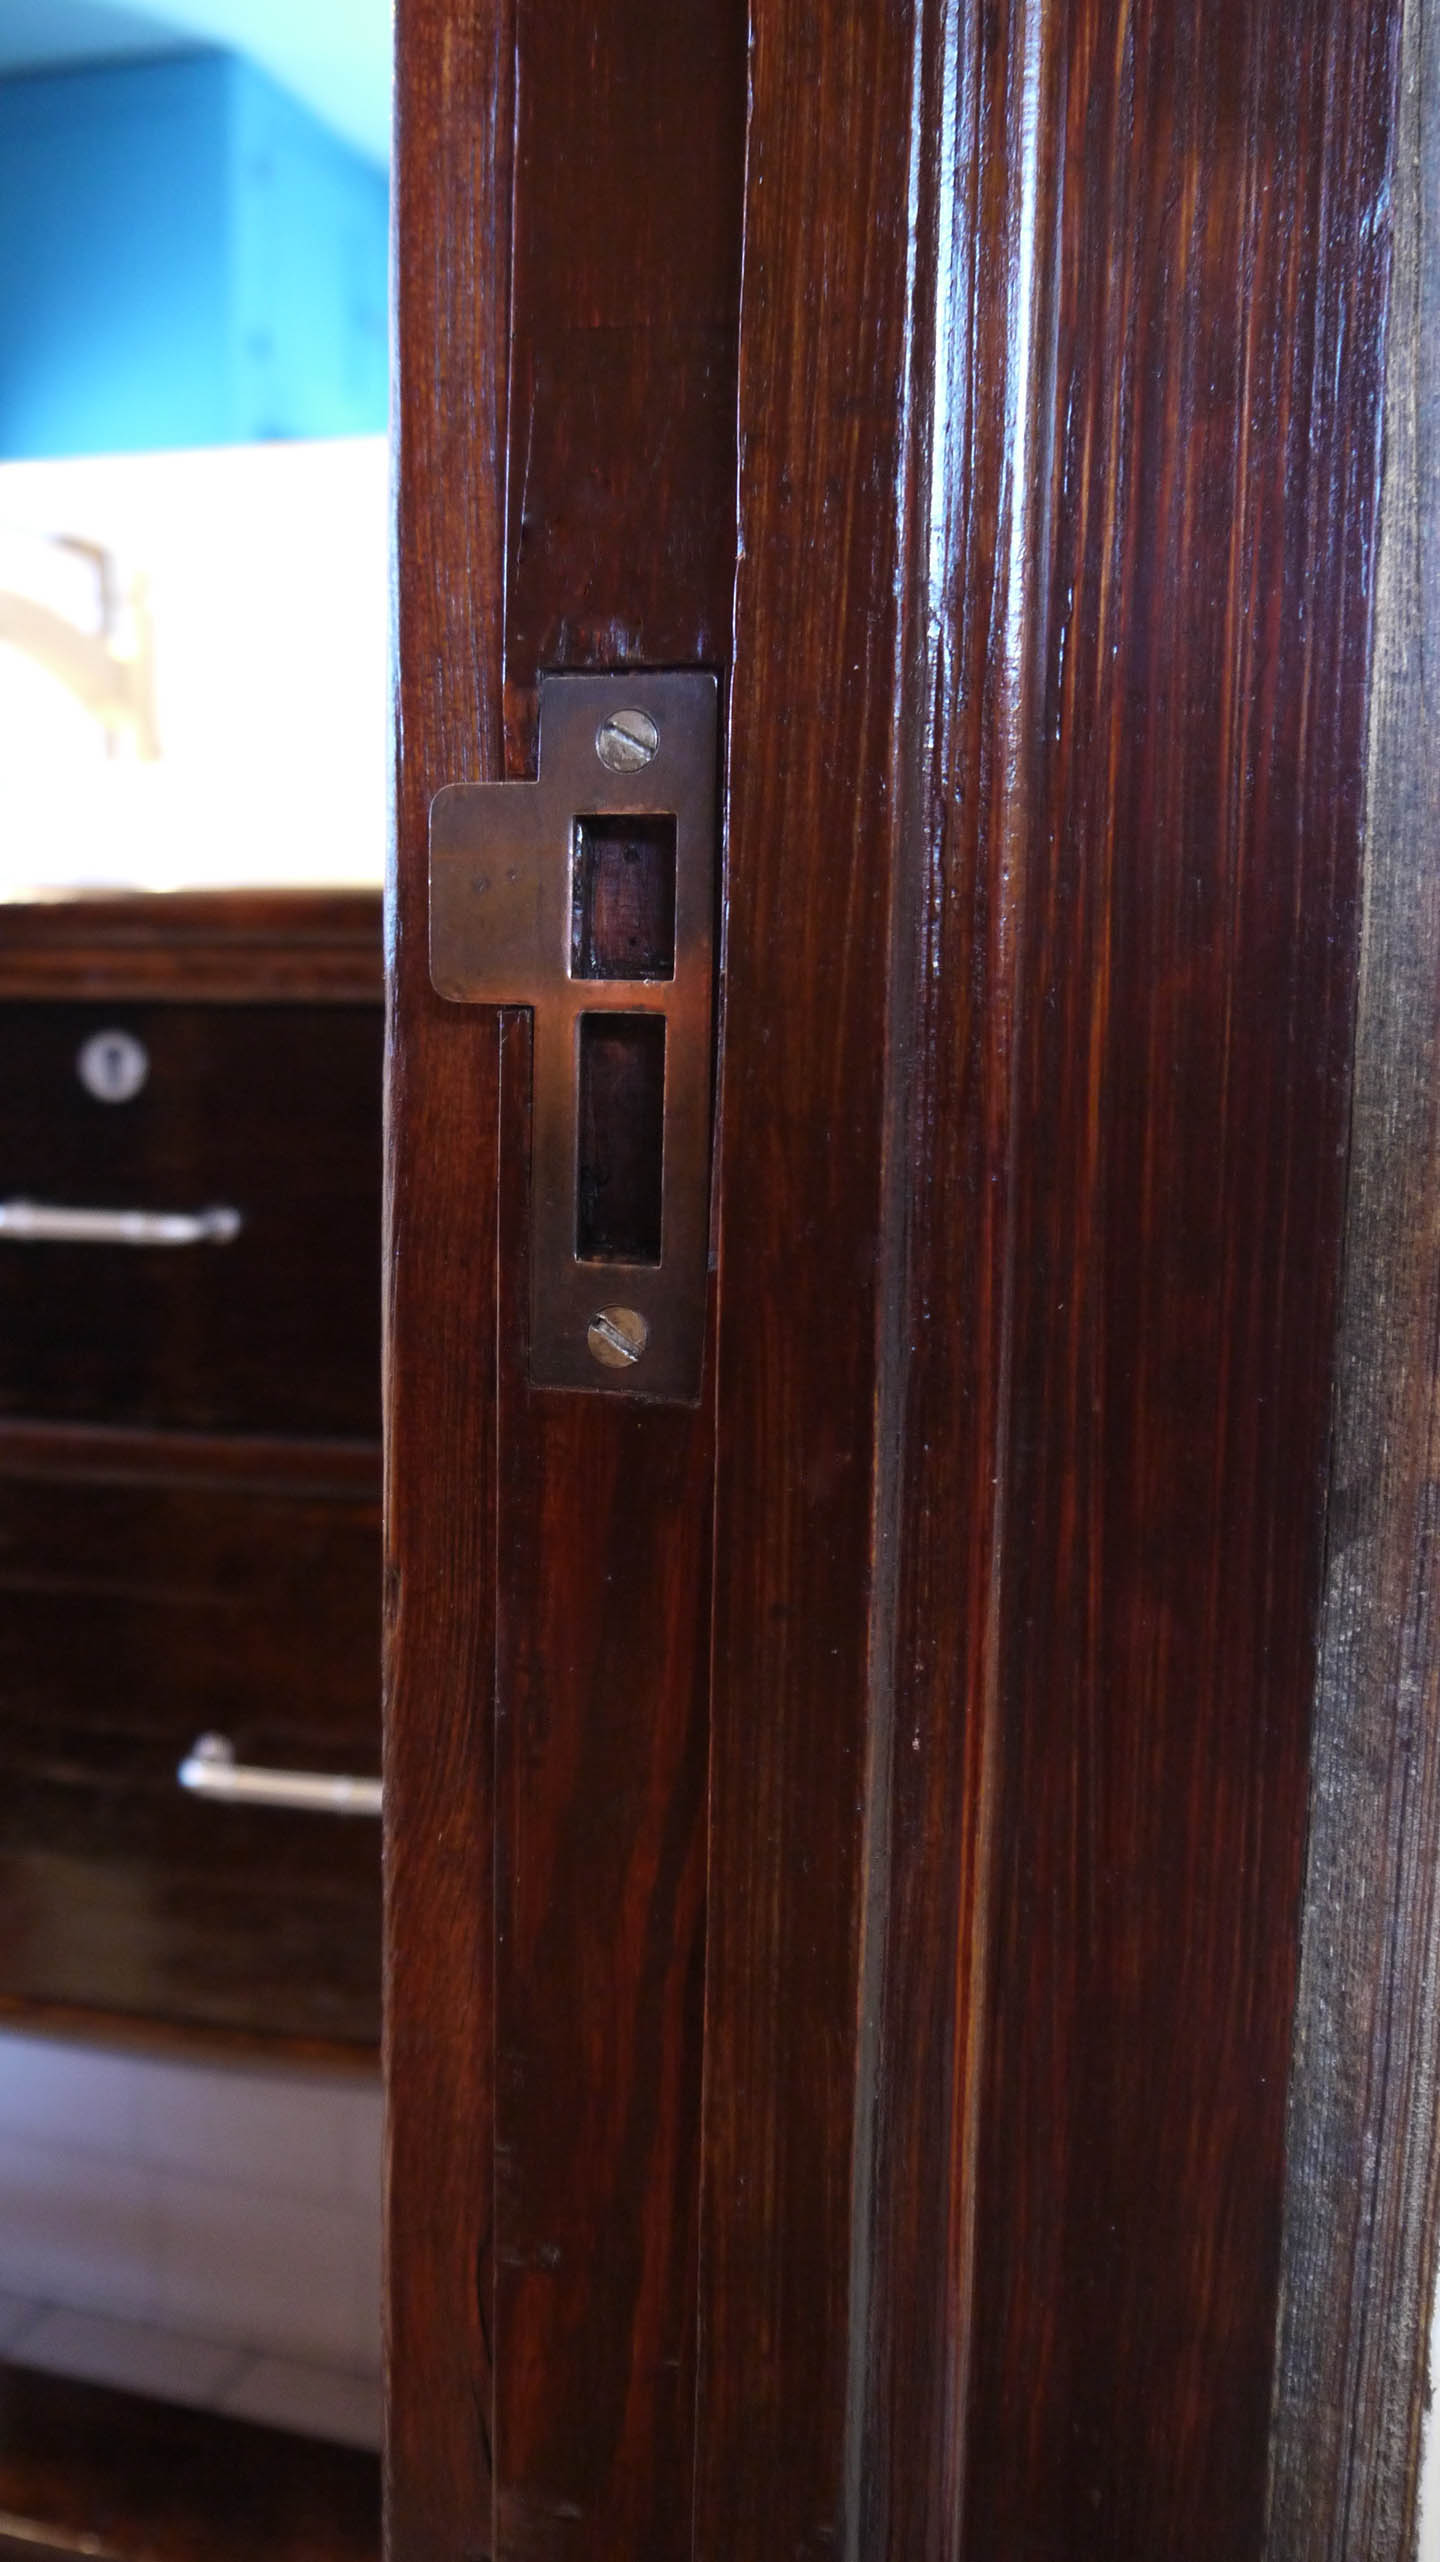
This picture was after I reattached the door stop also, so the door closes tightly and latches without rattling against the stop trim.
Then it was stain time. I wiped down the door really well with a slightly damp cloth, making sure to remove as much dust as I could. Giving the door plenty of time to dry I started staining the door with a clean cloth and the same Minwax Mahogany Gel Stain. The door accepted the stain really well, but with gel stain it takes a little technique to achieve a good look. Especially in the lighter wood areas or where the wood filler was really thick, I wold try not to wipe off all of the stain to help even out the color. I might hit a few light spots with a second coat of stain, but otherwise the door is ready for 2 coats of poly.

The contrast between the untouched kitchen woodwork and the now-beautifully stained door and frame is unnerving. I find keep finding myself staring at the door and how rich the color looks, trying to imagine how the rest of the woodwork will eventually look.
On the inside of the bathroom I nailed up the door trim that’s been waiting in the corner of the dining room. It’s finally starting to look finished – and then I realize I still don’t have outlet covers, lol.

Getting a Handle on Things
Posted by Adam A. Ries in DIY, Furniture on January 5, 2015
Following this year’s Christmas celebrations with family and friends, it is rewarding to be in my own place! Yep, the weekend before Christmas I finally got moved into the house! It was a push to finish the cleaning & scrubbing every room needed, but several friends pitched in and many hands make light work. The move wasn’t all that terrible either, I actually drug it out an entire week. Each day after work I would fill up my car with boxes and slowly unload them into the house, allowing me to unpack slowly and not get overwhelmed. (It was also a chance to realize that I might be a little bit of a pack rat, so I did quite a bit of purging, putting to work my recycling & trash pick up services these last two weeks.) And after all those family Christmas parties, it was nice to relax. At home. Alone. And quiet.
Beyond unpacking, organizing, tossing out, & cleaning more, I haven’t gotten to a whole lot of work inside the house. But now with a working bathroom, it was time to finish the drawers for the bathroom vanity. I had already completely disassembled & rebuilt each drawer to fit around the sink and drain plumbing. Unfortunately though, the drawers didn’t open or close well because the drawer faces were so tight to the dresser frame.

So before I attached the handles, I found where they were rubbing the dresser openings and got acquainted with my block plane to hone down the top edges of the drawer fronts. A small pile of wood shavings later, and they open & close without scraping. I even had room to attach little plastic drawer glides inside the dresser to help them operate more smoothly. Once I stained and sealed the raw edges with polyurethane, all that was left was to attach the handles.
What handle do you affix to an antique dresser turned sink vanity? The ones that were on the dresser when I bought it were made of cheap metal and the gold finish was rubbing off. The rest of the finishes in the bathroom are brushed steel, so I found these unassuming handles and I think they are just the right size. Enough that I can easily open the drawers, but they don’t take away from how bold the dark wood vanity looks in a sea of white tile.

The bottom drawer was entirely busted apart, I didn’t even attempt to fix it. I’m thinking eventually I’ll put a thin board underneath and have a couple baskets to hold towels, soaps, etc.
Next project? Stripping paint & staining the bathroom woodwork for around the window & doorway. The boards are already pulled off their frames, I just have to strip & sand years of old paint off. And once that is finished, I will let myself build a medicine cabinet.
It’s Alive!!
Posted by Adam A. Ries in Equipment on October 30, 2010
A cheeky Halloween title to this post, but I was truly excited to bring my orbital sander back from the dead. Back a few posts I mentioned how I burned up my orbital sander while removing the old varnish and stain off of the cabinet I salvaged from a yard sale. One evening while sanding I noticed constant blue sparks visible through the air vents in the side of the orbital sander. Although it didn’t quit working while I was using it, the next evening when I plugged in the cord and switched the sander to ‘on’, I was immediately surprised that nothing happened. The sander just remained a dead wait in my hand. I tried a 2nd (and 3rd) outlet to be certain, but eventually came to the conclusion that my sander had died at the young age of only about 6 years.

Of course I was distraught, that sander and I had gone through so much together; my first endeavors in drywall repair, speeding up the pace of furniture sanding, even prepping dozens of cabinets for painting. Without a doubt I knew I had gotten my money’s worth out of that sander. In the week after its death, I already began researching brands, models, and comparing prices from stores and online shopping sites. But I didn’t throw the dusty old sander out yet. Although a designer, I believe I have a bit of an engineers mind. My immediate thought when the sander didn’t turn on was something like, “Ooh, I am going to take this thing apart screw by screw!”
Now let me admit I know very little (or nothing) about electrical motors. After talking with my grandfather, an extremely knowledgeable Jack of all trades (actually, his name is Bob), I had quite a good understanding about how an orbital sander works. He encouraged me to take the sander apart (as if I needed any encouragement) and thoroughly blow out all the dust inside of the plastic housing. I did just as he recommended. As he described, I found two small metal brushes on springs that had become gunked up with dust and weren’t making an electrical contact.

After making sure these two small pieces were springing like new, I reassembled the sander to find it works once again! (Ok, in reality I had to reassemble it twice because I thought I was finished until I found a spare metal piece and had to take it back apart).
The un-dead in most movies always seem to wander in search of fresh brains… If I wake some night to find it staring at me I may get nervous.
