Spare bedroom, that is.
Several months without a post. That doesn’t mean I haven’t been busy, just that I haven’t been working on my own home. In fact, in the last two months I’ve helped my brother-in-law with different aspects of their master bathroom remodel, and a partial remodel on my mother’s kitchen (reconfigured the existing base cabinets, installed a dishwasher, built additional base cabinets, and installed new countertop).
But sometime in between building cabinets in my unheated garage in the middle of an Ohio February, I finished painting the spare bedroom and nailed the window trim & baseboards back into place. Wow, did that make a difference!
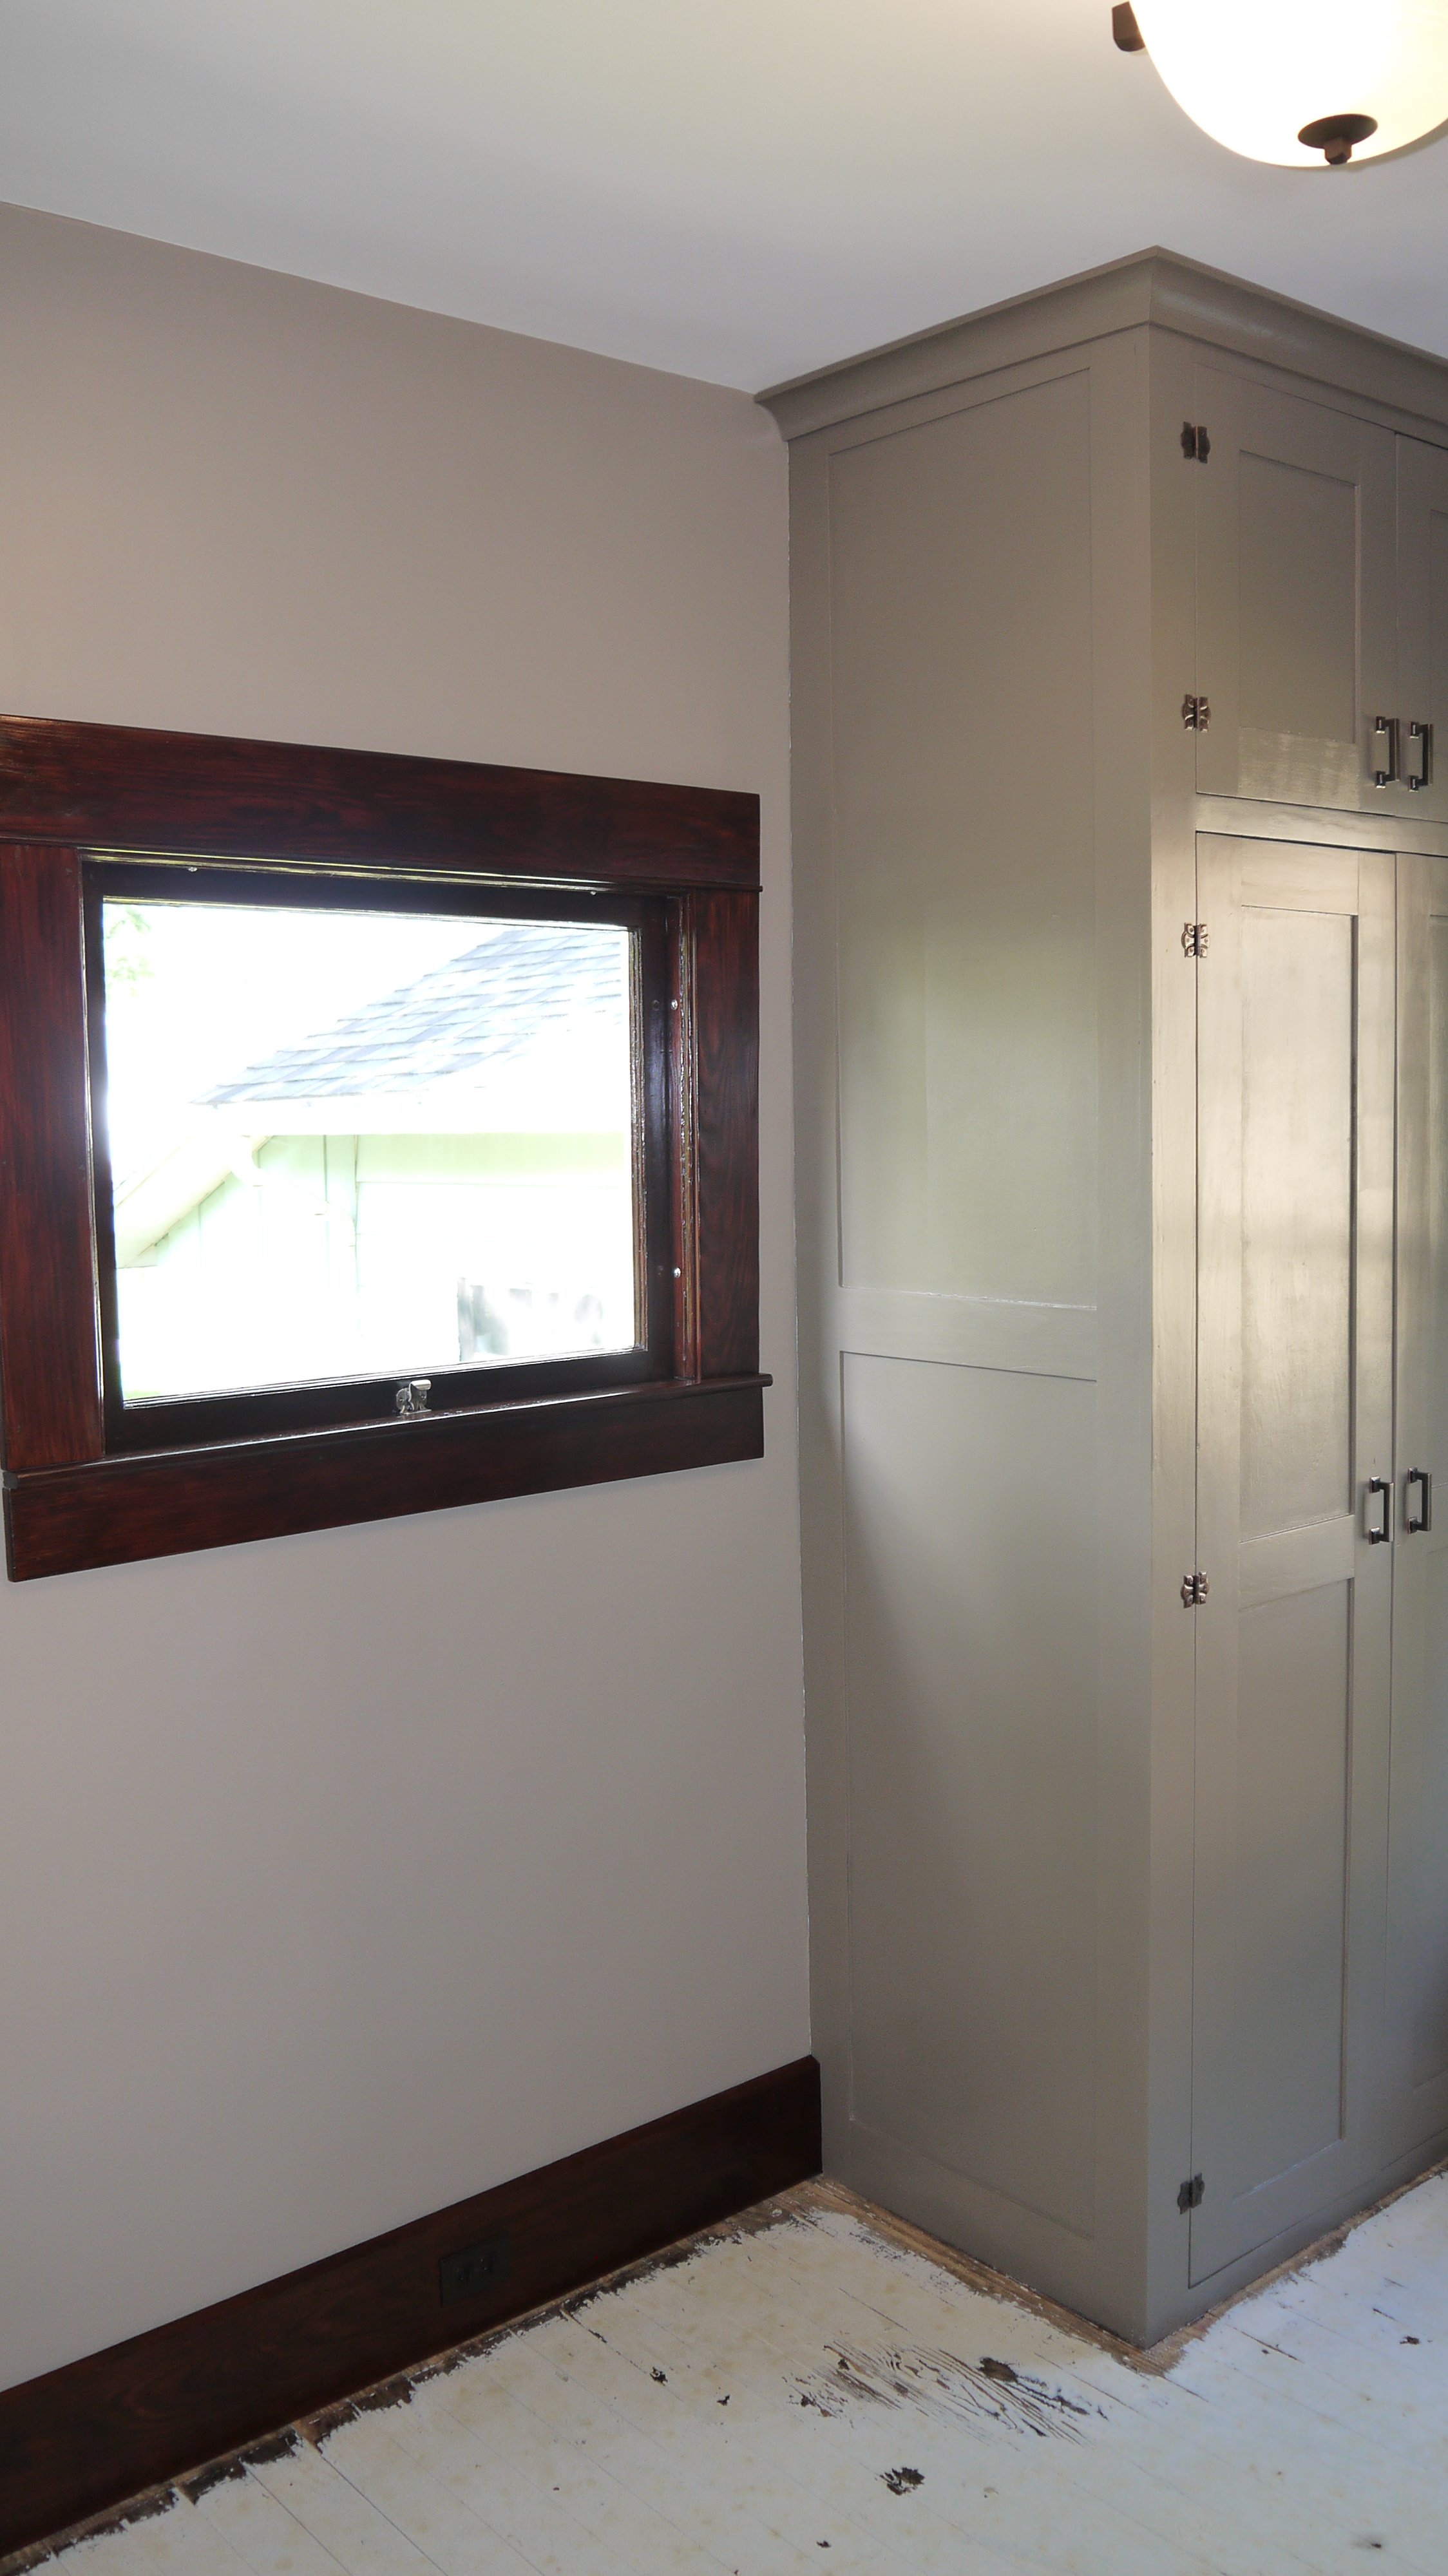
While reinstalling the baseboard, I added outlets to the perimeter of the bedroom through the baseboard. Each bedroom only had 1 original outlet to begin with. And I added the new outlets in the baseboard, just as the existing outlets were placed. I used brown outlet and outlet covers to help them disappear into the dark woodwork.


I already described the process of sanding & re-painting the wardrobe, and installing the light. Along with all new wiring, I can add this room to the 99% finished list along with the bathroom and laundry. (Like nearly every other room, the floor needs a few nails here and there to secure the boards, and then a whole-house floor refinishing party.)
Lastly, I found a door to fit at an architectural salvage store (the spare bedroom was door-less when I bought the house). It matches the bathroom door, but unfortunately was painted on one side. I spent the better part of 2 days stripping the paint – first white, then orange underneath.

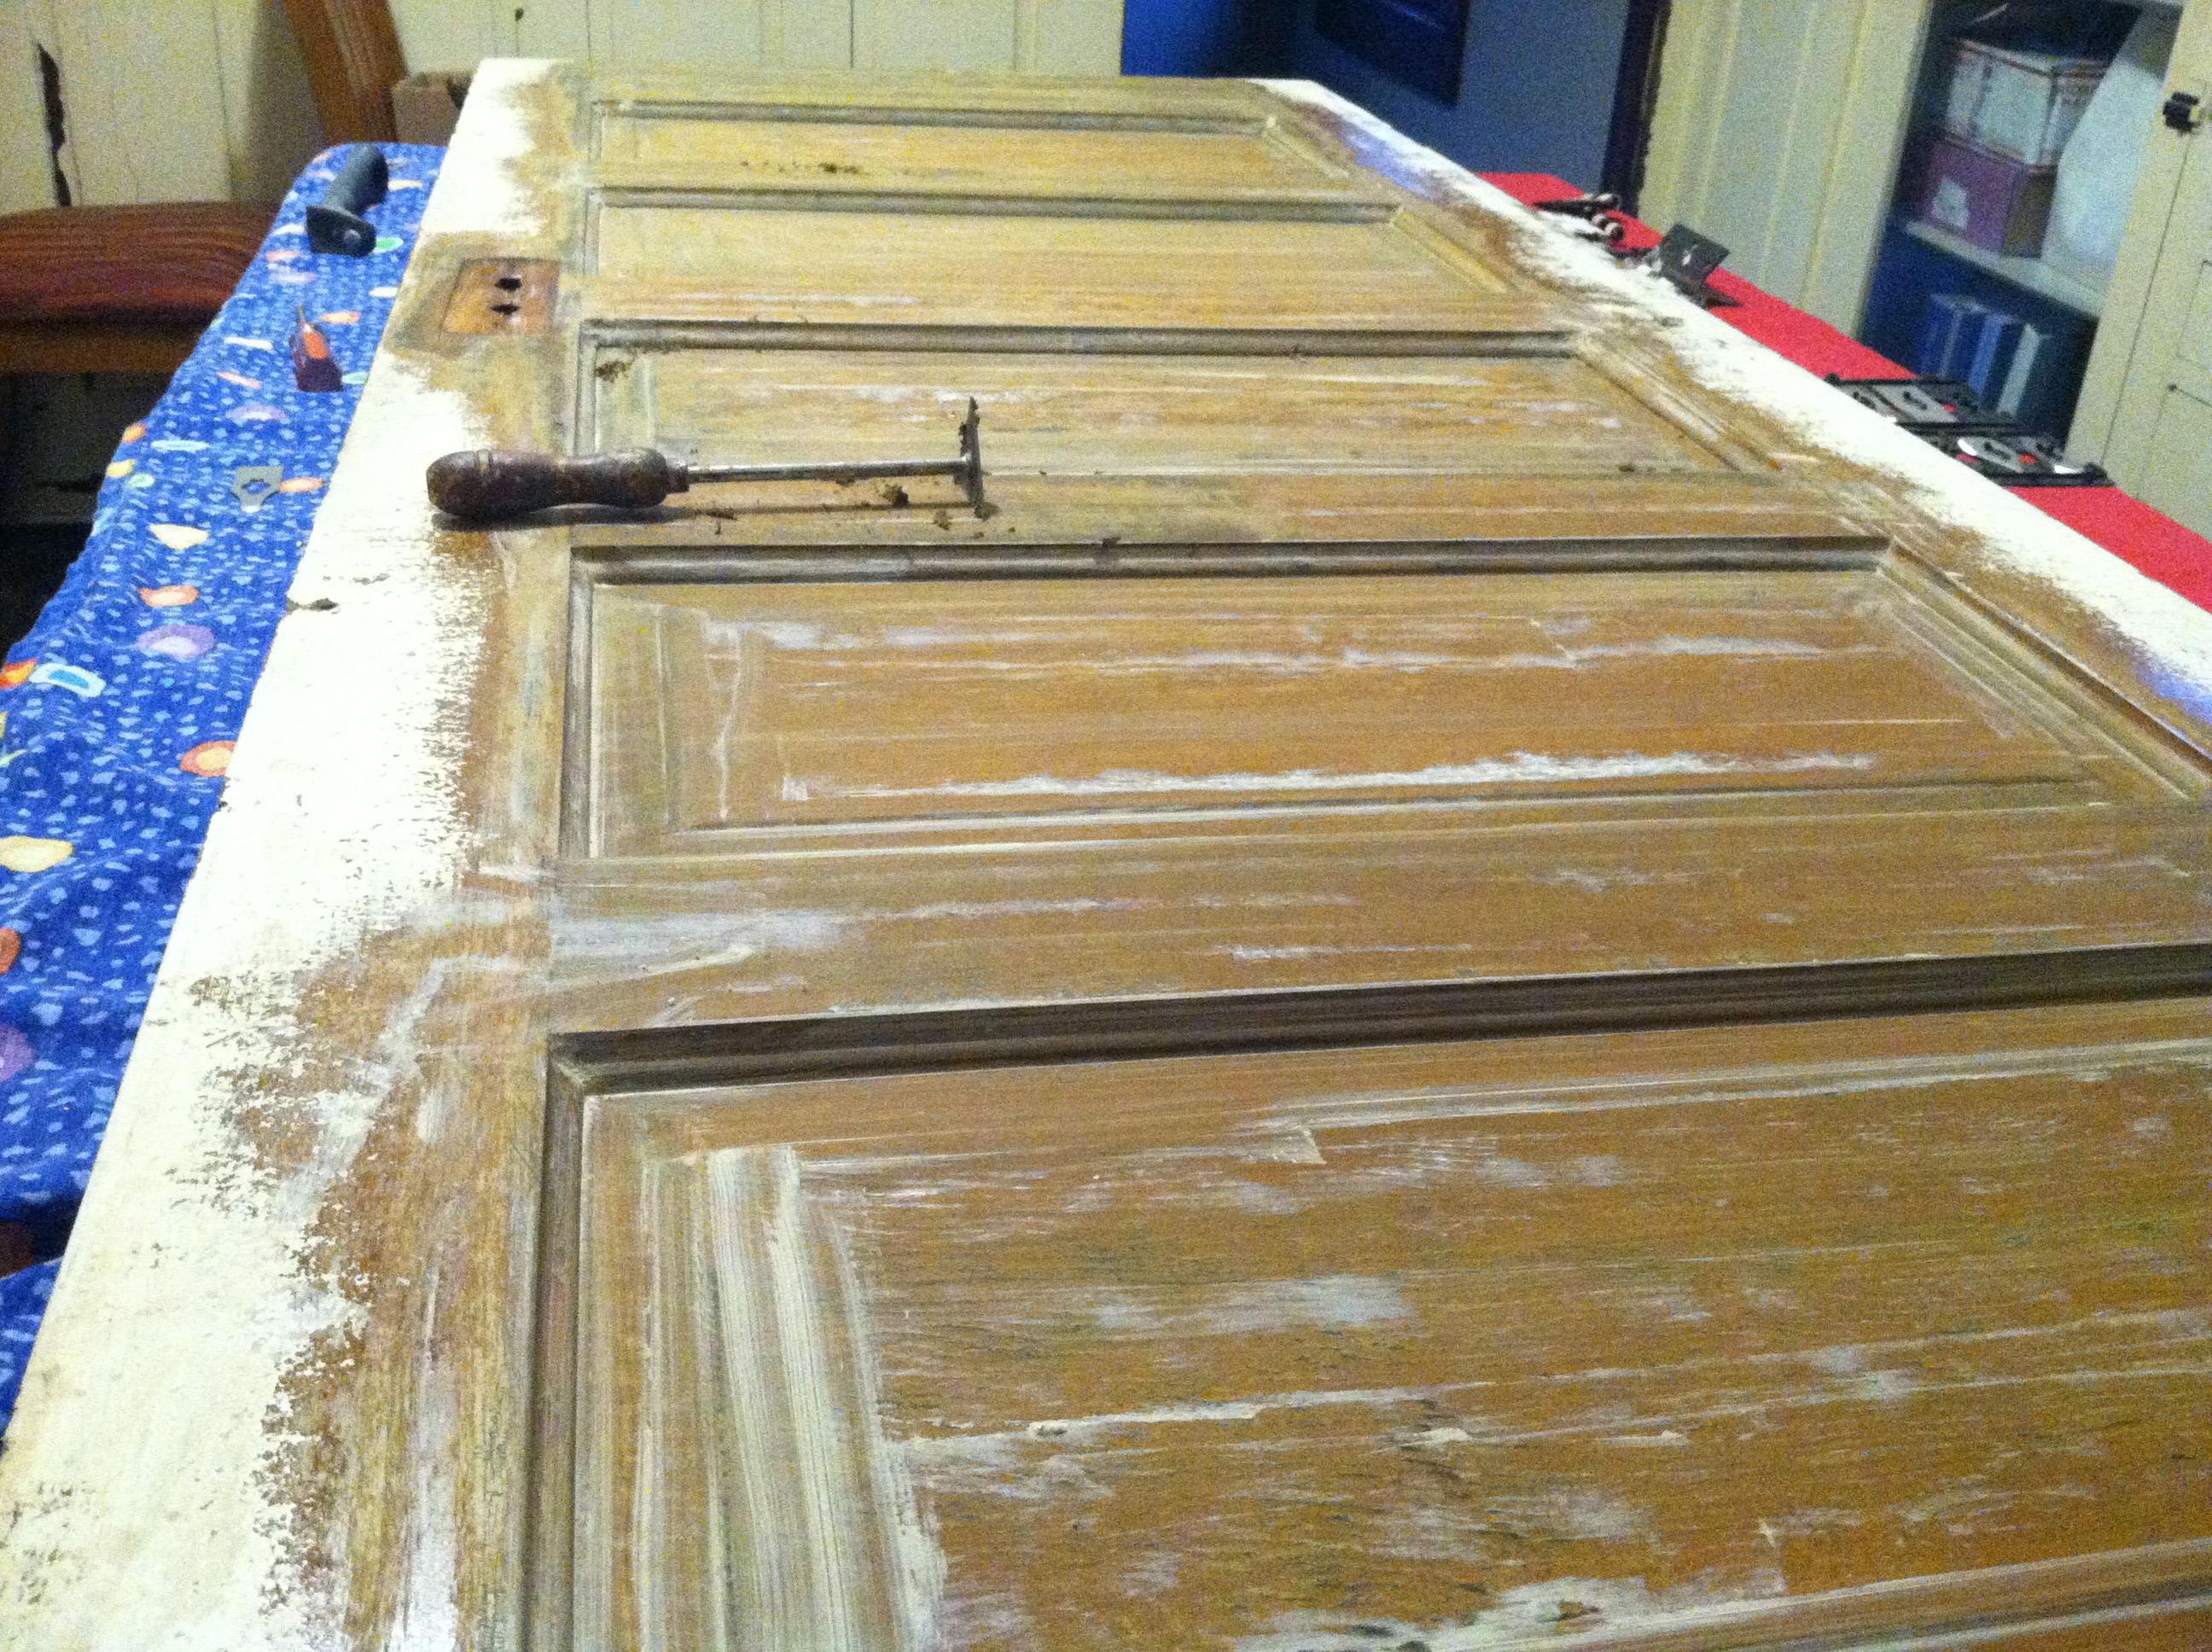
It was the correct height, but actually just about 1/4″ too narrow. I glued & clamped a thin piece of pine to the hinge edge of the door, then with a hand plane and sandpaper made it flush with the sides of the door.

The other side was stained & varnished almost a matching color to my woodwork, so I just sanded off the finish and then re-stained both sides of the door to blend the color. It took 2 coats of stain on the freshly stripped side to get dark enough, then 2 coats of satin polyurethane. The piece I added to meet the right width is almost unnoticeable.

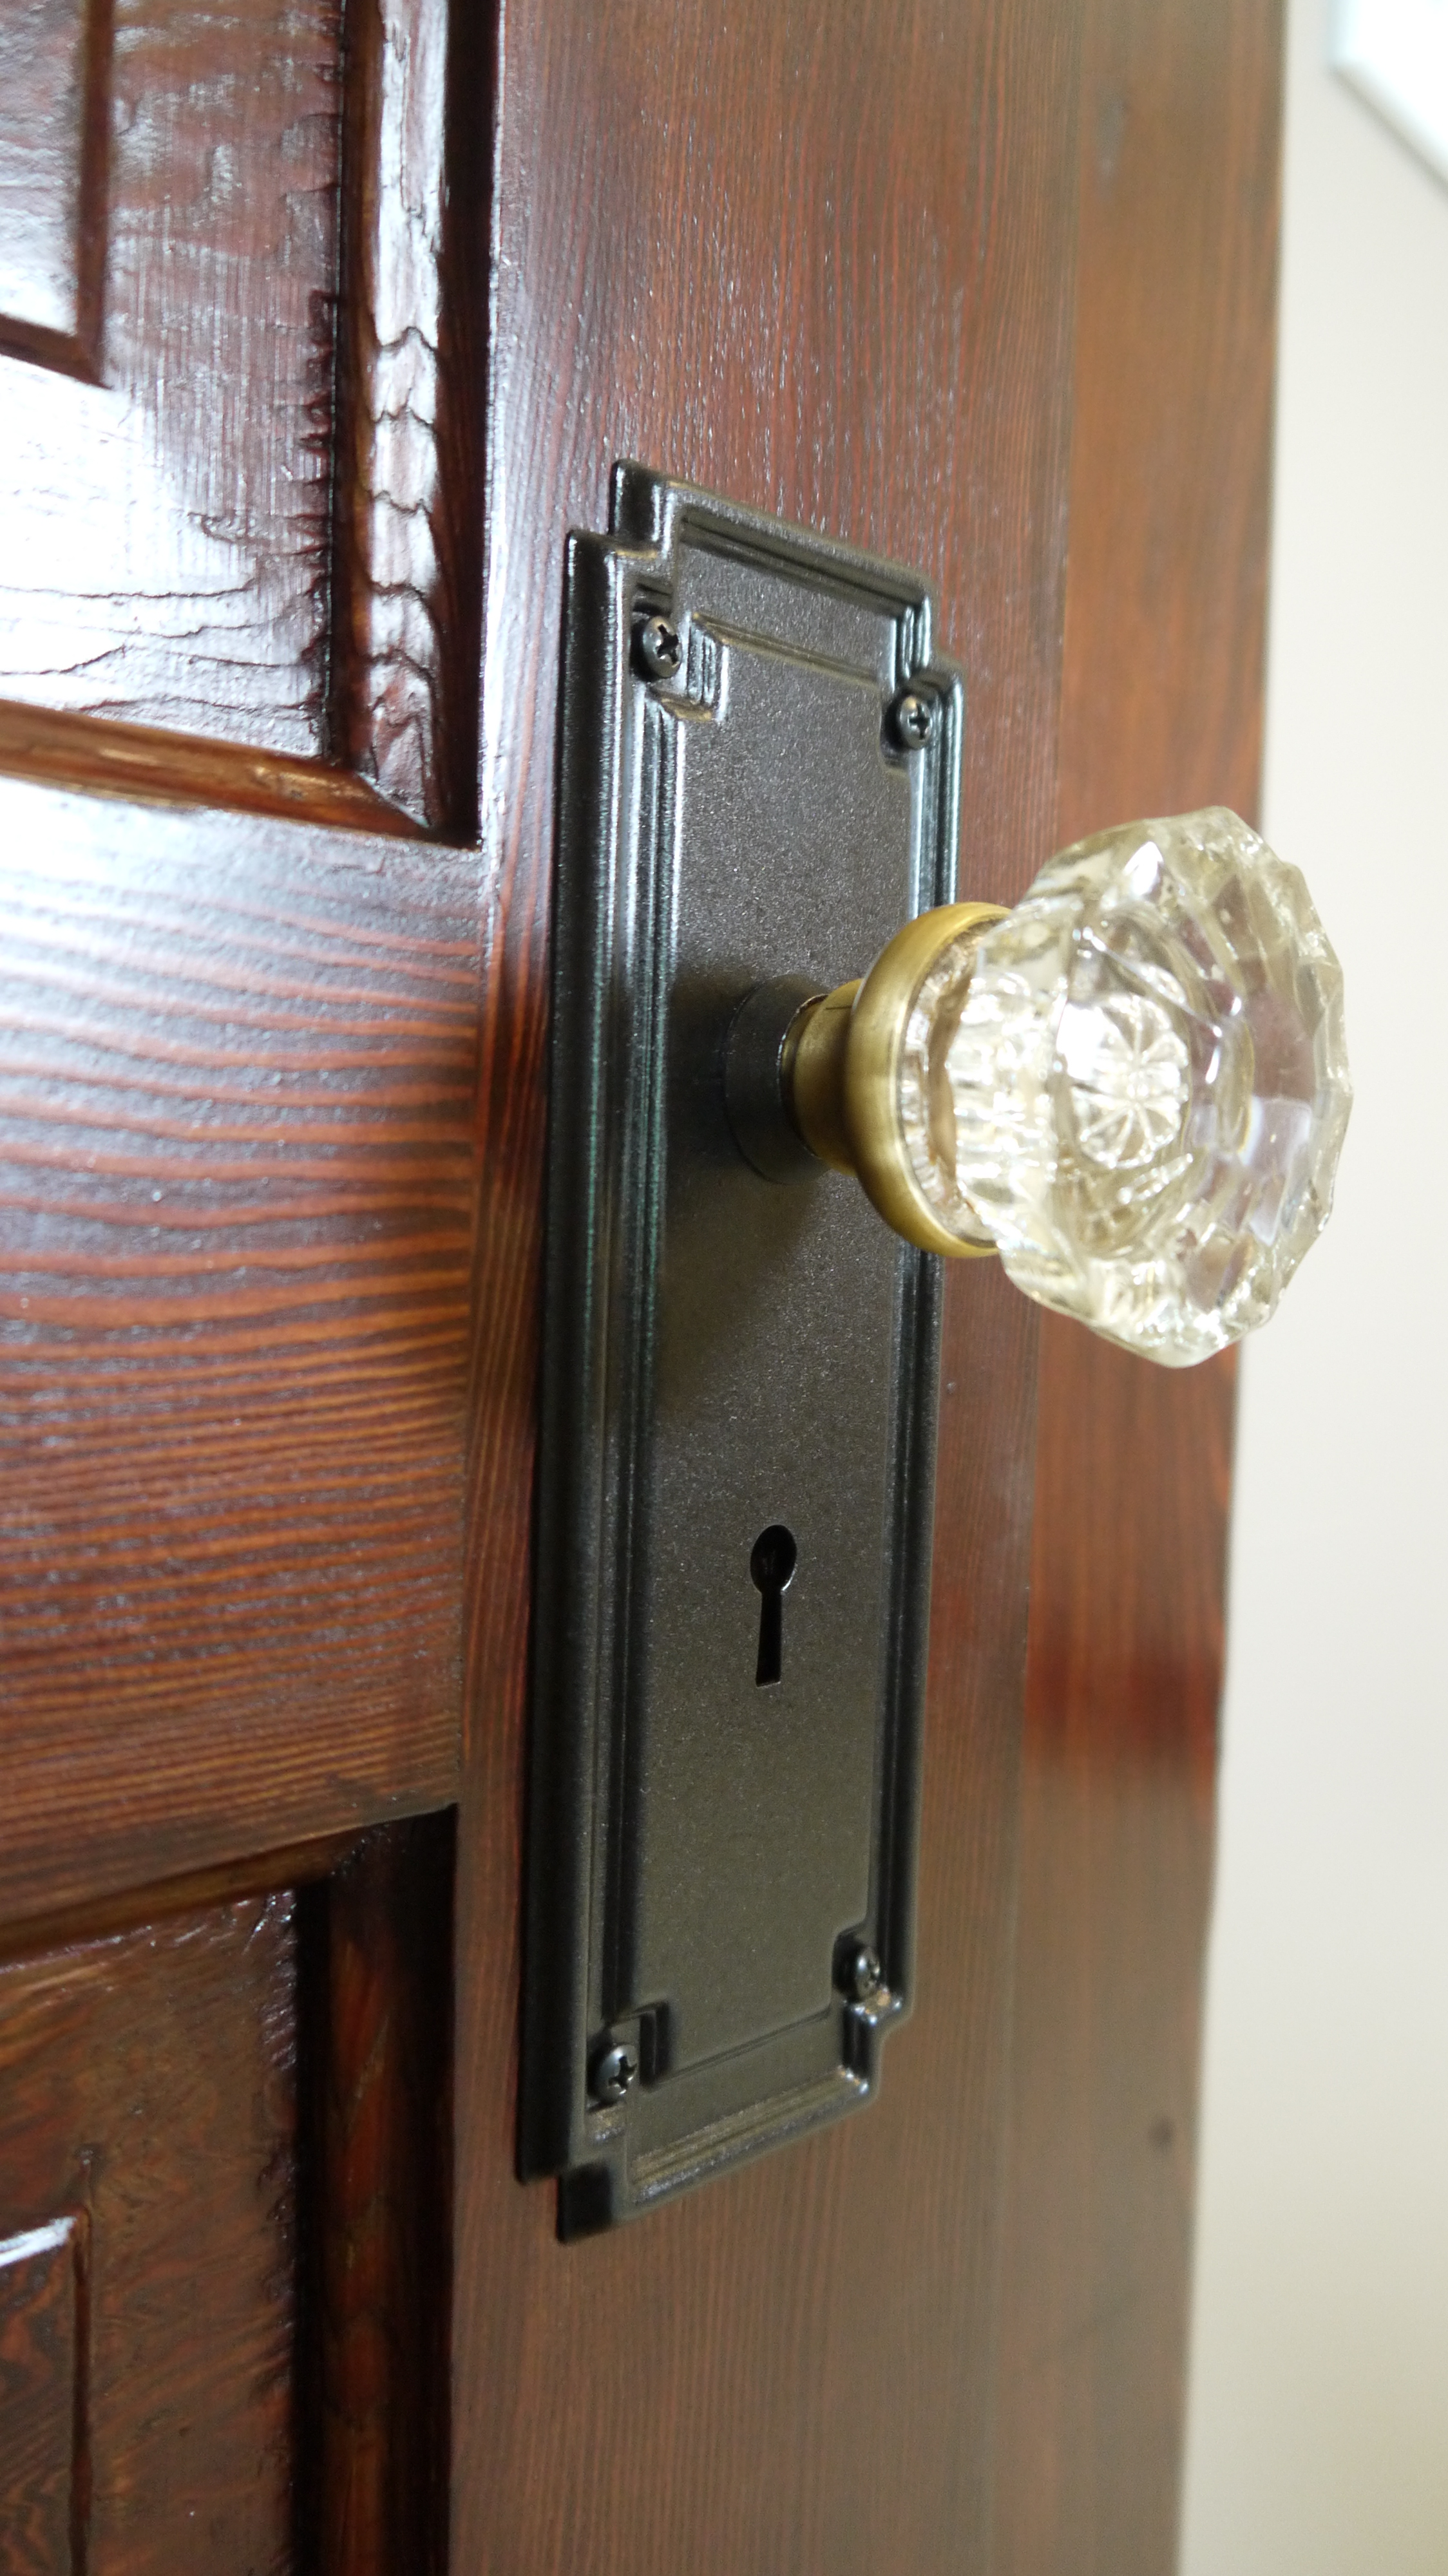
I’ve been collecting glass doorknobs when I find them inexpensively at antique stores or Goodwill, so I just had to buy the mortise latch threaded spindle – which I was pleasantly surprised to find they still sell at the hardware store. For me, there is nothing so rewarding as the feeling of putting the finishing touches on a completed project.

So now I begin the same process to the other bedroom, starting with stripping the woodwork and restoring the windows again.

#1 by Alisa on June 27, 2016 - 9:49 PM
That door turned out gorgeous and a perfect match! I wonder how you were able to get paint out from the door seams. I am currently stripping exactly same looking door and I can’t figure out how to remove paint deep in seams between panels without doing damage. I can’t believe how clean you were able to get yours! Amazing job.
#2 by Adam A. Ries on September 2, 2016 - 11:12 AM
Thanks, Alisa! There really is no trick to getting the paint out, just patience and consistency. Starting from top to bottom, one panel at a time, I bet I applied & removed paint stripper 3 times. First getting the bulk of the thick paint off, then the last few layers to find bare wood, then a 3rd time really going to town with a small plastic bristle brush in the corners, cracks, and seams. Sometimes I use old dentist’s picks for stubborn areas.
And in the end, I’m fortunate that I’m using a dark enough stain that any spots where the paint just absolutely will not come off, I can “paint” the stain thick enough to hide the paint. It blends in when using dark stain, and once poly’d, you can’t tell the door was ever painted!
Good luck on yours!