Archive for category Home Improvement
Getting Hinged
Posted by Adam A. Ries in DIY, Home Improvement on March 3, 2015
So one of the last minor details to finish in the bathroom was installing a door. I say minor, but apparently a few friends that have been over seem to think it’s a big deal. And I’ll admit, having the cat watch me every time I visit the bathroom is a little uncomfortable.
I salvaged several doors before an old brick building was torn down early last year. They spent the first winter in my mom’s garage until I moved them here, and I knew I’d be able to use a few of them. Sure enough, only 1 is a 5-panel wood door and it’s the perfect width for my existing bathroom door frame. I trimmed an equal amount off the top and bottom of the door (about 1.5 inch total) and it now is the perfect height.
Unfortunately the hinges on the existing door frame and the salvaged door don’t line up. I figured it would be best to change the hinge placement on the door since it’s in the garage resting on saw horses, and easier to conceal the old hinge mortices. Plus this way they are equally spaced from the top and bottom of the door frame.
However, it’s been a little cold in NW Ohio, so I ended up with the door on my dining room table instead of in the garage.

I used small blocks of wood to fill in the old hinge mortices, cutting them slightly thicker and glued them into place. Once dried, I planed them down flat with the edge of the door.

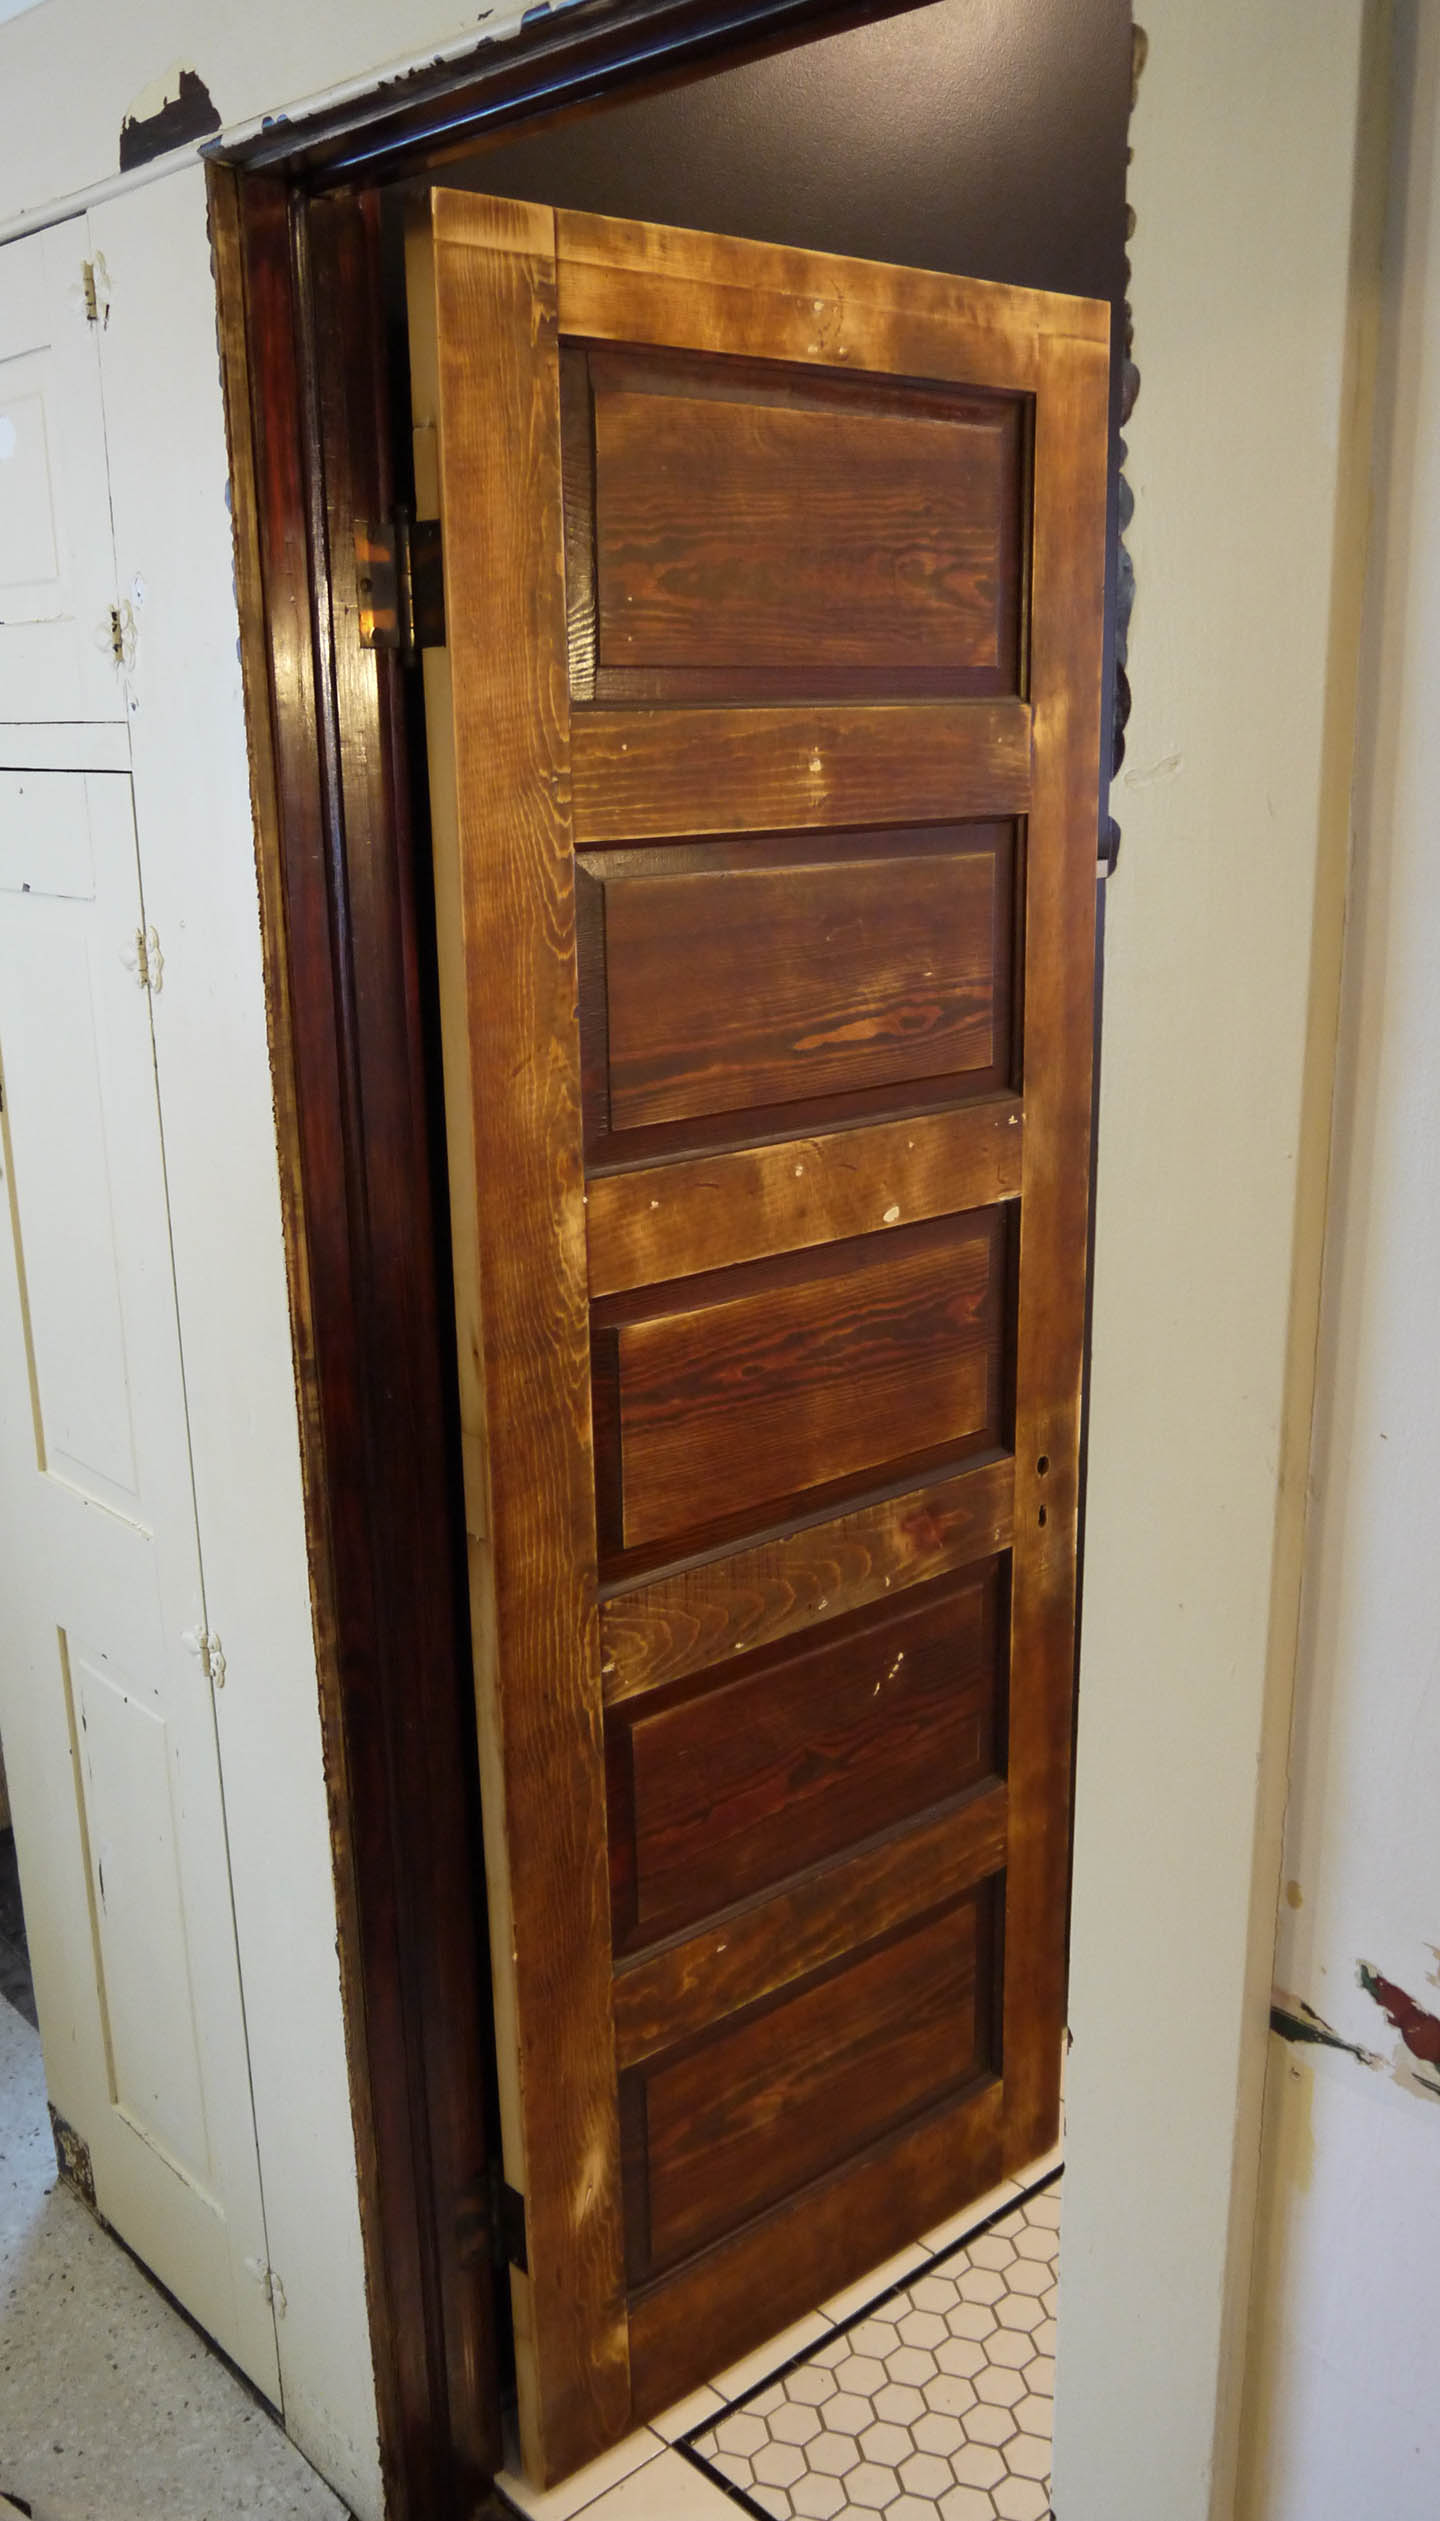
Then it was filler time. The door had some pretty nasty dings, dents, and a dozen holes. I filled every spot I could find with wood filler, and gave it ample time to dry. I moved the door back into the garage and sanded until my hands were frozen. The original stain color was a good match to begin, but the varnish was bubbled and scratched all over. I sanded down to remove the varnish and smoothed out the filled spots, trying not to remove the color underneath. Once sanded, I measured the spaces for the hinges using the existing door frame and carefully chiseled out these spots. Then came the moment of truth, hanging the door on the hinges:

It was a little snug in a few spots, but it fit! This photo looks like there is a large gap under the door, but it’s because the door hides the transition from the existing kitchen floor to the 1/2″ higher bathroom tile floor. When the door opens into the bathroom, it’s a very natural space between the door and floor, probably about 1/4″ or so.
I took the door off the hinges again and carried it into the garage for one more round of sanding, hitting the tight spots and making sure all the wood filled spots were smooth. In total, I think I carried the door in and out of the house more than a dozen times.
By re-inserting the handle mechanism, I marked on the door frame where the strike plate would need to go. It took me a little longer to chisel out this space, because the strike plate needs to be flush with the wood and the center needs to be chiseled deeper to make room for the latch to spring out.
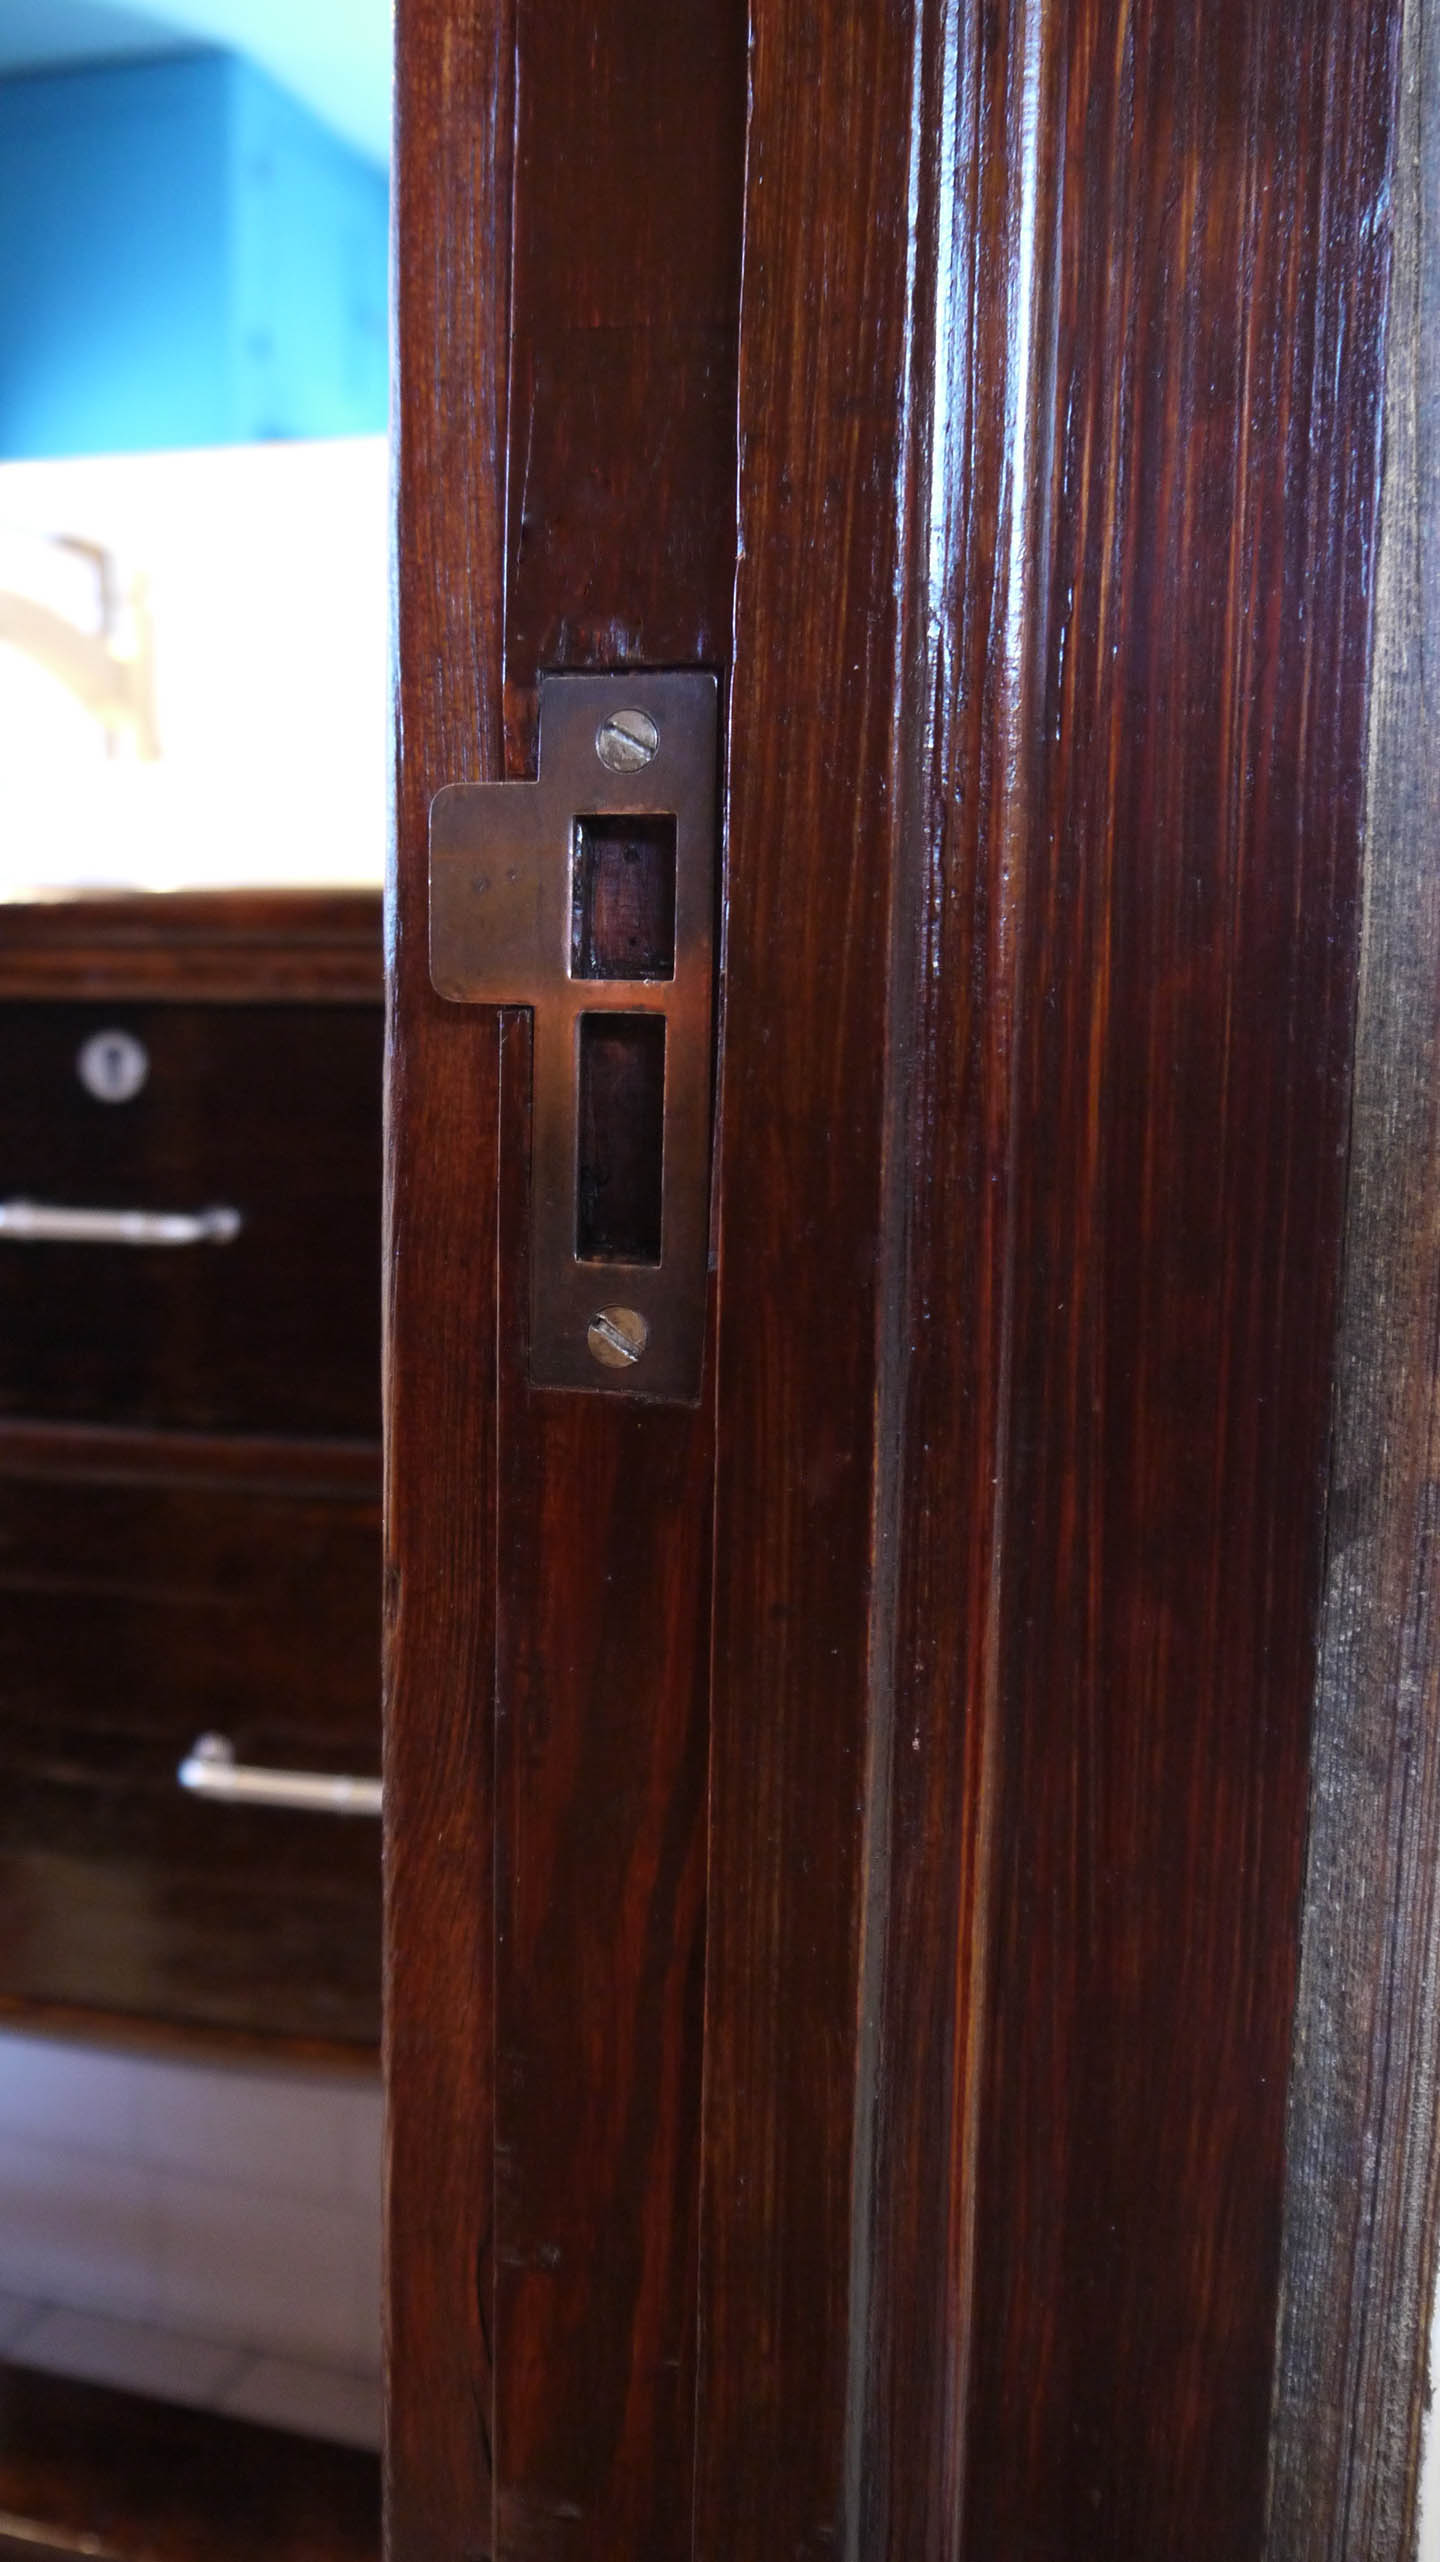
This picture was after I reattached the door stop also, so the door closes tightly and latches without rattling against the stop trim.
Then it was stain time. I wiped down the door really well with a slightly damp cloth, making sure to remove as much dust as I could. Giving the door plenty of time to dry I started staining the door with a clean cloth and the same Minwax Mahogany Gel Stain. The door accepted the stain really well, but with gel stain it takes a little technique to achieve a good look. Especially in the lighter wood areas or where the wood filler was really thick, I wold try not to wipe off all of the stain to help even out the color. I might hit a few light spots with a second coat of stain, but otherwise the door is ready for 2 coats of poly.

The contrast between the untouched kitchen woodwork and the now-beautifully stained door and frame is unnerving. I find keep finding myself staring at the door and how rich the color looks, trying to imagine how the rest of the woodwork will eventually look.
On the inside of the bathroom I nailed up the door trim that’s been waiting in the corner of the dining room. It’s finally starting to look finished – and then I realize I still don’t have outlet covers, lol.

Great Porcelain Scrub, Part II
Posted by Adam A. Ries in DIY, Home Improvement on November 5, 2014
I’ve learned from the DIY host Nicole Curtis that sometimes old plumbing fixtures just need some tough love in the form of elbow grease and lots of scrubbing. I realized what she meant when it was time to either clean or scrap the old cast iron tub. So now it was onto the original kitchen sink that was still in the house.
What that really means, is I’m starting to actually transition from demo/messmaking mode into cleaning and putting away mode! I’ve set the move-in date for the end of November, which means I have an entire workshop of tools and such to move OUT of the house and then a total scrub down of every surface in every room! No, it won’t be the Taj Mahal, but at least it will be clean and I can then work on 1 room at a time – no more tearing out floors or demoing plaster walls.
So I started with the kitchen area. Tonight after work I went to town on the kitchen sink and window.

The kitchen sink is the same to me as the bathtub – sure they are filthy and a few dings here and there, but they are original. They give the house that bit of character and charm that says old but loved. Sure there are a few blemishes, but so do all vintage pieces – and those imperfections make it perfect for this house and for the kitchen I have in my mind.
But an hour and some elbow grease and voila!
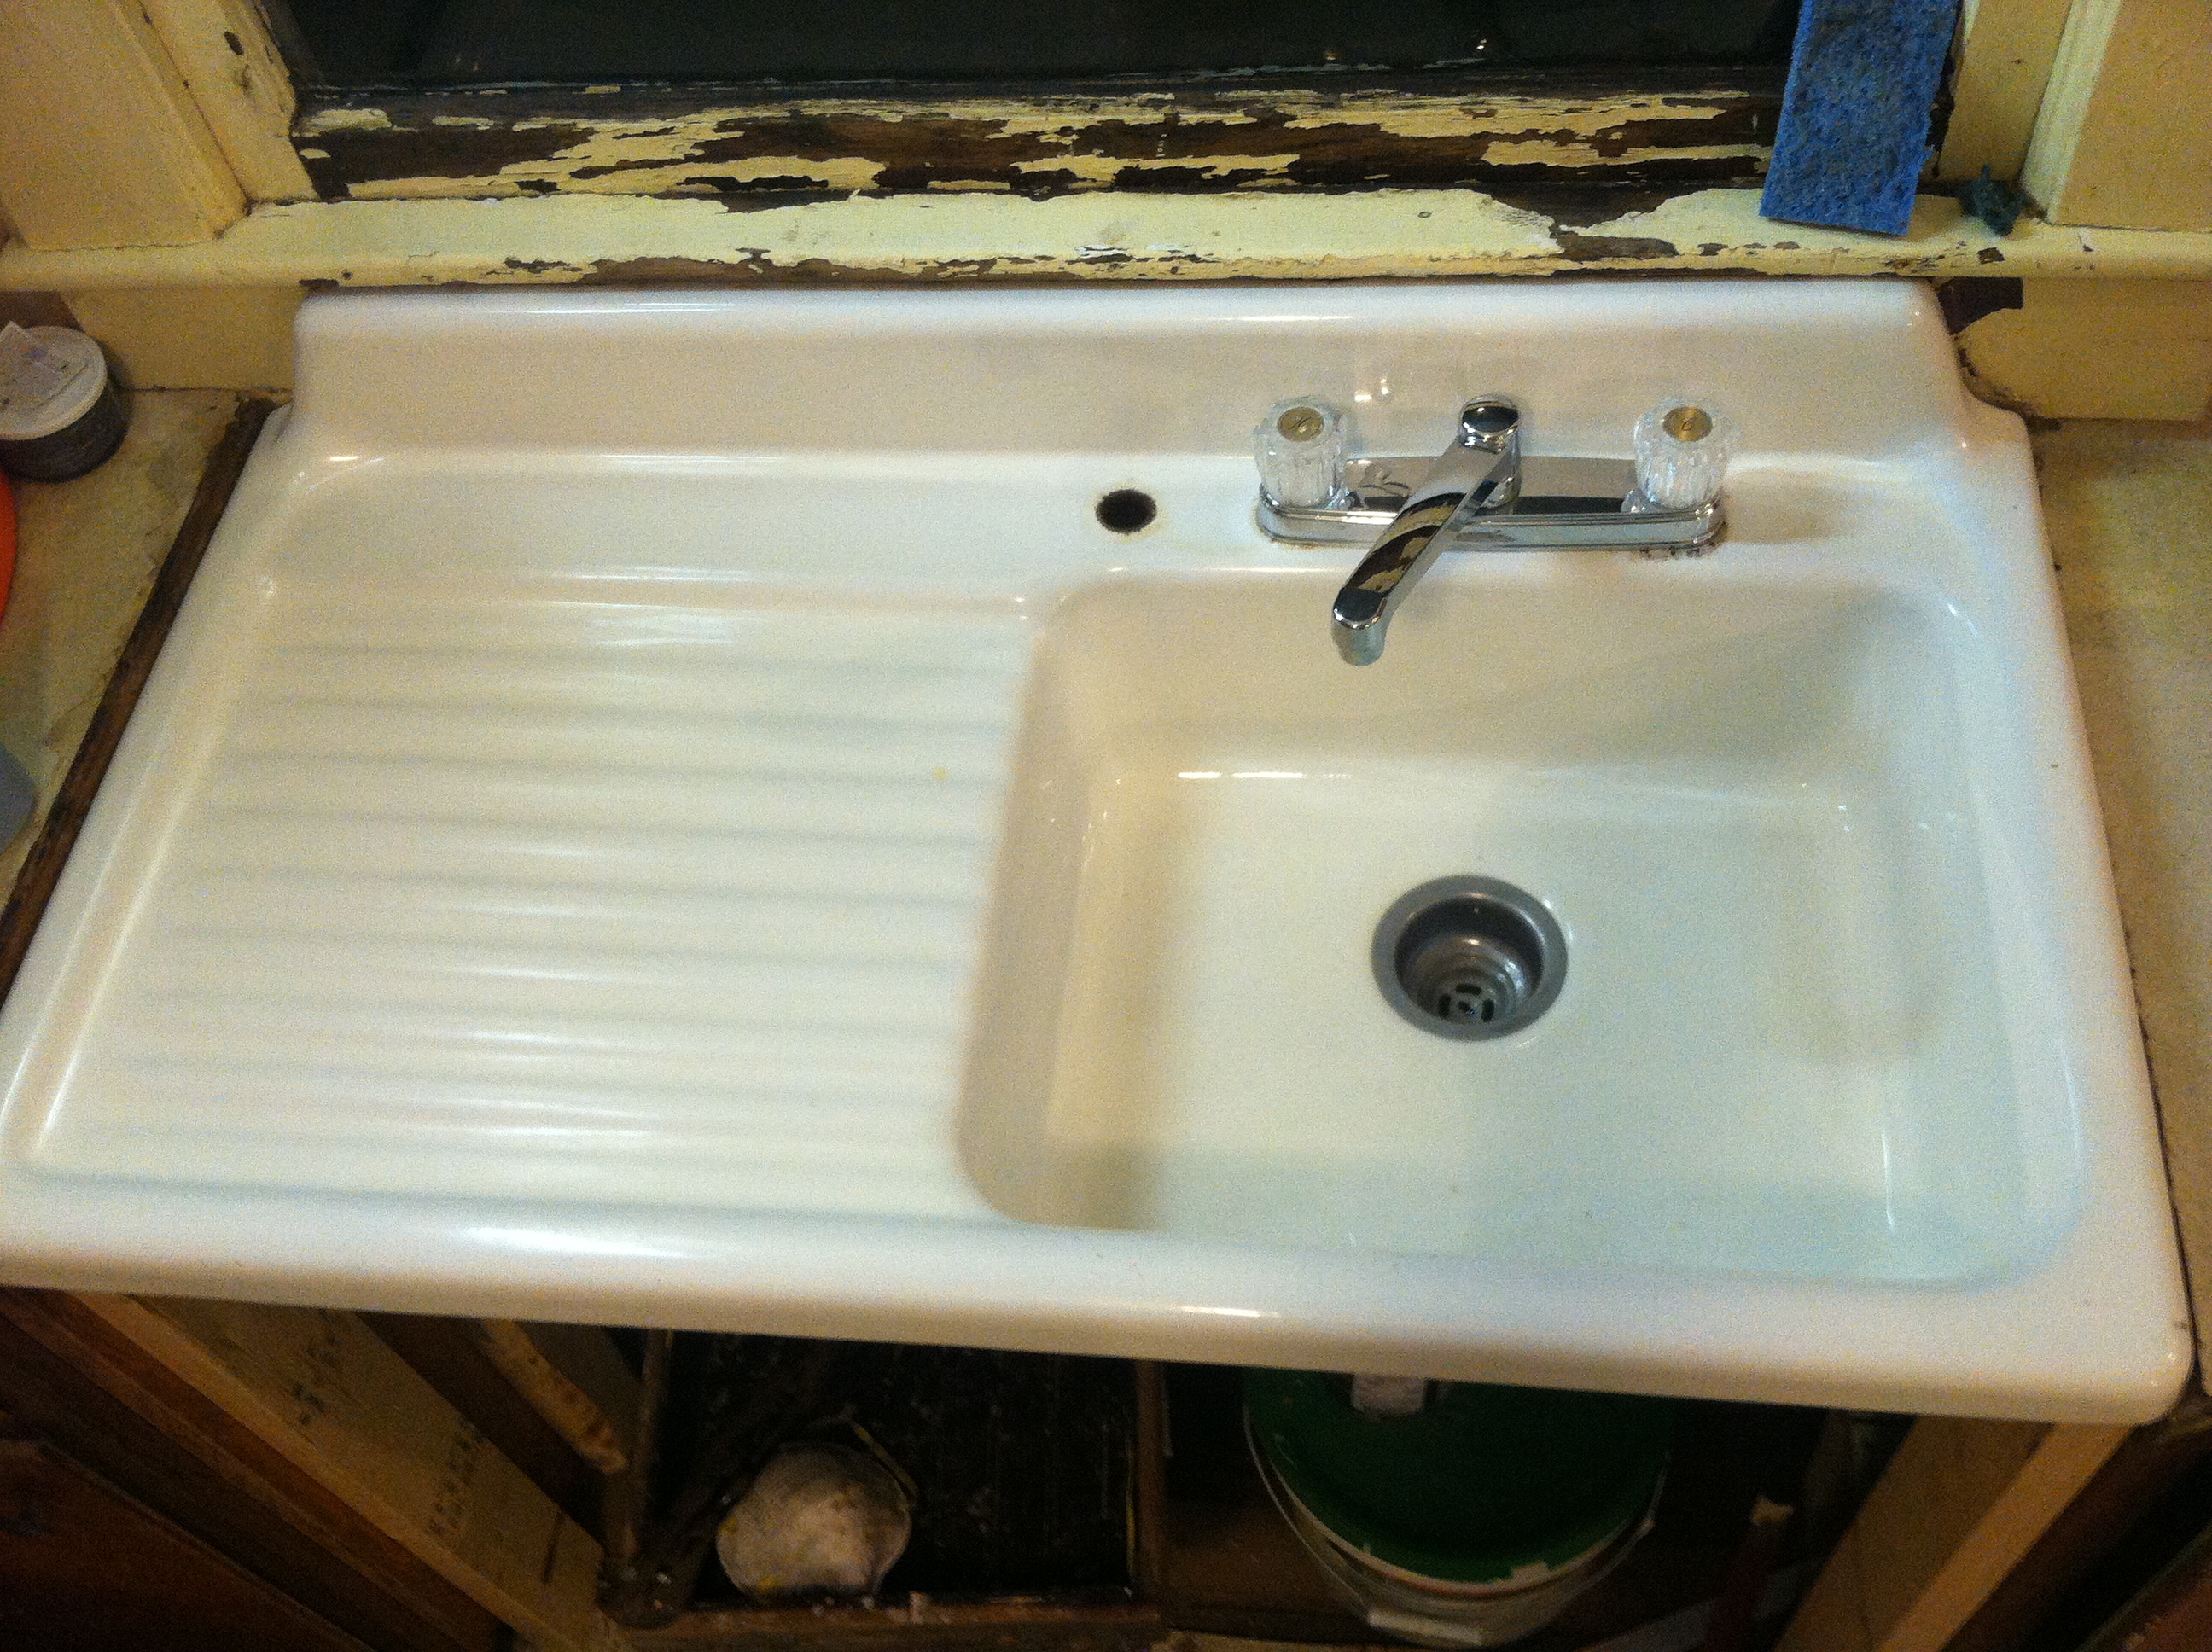
It’s shiny and white again, thanks to a little Bar Keepers Friend and a well worn Scotch-Brite pad. Not a bad before & after! (Ignore the extra hole to the left of the faucet – I’ve got it plugged from underneath for now, but when I finally – or if I ever- get to the full kitchen renovation, that will be a great spot for either a faucet sprayer OR this handy air switch for a in-sink disposal!)

More Done, More to Do
Posted by Adam A. Ries in DIY, Home Improvement on November 3, 2014
Although work and life has been busy over the last few weeks, (including a friend’s wonderful wedding weekend and a crazy Halloween party), I’m still getting work done on the humble bungalow. Slowly but surely.
Although I had finished the roof on the house the weekend before (rain and all), I still had the garage to tear-off and re-roof. Just a 1 car garage so I kept saying how I’d like to get it all done in one weekend. And we basically did.

Turns out there were 3 full layers of asphalt on the garage – but no shake shingles underneath. So although the extra layer of shingles took more time to tear-off, I saved time not needing to lay down new decking across the roof. It was tear-off and then immediately rolling out the felt paper. Although one afternoon did get rainy, we were able to spend all day Sunday getting it finished – literally working until dark and bringing out the work light for the last few rows.

But we got it all finished – I know its just a roof, but damn I’m proud of it! The difference of before and after makes the entire house look different!
Going back inside, I had left the bathroom without the finishing touches in order to get the roof replaced this fall. Although I had a working toilet, the kitchen sink was the only running faucet inside the house. I had begun the process of refinishing an old dresser to transform it into the bathroom vanity, but it sat unfinished for a few months.

I bought it from a Craigslist seller earlier this summer and envisioned it as a sink base. 1 drawer was already entirely busted, and even with my experience repairing broken furniture it was too far gone. So I didn’t feel bad cutting into the dresser top and altering the remaining drawers to make room for the sink drain and supply lines. I also stained the cabinet a bit darker for a richer contrast between the wooden vanity and all white bathroom tile. 4 layers of marine varnish later, and the cabinet was ready for the sink bowl.

I attached the faucet to the sink before placing the bowl into the cabinet – much easier to do that step when the sink is on the floor and you don’t have to lay on your back on the floor. When it came time to glue the sink bowl in place, I knew I didn’t want to move the sink around and smear silicone all over the dresser top. So I first dry-fit the sink, measuring from left to right, making sure the sink was centered. Once in place, I used masking tape to outline the perimeter of the sink. This way I knew exactly how to center the sink and this also gave me an extremely clean line for the silicone that squeezed out. The result speaks for itself – and is exactly the look I had in my mind.

Such clean silicone lines! And that wood counter is shine-y! Looks like glass, but it should hold up to water from the bathroom sink just fine for years to come.

I have the top drawers installed in this photo. They each had to be altered to make way for the curve of the sink bowl and additional space for the drain and supply pipes. In reality, the top drawers are only about half as wide as they were originally, but this way they still function and provide some storage. Enough room for all the typical top drawer bathroom items; toothpaste, toothbrush, razors, bar soap, and everything else that always finds its way here.
The middle drawer isn’t in the photo yet, I have one more coat of poly to brush onto that drawer front. For the bottom drawer opening, I’m thinking about a few slats across the bottom to hold a few baskets – stuff them with rolled up towels or something.
