Posts Tagged Silicone
More Done, More to Do
Posted by Adam A. Ries in DIY, Home Improvement on November 3, 2014
Although work and life has been busy over the last few weeks, (including a friend’s wonderful wedding weekend and a crazy Halloween party), I’m still getting work done on the humble bungalow. Slowly but surely.
Although I had finished the roof on the house the weekend before (rain and all), I still had the garage to tear-off and re-roof. Just a 1 car garage so I kept saying how I’d like to get it all done in one weekend. And we basically did.
Turns out there were 3 full layers of asphalt on the garage – but no shake shingles underneath. So although the extra layer of shingles took more time to tear-off, I saved time not needing to lay down new decking across the roof. It was tear-off and then immediately rolling out the felt paper. Although one afternoon did get rainy, we were able to spend all day Sunday getting it finished – literally working until dark and bringing out the work light for the last few rows.
But we got it all finished – I know its just a roof, but damn I’m proud of it! The difference of before and after makes the entire house look different!
Going back inside, I had left the bathroom without the finishing touches in order to get the roof replaced this fall. Although I had a working toilet, the kitchen sink was the only running faucet inside the house. I had begun the process of refinishing an old dresser to transform it into the bathroom vanity, but it sat unfinished for a few months.
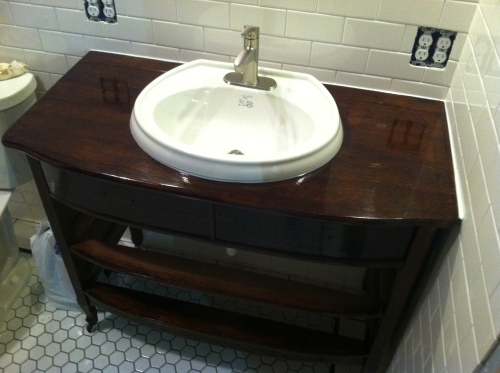
I bought it from a Craigslist seller earlier this summer and envisioned it as a sink base. 1 drawer was already entirely busted, and even with my experience repairing broken furniture it was too far gone. So I didn’t feel bad cutting into the dresser top and altering the remaining drawers to make room for the sink drain and supply lines. I also stained the cabinet a bit darker for a richer contrast between the wooden vanity and all white bathroom tile. 4 layers of marine varnish later, and the cabinet was ready for the sink bowl.
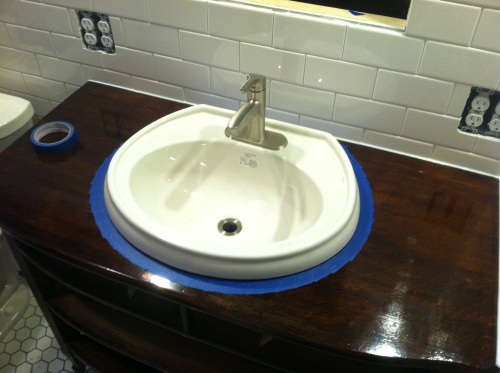
I attached the faucet to the sink before placing the bowl into the cabinet – much easier to do that step when the sink is on the floor and you don’t have to lay on your back on the floor. When it came time to glue the sink bowl in place, I knew I didn’t want to move the sink around and smear silicone all over the dresser top. So I first dry-fit the sink, measuring from left to right, making sure the sink was centered. Once in place, I used masking tape to outline the perimeter of the sink. This way I knew exactly how to center the sink and this also gave me an extremely clean line for the silicone that squeezed out. The result speaks for itself – and is exactly the look I had in my mind.
Such clean silicone lines! And that wood counter is shine-y! Looks like glass, but it should hold up to water from the bathroom sink just fine for years to come.
I have the top drawers installed in this photo. They each had to be altered to make way for the curve of the sink bowl and additional space for the drain and supply pipes. In reality, the top drawers are only about half as wide as they were originally, but this way they still function and provide some storage. Enough room for all the typical top drawer bathroom items; toothpaste, toothbrush, razors, bar soap, and everything else that always finds its way here.
The middle drawer isn’t in the photo yet, I have one more coat of poly to brush onto that drawer front. For the bottom drawer opening, I’m thinking about a few slats across the bottom to hold a few baskets – stuff them with rolled up towels or something.


