Posts Tagged Bathroom
On the Up and Up
Posted by Adam A. Ries in DIY, Home Improvement, Interior Design on July 9, 2014
Meaning, drywall and cement board! Although most of the bathroom was ready to accept wallboard once the plaster was torn off, I did have to do a little framing at what would be the back of the tub/shower. As you can see in this 3D model, the bathroom is about 5′-8″ wide, and a tub is only 5 feet.

That leaves me with a 8 in gap between the tub and the existing bath wall. So I framed in a full height wall to have a support to build a shower wall. In the end, I’m planning to trim it out with little cubbie cabinets to look very similar to this (only I will continue it all the way to the ceiling).

I used 2×2 lumber as the main section, and a 2×4 on the outside for strength (non-weight bearing walls can be constructed of 2×2 lumber – it’s how thin walls and even walls that house a pocket door are constructed).

I added lots of cross-supports between the studs and the wall behind. Although it was very strong on it’s own, this will be a tiled shower wall, and I don’t want any flexing to crack tiles or cause them to break off. The 1×4 sections between the studs are flush to the front of the framing studs. Just like the ones you can see along the top edge of the tub, these were a recommendation from a how-to video I found very informative on YouTube (Seriously, TileMasterGA: I have learned so much from his many videos documenting each thorough step of a quality and long-lasting bathroom renovation). These boards he recommended are to provide additional support to secure the wallboard as strong as possible, minimizing flexing. I just used scrap boards for these pieces. I also put them at the height where 2 sections of wall board will meet, to make sure the joint has this strong support as well.
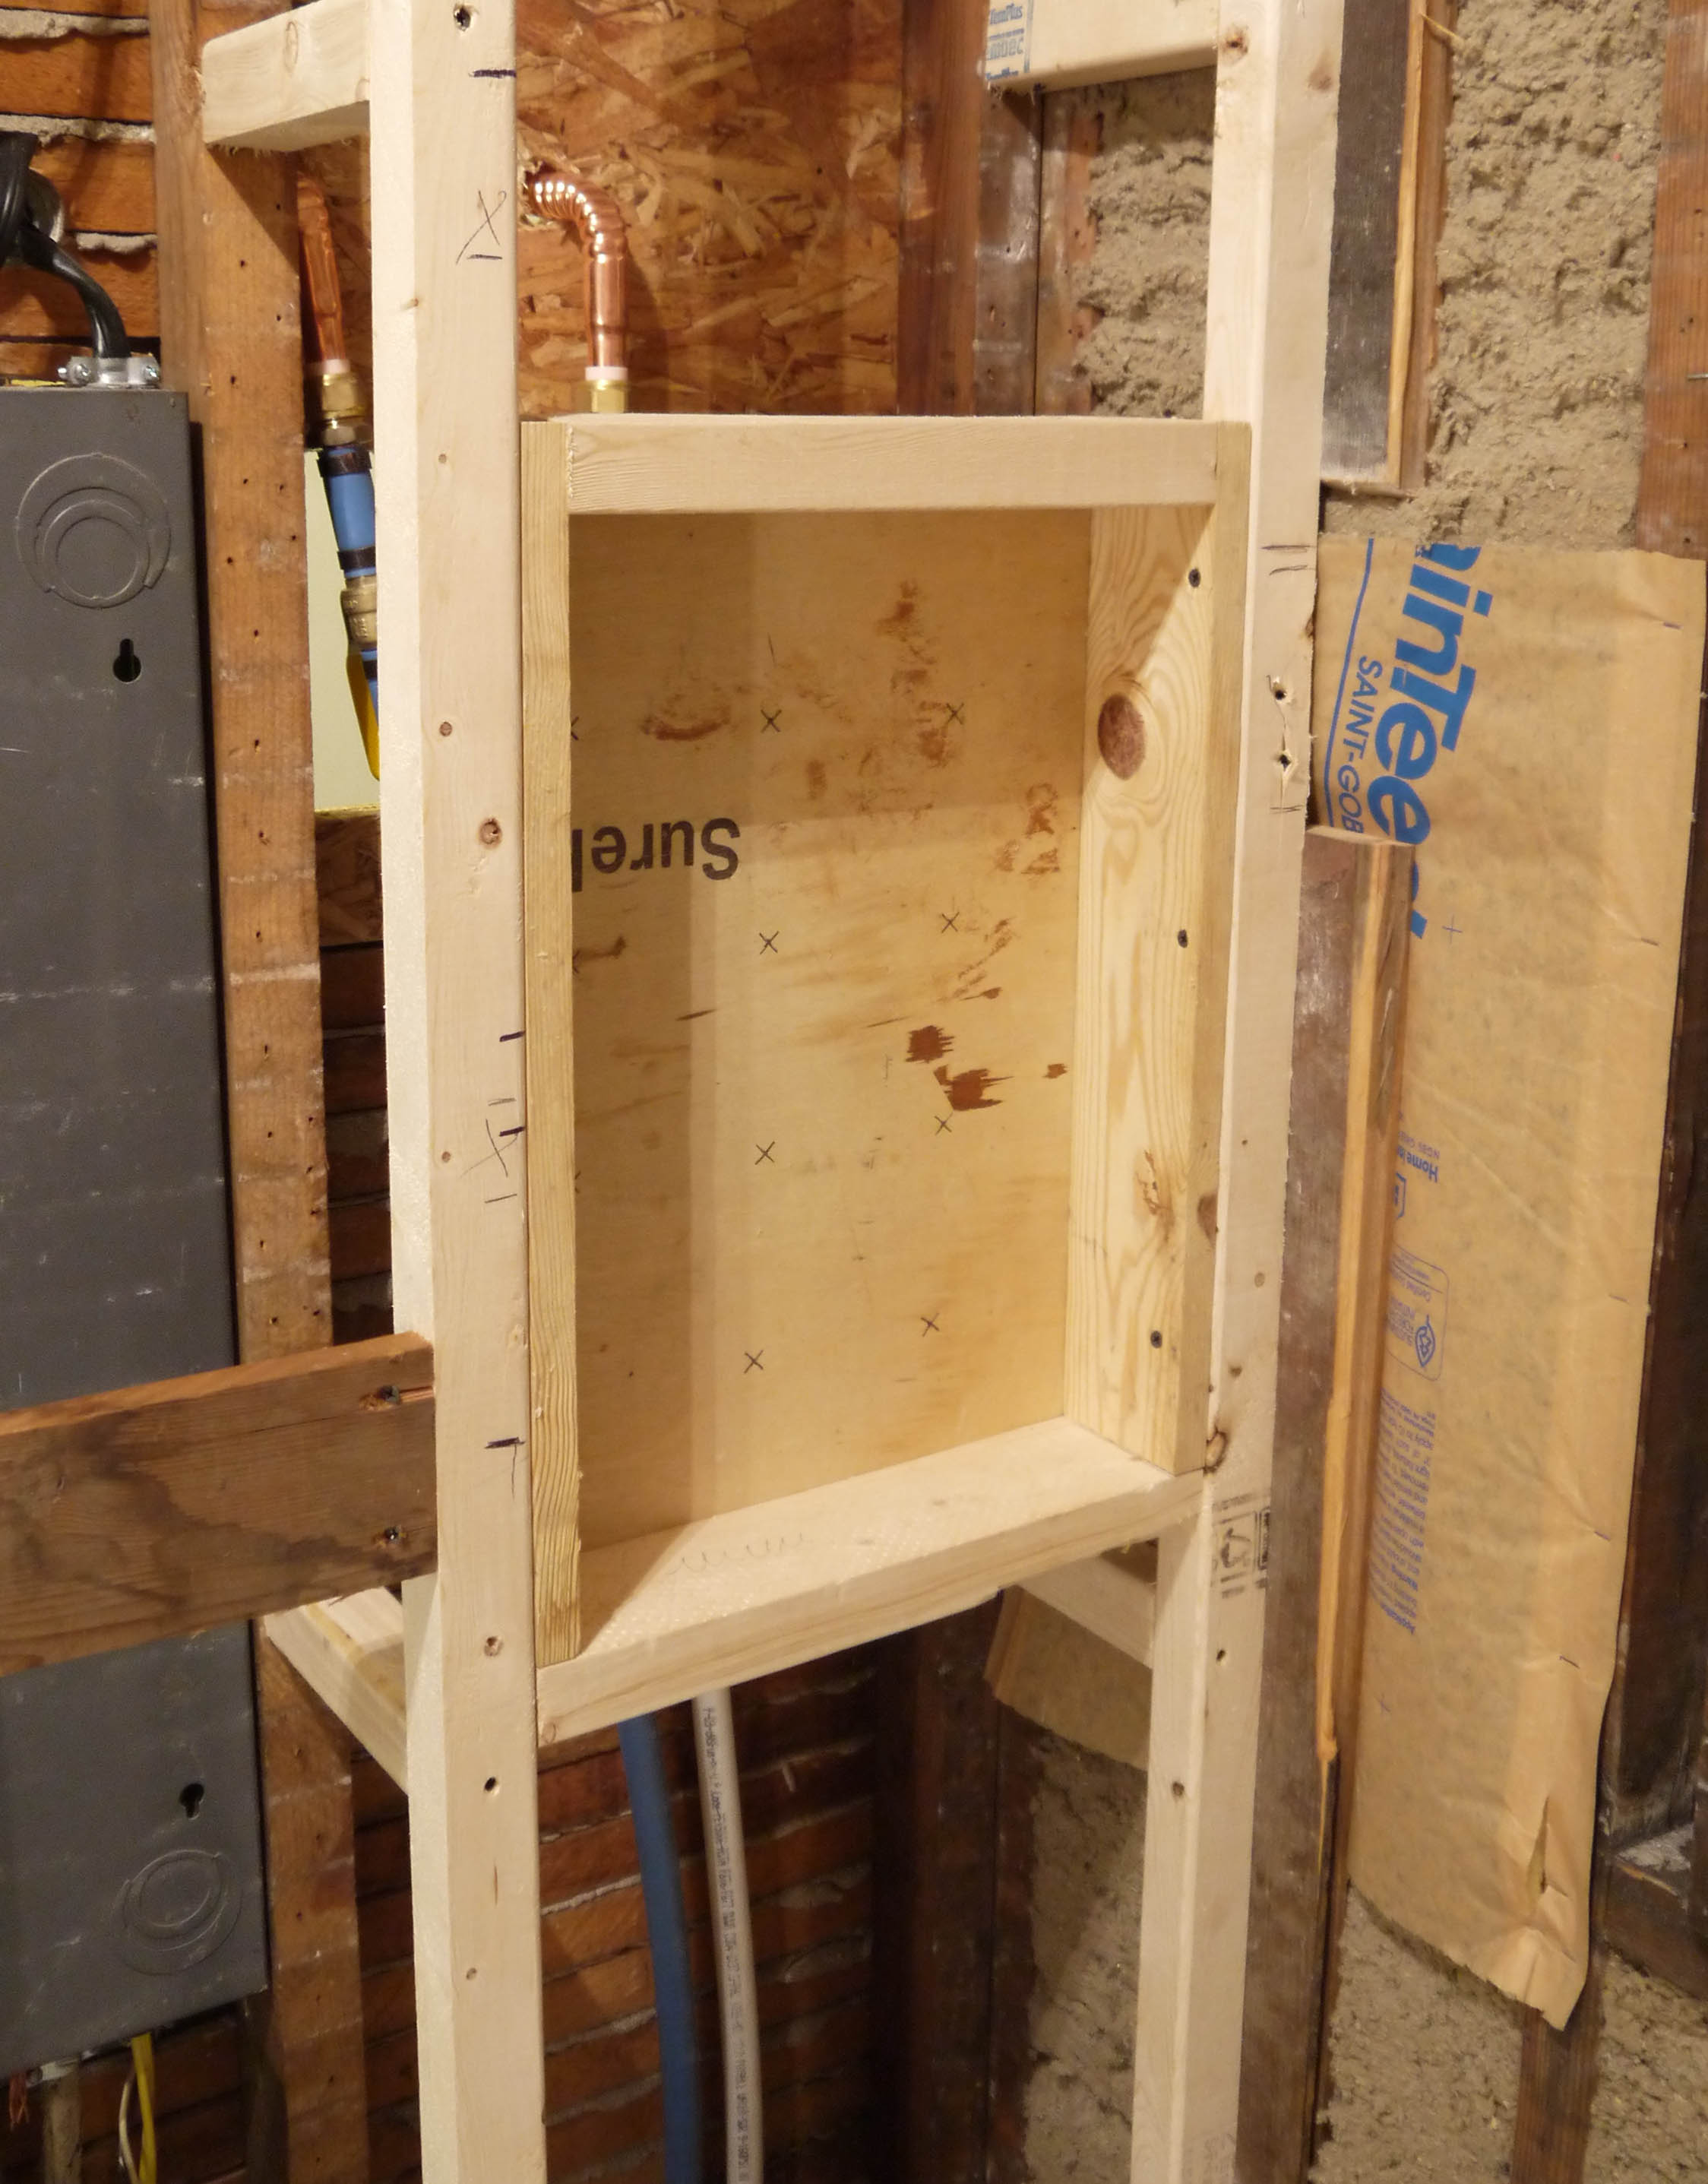
This is what I’m super excited about. It’s my shower soap & shampoo niche. I’m not a big fan of these old metal shower soap trays (although they are very appropriate for the time period look I’m going for – pretty sure I tore 1 or 2 out in the beginning). Instead, I wanted a built in niche, so I basically built a window frame and secured it into this wall space. It will get covered in cement board just like the shower walls, then tiled to look seamless like this:

Only I don’t like how far apart the two niches are, I’m going for more like this, with just a thin shelf for small bottles and a bar of soap:

So back to reality. Wall board goes up pretty quick, and relatively easy. The only bad part is lifting the 2nd sheet up to the ceiling and holding it while driving the first couple screws to secure it.

Oh, and don’t forget to pre-measure & mark the location of outlets, light fixtures, or pipes. That meant taking the one sheet back down to measure, and then lifting it up and securing it all over again. Marking the location takes a lot of the guesswork out of using a RotoZip to cut out for the opening.
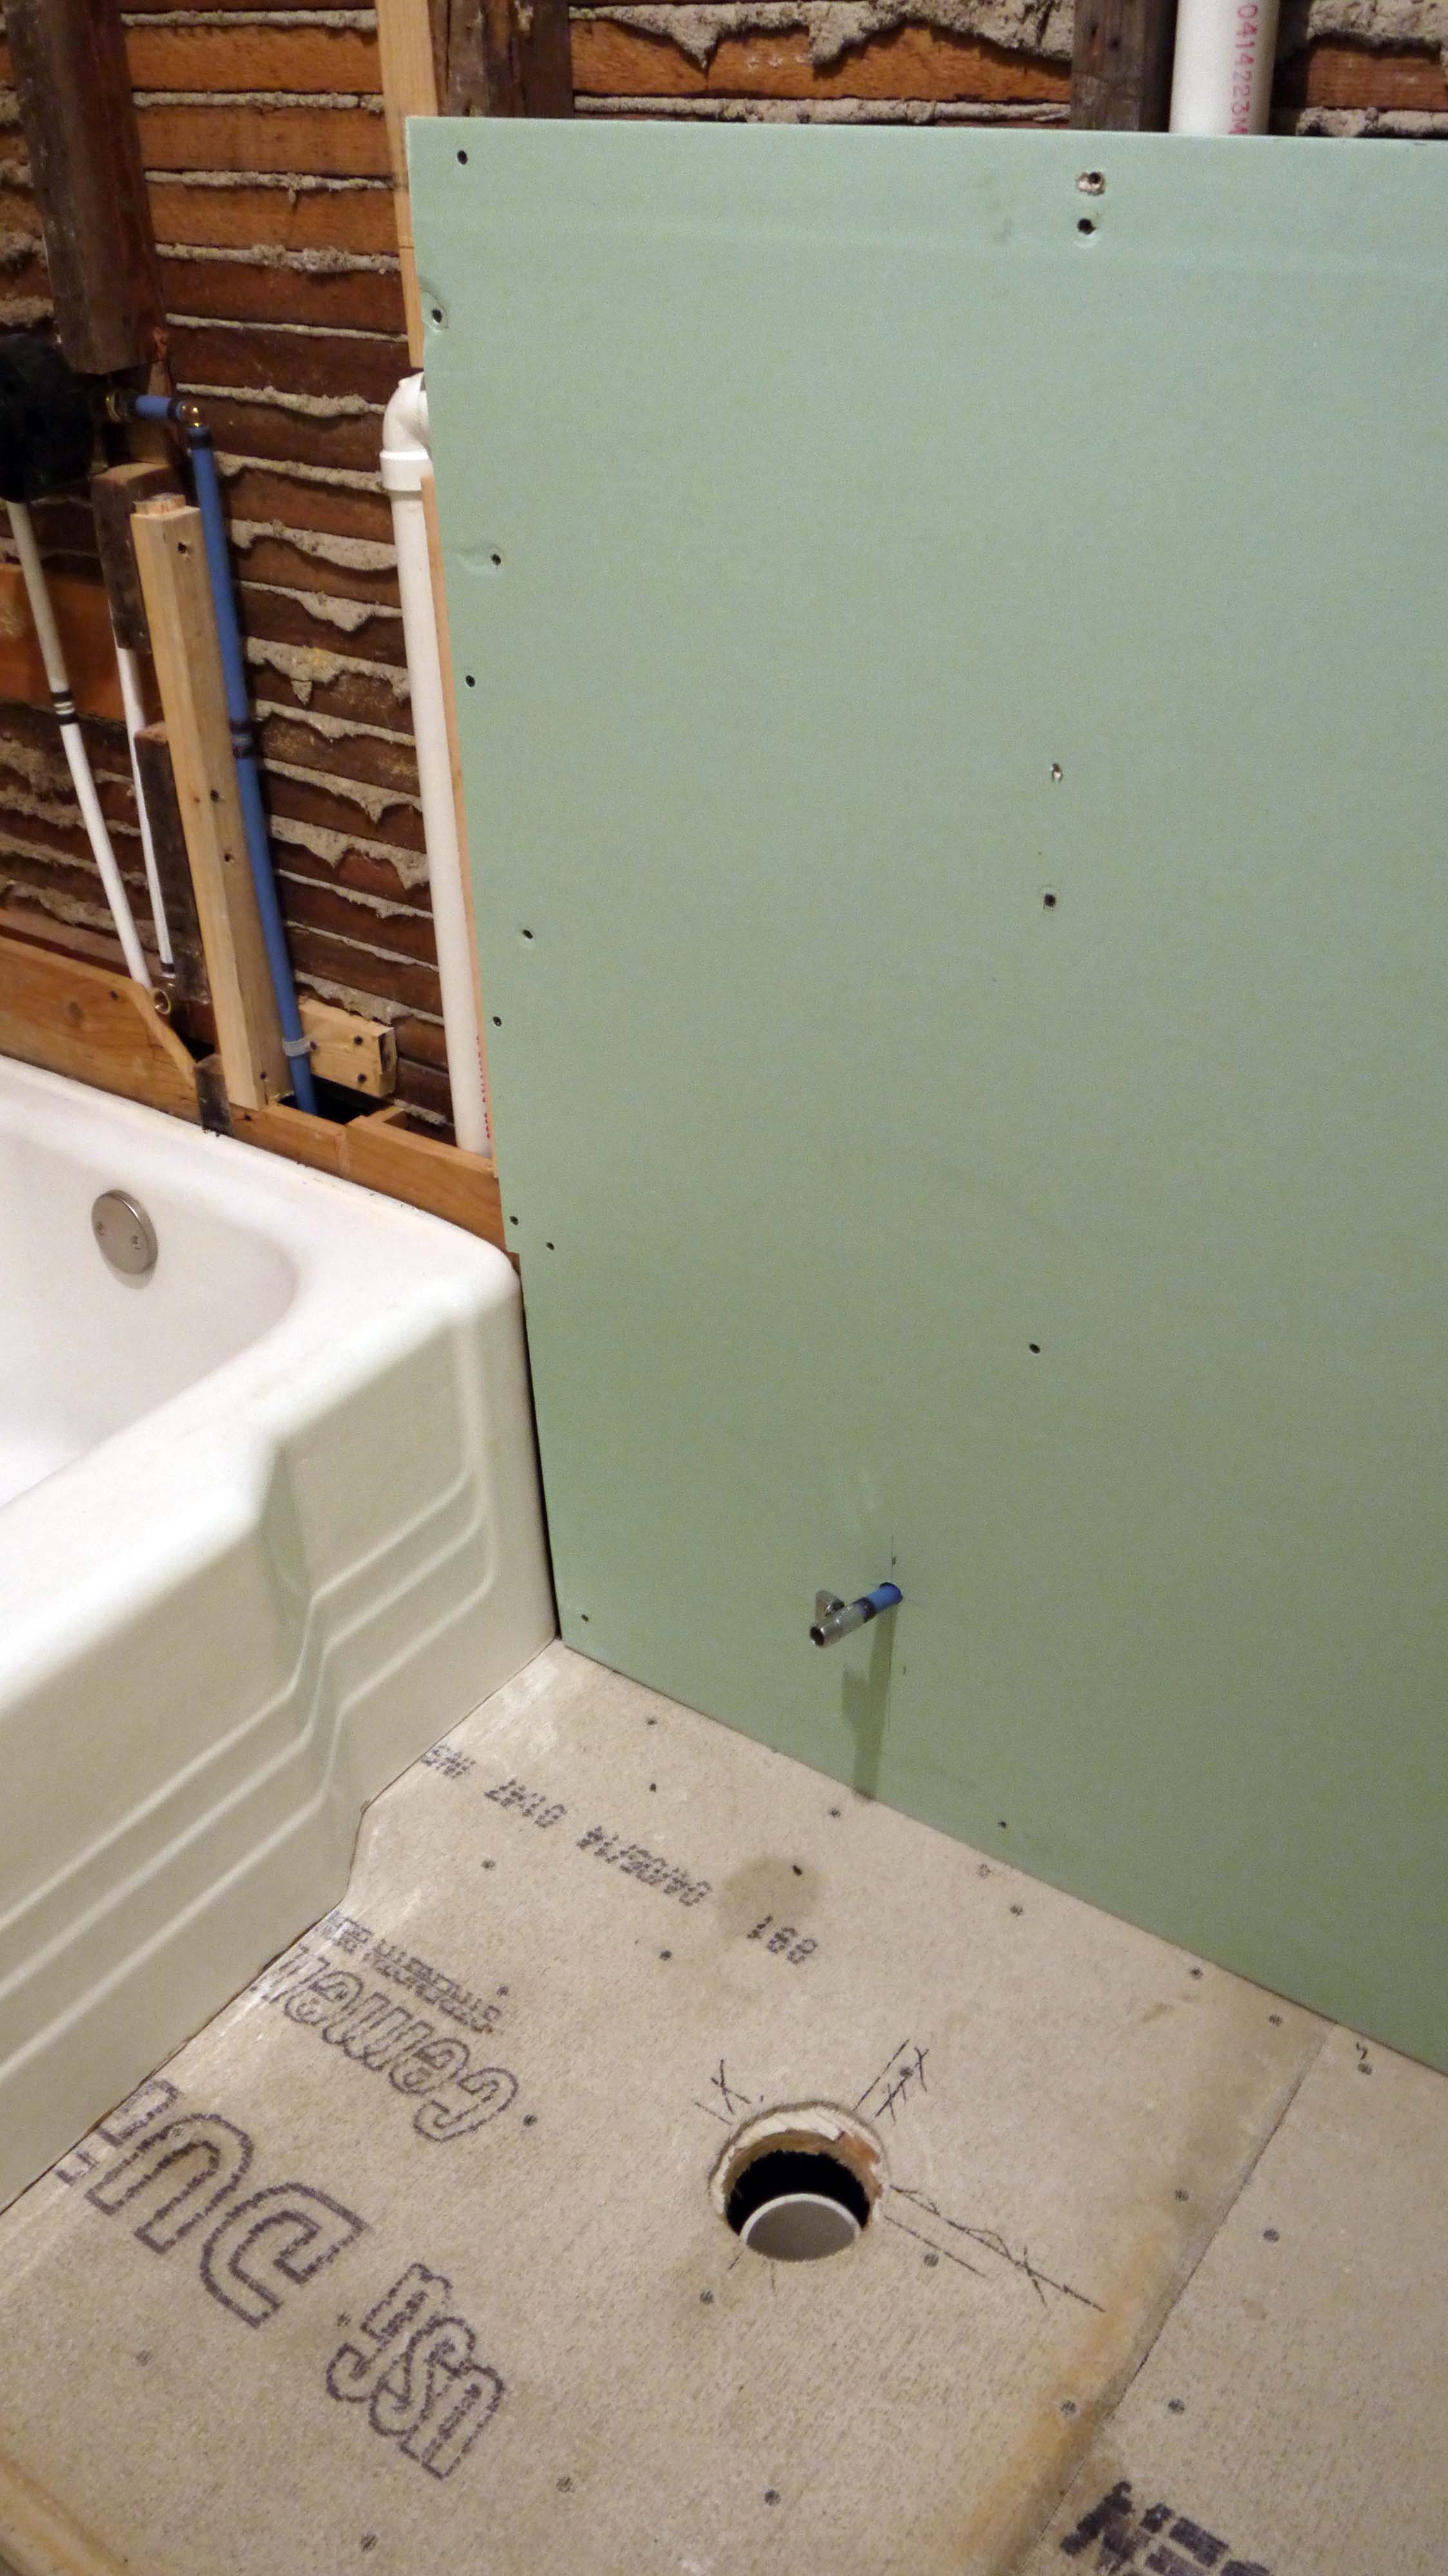
The cement board went pretty easy too. It comes in slightly smaller pieces (3’x5′ instead of a regular drywall 4’x8′), so it’s easier to handle and lift on and off of sawhorses.
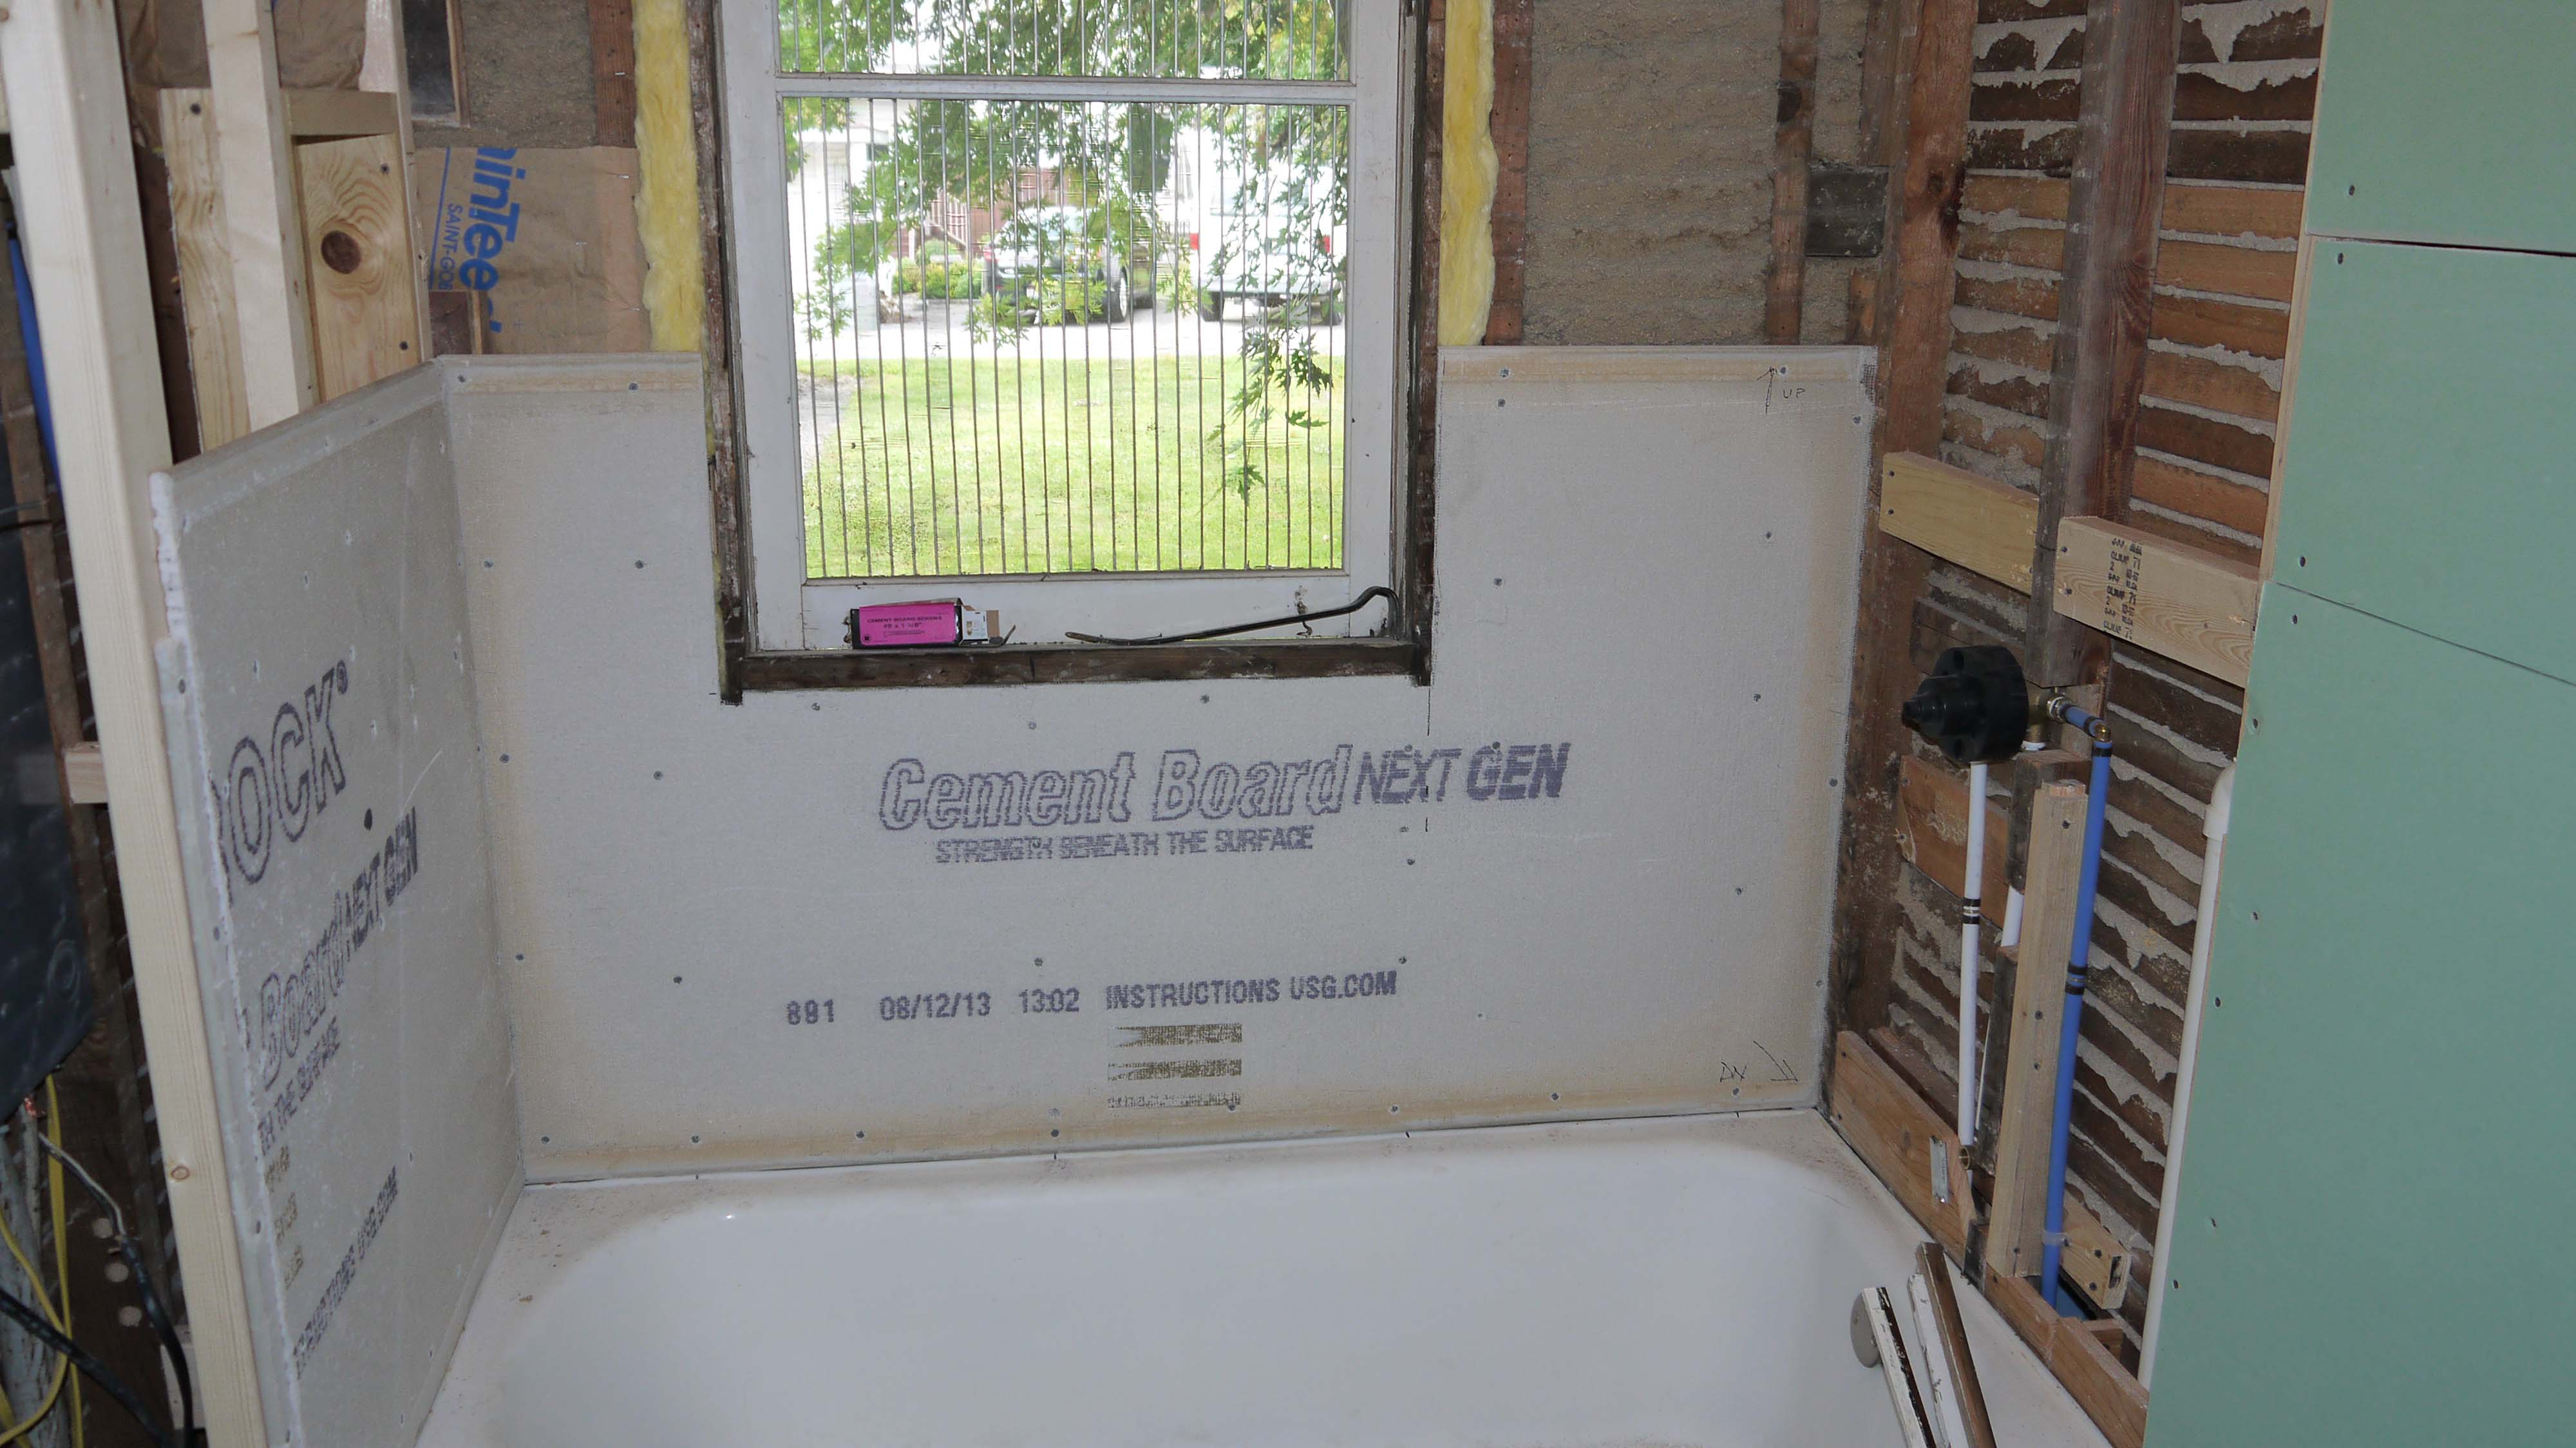
Cutting the cement board is not as easy as cutting drywall. Instead of scoring with a utility knife and snapping it apart, I used a metal cutting blade in my handheld jigsaw. It did a little tearing out along my cut line line (after all, there are pieces of aggregate compressed into the board just like in cement), but it’s a raw edge so that’s ok. I didn’t have any trouble drilling holes for the tub and shower faucet or the mixer valve. I just used the matching size hole saw bit and it went through just fine. For attaching the cement board, the lumberyard sold me special ‘cement board’ screws that are recommended. They have different threads than drywall screws and a larger head, which prevents them from pulling through the surface too far. They barely countersink themselves and that holds the cement board tightly against the wall studs. Same as the floor, the shower walls are super string and rigid, and just about ready for tile!
And here’s the bathroom all boarded up:

I can’t even begin to express how good it feels simply to have walls again!
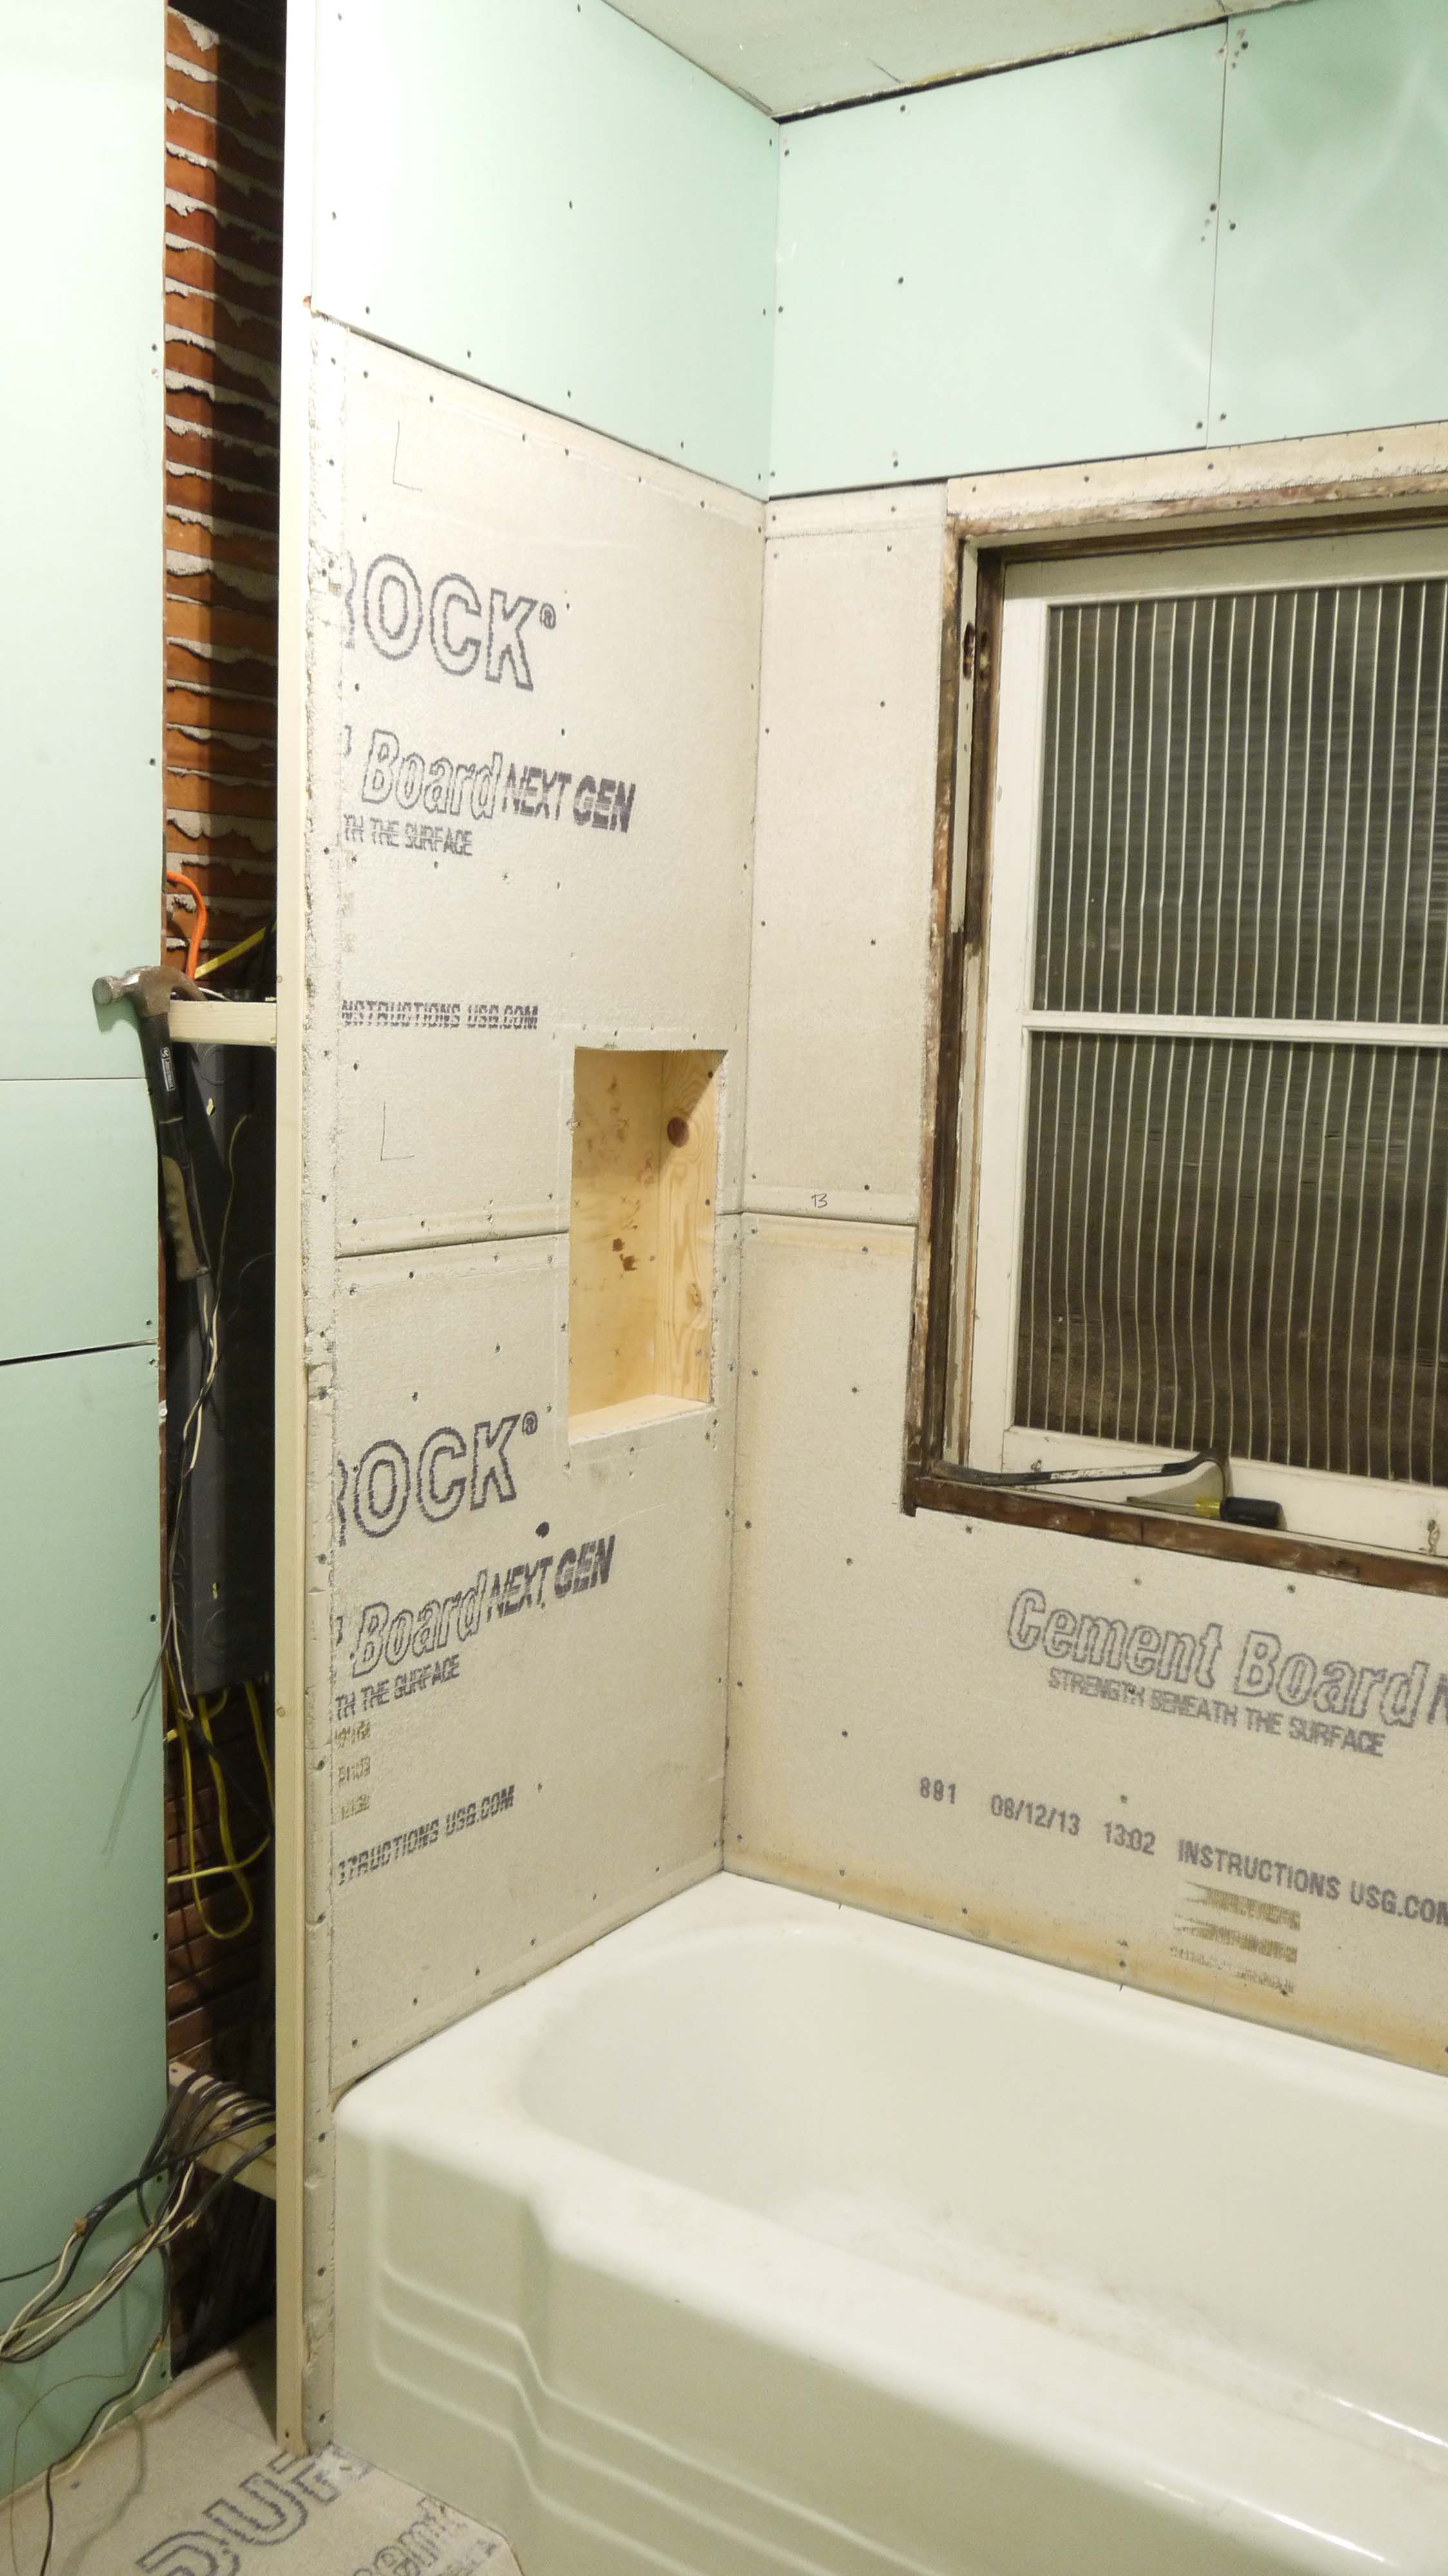
Oh, except the niche. I still have to cut the smaller pieces to fit inside that area.

Don’t look for regularity in the screws. There isn’t any. I put a screw wherever I felt it needed one. And especially don’t count how many holes there are without screws. Screw guns are so finicky + extremely hard old-growth lumber wall studs = a lot of stripped out screws. But the next step should fill and cover all of those. Bring on the mud!
The Great Tub Scrub
Posted by Adam A. Ries in DIY, Home Improvement on July 2, 2014
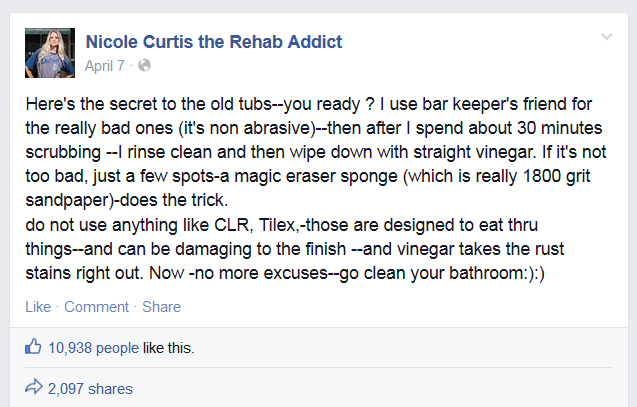
I sit here typing with sore arms, gouges on my index finger, and a lack of fingerprints – they’ve been scrubbed off. All in the name of Nicole Curtis – the famous DIY Network star (aka The Rehab Addict), well known for her love of old character-rich homes and especially vintage plumbing fixtures. Well Nicole, just wait until you see this before & after!
I used her recommendations to bring the homes original old tub (dated 1942 on the base) back into shiny white usefulness. Between rust stains, years of layered silicone adhesive, paint, and old stuck on duct tape, this tub had seen better days. But I knew a beautiful vintage white was hiding underneath.
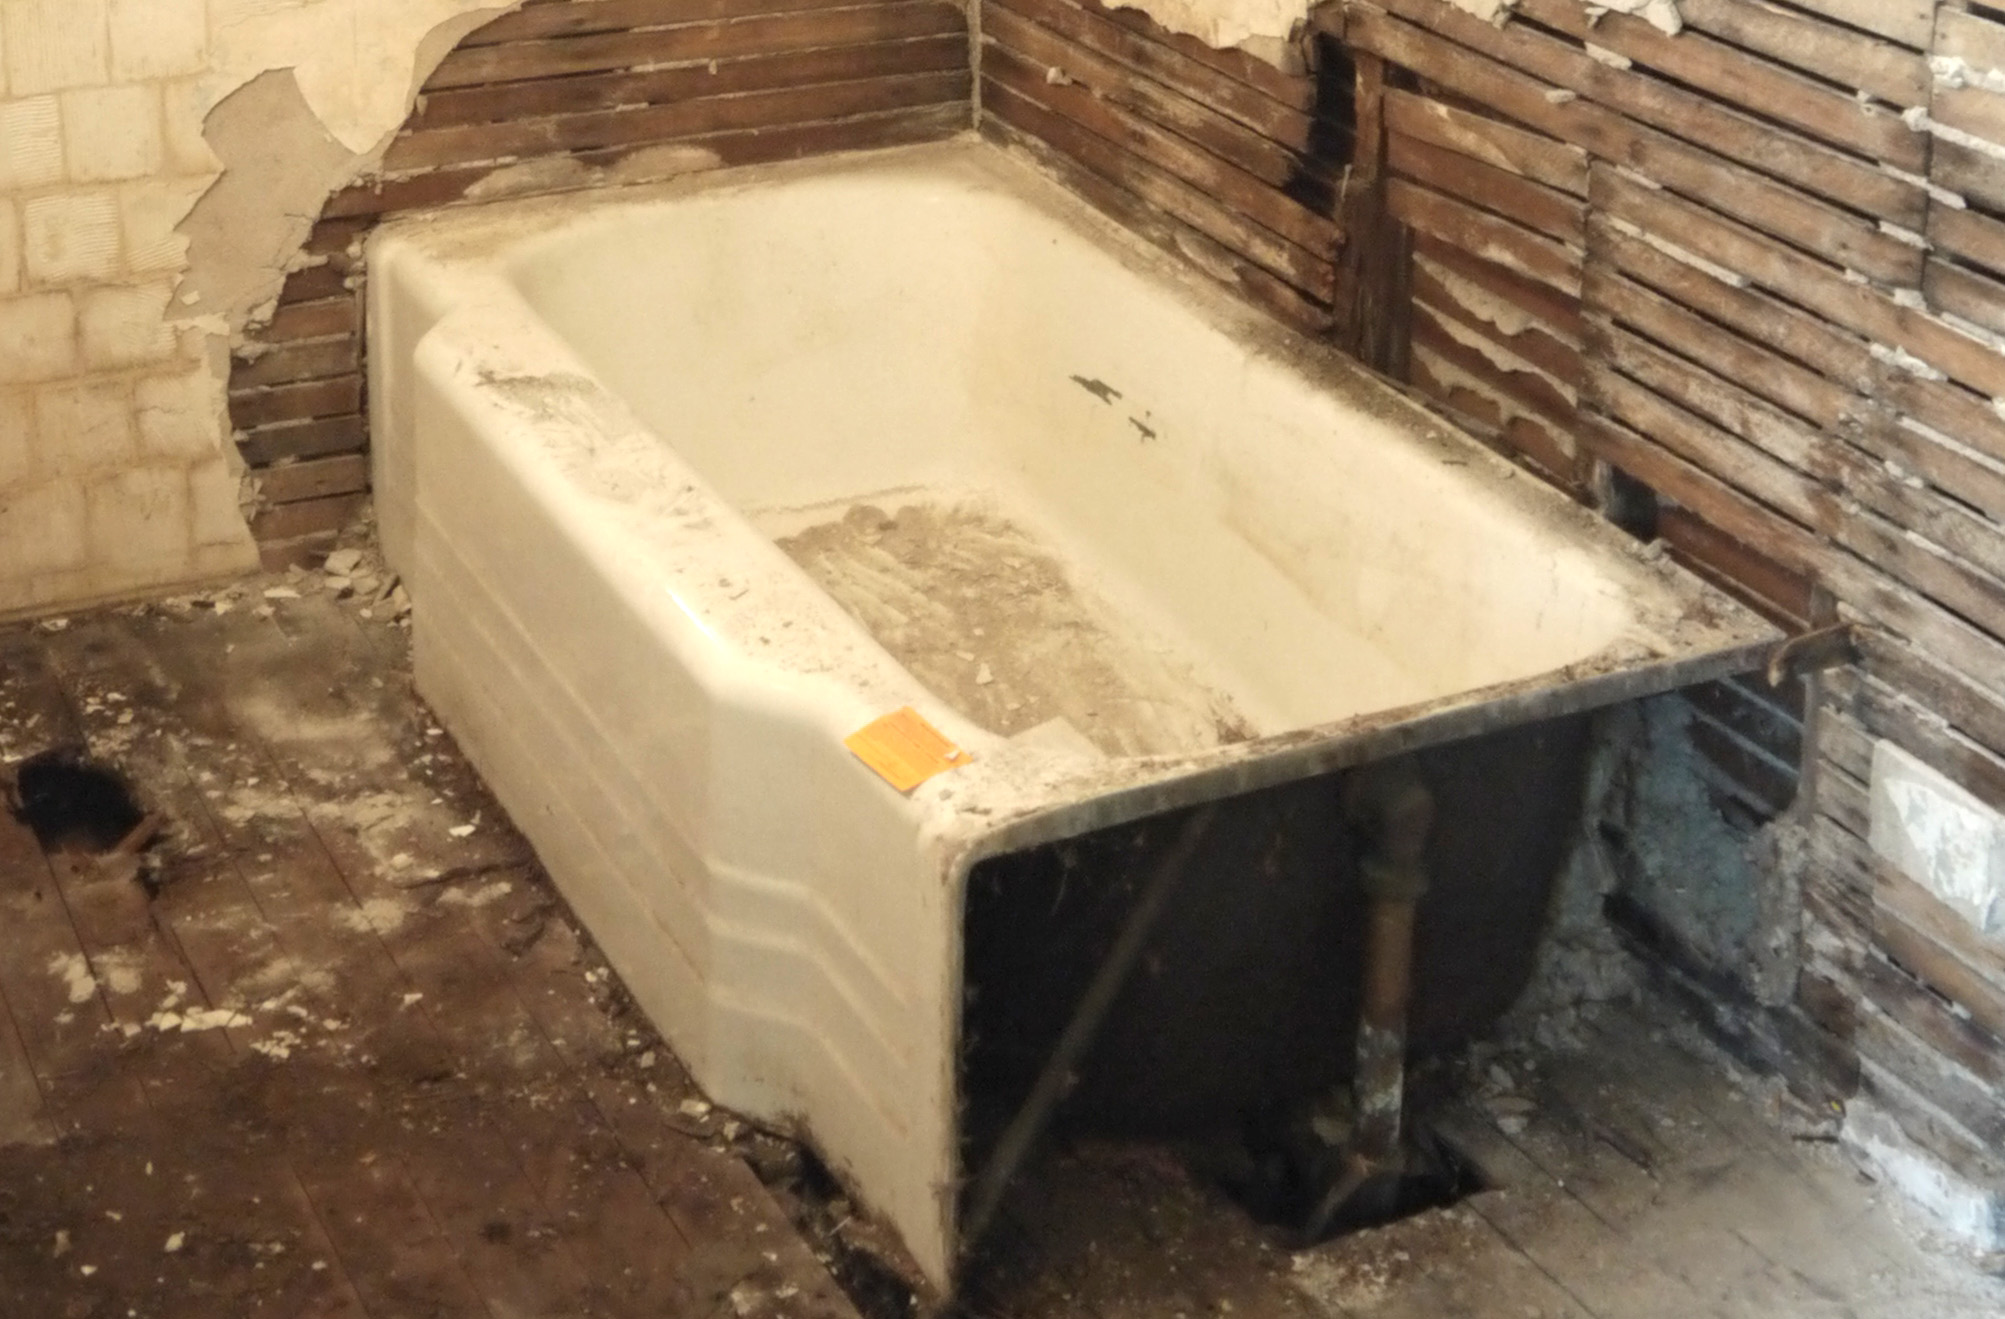
Not quite a luxury soaking tub, eh? Nicole recommends Mr Clean Magic Eraser for light staining and scuffing. For heavy stains and gunk, she claims her secret is Bar Keeper’s Friend.
I used almost an entire canister of Bar Keeper’s Friend (BKF), a nylon scratch pad, utility blade, and sponge. And believe me, it took way longer than the half hour she claims.

The scrubbing takes a lot of elbow grease, and I continuously kept rinsing with hot water so I could see my progress. After about an hour, I had the results below.

It really did clean up pretty good. I already have the over flow & drain assembly put together (it is easier to do this before moving the tub into place), this way as I rinsed each portion the water could just flow down the drain. Unfortunately, the drain area revealed my fears: more than just surface rust. The enameled finish is completely eaten away around the drain flange, showing the rusting cast iron underneath. The area just above the flange, where decades worth of falling water from the faucet hits, is also starting to show the gray metal through the white finish.

These aren’t deal breakers for me. From what I’ve researched, Bondo auto body filler makes the best way to fill the pitted areas where the enamel finish is rusted through. Once dry, it can be sanded smooth with high-grit wetsand paper. Several companies make DIY tub & sink refinishing kits, either brush-on or in an aerosol can, that are supposed to be a durable solution for homeowners to refresh their tubs, just like painting. I’ve read varying reviews on these, but it sounds like if they are applied correctly (thorough scrubbing, etching, and then 2 thin coats) they can last 5-8 years looking just like new. I’m not interested in repainting the entire bathtub, but I’m thinking that is my solution for this small area around the drain.
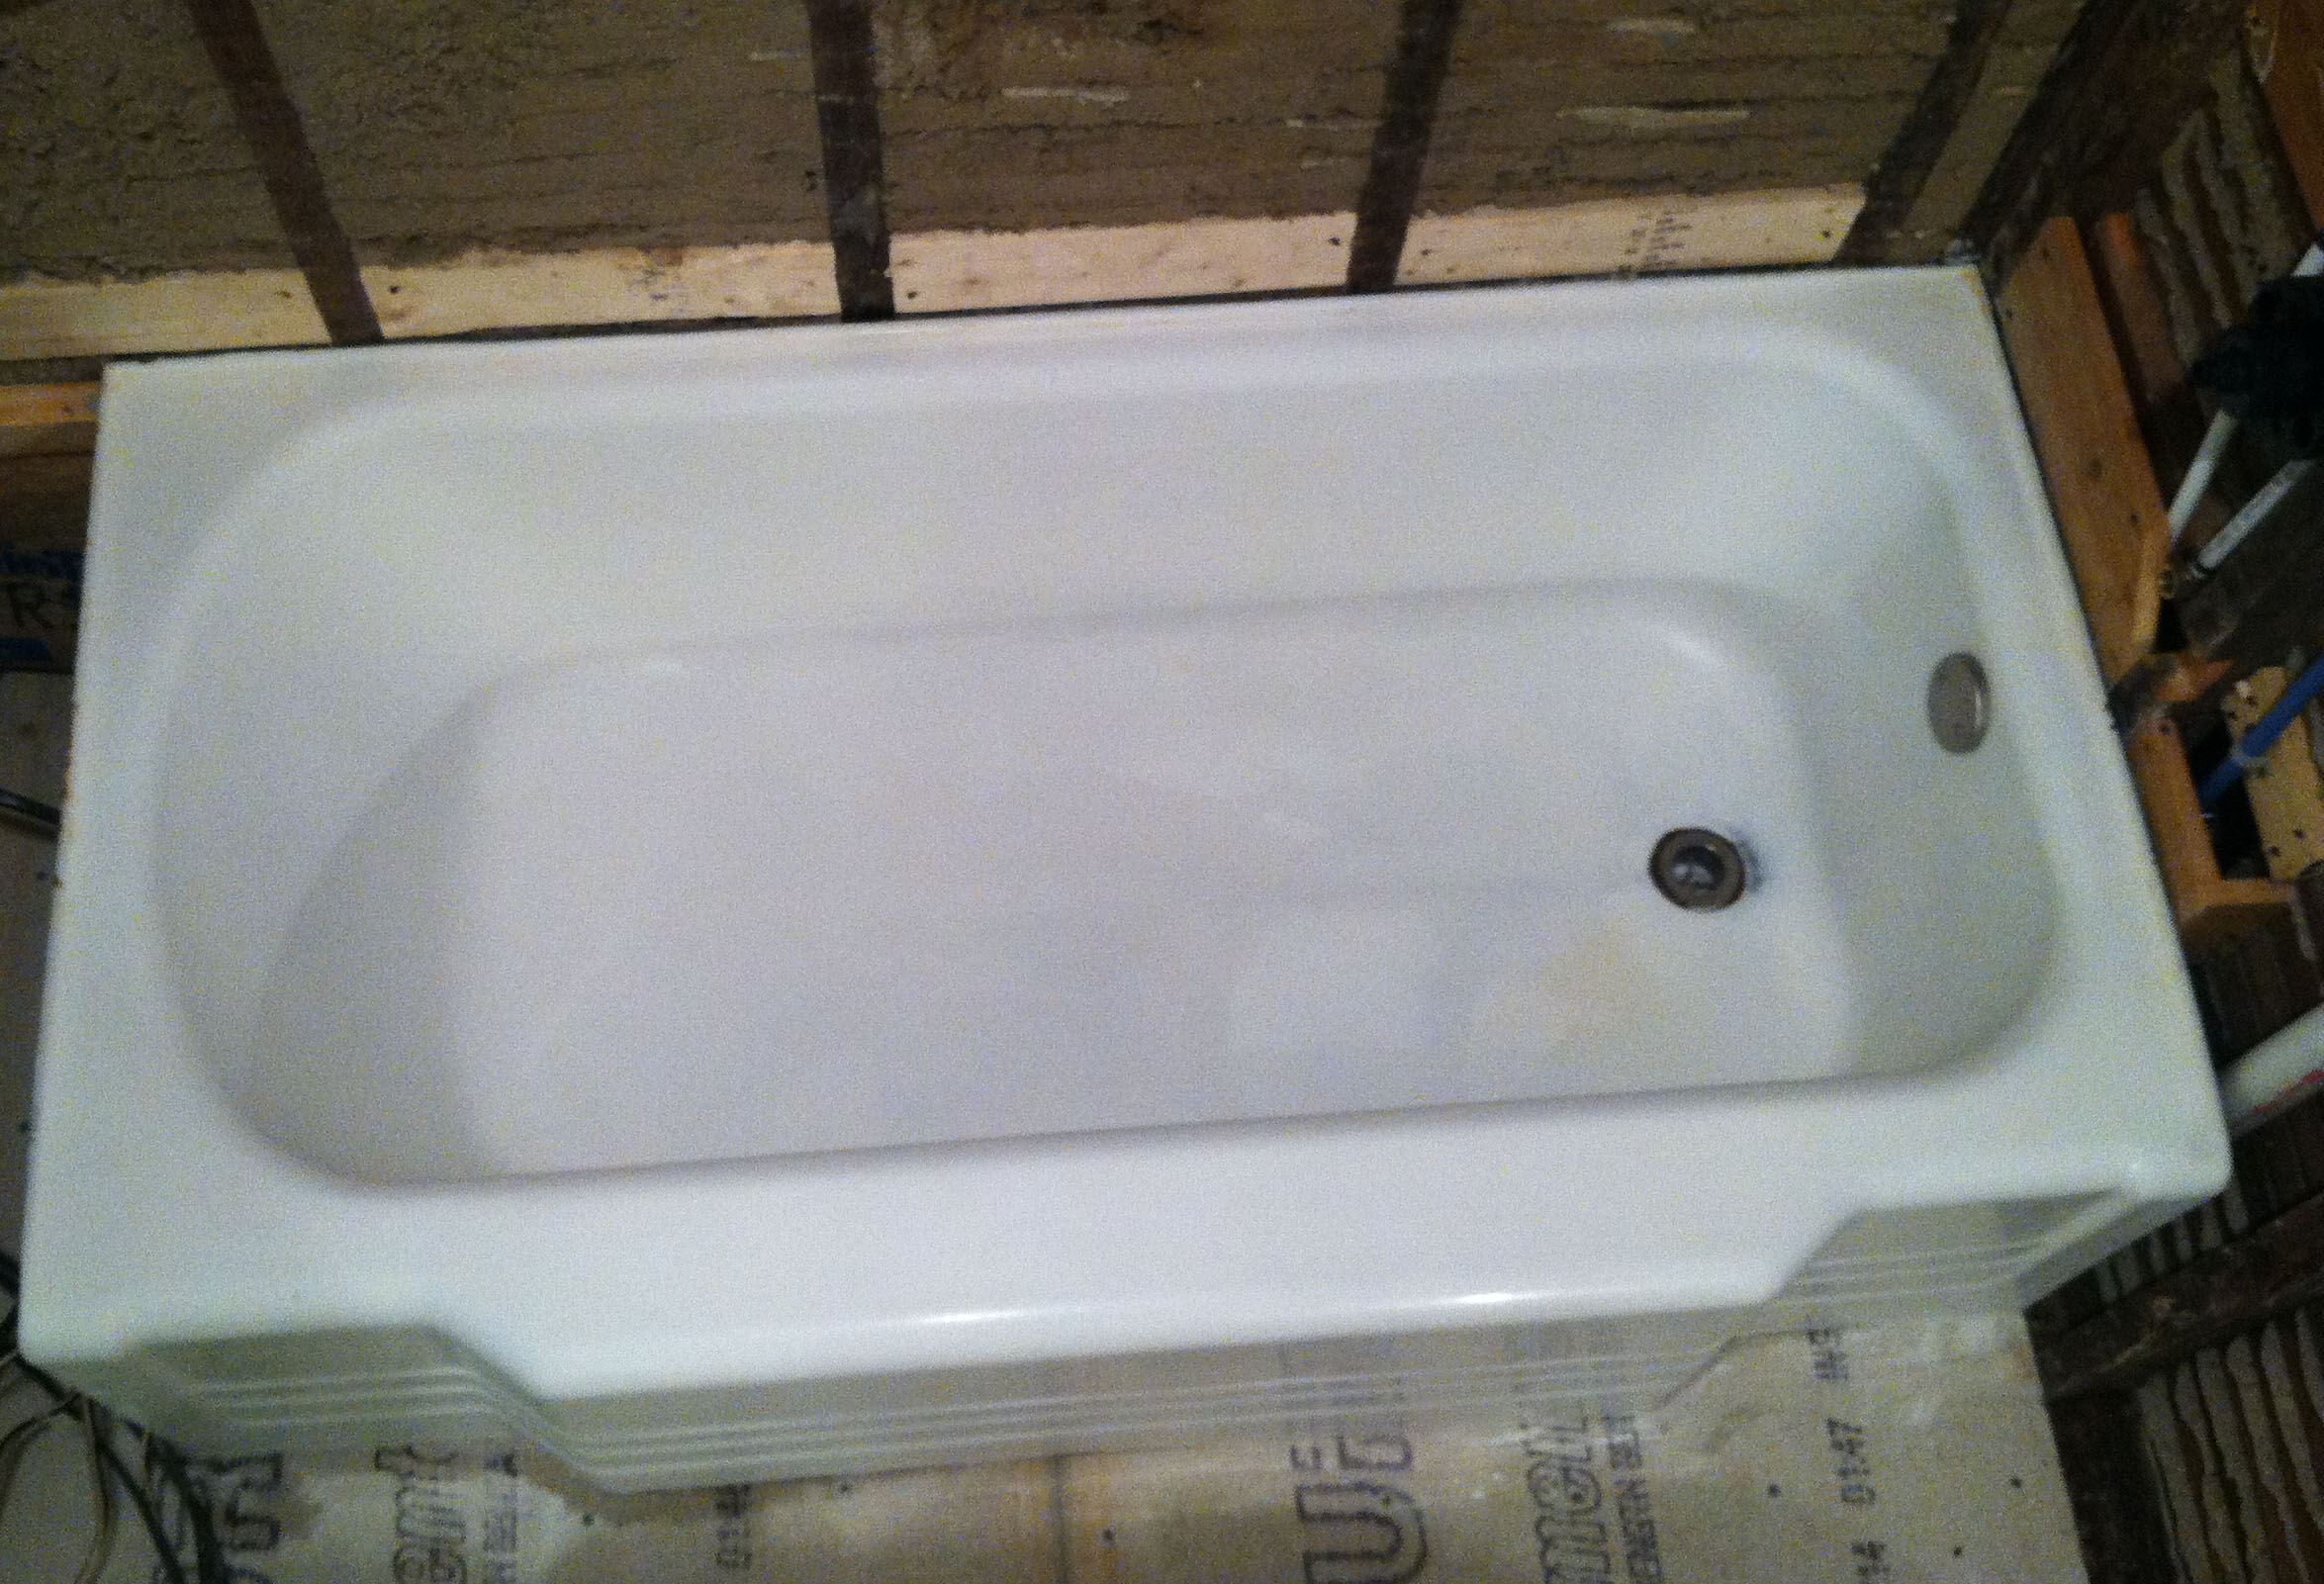
Another 45 minutes or so of scrubbing tonight, and here is the renewed bathtub! There are a few chips, a few deep rust stains that won’t scrub out, and even a strange yellowy discolored area – but that gives it age and character. New plastic or fiberglass tubs have no place in an old home. They don’t look right, and their hollow sound doesn’t feel right. I want authenticity – the chips, the dings, the scratches and all.
That much closer to a July 4th Holiday Tile Floor & Walls weekend spectacular. The cement board for the shower walls arrives Thursday after work, and then I turn tile pro!
PVC You Later
Posted by Adam A. Ries in DIY, Exterior, Home Improvement on July 1, 2014
As in, I’m done with the PVC drains and vents! What a relief. I had most of the rough plumbing done a few weeks ago, enough to install the subfloor & underlayment, but I still had a few things unfinished. So over the past week I rough plumbed for the tub faucet, shower head, and shower mixer valve.

The extra notch out of the wall stud (don’t worry, this is not a load bearing wall!) is because I second guessed myself about the height of the mixer valve and shower handle. I originally put it at a height that felt comfortable when standing. But then I found that the typical standard is really really low, so I moved it down. After showering just this morning, I realized that as a 6′-4″ man, I don’t want to have to bend down to reach the shower handle. So I think I’m going to move it back up. I did decide upon a very tall height for the shower faucet. I believe it’s time to rid myself of this plague that has troubled my showering experience for the past decade:

Seriously, I can’t even remember what it feels like to wash my hair without ducking or bending half over. I cannot wait.
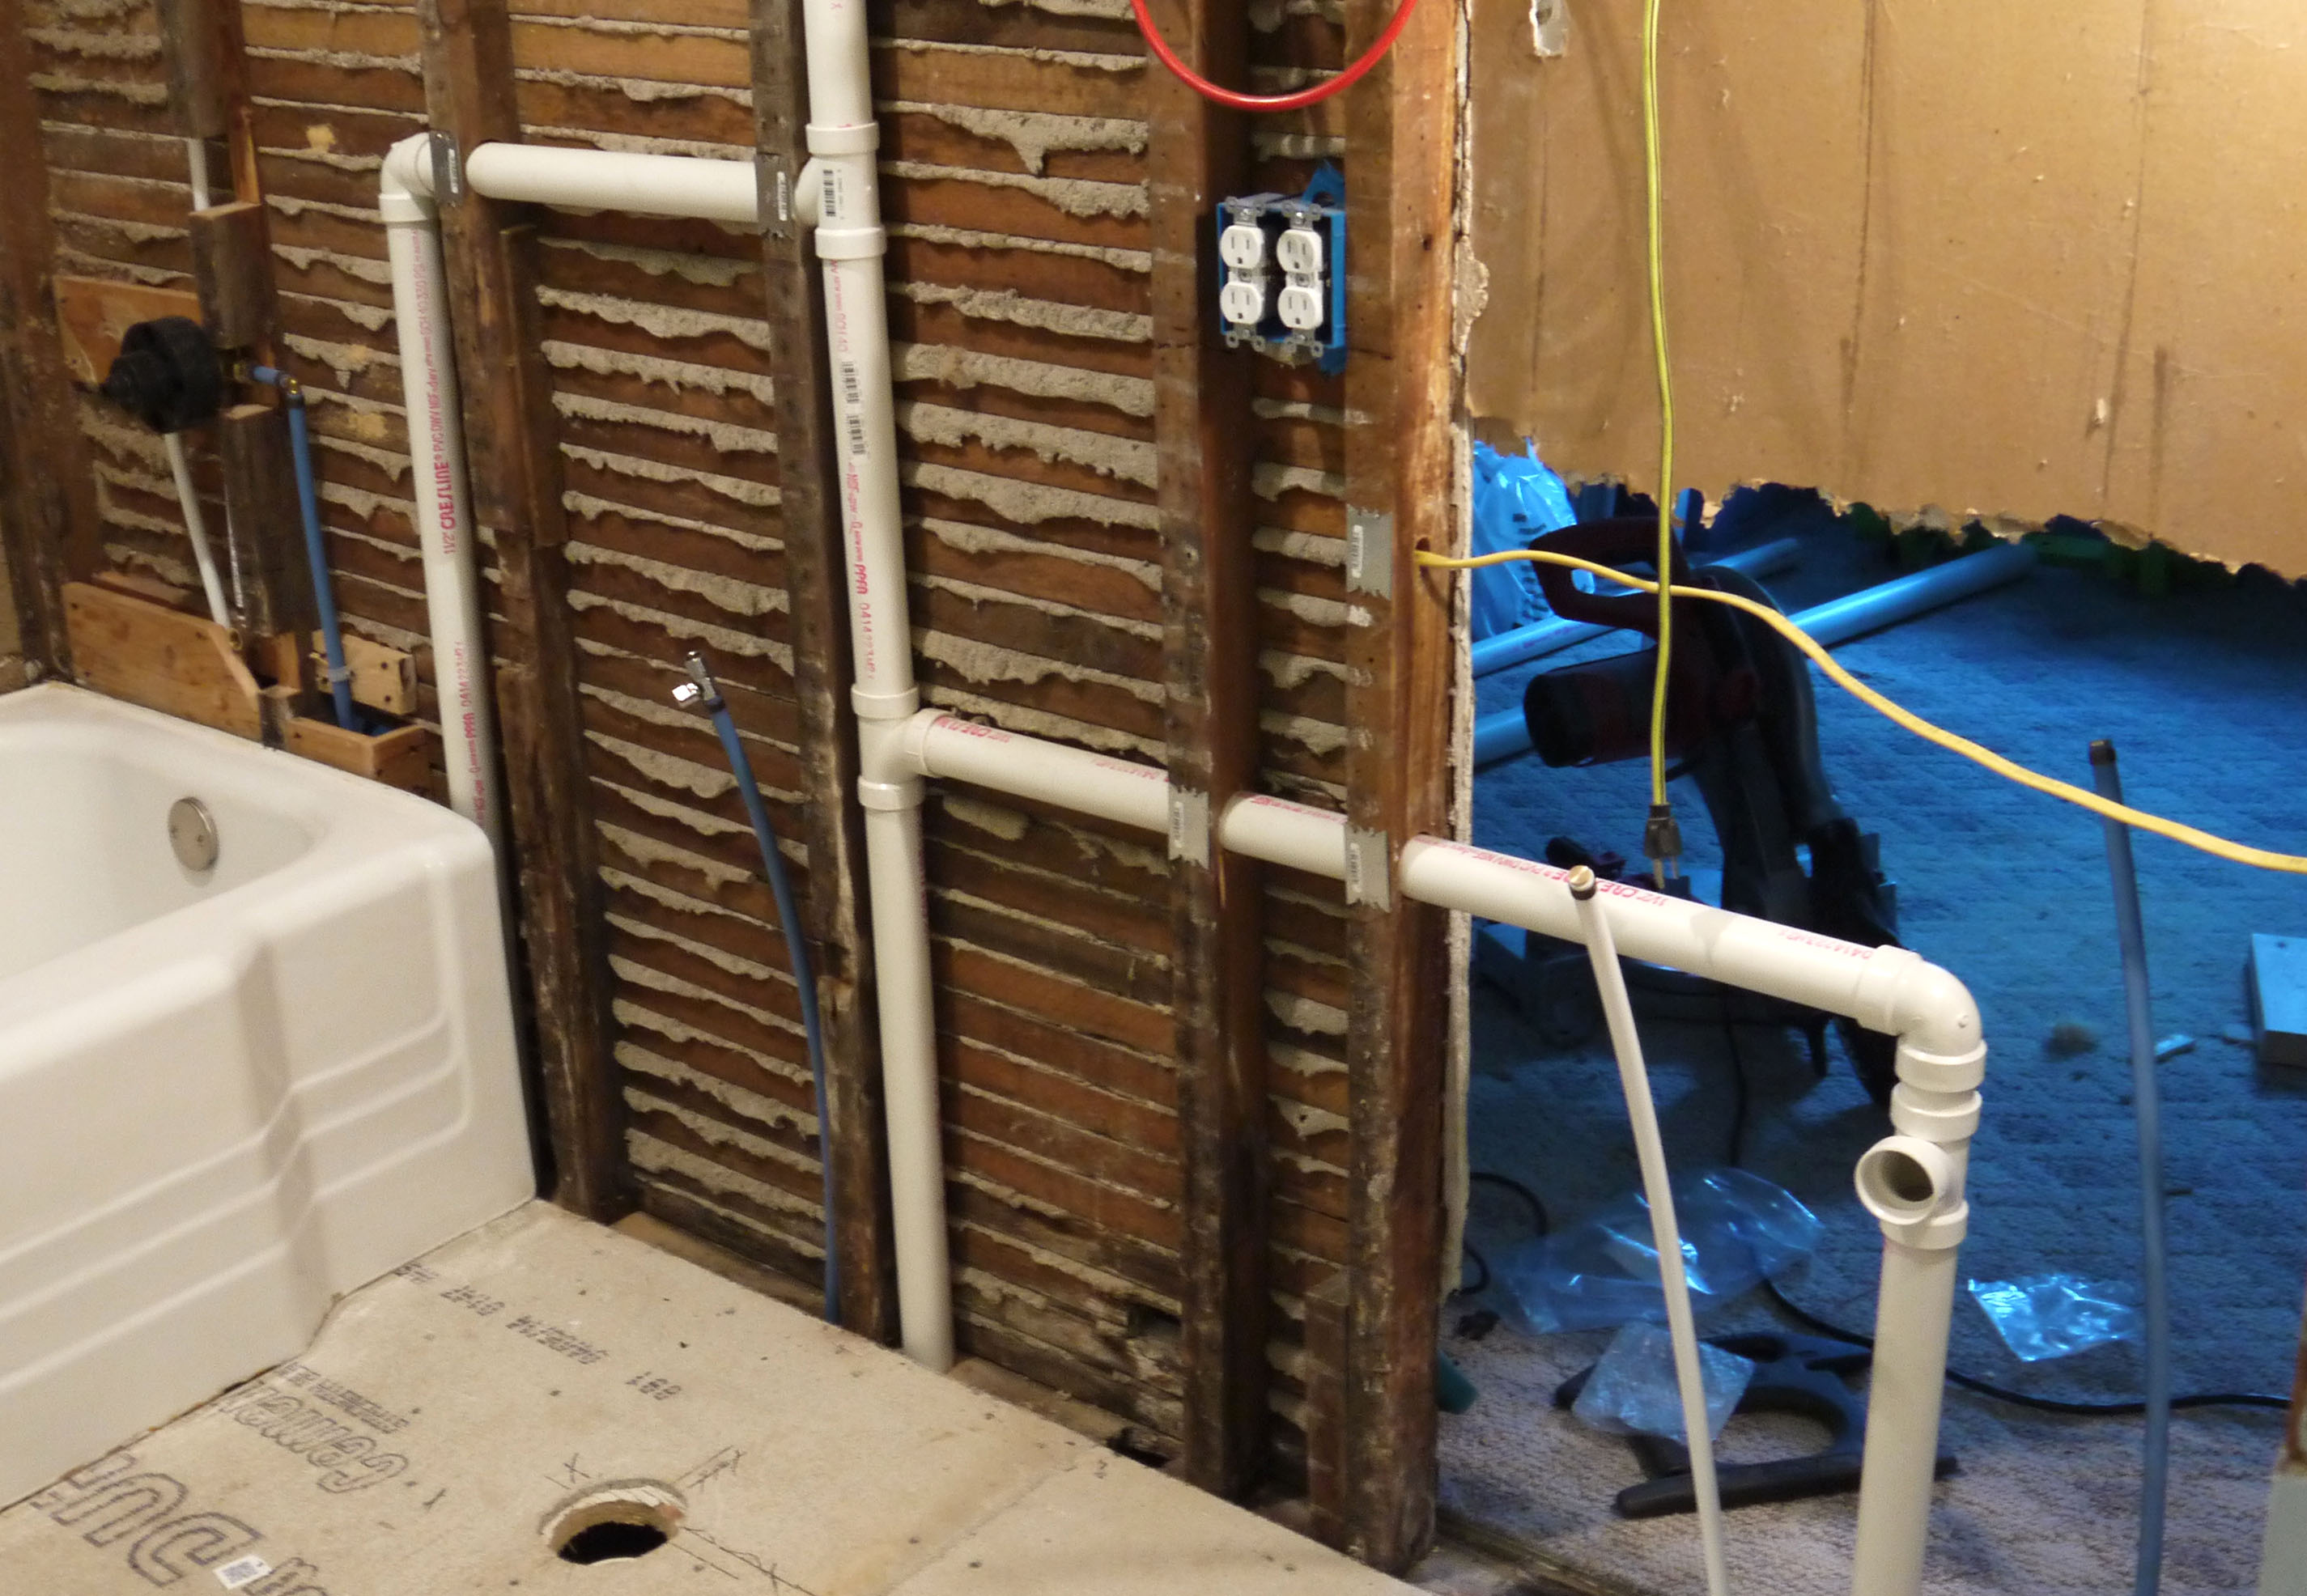
I also finished the tub drain & overflow – which meant carrying sliding the tub into place – and then I connected all 3 of the bathroom drain vents and ran that vent pipe up through the ceiling. Above are the three vents coming through the floor, connecting to a main vent, and then going up through the ceiling. Once through the ceiling the pip transitions to 2″ in the attic before exiting through the roof. And then bathroom was entirely ready for wallboard!
Based on everything I’ve read, I decided upon cement board on the walls around the tub/shower as a backer board for tile, but the rest of the bathroom walls will be moisture resistant drywall – often called greenboard. My brother-in-law helped me hang a few sheets of drywall Saturday, so the west bathroom wall is covered. I’ll do the same on the east wall. The south wall is staying plaster – with some patching around where the new light switches are. The bathroom is 5’8″ wide, and the tub is only 5′, which leaves me with a narrow space on the wall opposite of the shower head. After some Pinterest searching, I came upon a great solution to use this narrow space- almost the exact size, too.

Not my choice of colors for the towels, but you get the picture. It turns what would otherwise be unusable space into a little bit of storage. It will be fun framing it out, but if I do it right, it might also serve as handy access area to the back of the breaker panel in the wall behind (for future electrical updates needing additional wires).
So to recap, below shows the different stages from just about a month ago to where I am now.
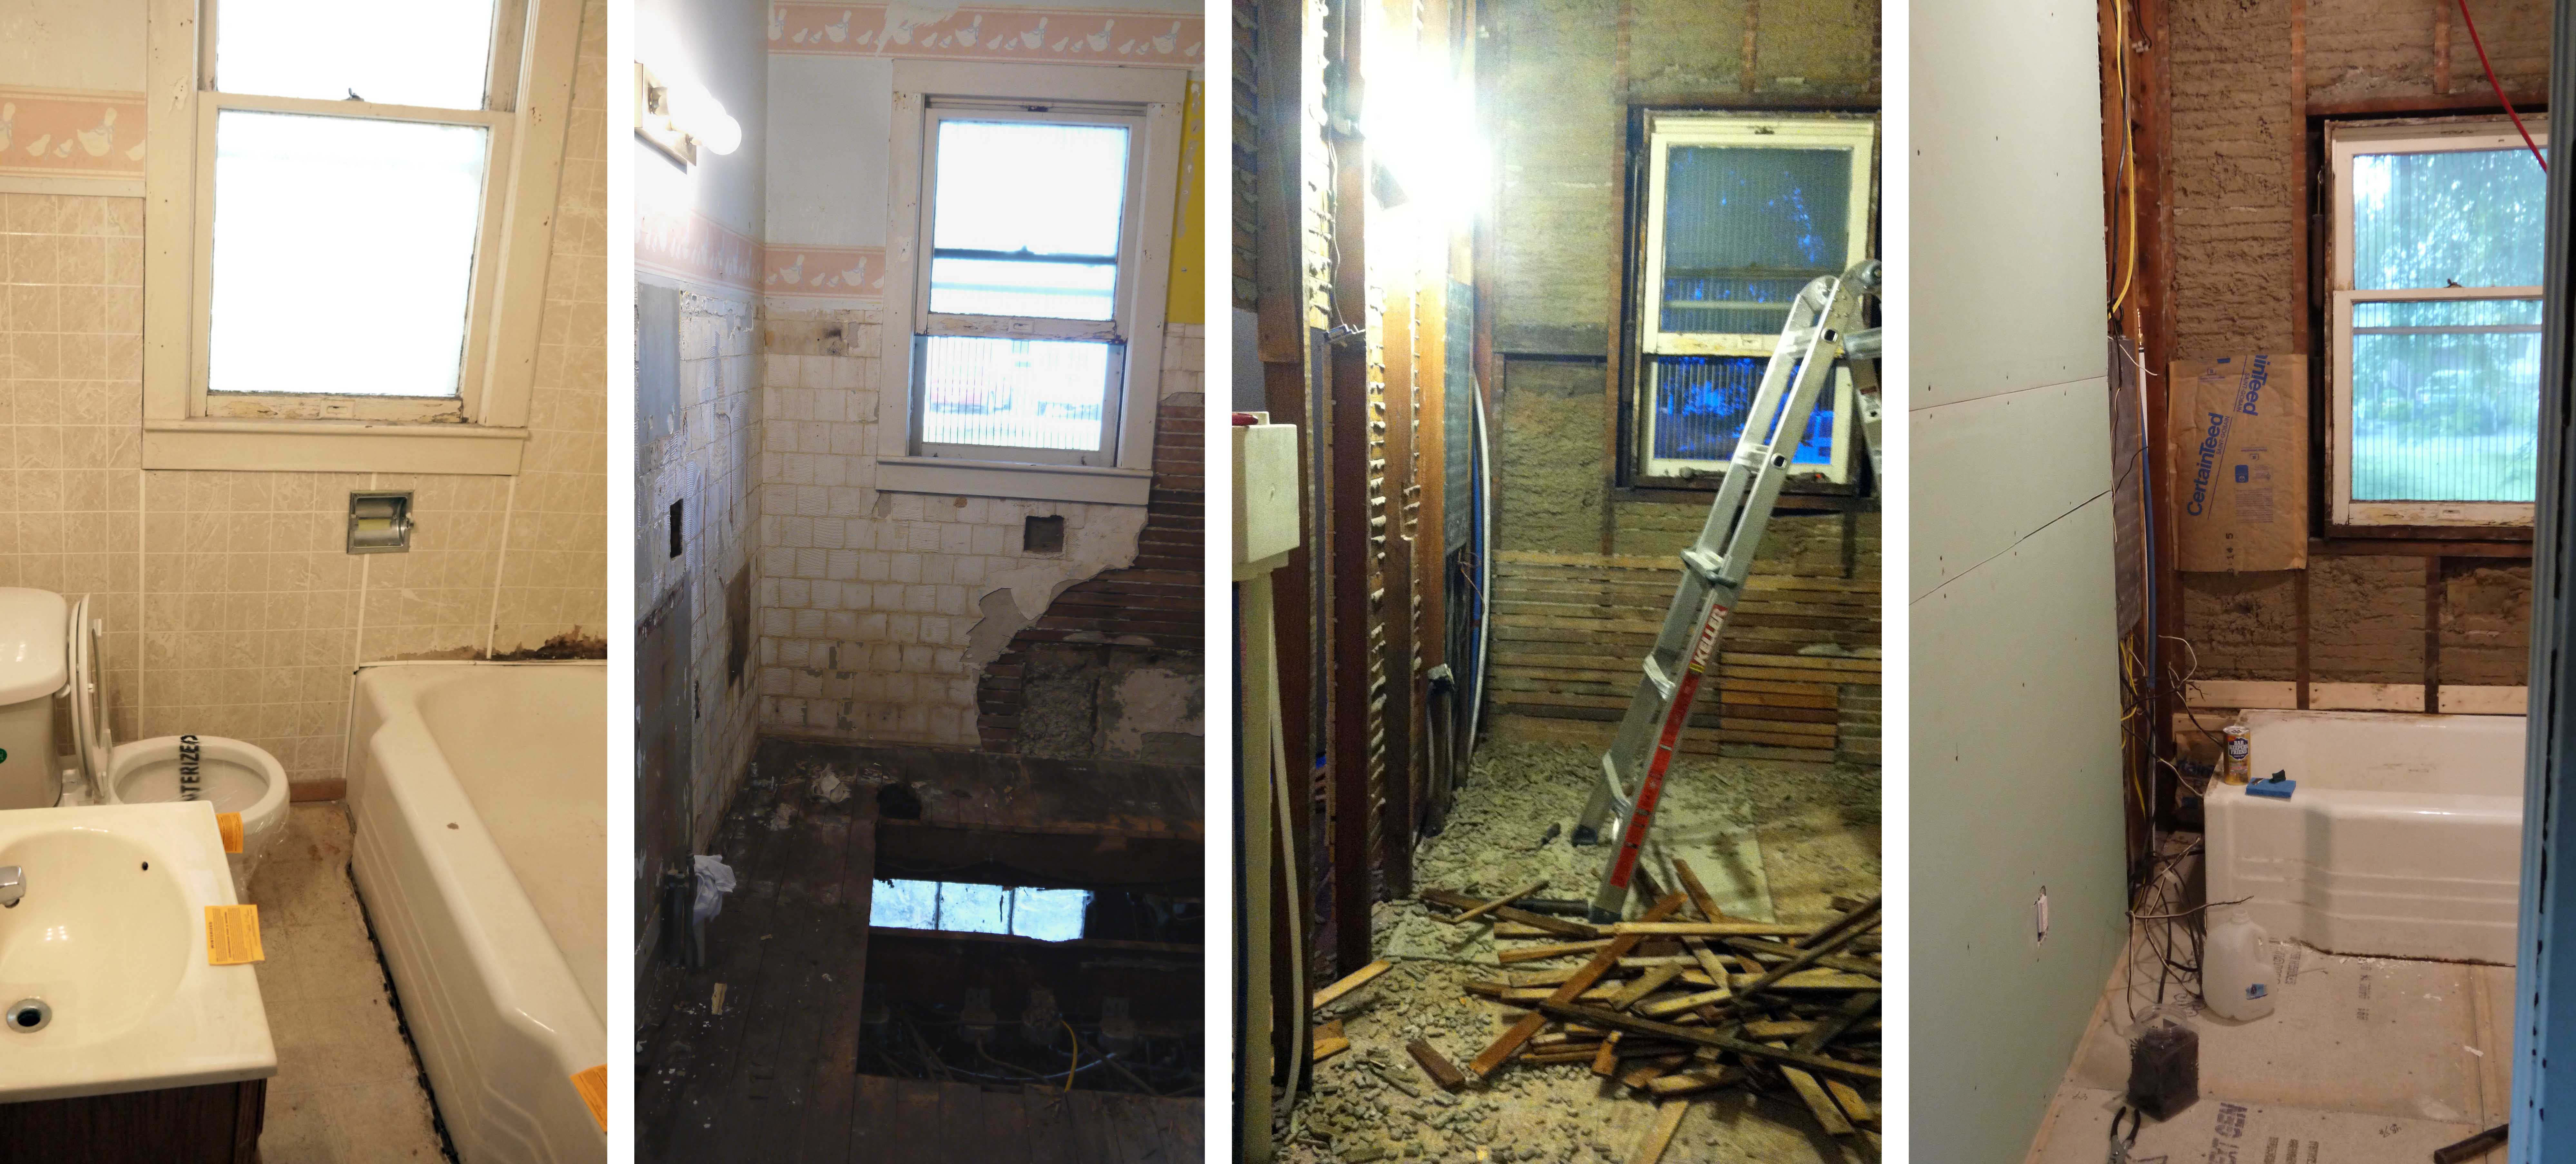
I can almost see the finished product (thanks to the hours I’ve spent on Pinterest!).
I actually got a lot done this week – kitchen sink, tub, part drywall, purchased wall tile for bathroom. But the biggest accomplishment was not mine, but rather what Dennis was able to get connected for me. The process itself is worthy of an entire upcoming post – wet floor, curse words, and a return trip to the hardware store – but for now, I’ll leave it at a single photo and one last sentence. I have hot water.

