Posts Tagged Drywall
On the Up and Up
Posted by Adam A. Ries in DIY, Home Improvement, Interior Design on July 9, 2014
Meaning, drywall and cement board! Although most of the bathroom was ready to accept wallboard once the plaster was torn off, I did have to do a little framing at what would be the back of the tub/shower. As you can see in this 3D model, the bathroom is about 5′-8″ wide, and a tub is only 5 feet.

That leaves me with a 8 in gap between the tub and the existing bath wall. So I framed in a full height wall to have a support to build a shower wall. In the end, I’m planning to trim it out with little cubbie cabinets to look very similar to this (only I will continue it all the way to the ceiling).

I used 2×2 lumber as the main section, and a 2×4 on the outside for strength (non-weight bearing walls can be constructed of 2×2 lumber – it’s how thin walls and even walls that house a pocket door are constructed).

I added lots of cross-supports between the studs and the wall behind. Although it was very strong on it’s own, this will be a tiled shower wall, and I don’t want any flexing to crack tiles or cause them to break off. The 1×4 sections between the studs are flush to the front of the framing studs. Just like the ones you can see along the top edge of the tub, these were a recommendation from a how-to video I found very informative on YouTube (Seriously, TileMasterGA: I have learned so much from his many videos documenting each thorough step of a quality and long-lasting bathroom renovation). These boards he recommended are to provide additional support to secure the wallboard as strong as possible, minimizing flexing. I just used scrap boards for these pieces. I also put them at the height where 2 sections of wall board will meet, to make sure the joint has this strong support as well.
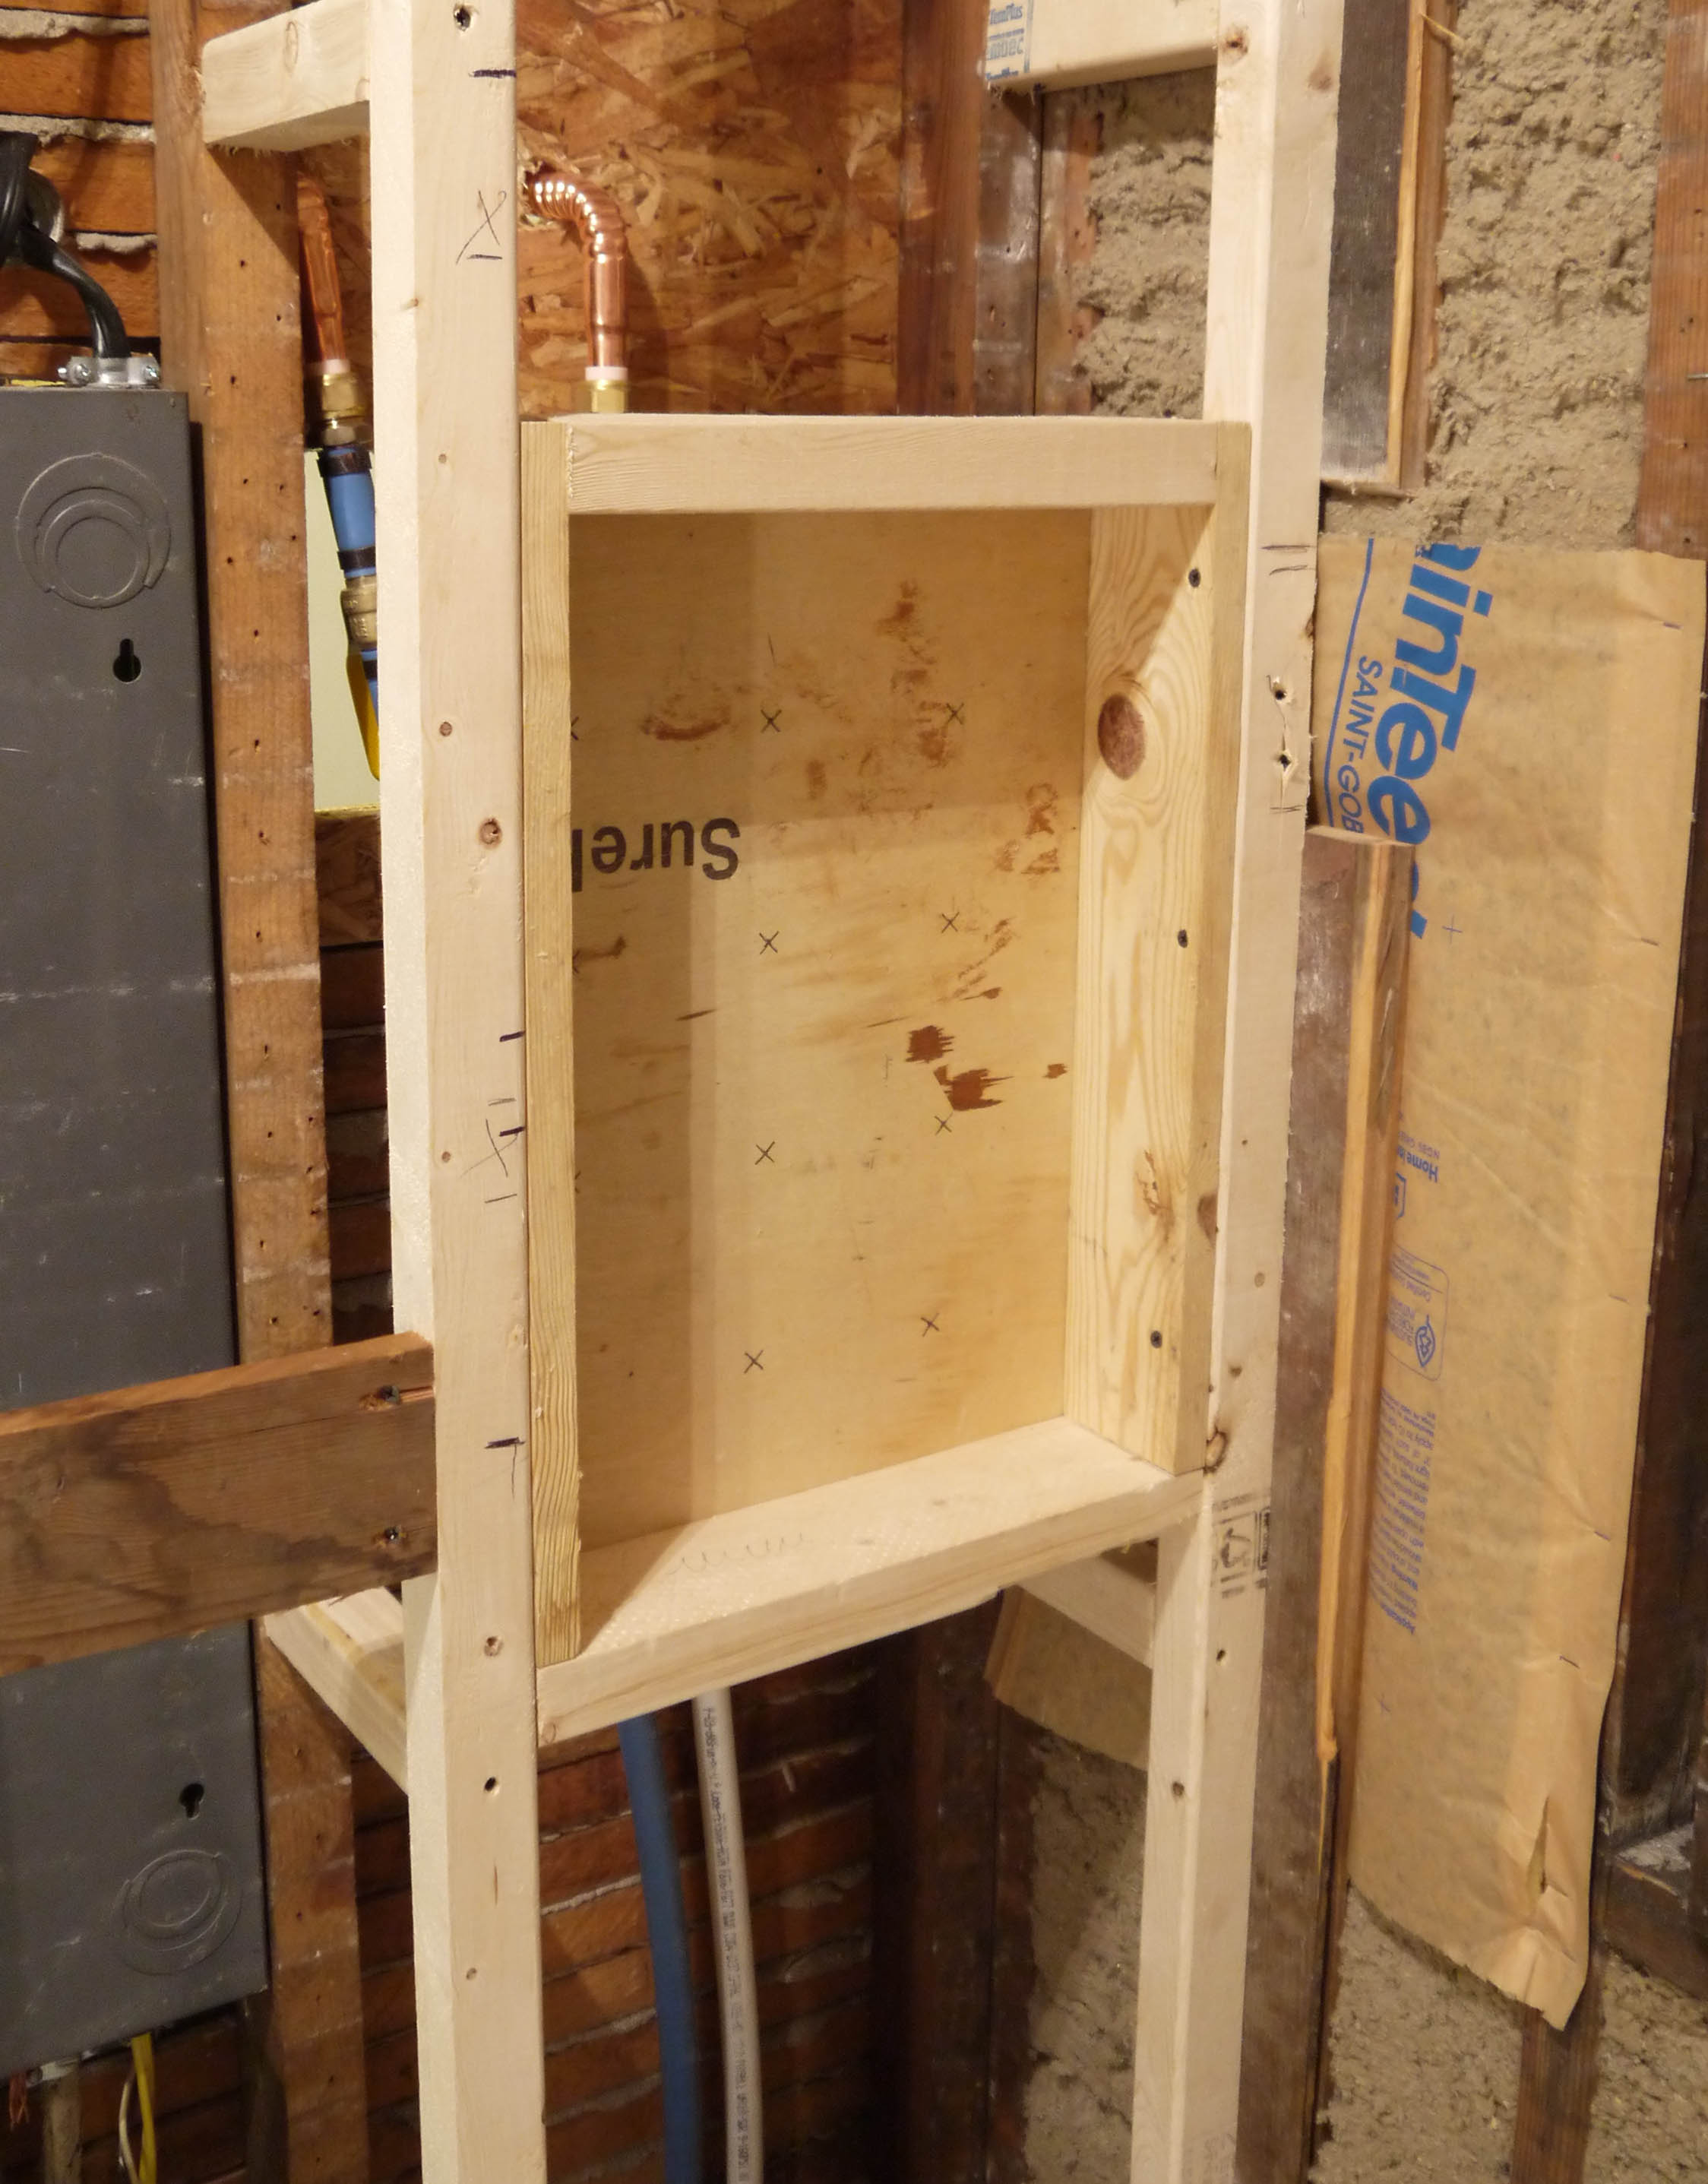
This is what I’m super excited about. It’s my shower soap & shampoo niche. I’m not a big fan of these old metal shower soap trays (although they are very appropriate for the time period look I’m going for – pretty sure I tore 1 or 2 out in the beginning). Instead, I wanted a built in niche, so I basically built a window frame and secured it into this wall space. It will get covered in cement board just like the shower walls, then tiled to look seamless like this:

Only I don’t like how far apart the two niches are, I’m going for more like this, with just a thin shelf for small bottles and a bar of soap:

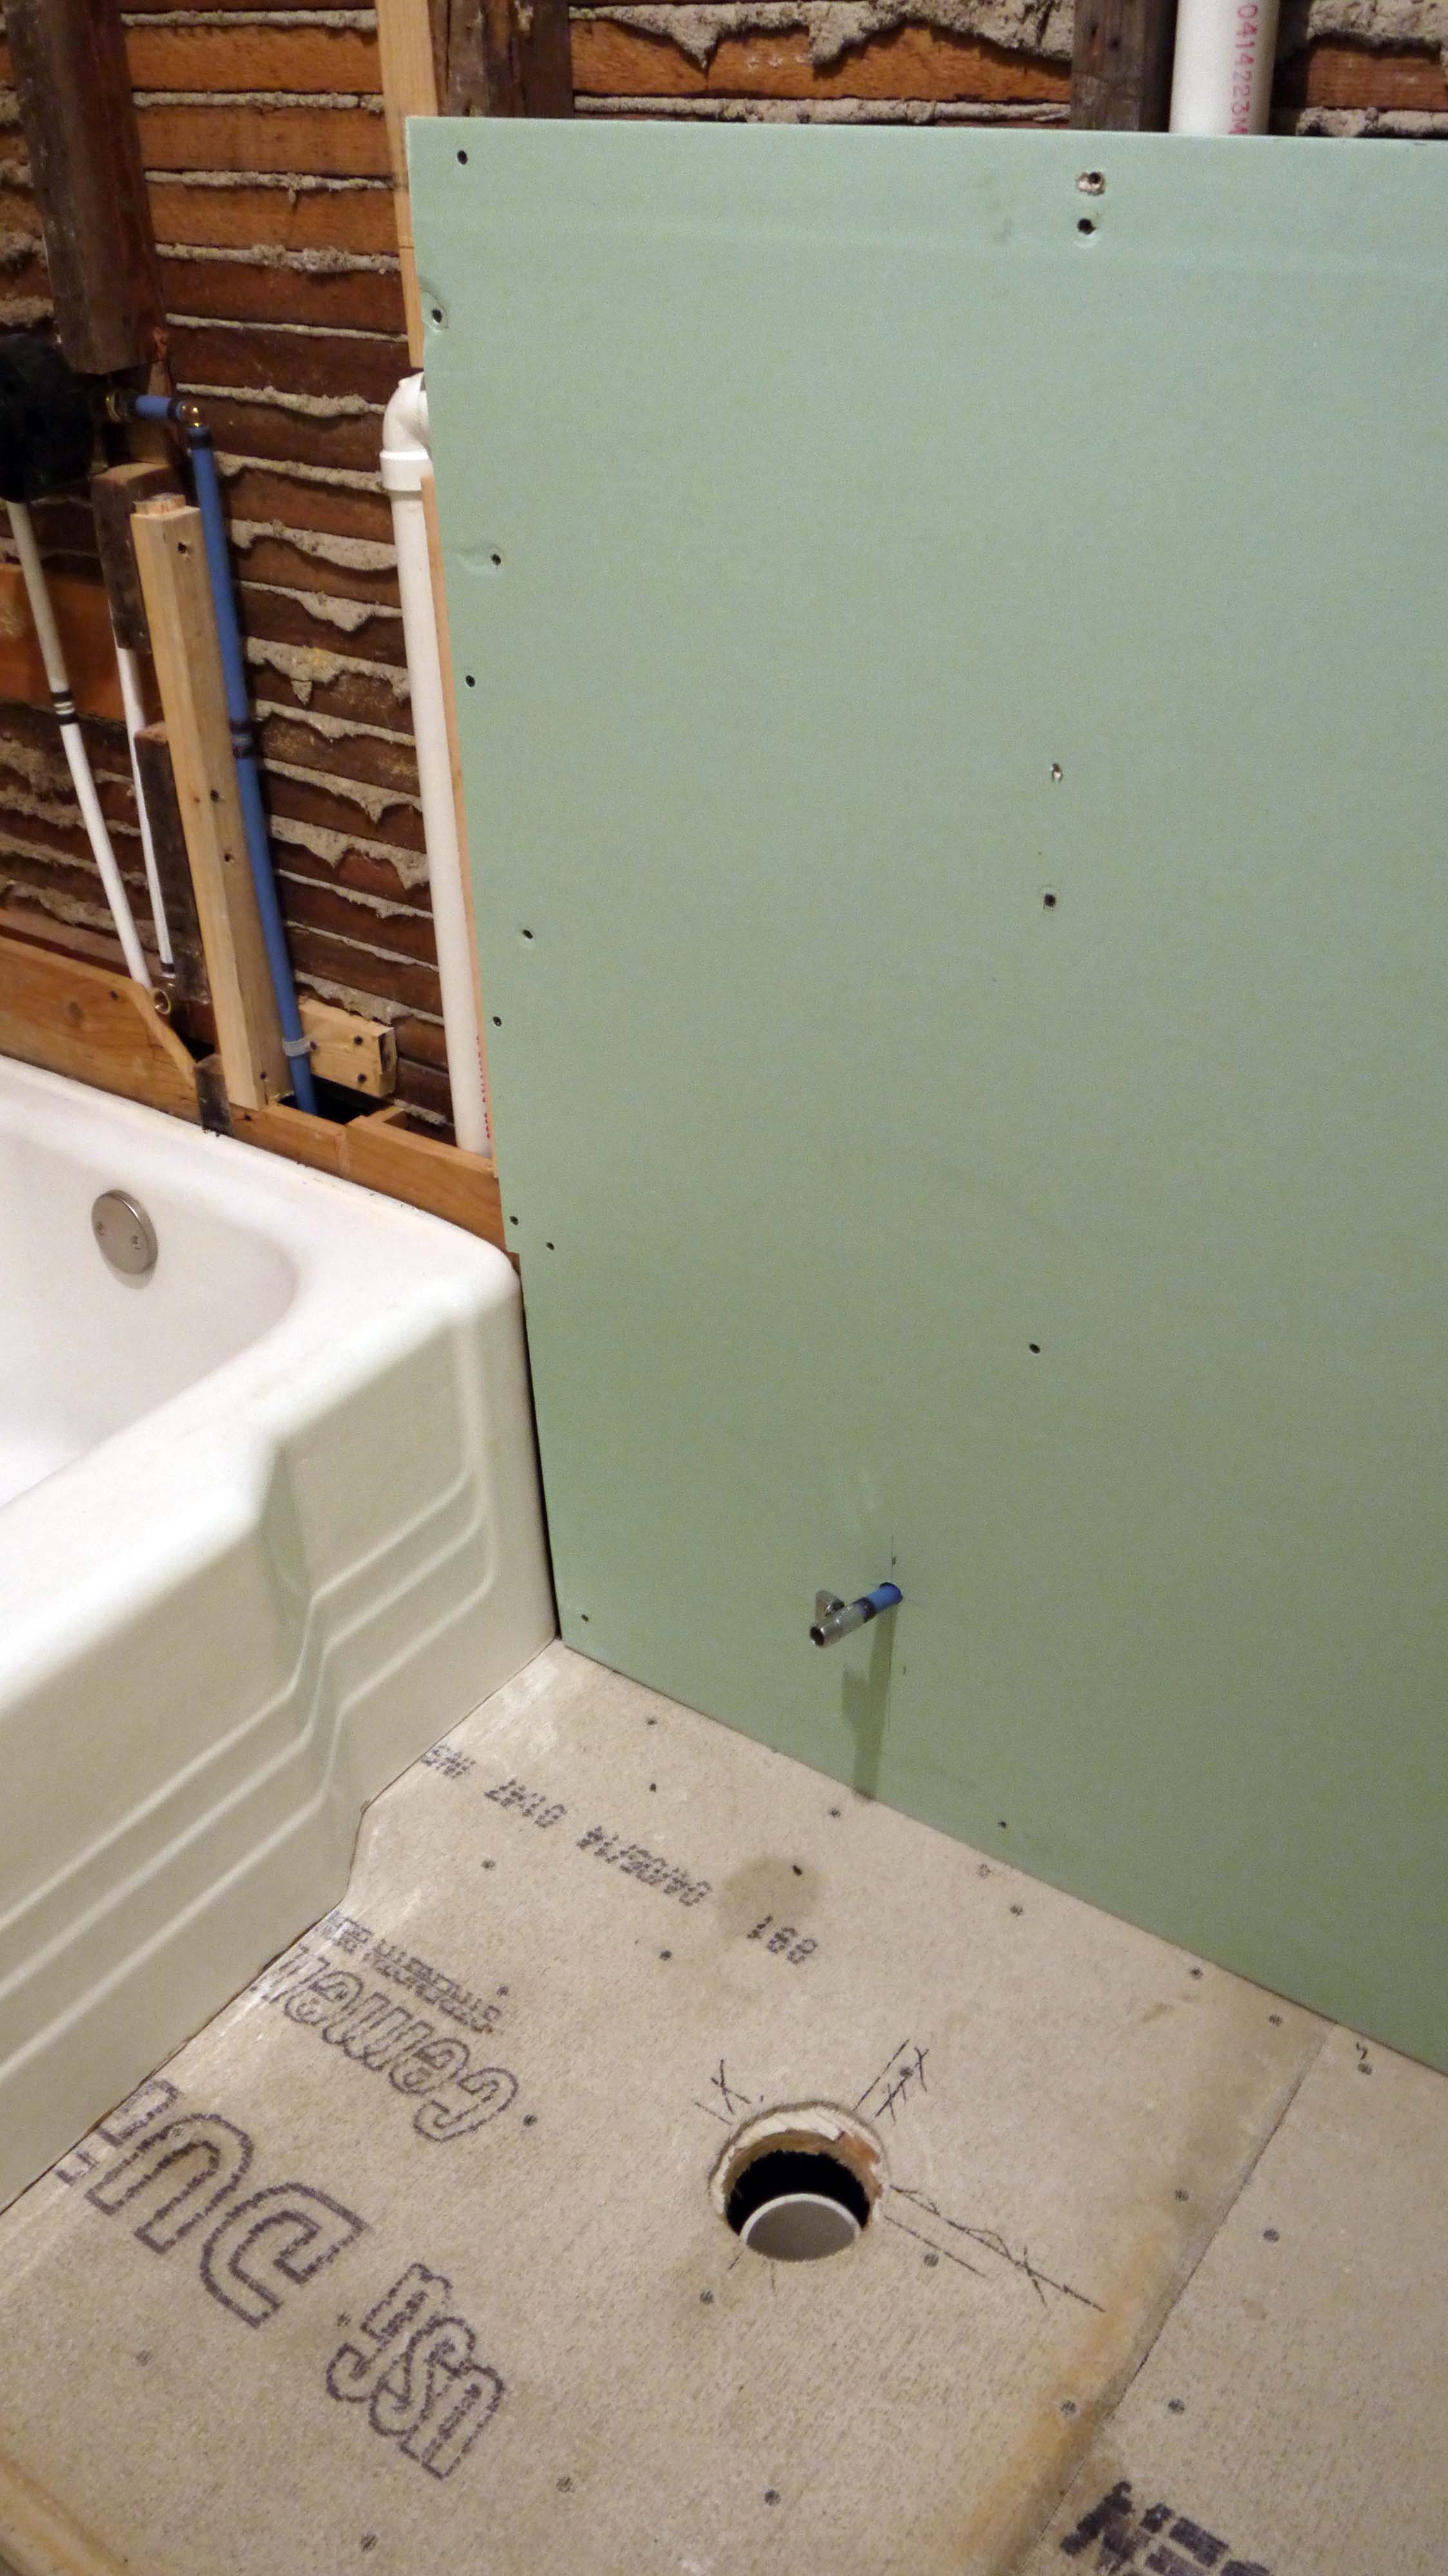
So back to reality. Wall board goes up pretty quick, and relatively easy. The only bad part is lifting the 2nd sheet up to the ceiling and holding it while driving the first couple screws to secure it.

Oh, and don’t forget to pre-measure & mark the location of outlets, light fixtures, or pipes. That meant taking the one sheet back down to measure, and then lifting it up and securing it all over again. Marking the location takes a lot of the guesswork out of using a RotoZip to cut out for the opening.
The cement board went pretty easy too. It comes in slightly smaller pieces (3’x5′ instead of a regular drywall 4’x8′), so it’s easier to handle and lift on and off of sawhorses.
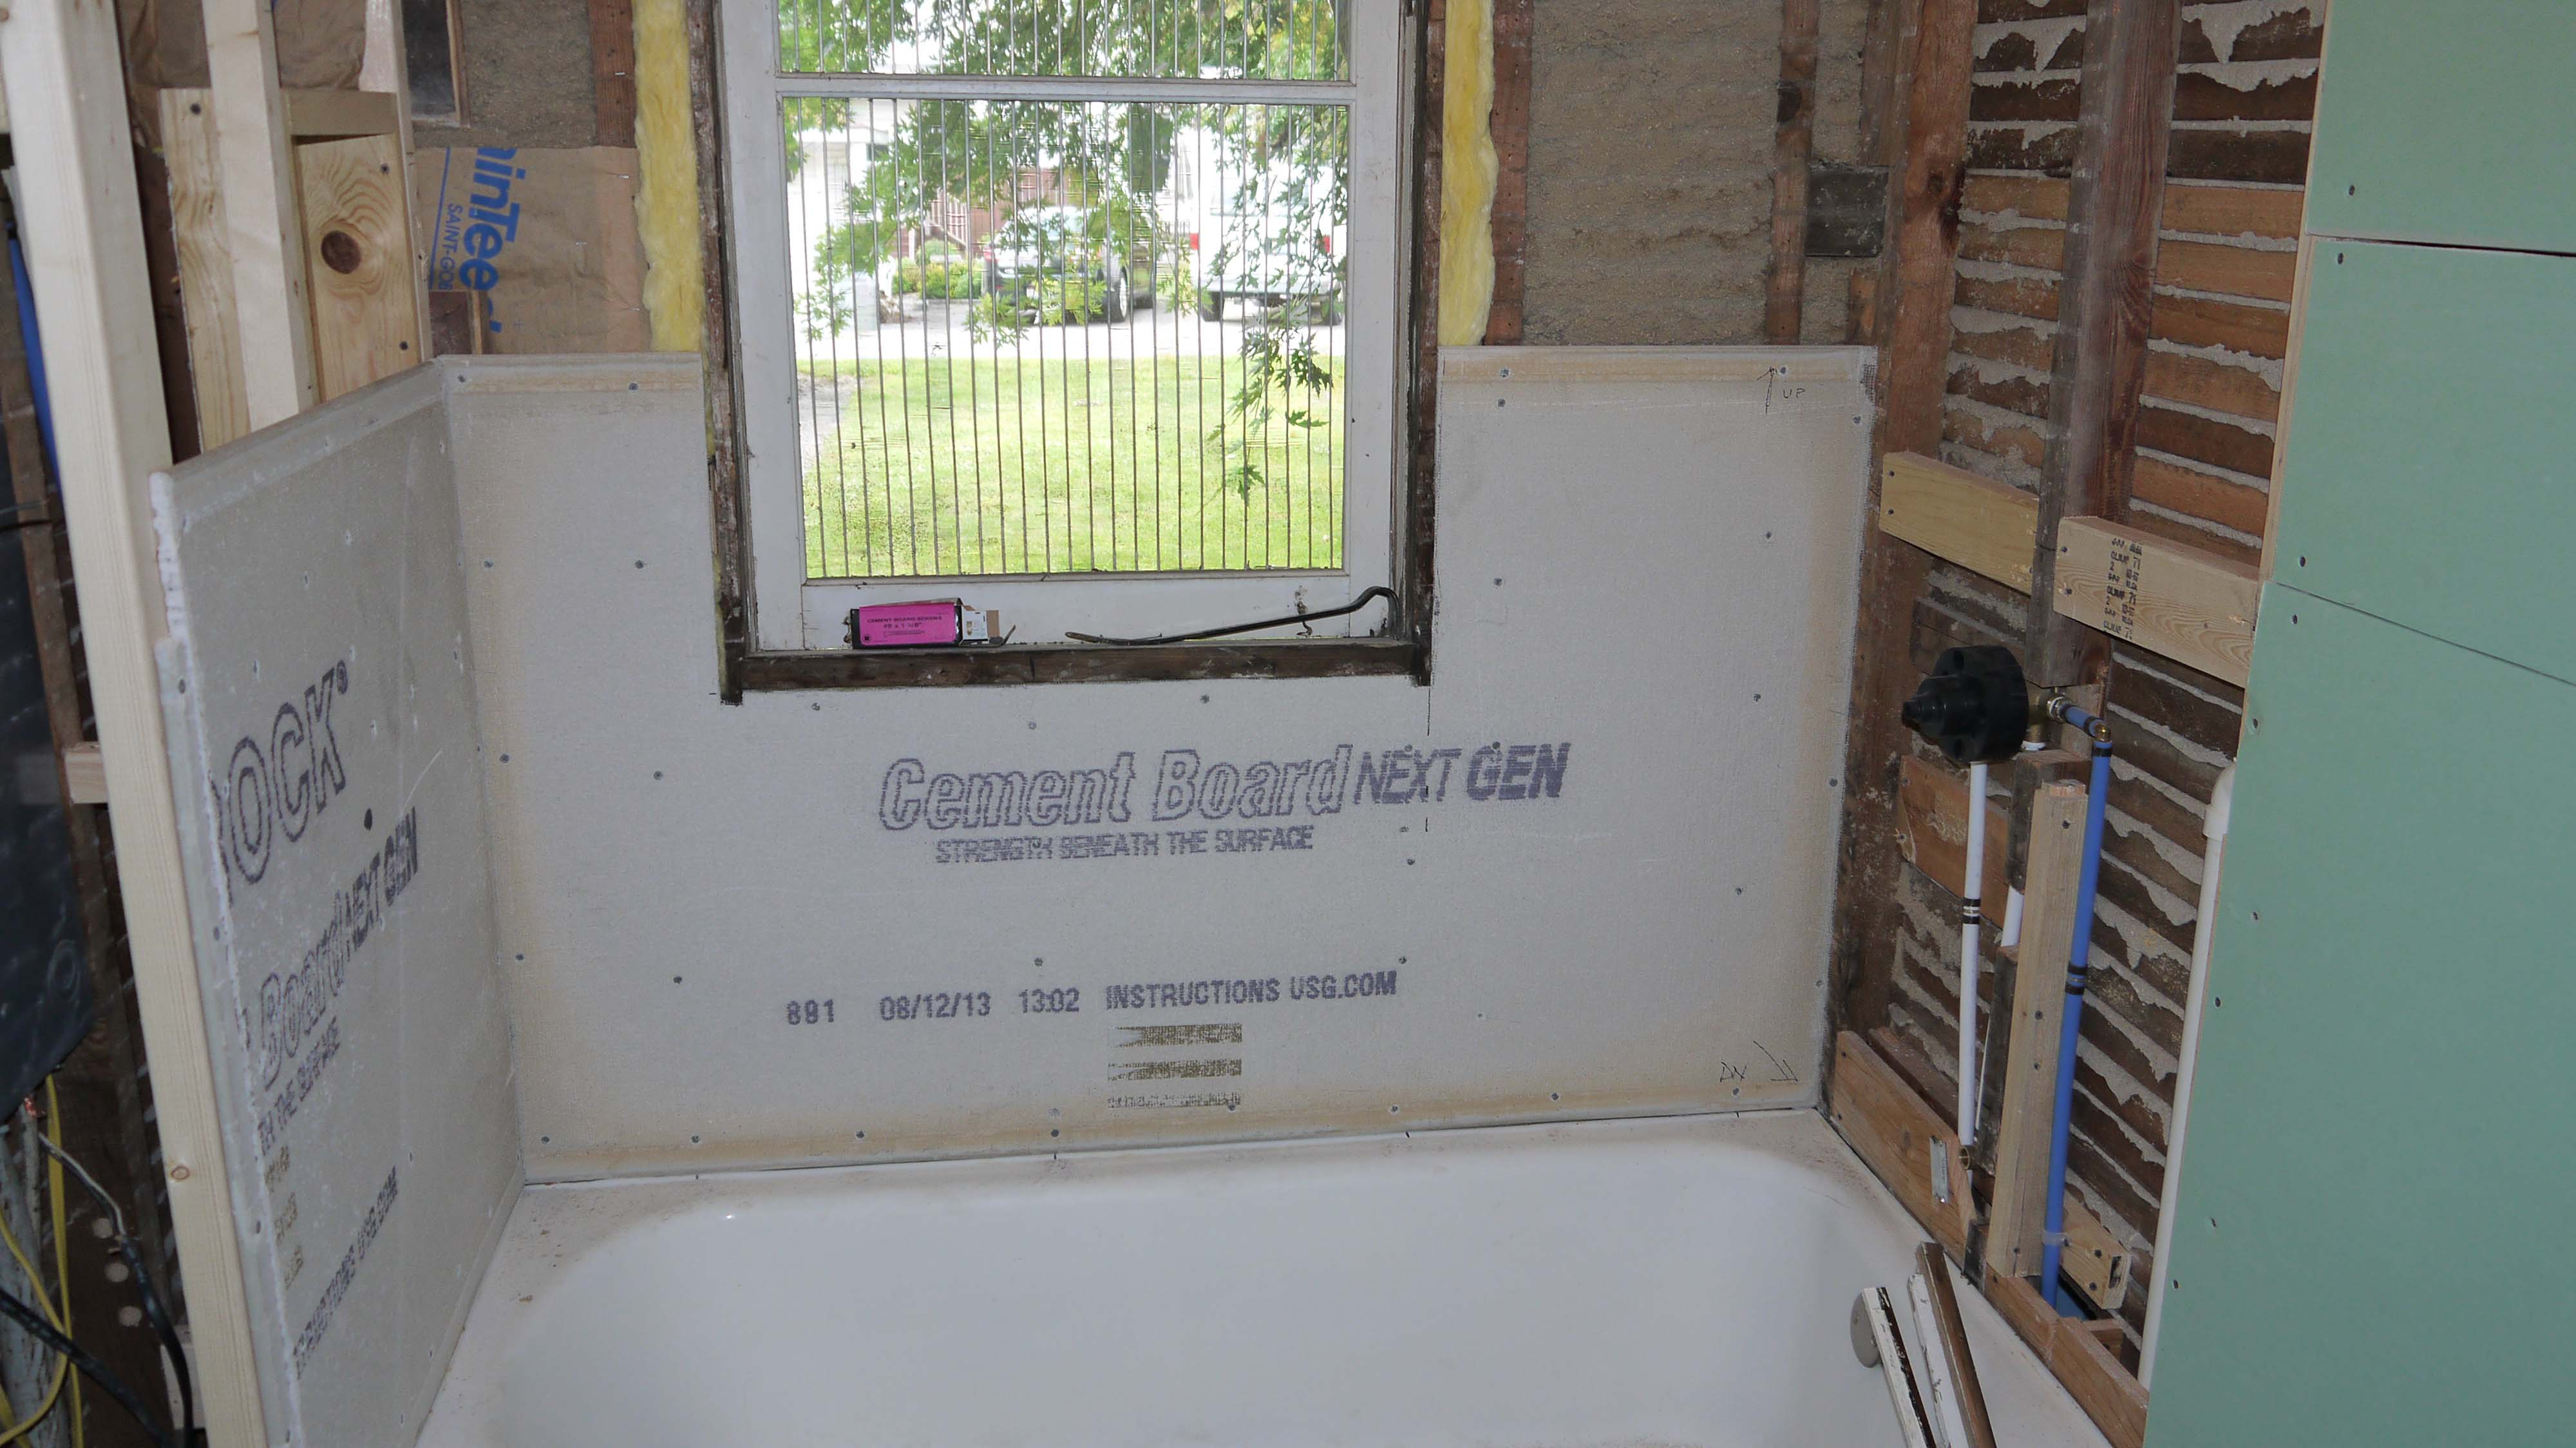
Cutting the cement board is not as easy as cutting drywall. Instead of scoring with a utility knife and snapping it apart, I used a metal cutting blade in my handheld jigsaw. It did a little tearing out along my cut line line (after all, there are pieces of aggregate compressed into the board just like in cement), but it’s a raw edge so that’s ok. I didn’t have any trouble drilling holes for the tub and shower faucet or the mixer valve. I just used the matching size hole saw bit and it went through just fine. For attaching the cement board, the lumberyard sold me special ‘cement board’ screws that are recommended. They have different threads than drywall screws and a larger head, which prevents them from pulling through the surface too far. They barely countersink themselves and that holds the cement board tightly against the wall studs. Same as the floor, the shower walls are super string and rigid, and just about ready for tile!
And here’s the bathroom all boarded up:

I can’t even begin to express how good it feels simply to have walls again!
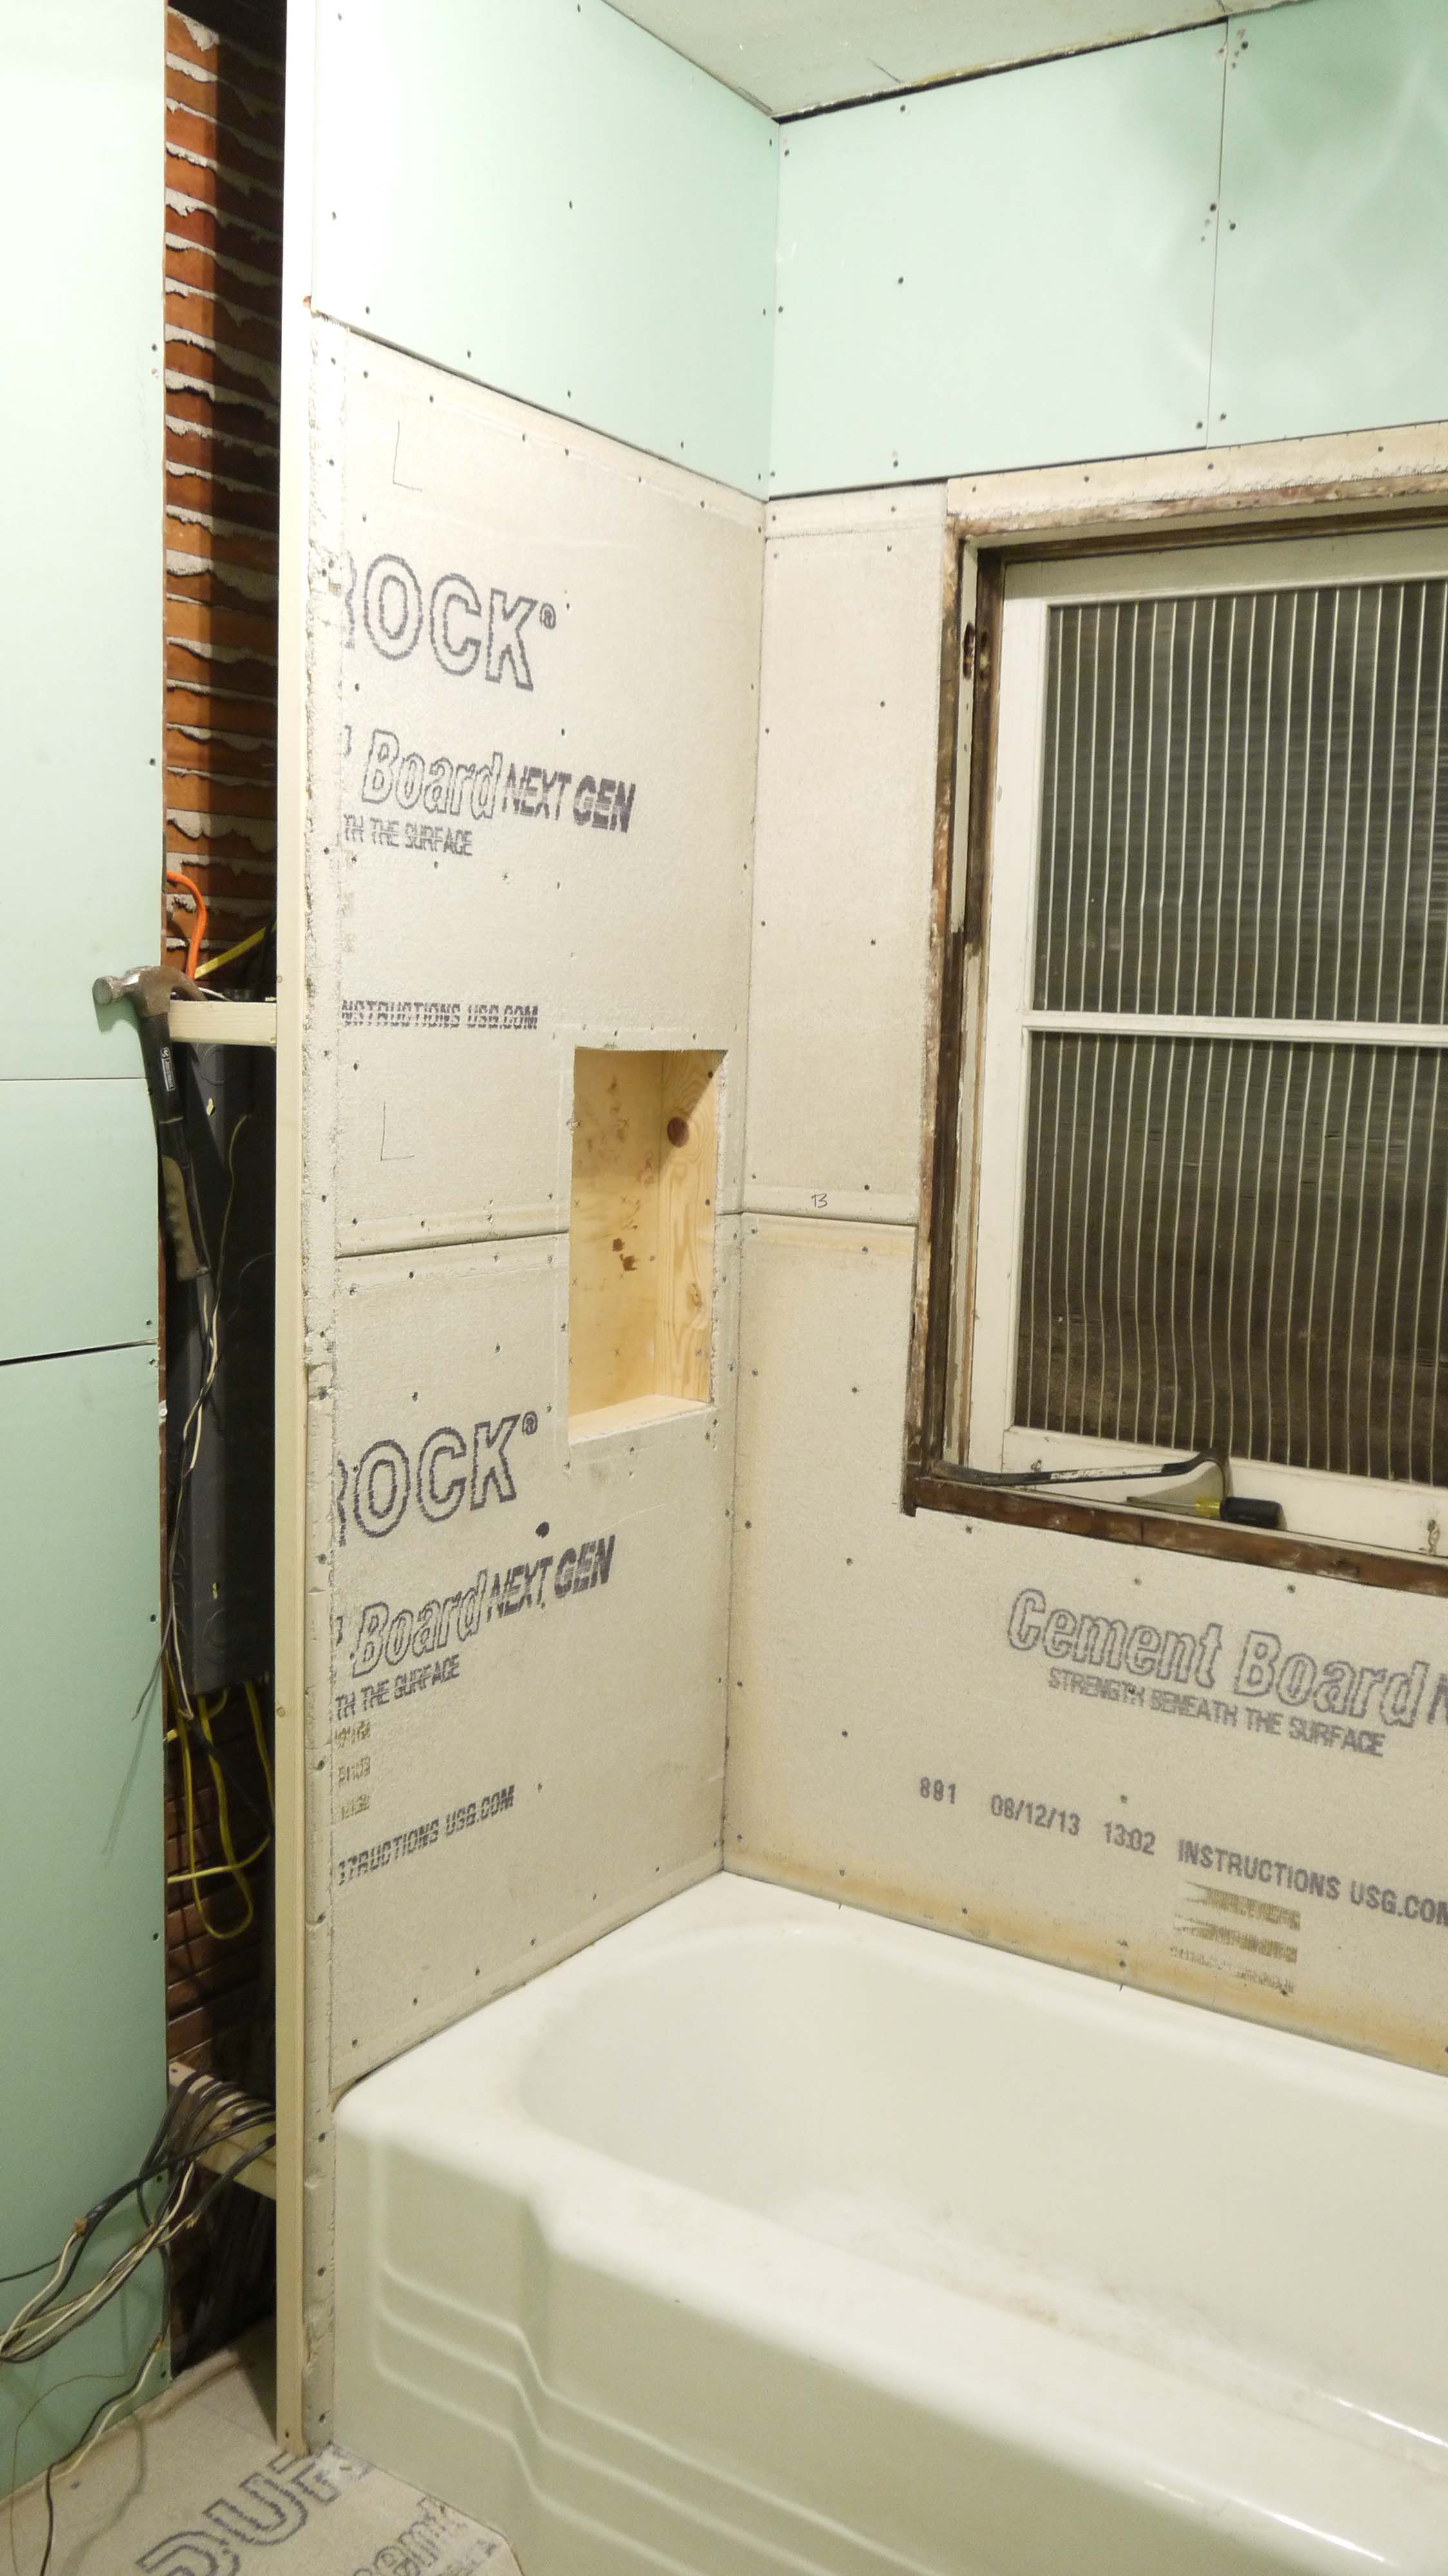
Oh, except the niche. I still have to cut the smaller pieces to fit inside that area.

Don’t look for regularity in the screws. There isn’t any. I put a screw wherever I felt it needed one. And especially don’t count how many holes there are without screws. Screw guns are so finicky + extremely hard old-growth lumber wall studs = a lot of stripped out screws. But the next step should fill and cover all of those. Bring on the mud!
Wordless Wednesday – Or Not
Posted by Adam A. Ries in DIY, Home Improvement on June 11, 2014

No, not really. Anyone who knows me knows that I am never without words.
This photo shows all of the lath boards nearly completely removed. In the last post, I was contemplating whether or not to tear them off. The biggest concern I found was that the studs might not be level along the wall, which would not result in square corners or flat walls. If the walls were simply going to be painted drywall, this wouldn’t be a noticeable issue. However, both around the shower and remaining bathroom walls I plan to use white subway tile to chair rail height. I was afraid that if the walls were not flat, the tile installation would either not go as planned, or the result would be less than professional.
“If you’re going to do it, do it right.”
So I spent about 4 hours tonight finishing to remove all of the lath boards. Now a large metal level held up against the studs will help me determine if the corners are square and if the wall surface is flat and ready for wall board. If they are not, I will shim up the wall studs like I did the floor joists.
For the tile portion of the walls, I plan to use greenboard. It is the product most recommended for bathroom applications. It’s not water proof as a lot of people think, but it is more resistant to moisture than traditional gypsum board or drywall, and it is a ready surface for accepting thin set (mortar) and tile. Above the tile line, I will use traditional drywall. Mudding the seams and corners will be a brand new learning experience for me, but I’m still a little while from that point.
This coming weekend I have two friends (one is a licensed electrician) coming to help me wire the bathroom and re-wire the laundry area. It is nice to know people who have the right tools and the pro-knowledge in each area of home renovation. I drew a simple electric plan and they sent me back a shopping list so that I am ready Saturday. What could be easier?
