Posts Tagged Painting
Optimus Prime-r
Posted by Adam A. Ries in DIY, Home Improvement on July 14, 2014
Tonight after work I swung by our friendly local Sherwin-Williams store to ask which primer would be best for fresh drywall. There’s nothing worse than spending hours prepping and painting a room, only to see each and every patch once the paint is dry because the primer didn’t prepare the walls like it was supposed to. Drywall paper will absorb paint differently than sanded joint compound, and I wanted to make sure I used the right primer so that these areas wouldn’t be noticeable with the final coat of paint.
Although they do carry a primer specifically for drywall, the friendly saleswoman assured me their Multi-Purpose primer would work great for the drywall and the existing ceiling both. Sure enough, the can lists that it will work on everything from glossy surfaces to patched surfaces to fresh drywall. Winner.
I already had roller covers and brushes, so I immediately went to work. I was a little apprehensive to prime the walls, because there is no hiding the imperfections of my drywall seams and patching once the primer goes on. Not to say I couldn’t fix those spots later, but it would point out any areas I hadn’t paid enough attention to.

But in reality, I had very little to be worried about. If I do say so myself, I am quite the drywall master! I barely did any sanding, yet the seams turned out almost invisible, and there are just a few tiny little areas of bubbles or lines that I might go back and put a thin layer of joint compound over. But even if I don’t, the areas are so small and hidden that probably no one except me would ever notice them.

I did not tape the seams between the walls and ceiling, because I know I will line the room with crown molding, which will end up covering this gap. That also means not having to prime all the way up to the ceiling.
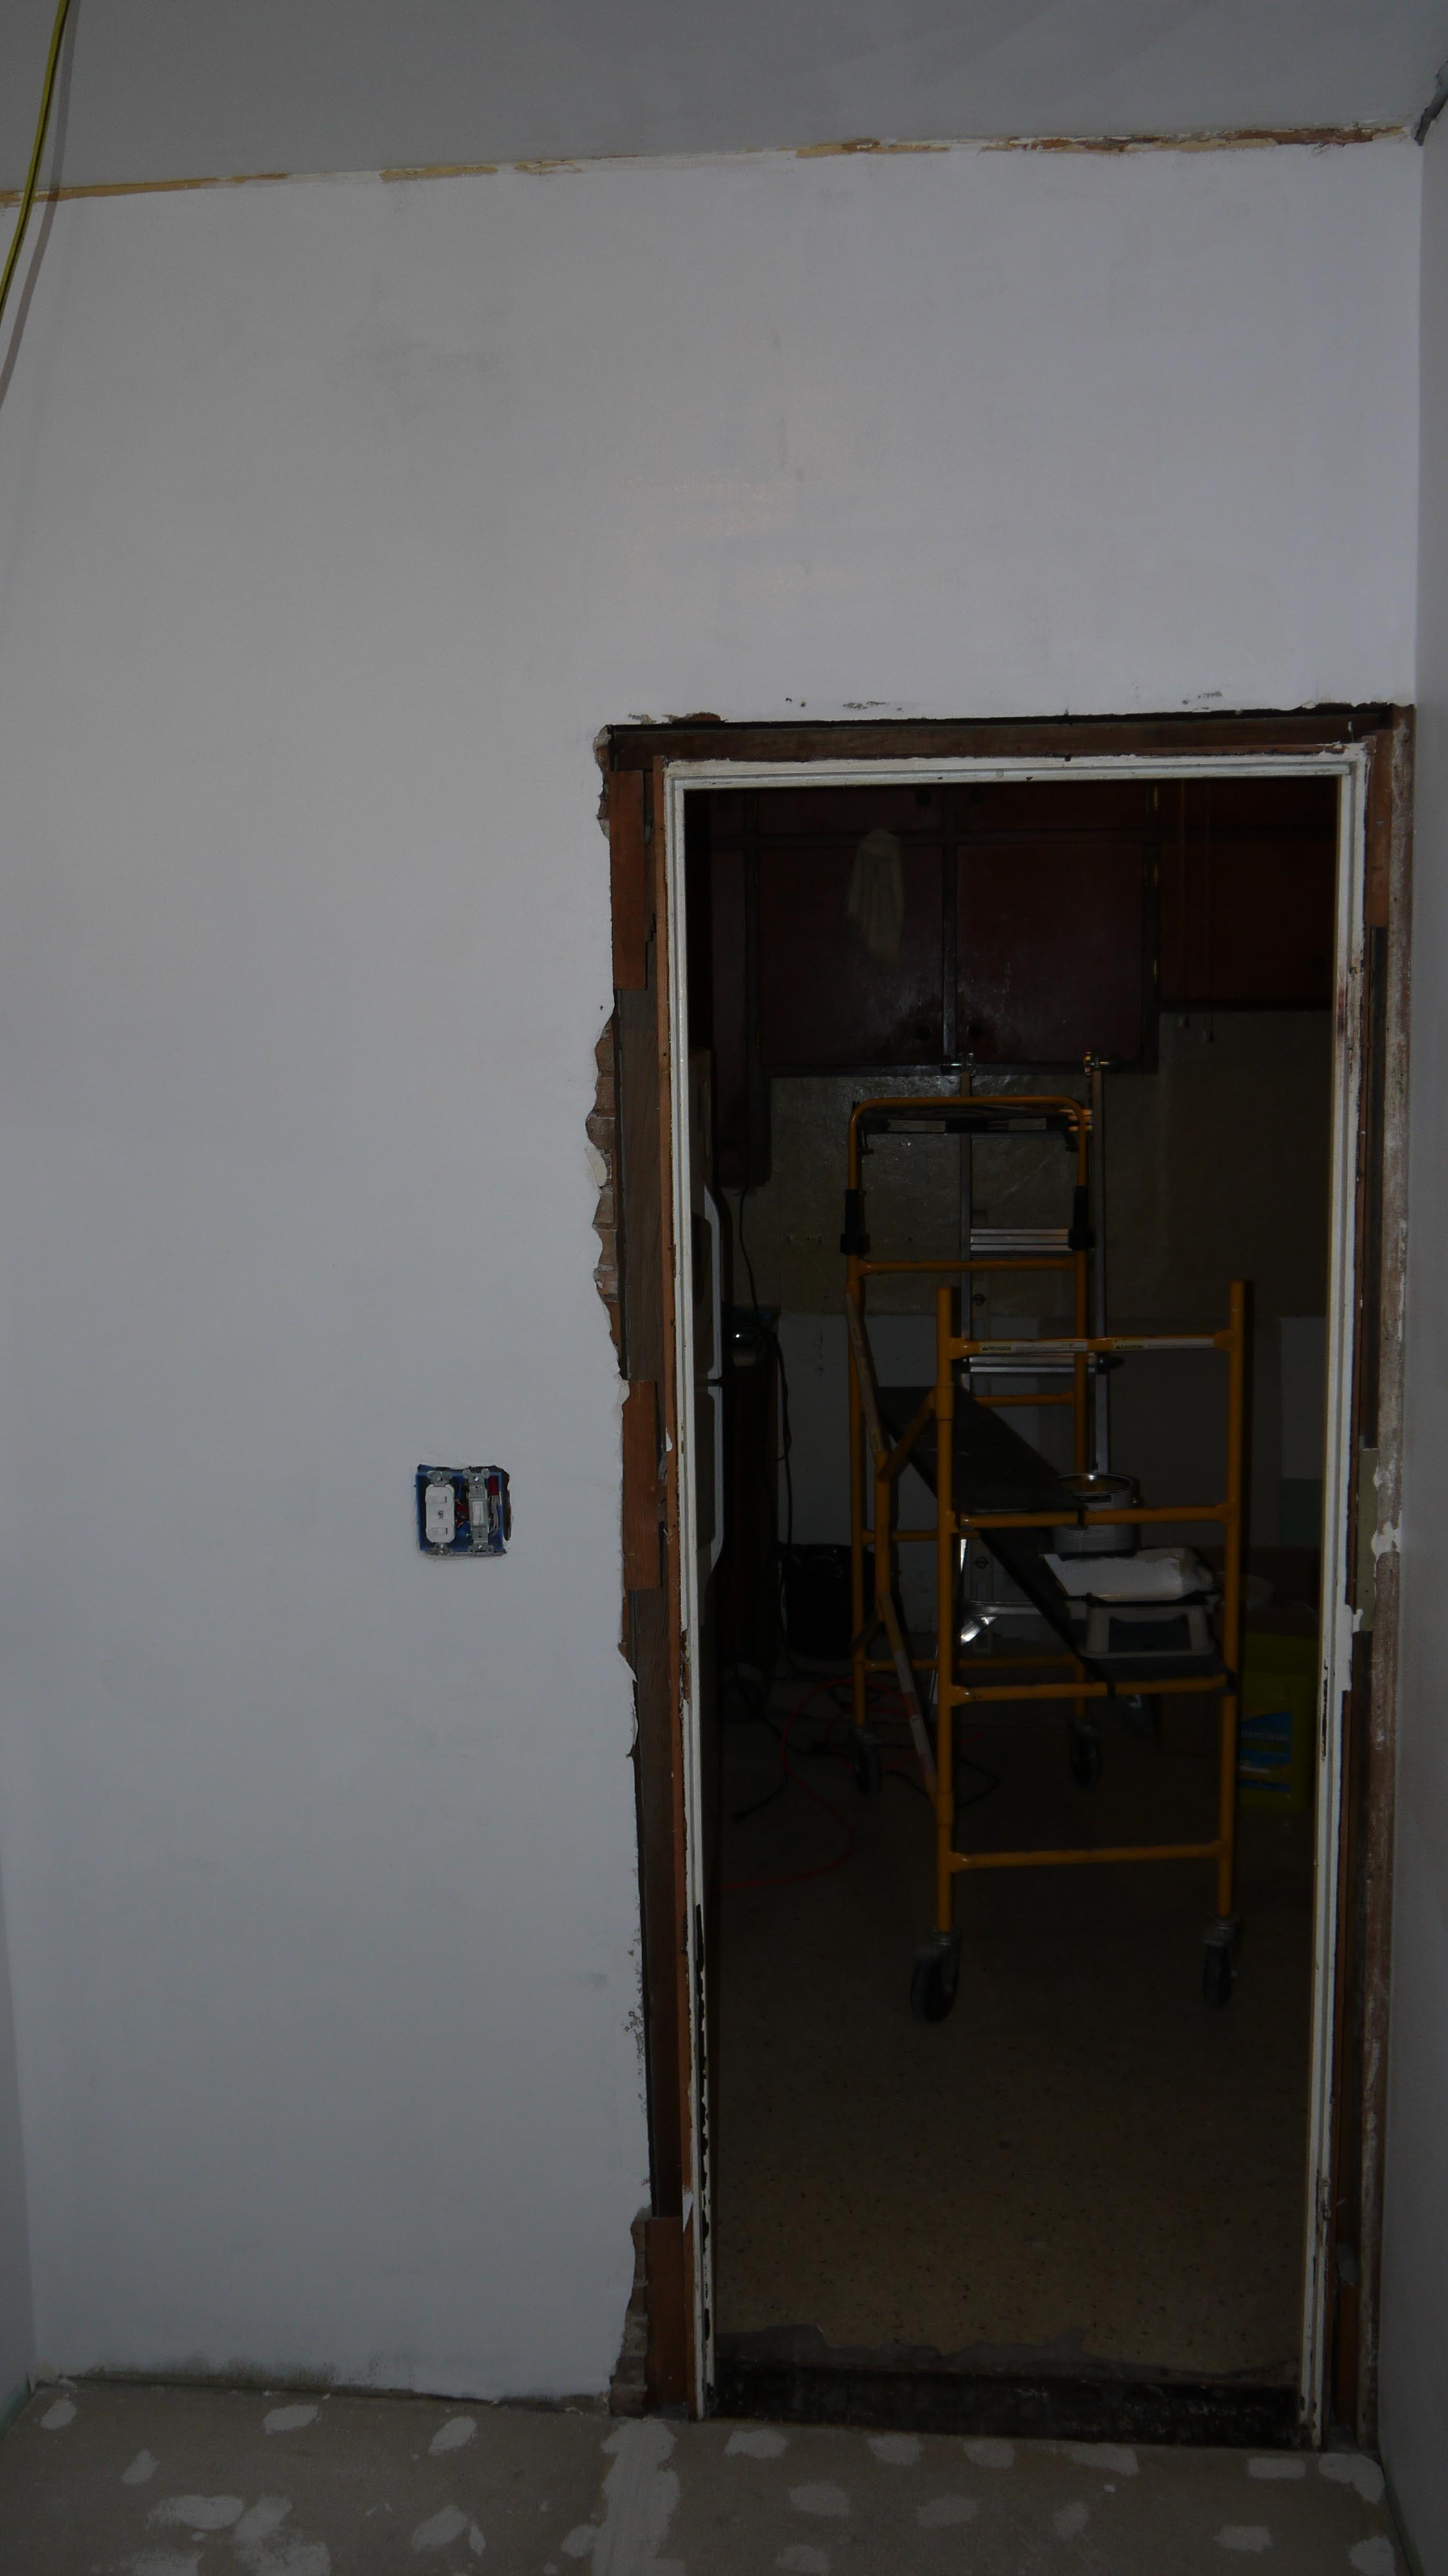
The perimeter of the attic opening looks a little unfinished, but that’s because I removed the trim pieces since they were so caked with thick ugly layers of paint. I’m not going to strip them down to natural wood, but simply sand them a bit so they aren’t so crude looking. The attic opening will be painted white to look the same as the rest of the trim in the room.

The primer I used is pure white. This will be ok for the ceiling, which will be a very pale gray. But for the walls, I’m going to apply a 2nd coat of primer that has been tinted gray. Painters recommend a gray tinted primer for most dark colors and even when painting reds, as it helps the actual paint color come through. I’m planning on very dark gray – almost black. Below is almost exactly the look I’m going for: dark walls, lots of white tile, black framed artwork.

It’s monochromatic, but in no way is it cold or dull. It’s masculine and bold, minimalist yet timeless. The only difference is that I’ll warm up the space with a stained wood vanity – (because if I went with just a pedestal sink, this bathroom would have almost zero storage space) – more on the vanity cabinet soon And maybe a stained wood door. Haven’t fully decided yet. And that is a whole separate conversation – I don’t have a bathroom door. The one I removed was a cheap hollow core door, with a few holes and about to fall off of its hinges. The one bedroom doesn’t have a door at all, so I want to find a style I can use for both. But more on that later. I mean, come on, without a working toilet why would I need a door yet?
Winter’s End?
Posted by Adam A. Ries in Exterior, Home Improvement on March 1, 2014
Nearly a 1 year hiatus. Yes, and although I’ve often considered updating, I’ve been learning how to manage my full time job, living with family, and keeping friends on the weekends. With quite a few projects in between also. What have I accomplished over the past two years, since I got really lazy journaling about home improvement projects? Let me think:
- Primed the entire house exterior
- Painted the entire house exterior
- Painted front & side entry doors
- Install all new window trim and moldings through entire house
- Stained or painted new window trim (the bathroom, laundry, and kitchen have painted woodwork)
- Ordered raised panel vinyl shutters (not my favorite material, but inexpensive and zero maintenance won this time)
- Primed & painted vinyl shutters (4 pairs)
- Hung shutters on front & side windows
- Blown cellulose insulation into attic (insulation value at R-60, baby!)
- Painted main living room (boring white was getting old)
- Hang living room curtains on new sturdy drapery rods
- New laminate countertops & tile backsplash in the sister’s kitchen
Most of these steps I didn’t document, but I can highlight the finished outside of the house!
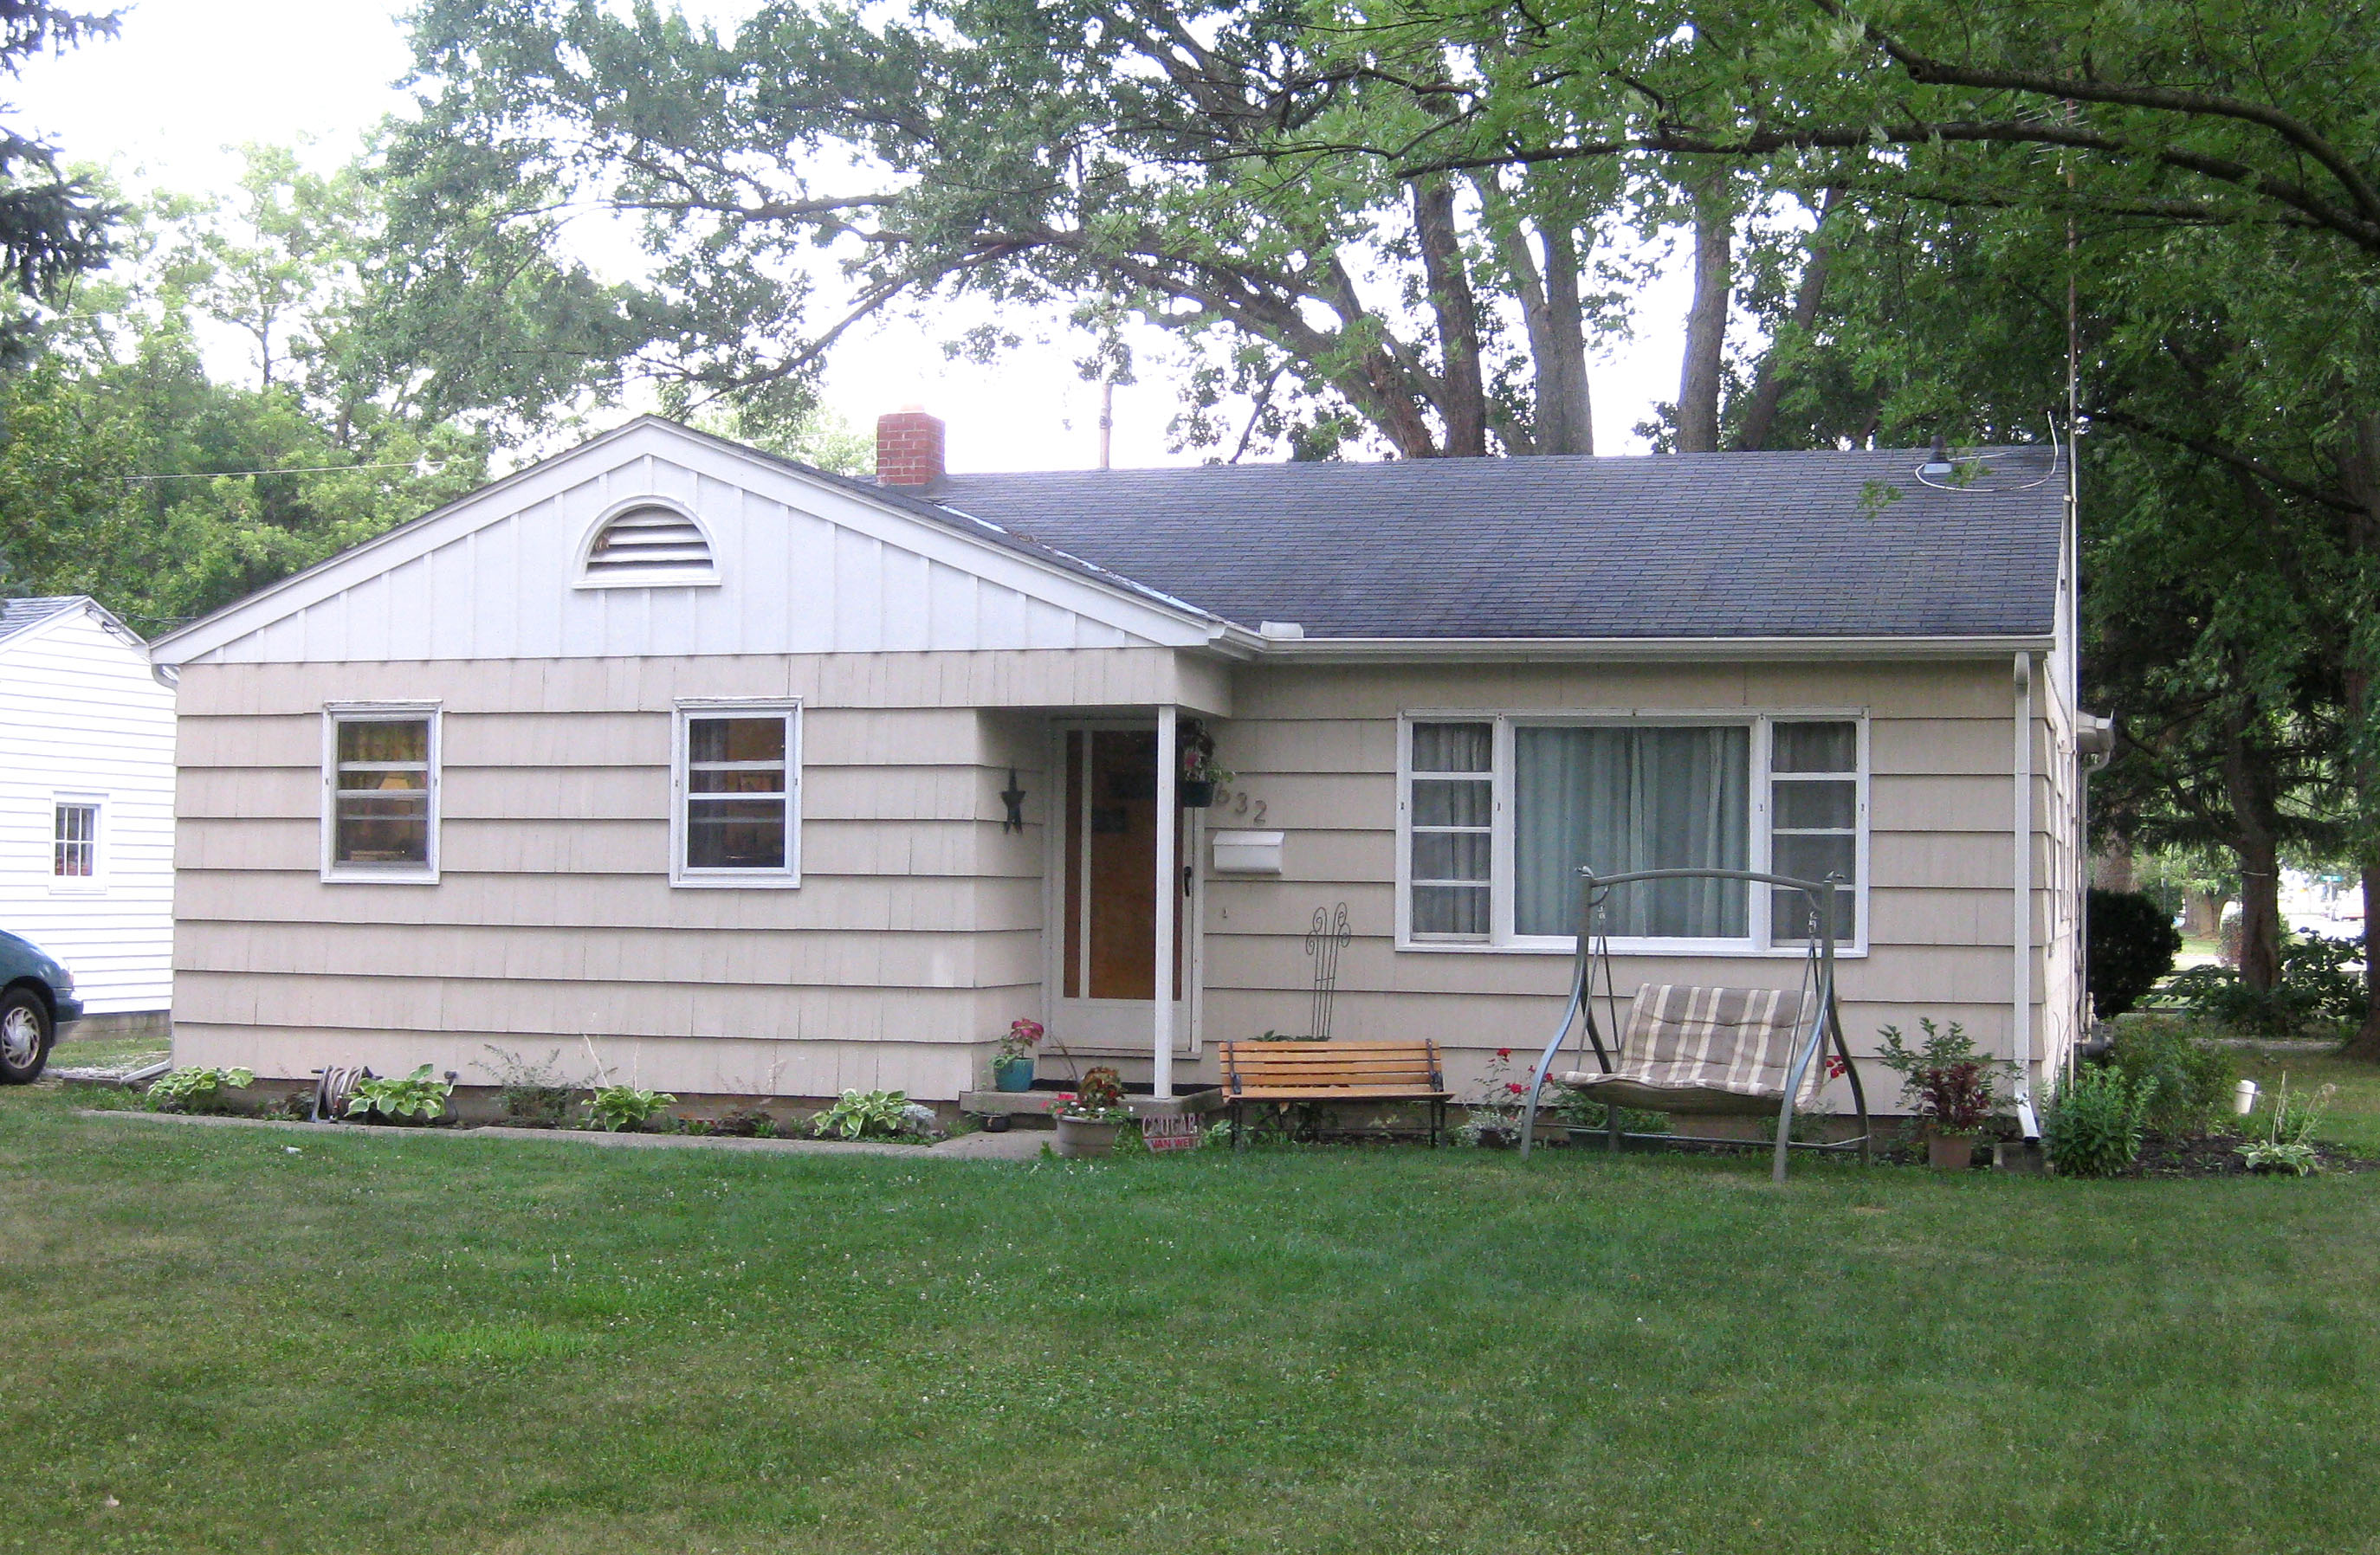
Below is the completely untouched “before” picture. Other than maybe a few plants and the park bench, this is how the house looked before I started working at all. Complete with rotting windows, vintage door, and fading bland paint job.
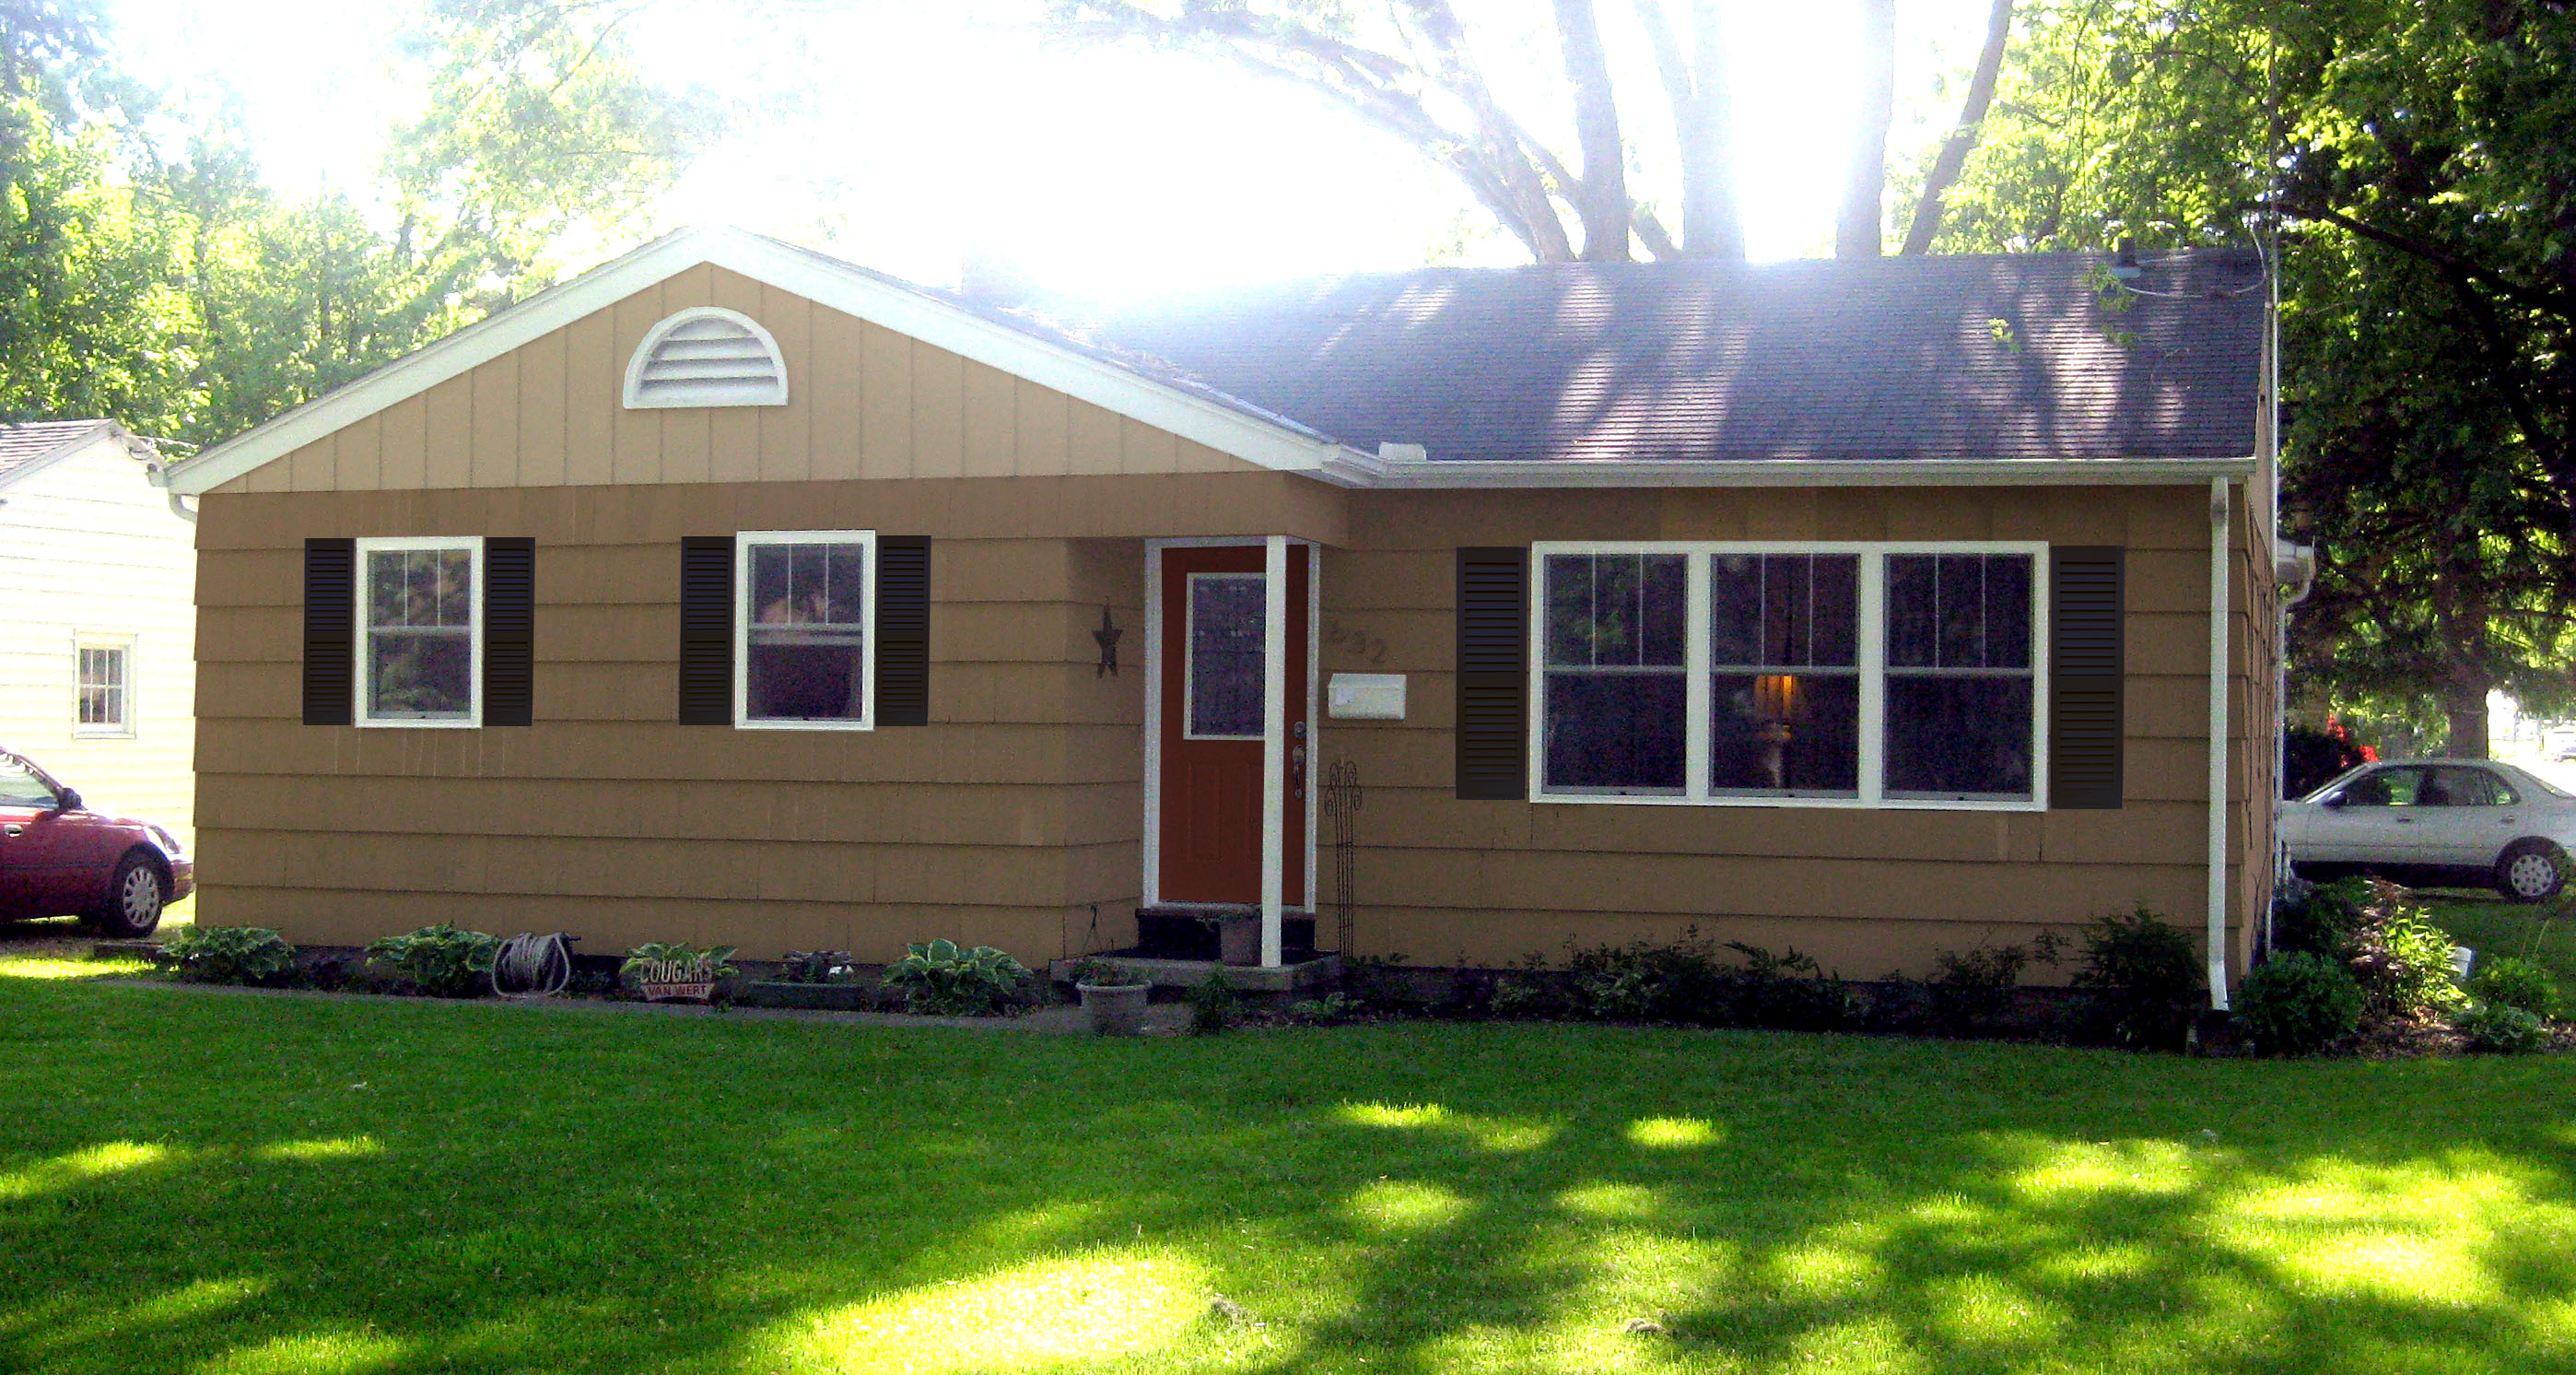
Here is my rendered “after,” with the intention of all new windows, doors, shutters and a new and noticeable paint scheme.
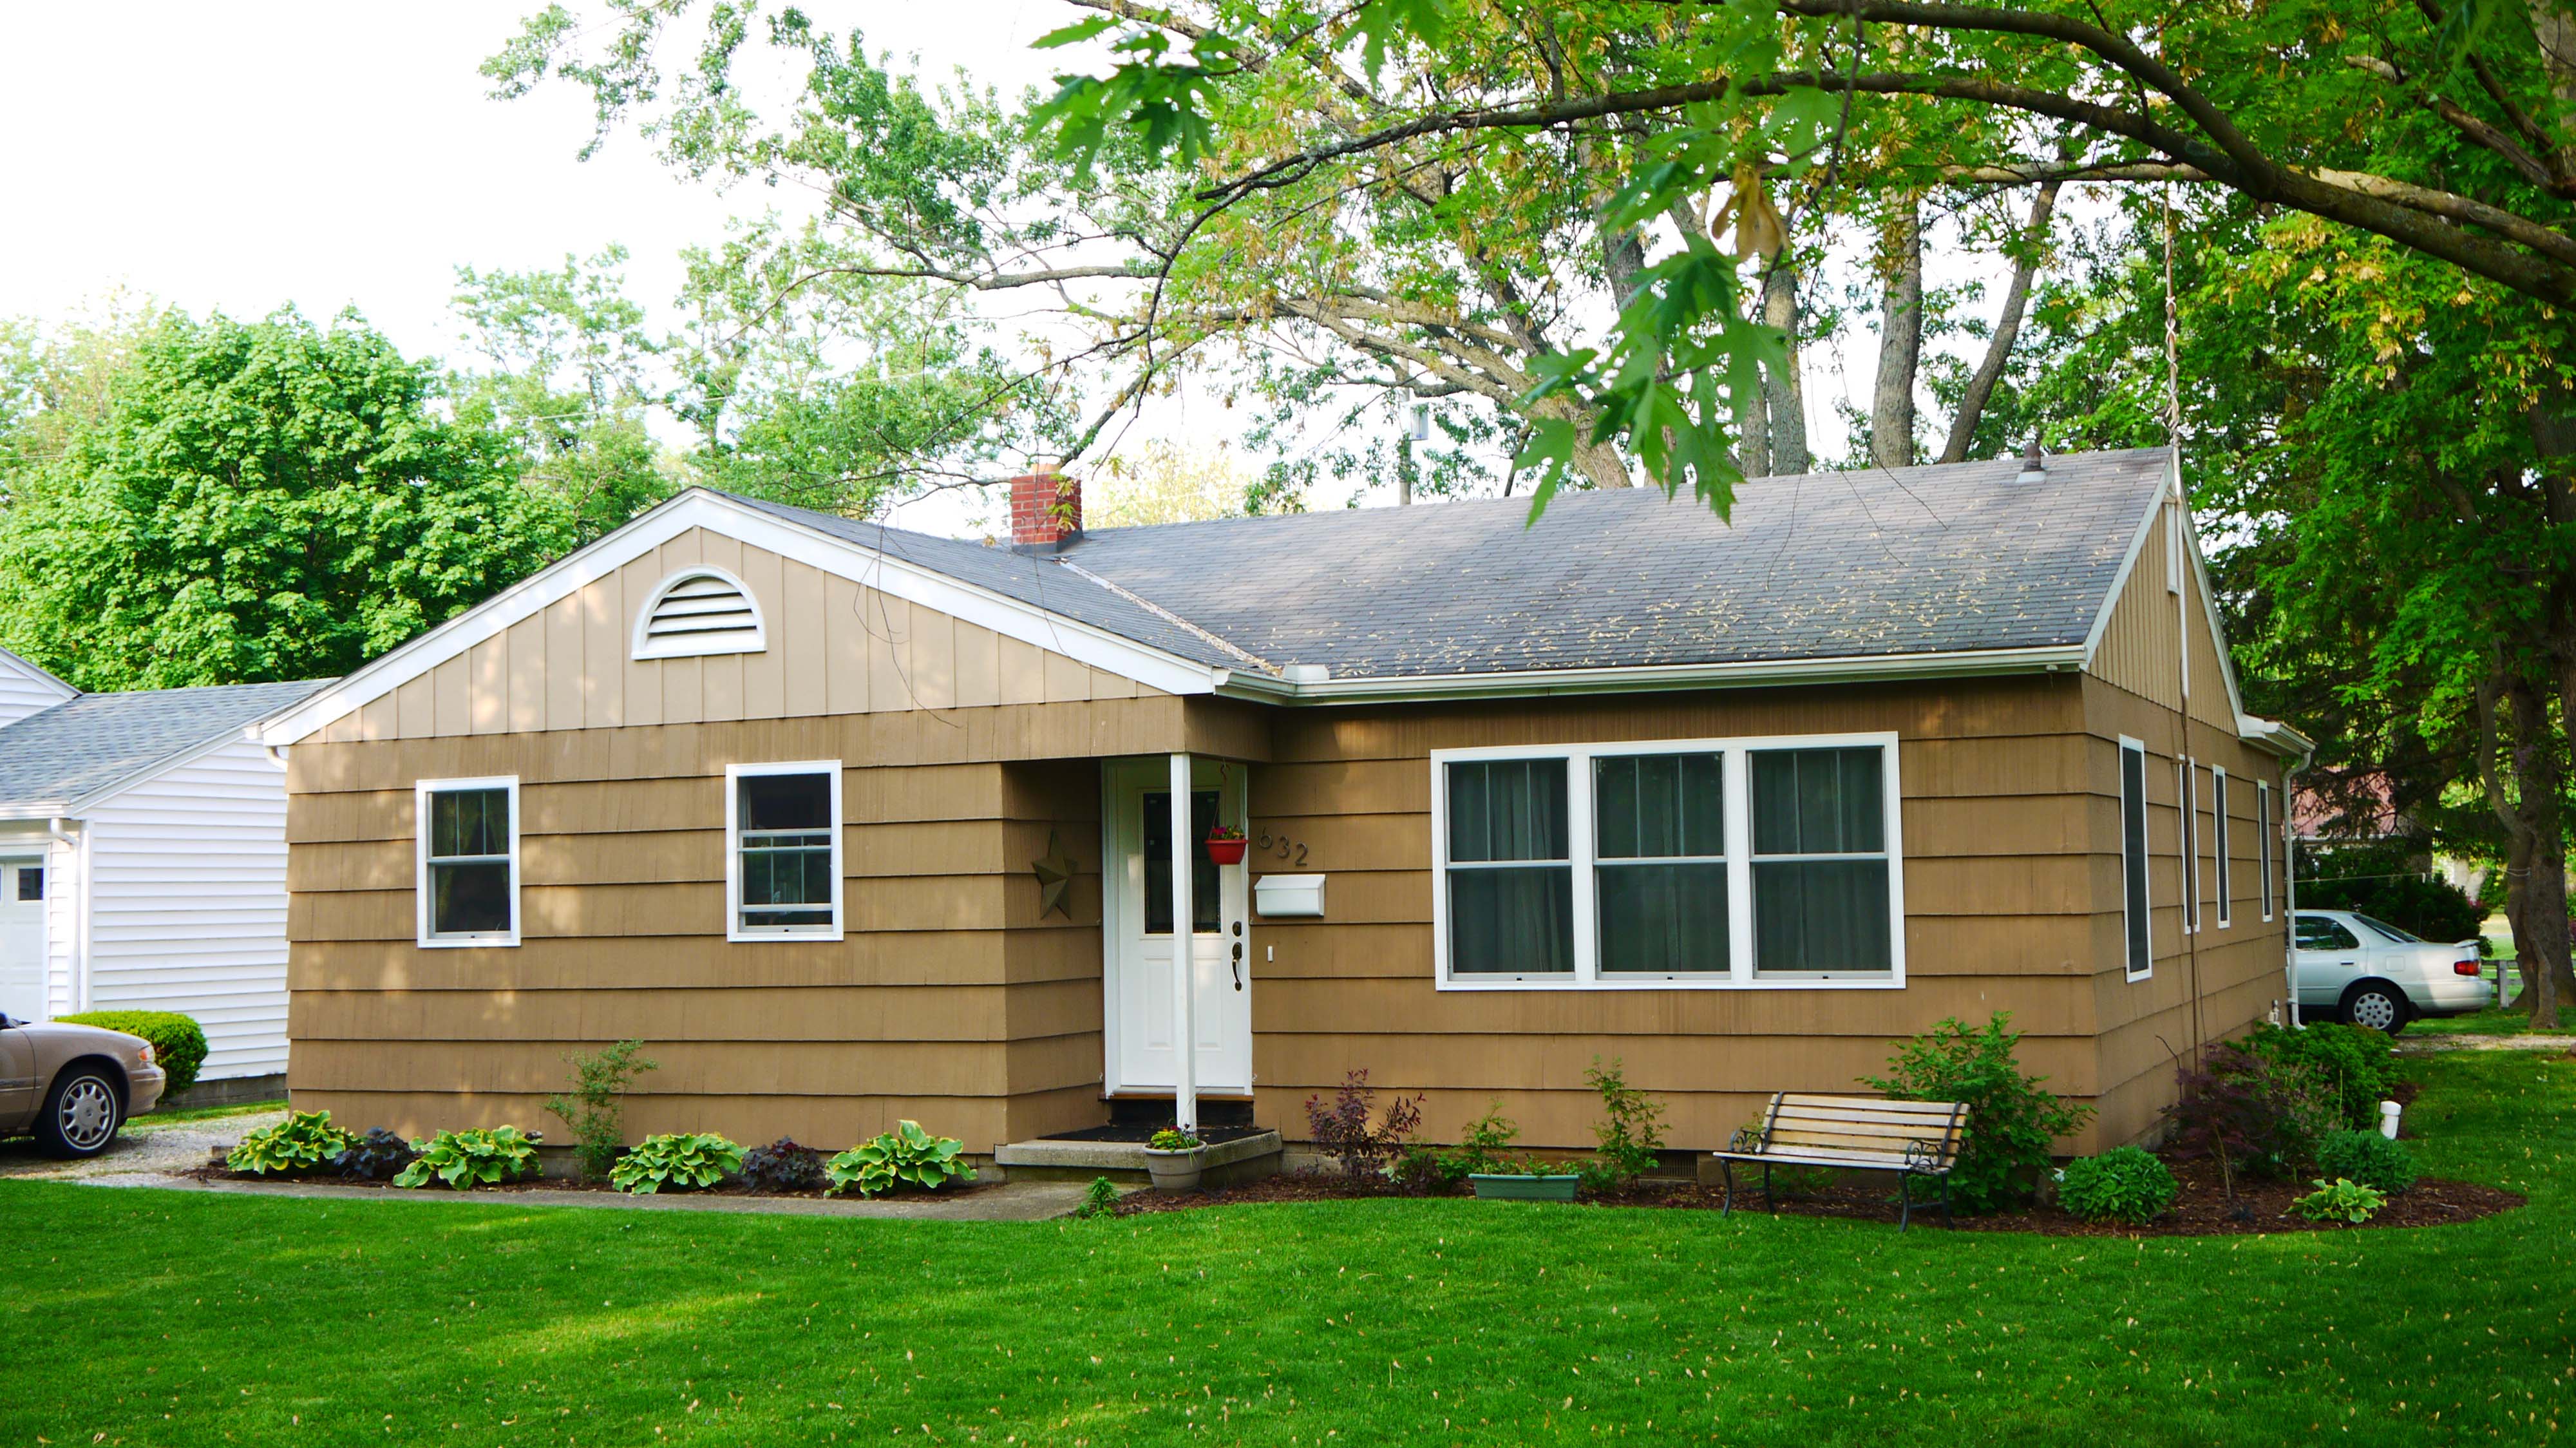
And here is the “after!” All the work I mentioned is complete, it’s only taken a little more than 2 years!
 Oops, apparently this was before the shutters went up. But you can see how nicely landscaped it looked last summer, with fresh mulch, plenty of rain, and such a beautiful shaded green lawn. It has definitely spruced up the entire corner. What was before an almost unnoticeable little house is now a home that just looks loved and well maintained. And a little bit of personality thrown in there too.
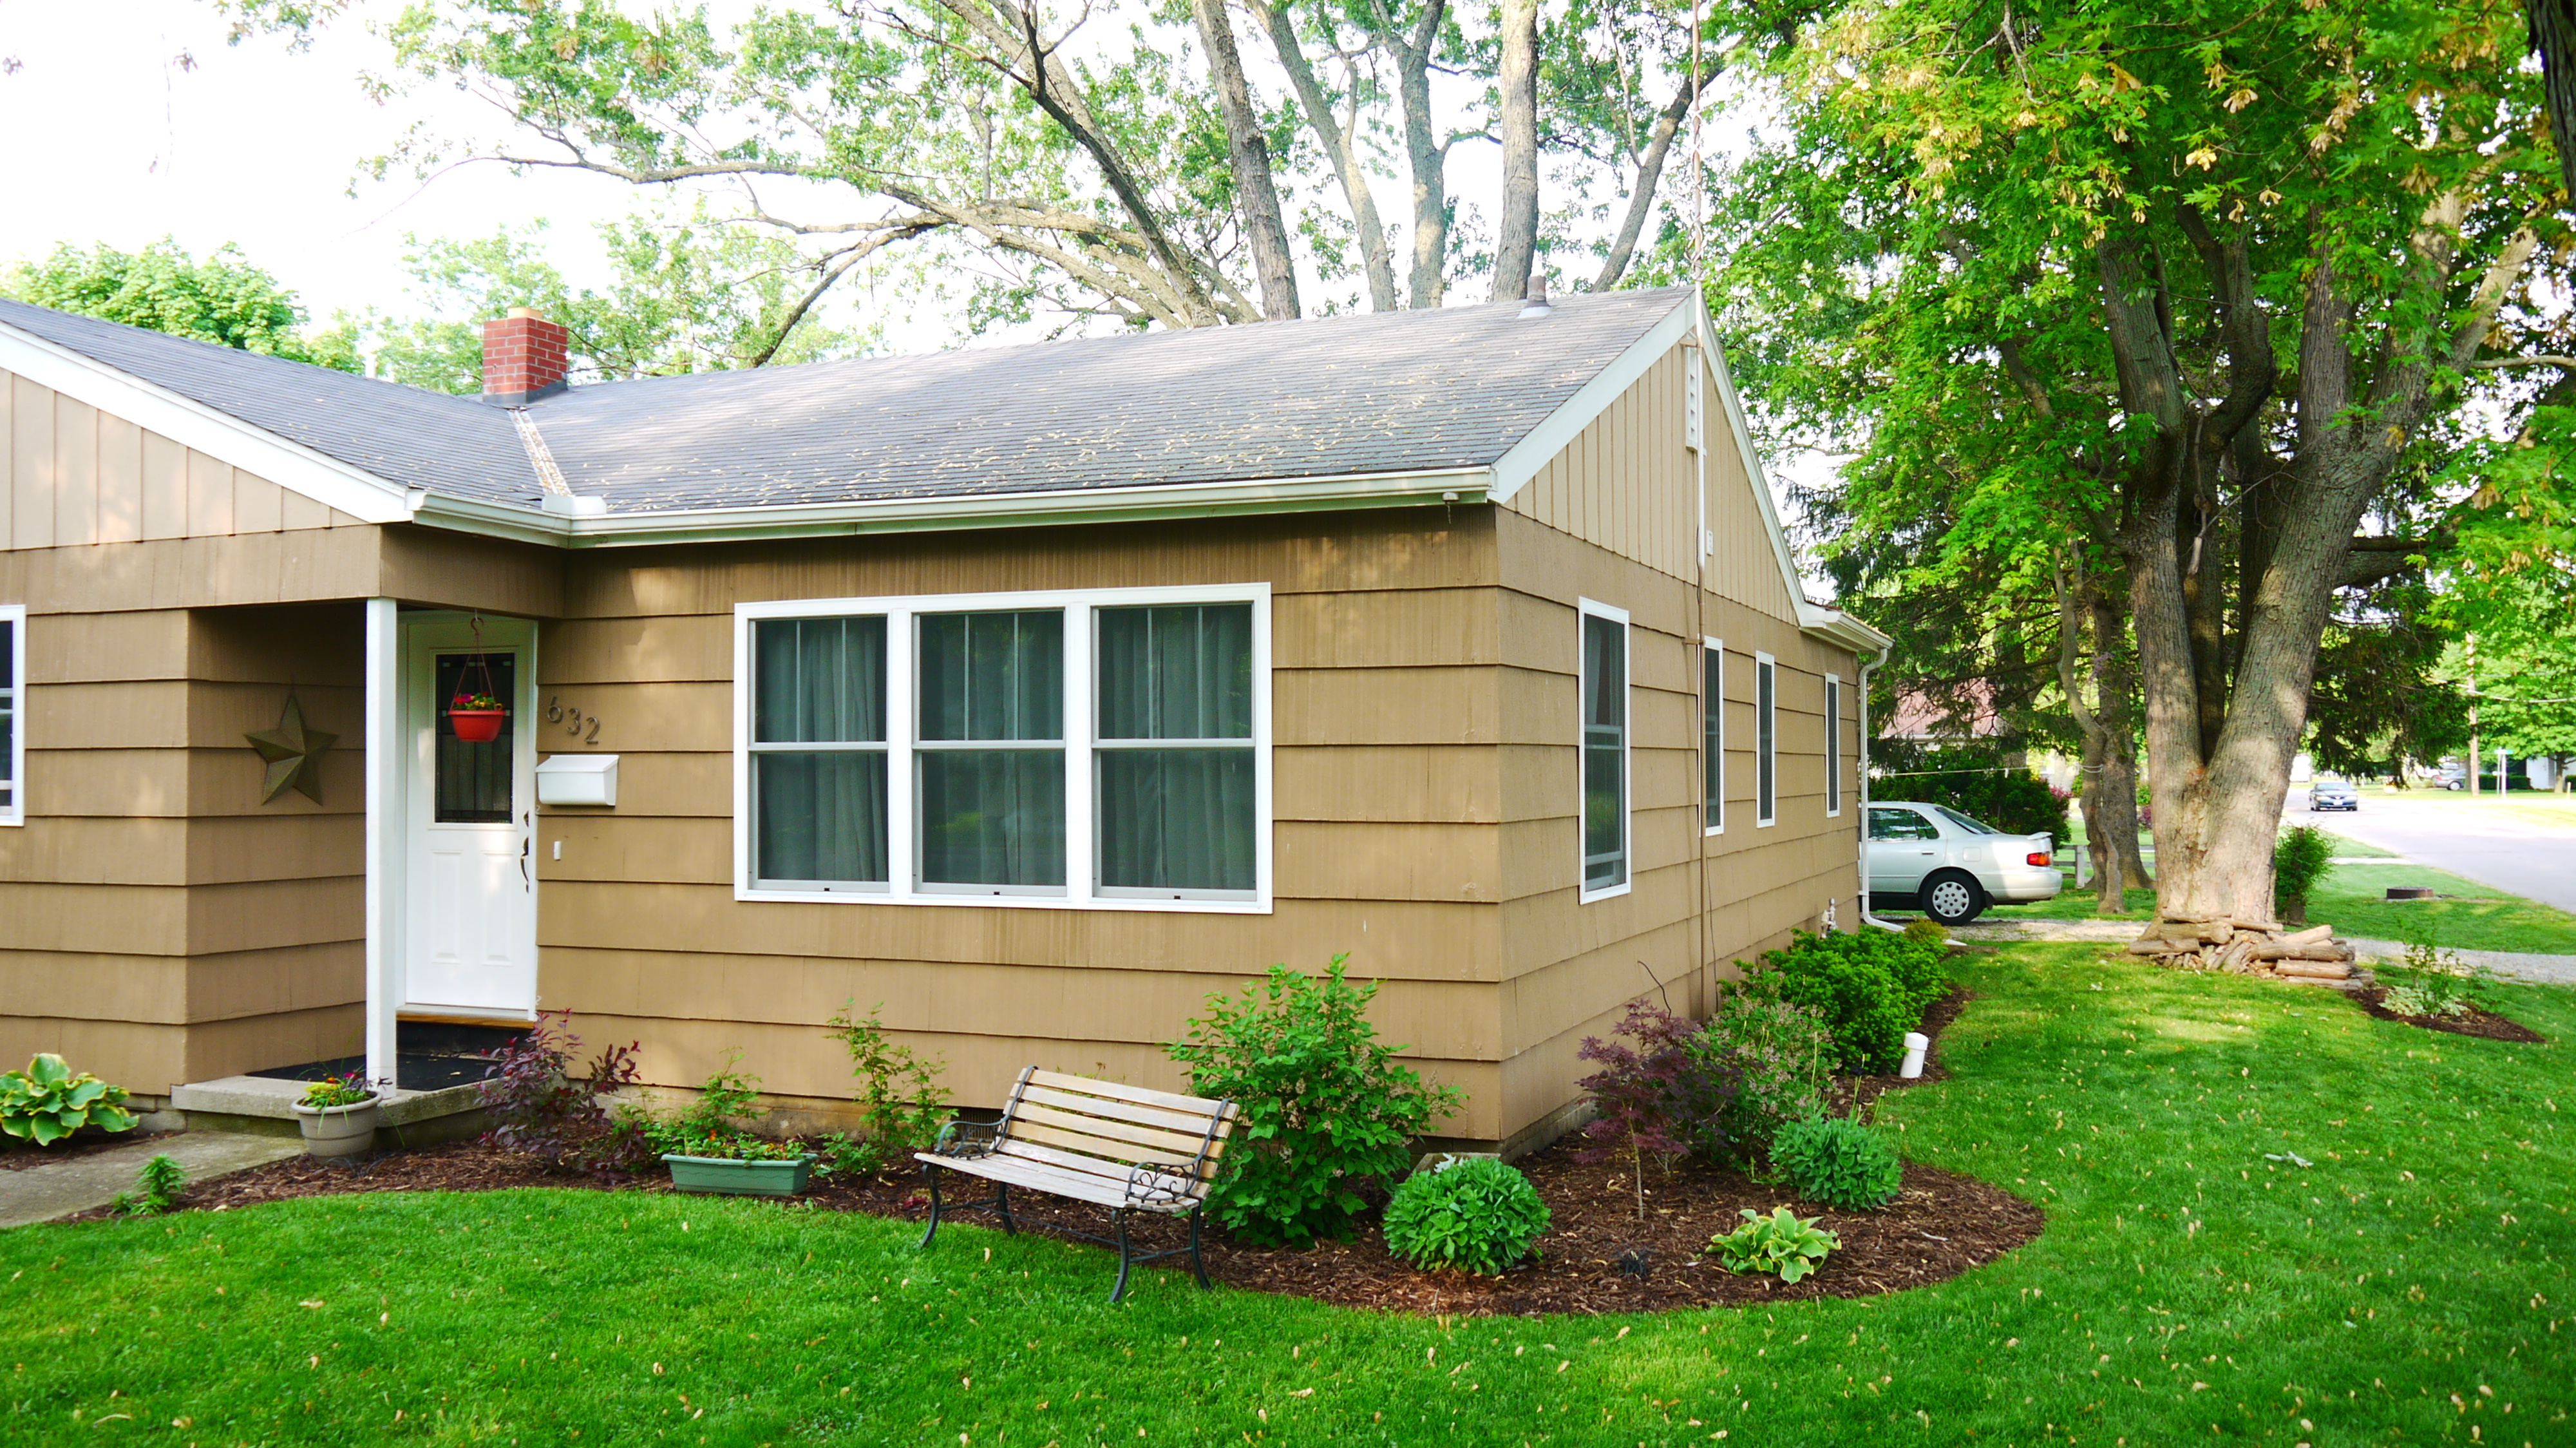 I really liked how the landscaping with its large radios curved edges has really softened the strong horizontal and box-like lines of the house.
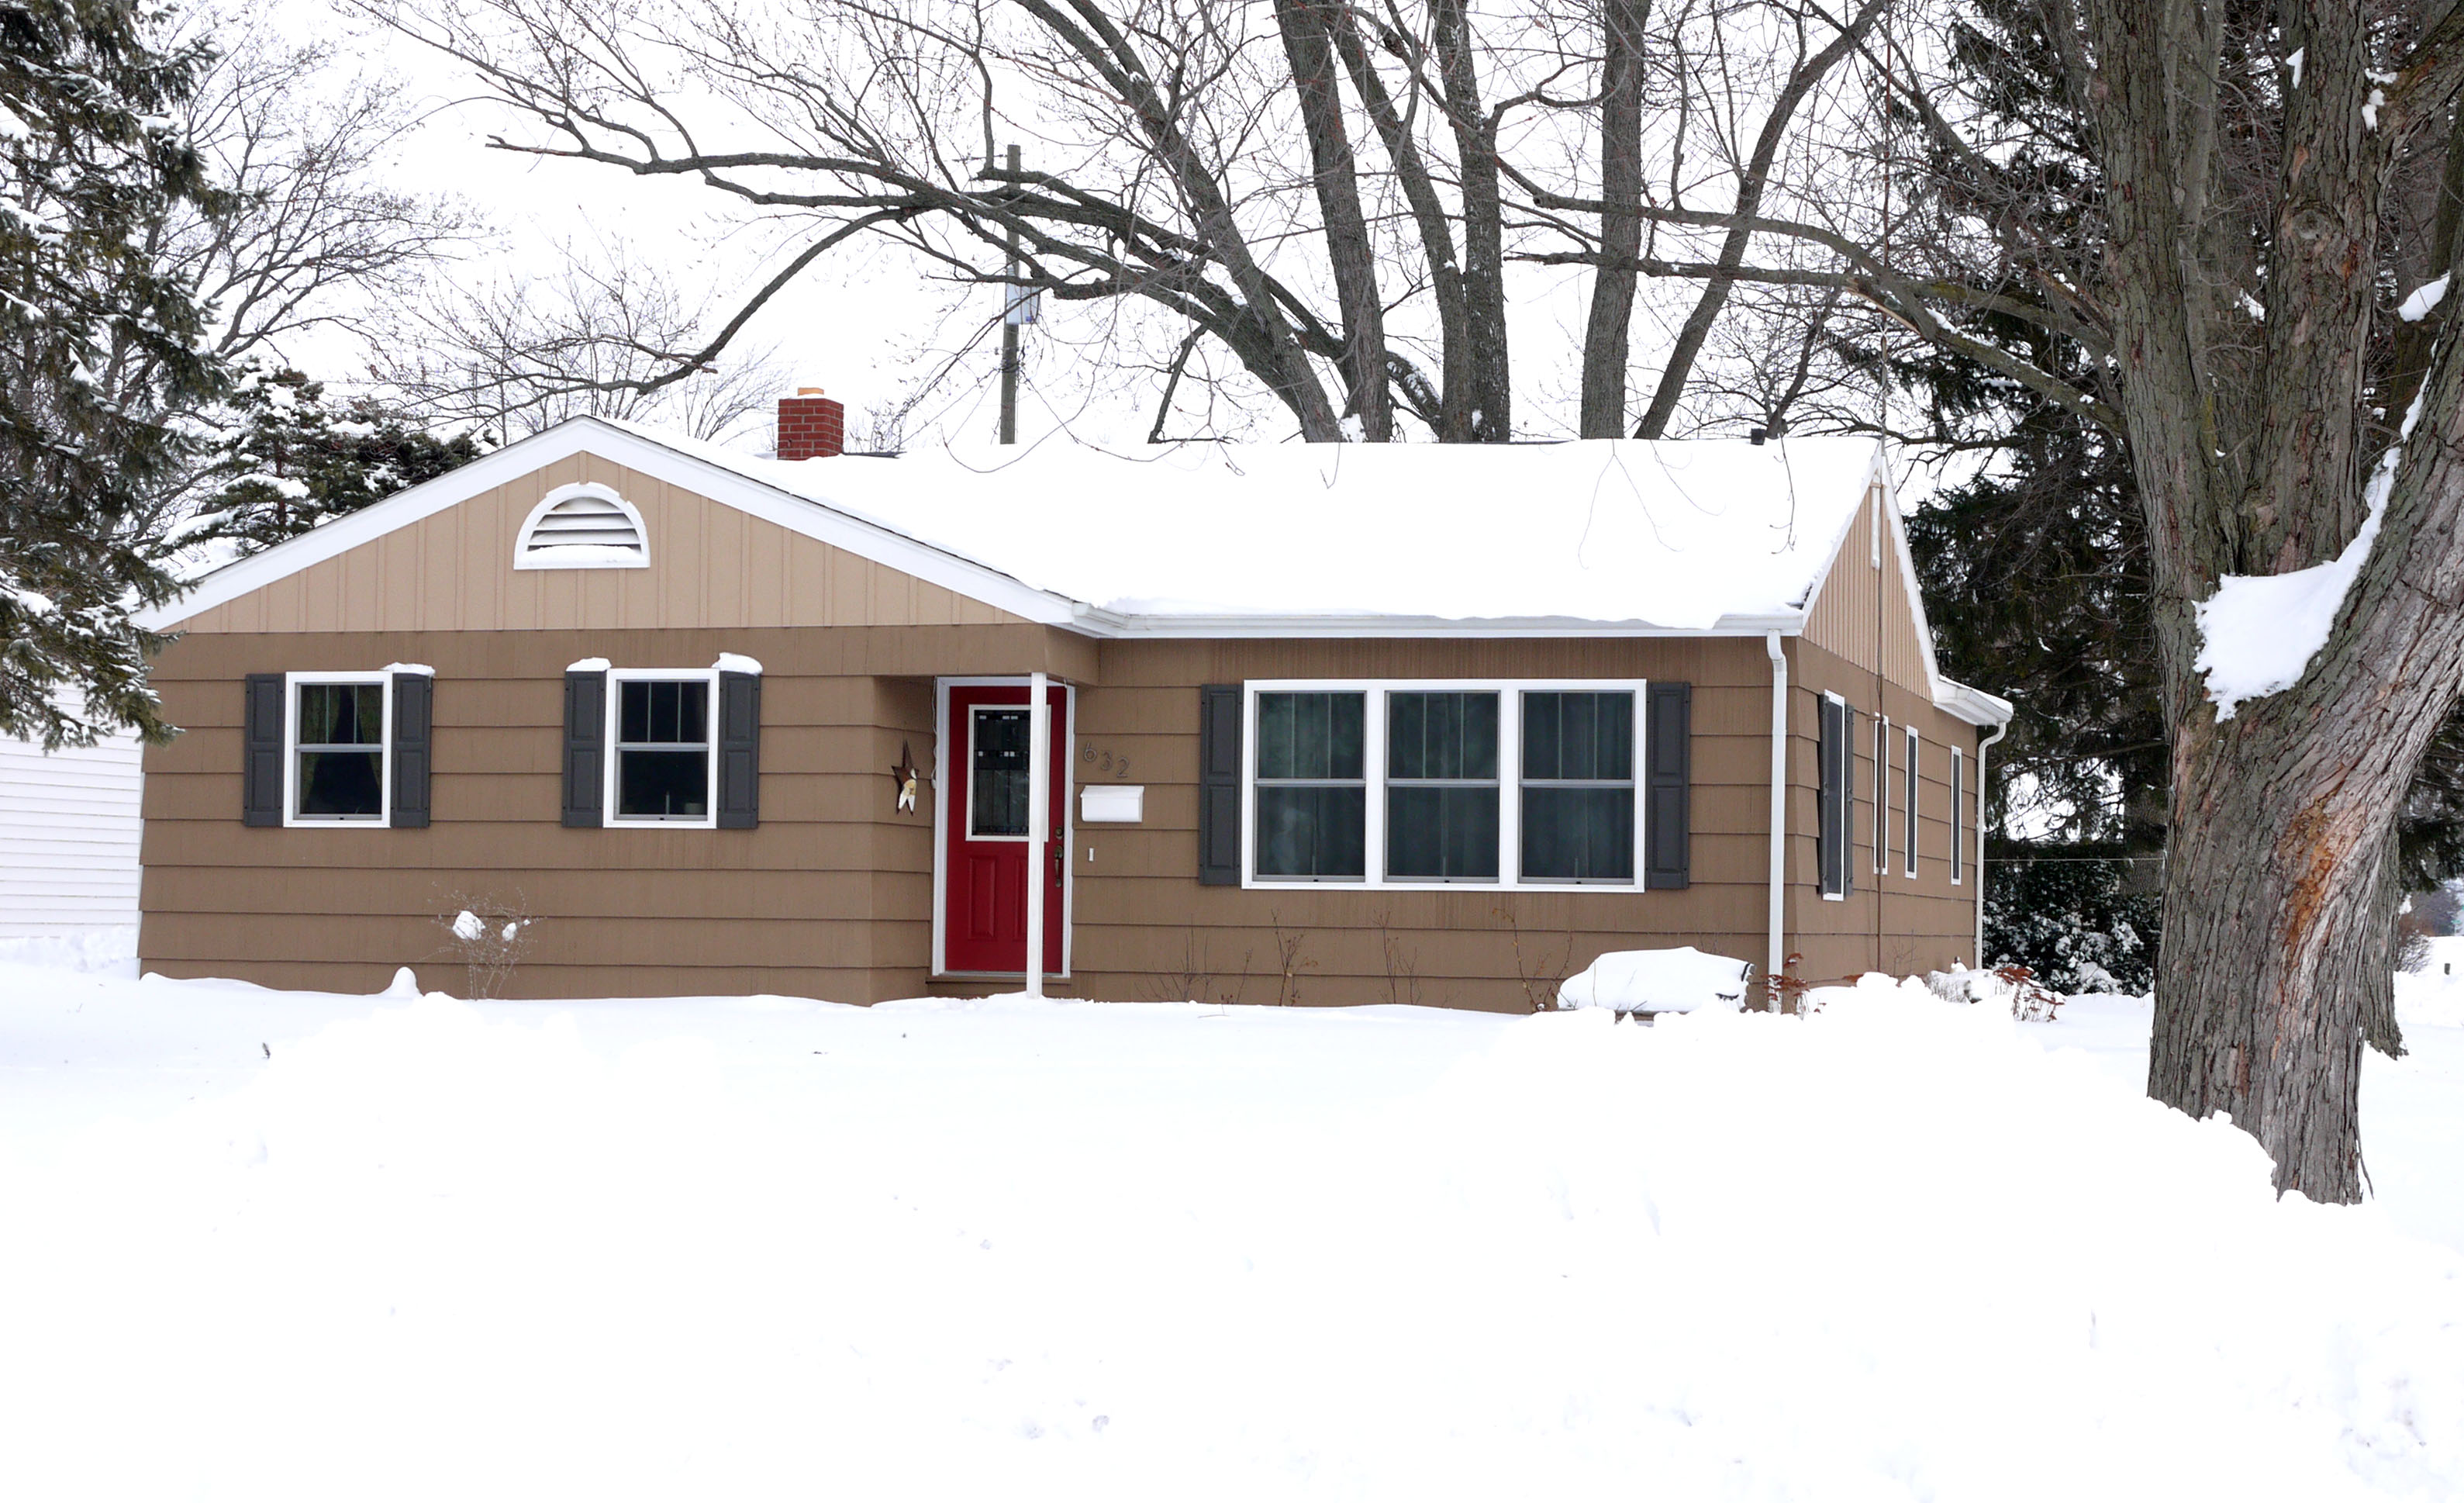
And here is the house (with shutters) earlier this winter, about mid January.The shutters are actually a color called Urbane Bronze (Sherwin Williams), but it is a strange color. Some days they look brown, some days they look black, and in the photo above they look blue gray. Since we didn’t replace the dark gray roof, I thought a gray/brown shutter color would help tie in the dark roof and brown paint scheme. And I think it accomplished that.
Although you cannot tell in the above photo, thanks to all that snow. NW Ohio has gotten in excess of 52 inches of snow this season, more total snowfall since the Blizzard of 1978! But the fancy Nest thermostat and medium efficiency furnace kept up just fine. Although I can’t compare until the winter is officially over (yes, I do keep utility bills each year so I can document the homes energy usage and compare it after I complete energy upgrades), I would dare to say the energy usage this winter is probably lower still than any winter before this thanks to the energy efficient and air-tight windows and doors. And you can also see how, thanks to the attic insulation, we have very little heat loss through the roof, as the heat from the house doesn’t escape from the ceiling to melt snow off the roof.
Seeing Portabello
Posted by Adam A. Ries in DIY, Exterior, Home Improvement on August 16, 2011
Yes, for the past two weekends we have been seeing and smelling portabello. And getting it all over our hands, faces, and even in our hair. No, I’m not talking mushrooms.

I’m talking paint. As in, Sherwin-Williams Portabello 6102. Don’t let this small color swatch fool you, it looks so much richer in real life, almost like the underneath side of that mushroom above. It really is a very saturated and beautiful golden-reddish-brown color. Catch up to speed on our big house painting adventure planning and how we debated paint colors at this post over here, or see the abbreviated version of the color scheme and a rendering of the finished house by clicking on this post.

Onto the good stuff. We were fully geared up and prepared to paint the house with 2 brushes in each hand. And that is exactly how we primed the entire exterior with Zinsser Peel Stop clear binding sealer. It was like painting with milk; very thin and watery, and dried to a very slight sheen over the surface of the shingles. We wondered if it was even doing any good until we had to clean a few dried drips off of a window frame. Oh my goodness was it nearly impossible to clean off once dry! So if it stuck that well to new shiny vinyl window frames, I figure it must have been a good product!
But after priming, I was not at all interested in repeating that brushing torture once again with the paint. So I began asking around and doing some research on airless paint sprayers. It turns out they are pretty affordable to rent and seemingly easy to learn to use. In fact, this YouTube video is the clip that made me say out loud, “that’s it, we’re renting a sprayer!”
The man in the video is painting the same style and size shingles as my house (pretty much the same ‘before’ color, too) and boy does it go super quick! So just like the video, we masked off all the windows and doors with masking tape and painter’s plastic. We propped up cardboard under the last row of shingles to cover the foundation, and I held a piece of cardboard attached to a handle as a long blade against the soffit above the top row of shingles. And then it was time to spray.
I first used water to familiarize myself with the airless sprayer. I ‘painted’ water onto a large piece of cardboard so I could see how thin and even of a spray the machine produced. By spraying in about 3 – 4 foot lengths and overlapping each path by half, I got the hang of it really quick. So I primed the sprayer with paint and gave myself one more test run on the cardboard. Time to hit the house. I don’t know why I was so hesitant, the paint sprayed out so thin and evenly, filling all of the grooves in the cedar shingles effortlessly. By overlapping each length of spray, I was left with a smooth finish and a solid cover of paint. No need for two coats!

Check out the white primer polka dots, no? You have no idea how glad I was to paint over them and rid the house of its primer pox epidemic. And now for a close up comparison of the ‘before’ and ‘after’ colors for you to eat up (yes, that was a pun on the paint color name).

The only caution I would give, and I was fairly warned by the managers at the Sherwin-Williams store, is to be prepared to back-roll (or in my case, back brush) the paint after spraying a large section. Anywhere that I overlapped more than a half stripe or even sprayed a second coat would begin to run and form drips. These areas just need a once-over with a paint brush, hence the term back brushing, to even out the spray.
I actually painted the house in 2 Saturdays, partly because I started later in the day (masking off windows takes for-ev-er) and partly because I ran out of paint on the first Saturday too late in the day to run out and get more. But after it was all painted (even before it was completely finished), I was ecstatic with how it looked! I am in love with the deep rich color, and so pleased with how well the paint covered. We painted with Sherwin-Williams Duration Exterior Acrylic Latex , known for its superior color coverage and long lasting paint performance.
So how far have we come? Here is the original before photo, house circa summer 2009; aka, boring beige (although it has a slight pink tinge in that particular photo).

Here is the house before we painted. Yes, it is looking a little poka-dotted or zebra striped or something in between as a result of different color shingles around the windows, tinted primer under the picture window, and tons of primed areas around the single windows. As people would walk through the neighborhood in the evenings, you could see them point and look, and looooook. Probably wondering what in the world we were doing. At least the sky is beautiful in this photo.

And here is the house after a super rich paint job of Portabello. I was going to say what percentage of an improvement the new paint is, but the actual number is off my scale. Probably something like a mbajeelion (silent m) times better looking. (Click here to see how closely this real photograph compares to a rendered image I created at the beginning of this painting project).

Improvement? I think so. I am still in the process of painting the fascia boards and soffits bright white, and then will be painting the gables. All by hand, brush and roller. I decided that with the amount of overspray produced by the airless sprayer, it would be nearly impossible to spray the gables and have a clean crisp painted edge when done without using 20 miles of painter’s tape. Which isn’t cheap, by the way. So up and down a ladder with a paintbrush in hand I will go. And hopefully I will finish before the snow flies.
