Posts Tagged Tub
Everyday I’m Tiling
Posted by Adam A. Ries in DIY, Home Improvement on July 31, 2014
But still not finished. I must have put in the equivalent of 5 full 8 hour work days over the course of last week, doing any last minute prep and then tiling the shower surround and bathroom walls.
As far as last minute prep: I caulked the seam around the window opening between the cement board and old window frame (which becomes the rough opening for the new replacement window) and then painted the waterproofing membrane over top once the silicone was dry – one cannot be overly waterproof. I also caulked the joint where the cement board meets the tub, running my finger along the bead of silicone to make sure it wouldn’t dry proud of the cement board and effect the tiles adhering flat.
And then it was time to bust out the wet saw and mix up mortar. I also purchased a manual tile cutter, because I thought it might be faster for straight cuts on these small tiles, but a wet saw is the only way I know how to cut corners or grind rounded shapes in a piece of porcelain tile. And sometimes I just need to shave the slightest sliver away from a cut, and the wet saw is the best for this also.
For mortar, the tile store sold me Full Flex Premium thin set mortar. They explained that it would be the best product to use for everything – the shower walls, bath walls, and floor. I roughly followed the mixing ingredients, until it was about the thickness of cake icing. Although the professionals will trowel it onto the walls in a small section at a time, I kept finding it would dry too quickly that way (lots of cutting tiles, then re-cutting tiles, and before too long the mortar wasn’t sticky any more). So I switched to using the back-butter method, where I lather up each tile, scrape with a notched trowel, and then push the tile into place. It goes slower, but I felt it was cleaner and gave me more control.
The large areas went fairly quick.
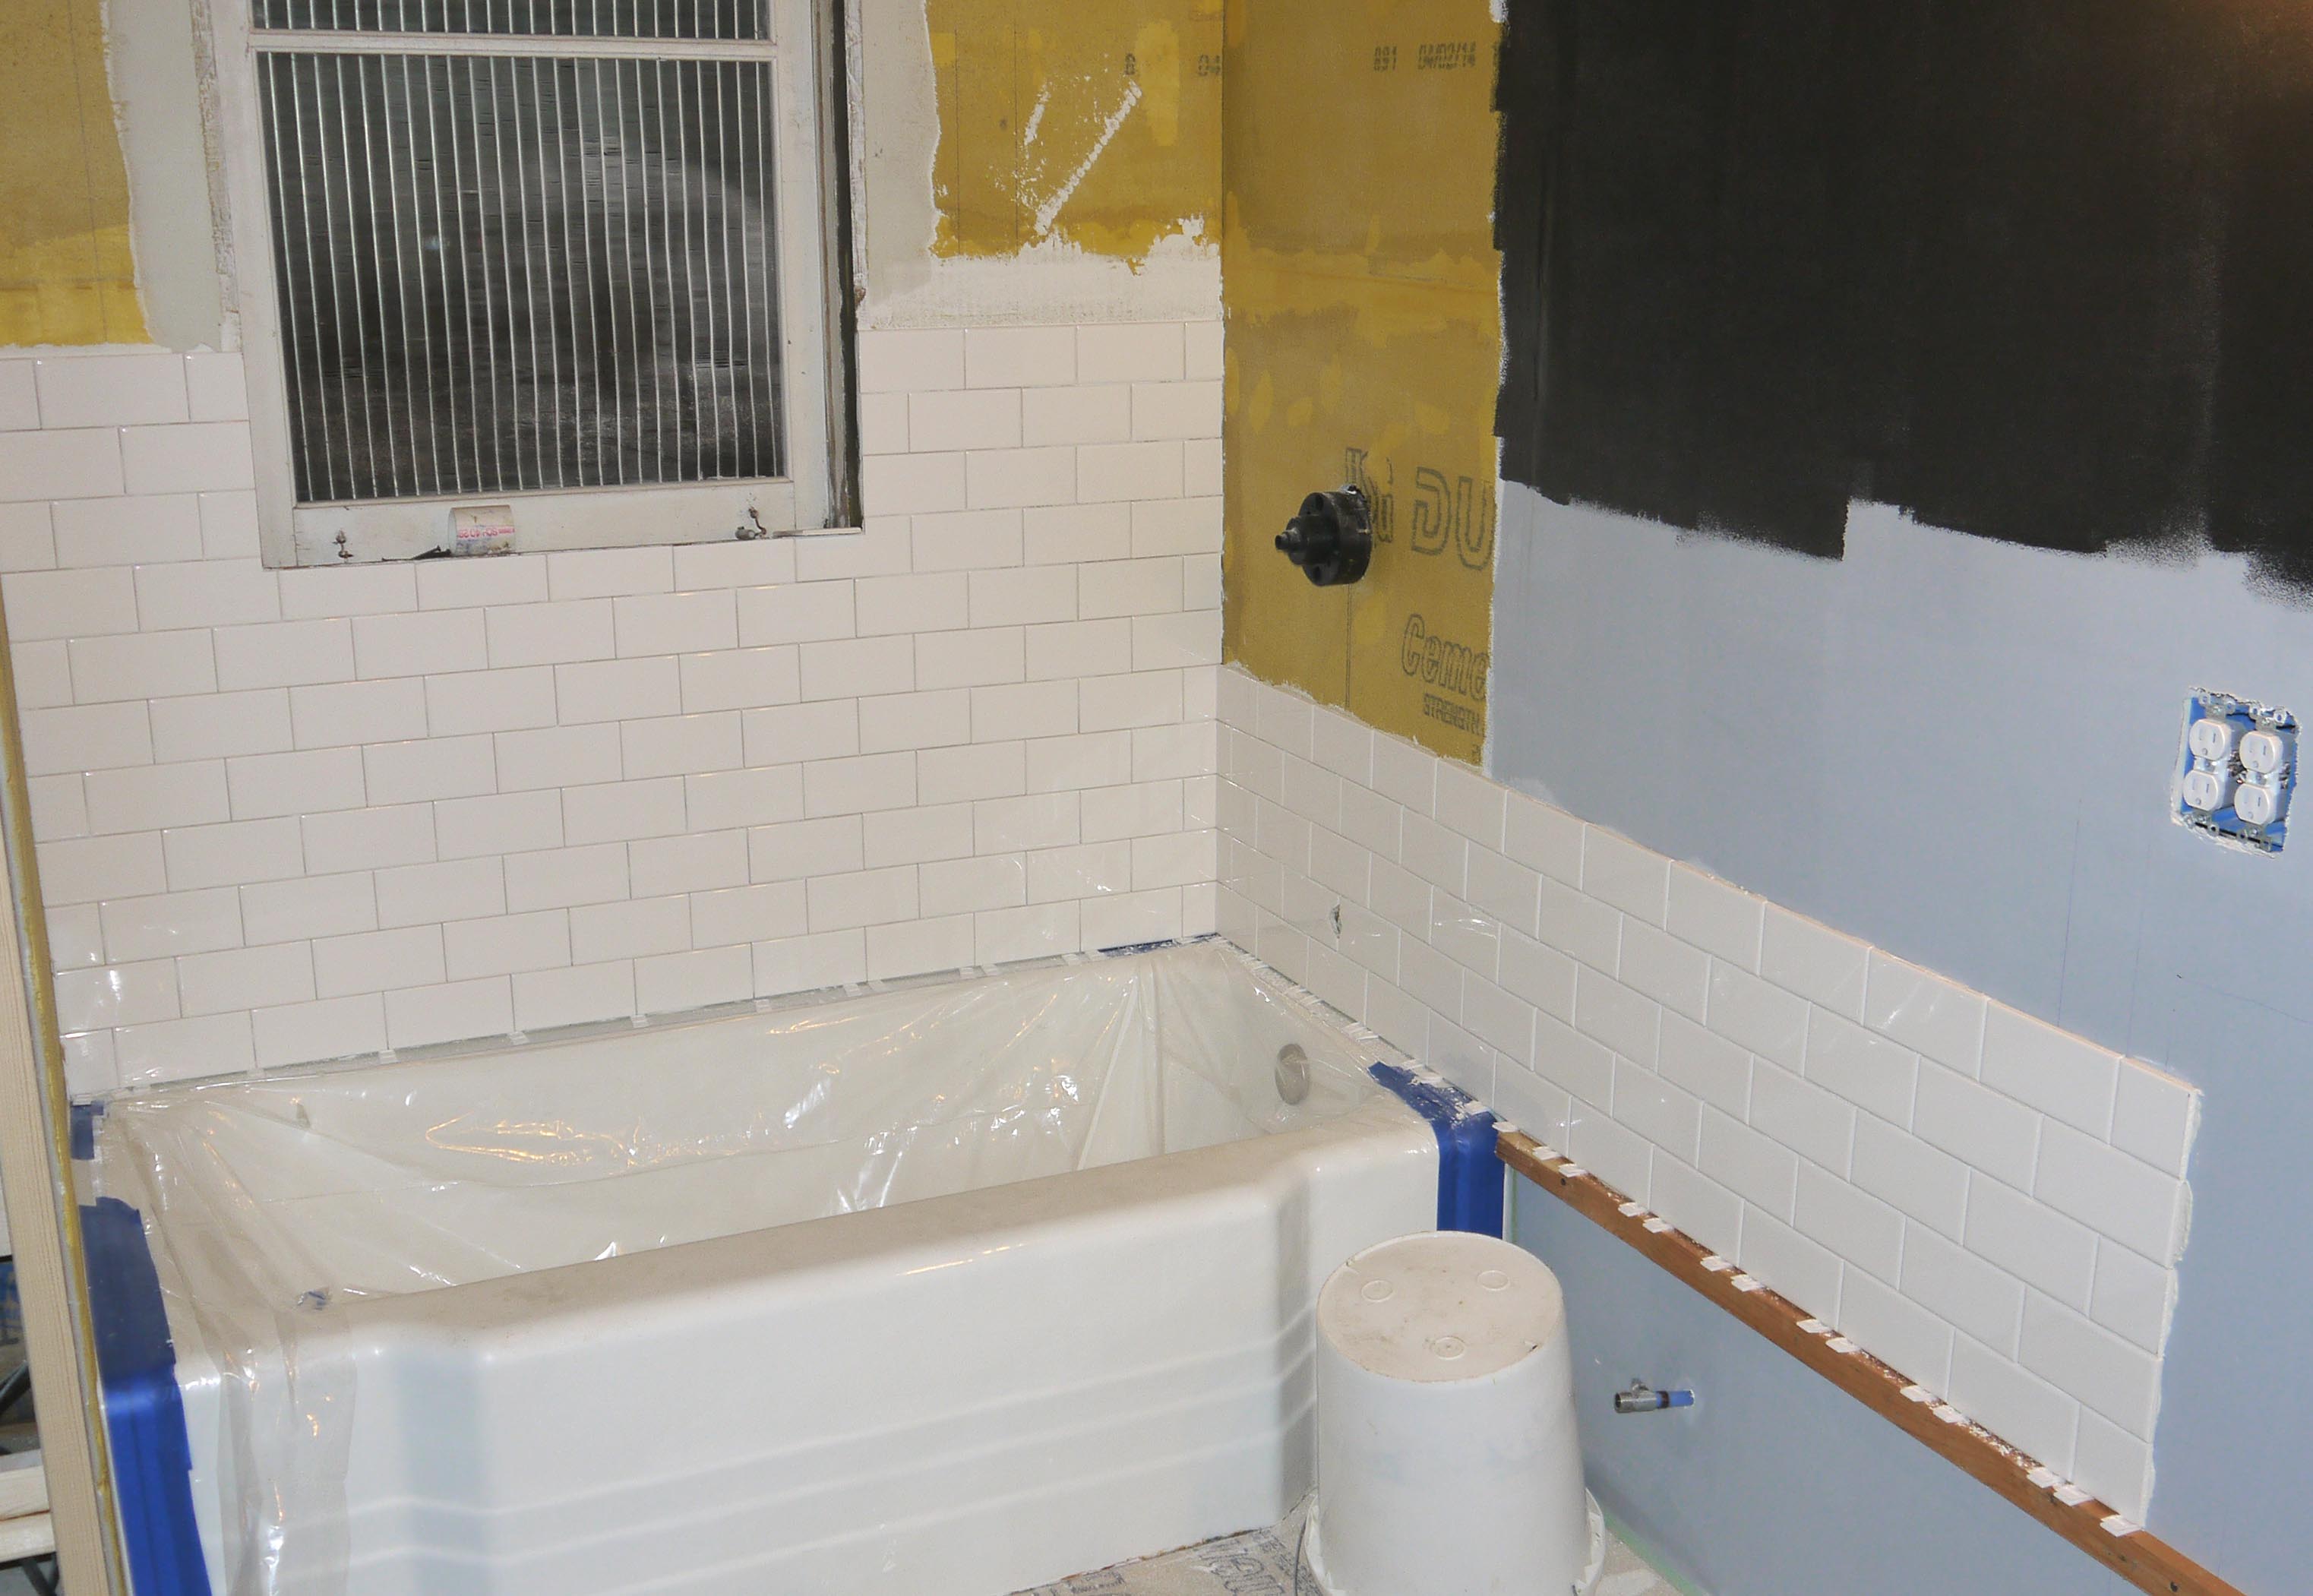
I started with the tub side wall, under and around the window. Rather than get fancy with the corners, I simply tiled the side wall all the way to the corner and then butted each row of the front and back wall up against the corner once again. Once its all grouted, it will just be a straight line in the corner rather than a weave that a professional might make by doing one row at a time and alternating each row.
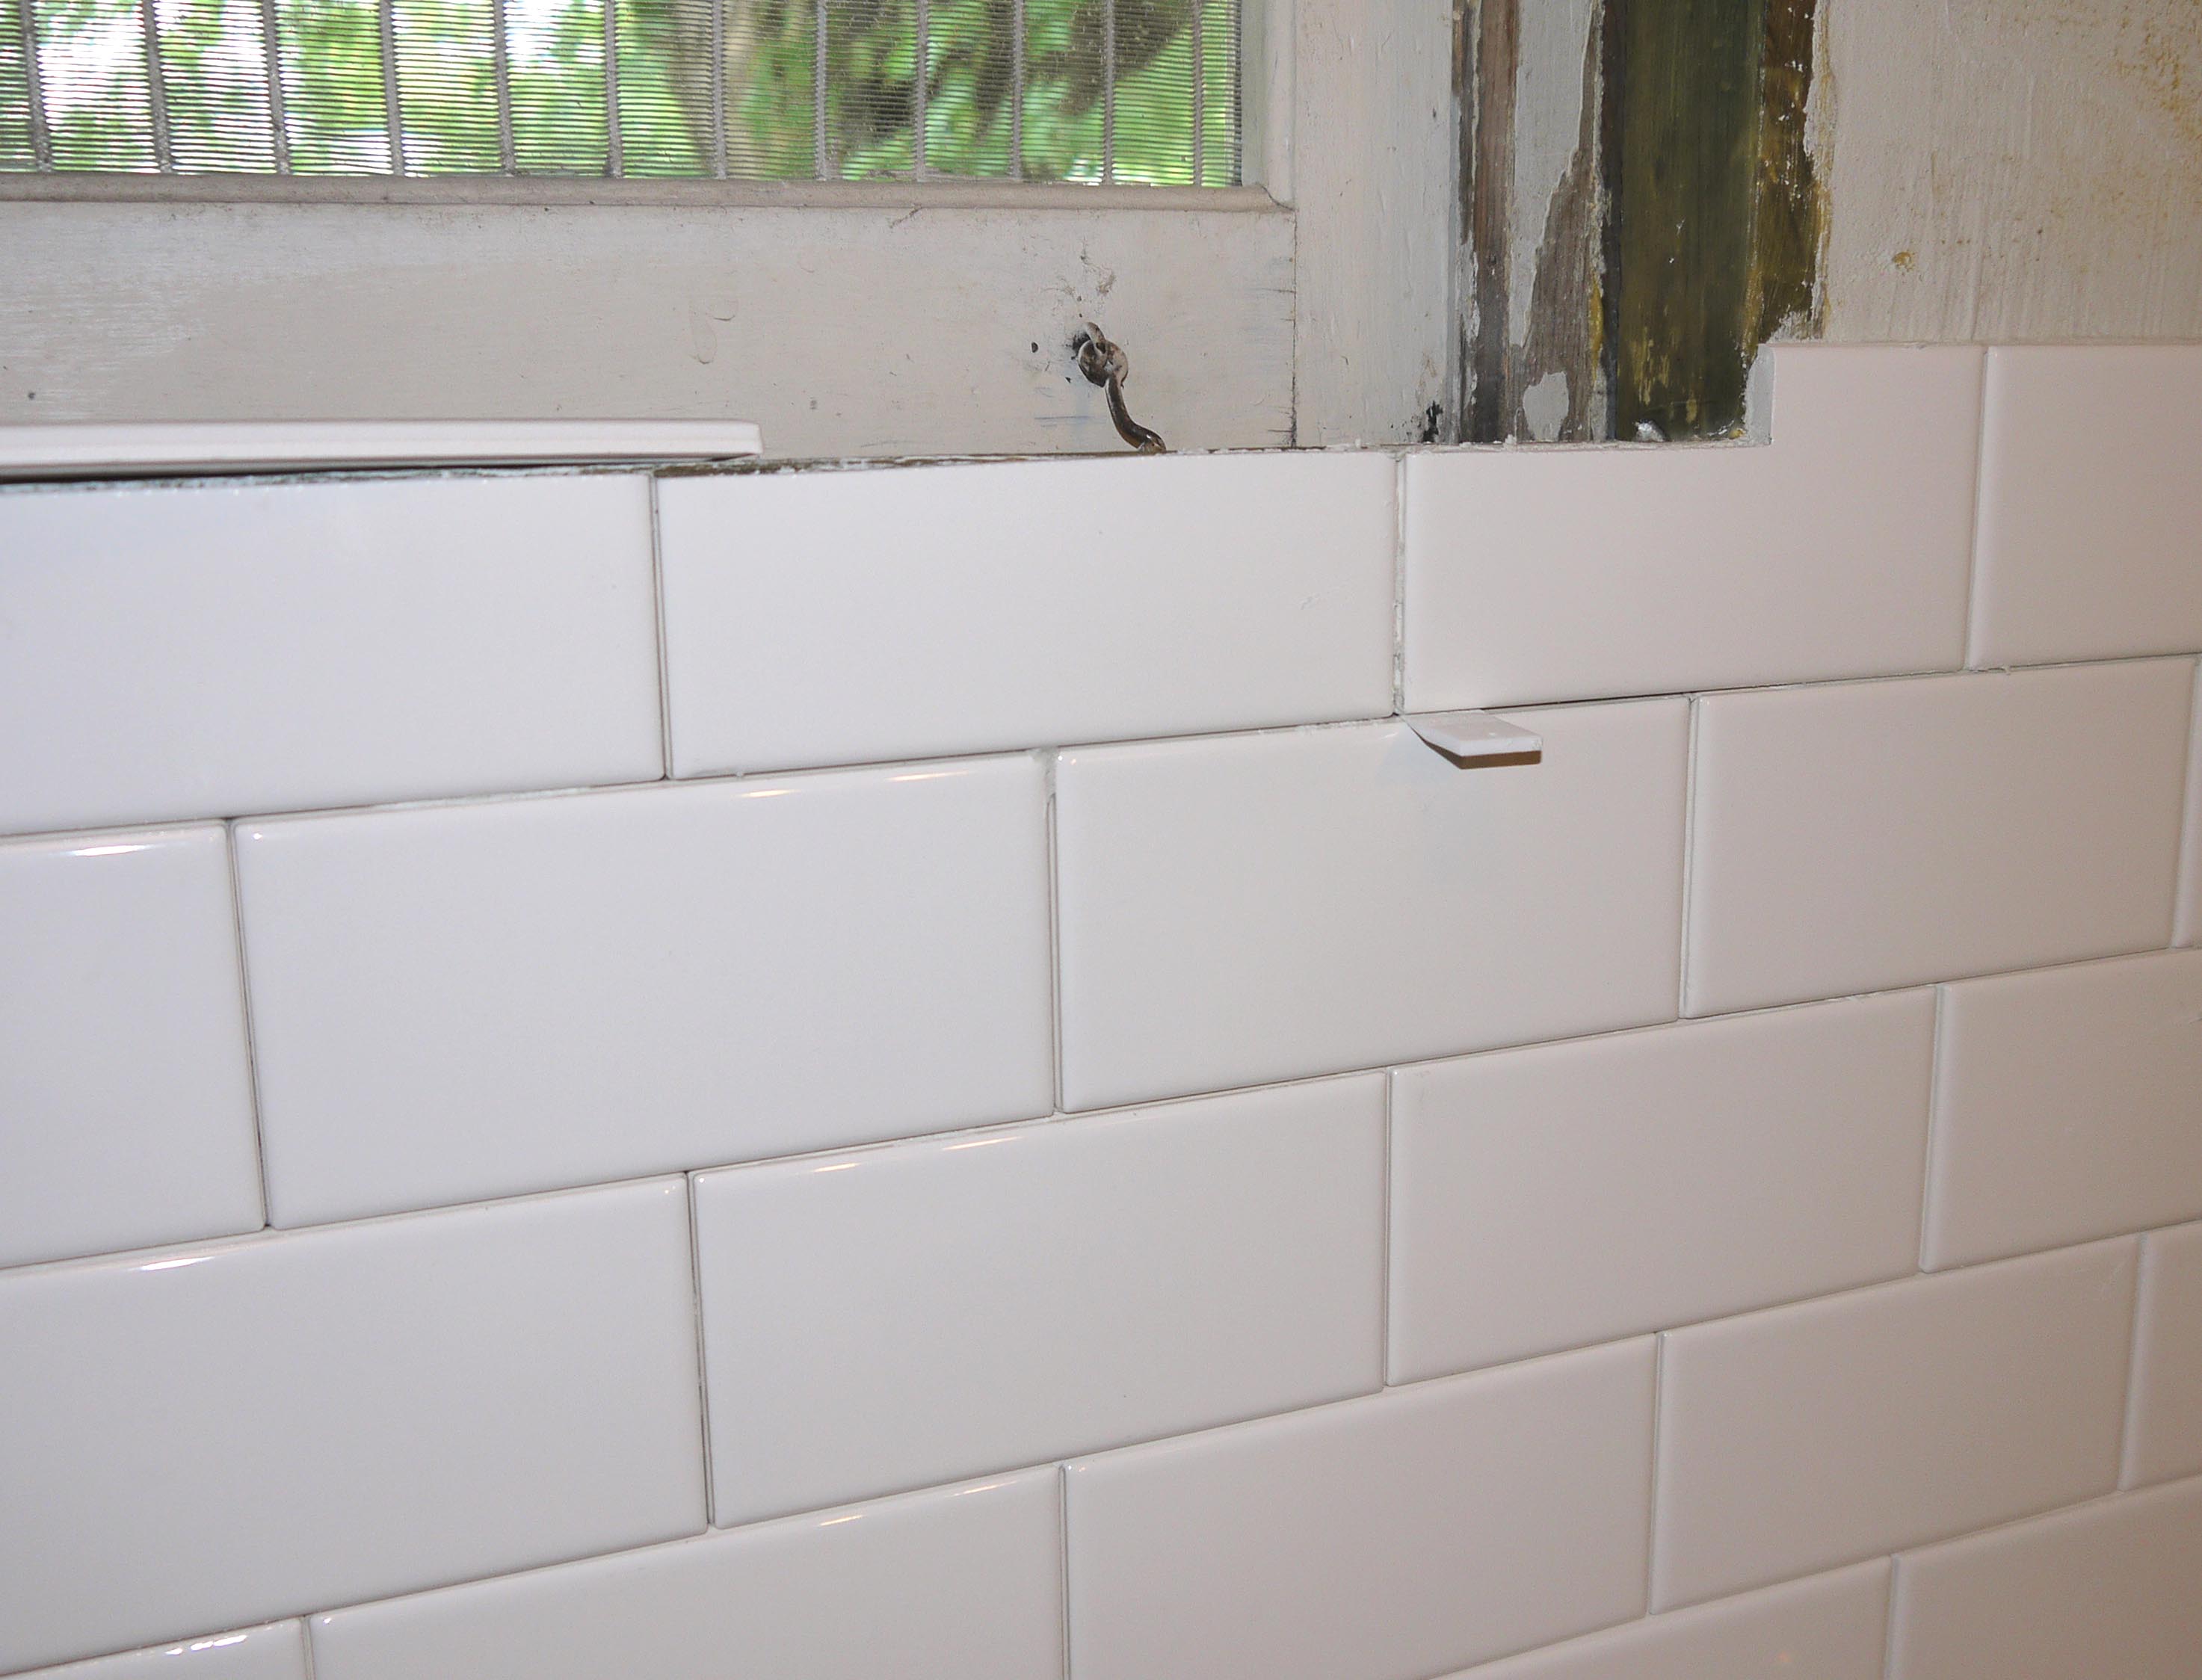
Above is the closeup of the corner. I also left an 1/8th inch gap between the bottom row and the lip of the tub, as instructed by the TileMasterGA via YouTube. Rather than grout this line, it will be filled with white silicone to seal the space and create a waterproof line so water cannot get beneath the tile or behind the tub.
The wood trim attached to the wall provided a straight edge to begin tiling this wall, level with the ledge of the tub. This way, each row would meet in the corner and the grout lines would be aligned.
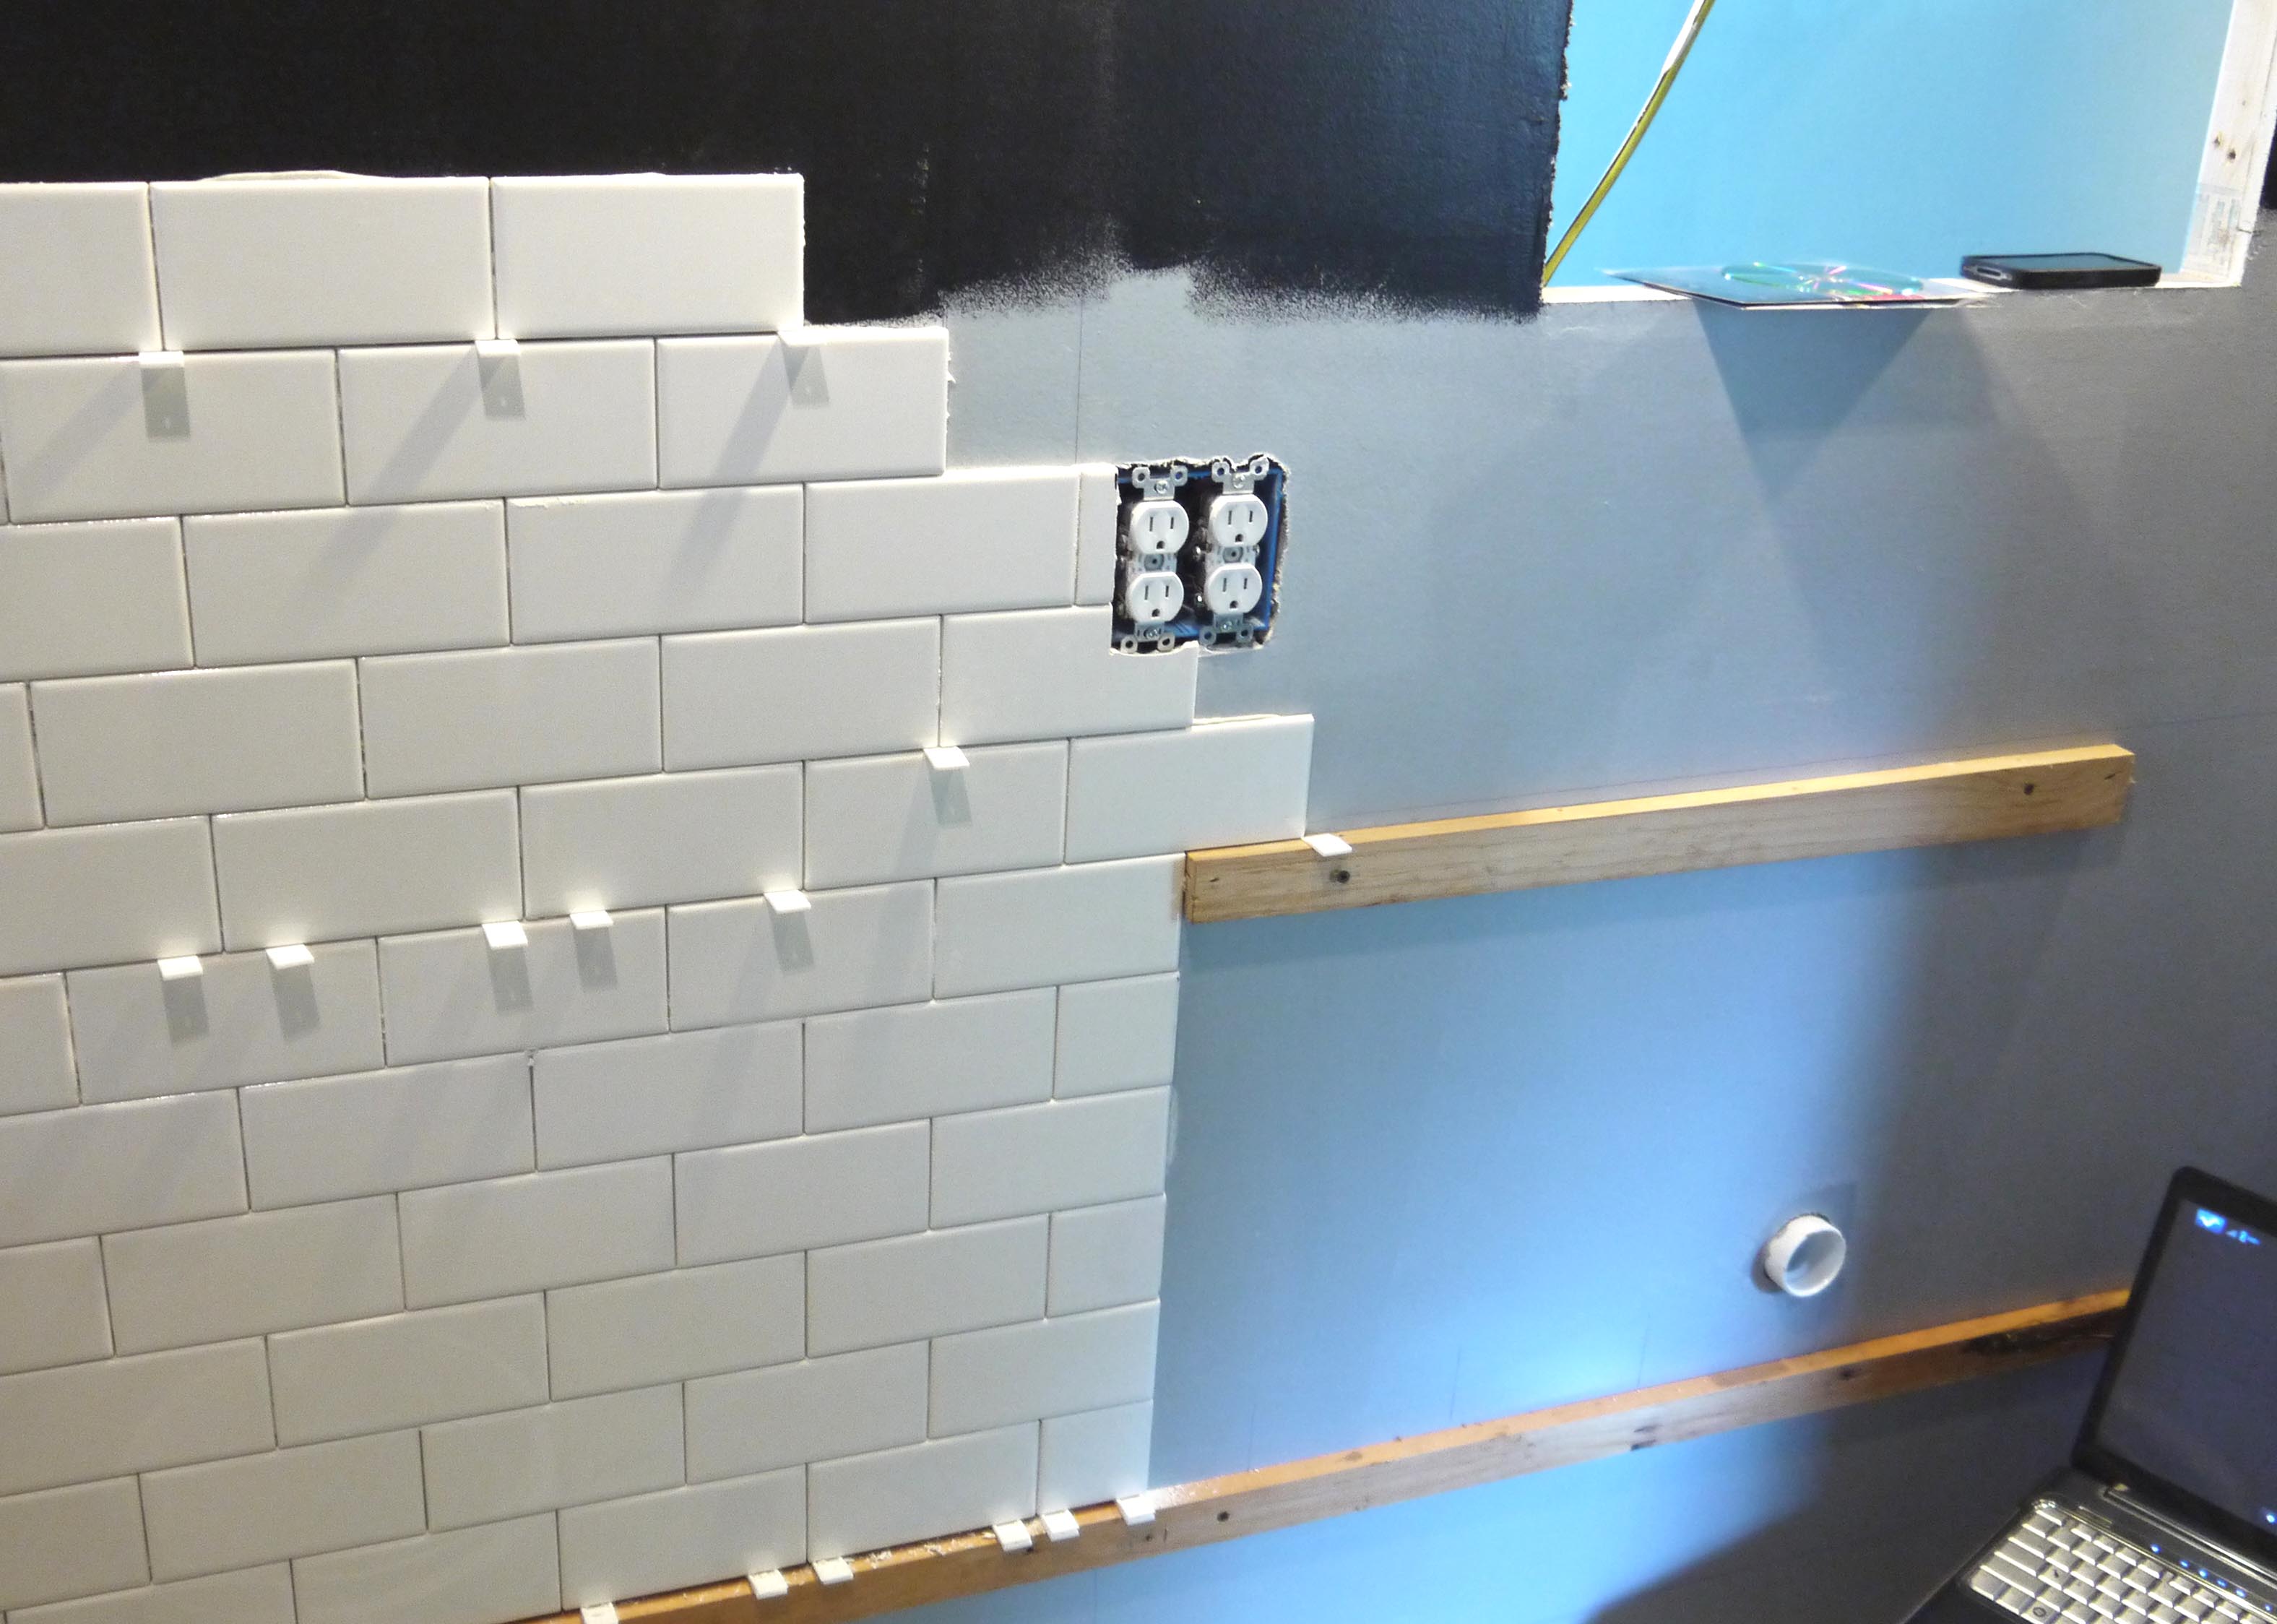
The second wood piece is just slightly below what will be the top edge of the vanity cabinet. Since I expect the cabinet to be pretty permanent, I went all cheap scape and decided I didn’t need to tile the area that would be hidden behind the cabinet. Seemed like a waste of tile and time.
Around the window, I cut the ties flush with the inside edge of the wood frame. The new window will be a snug fit inside this frame, and once the window is installed I can place the marble ledge for the window sill and use bullnose edge tiles up the sides to finish the inside edges.
It took several long days, hundreds of trips outside to the wet saw to cut (and then re-cut – and then cut my fingers on sharp edge of the tile), but the large areas went pretty fast.
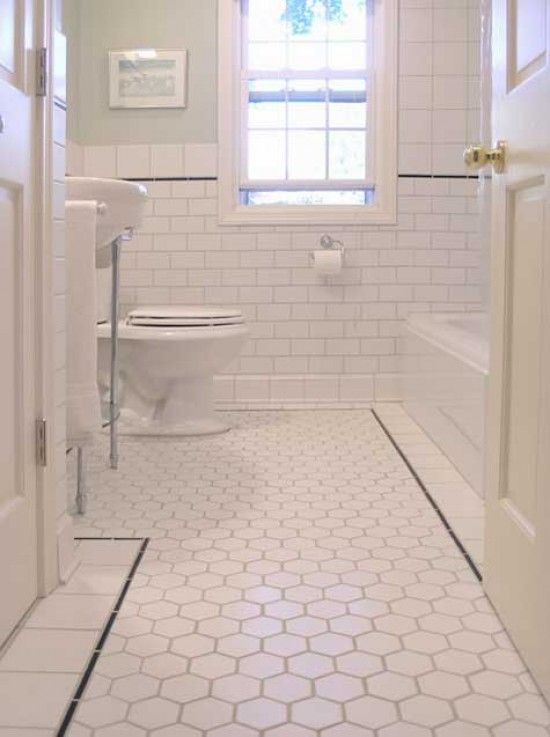
Above is a sneak peak of my floor tile, I plan to start that next week. Although it will have a simple border along the walls, it should go much faster being 12×12 inch sheets and a simple square floor area. It was the trim pieces and corners and anything needing cut after cut which took longer. A few days later, and this is the result:
This last photo shows the top details where the tile meets the painted drywall. Black line, mini subway tiles, a 2nd black line, and then a decorative chair rail cap. I finished the wall tile late tonight, but I still need to scrub some excess mortar out some of the joints so that the grout will be even. I’m thinking super pale gray grout for the walls (just slightly off-white to provide some contrast), and medium gray grout for the floor tile to give that antique floor look. But I’ll get the floor fully tiled first, and then I’ll begin the grouting step. My inspiration for the floor:
Mud Wrestling, and how the ceiling turned yellow
Posted by Adam A. Ries in DIY, Home Improvement on July 13, 2014
Not really wrestling, more like flinging. Because taping and mudding all of the drywall seams actually went pretty smoothly (no pun intended), but I did throw a little mud. There is definitely a knack to mudding drywall, flinging it from one trowel to the other to keep it manageable and at the edge of the knife. I watched several videos with tips and step by step instructions. The main lessons I took from the videos were 1) be generous with the mud first, then 2) scrape off as much as possible. Number 3), professionals use paper tape for seams. 4) Thin coats are the secret to a professional looking mud job. As are the correct drywall knives.
That being said, I started on the wall where I knew most of the seams would eventually be covered in tile. I figured that would be the best way to begin.

Sheets of drywall are 4′ x 8′, so laying them sideways in a typical house with 8′ ceilings results in 1 seam in the center of the wall. My house has 9′ ceilings, which throws off that whole system. Since I know I want to tile the walls from the floor to plate-rail height (about 4′-6″ off the ground – to match the wainscot in the dining room), I put the 12 inch stripe in the center of the room where the two seams will be hidden once the tile goes up.
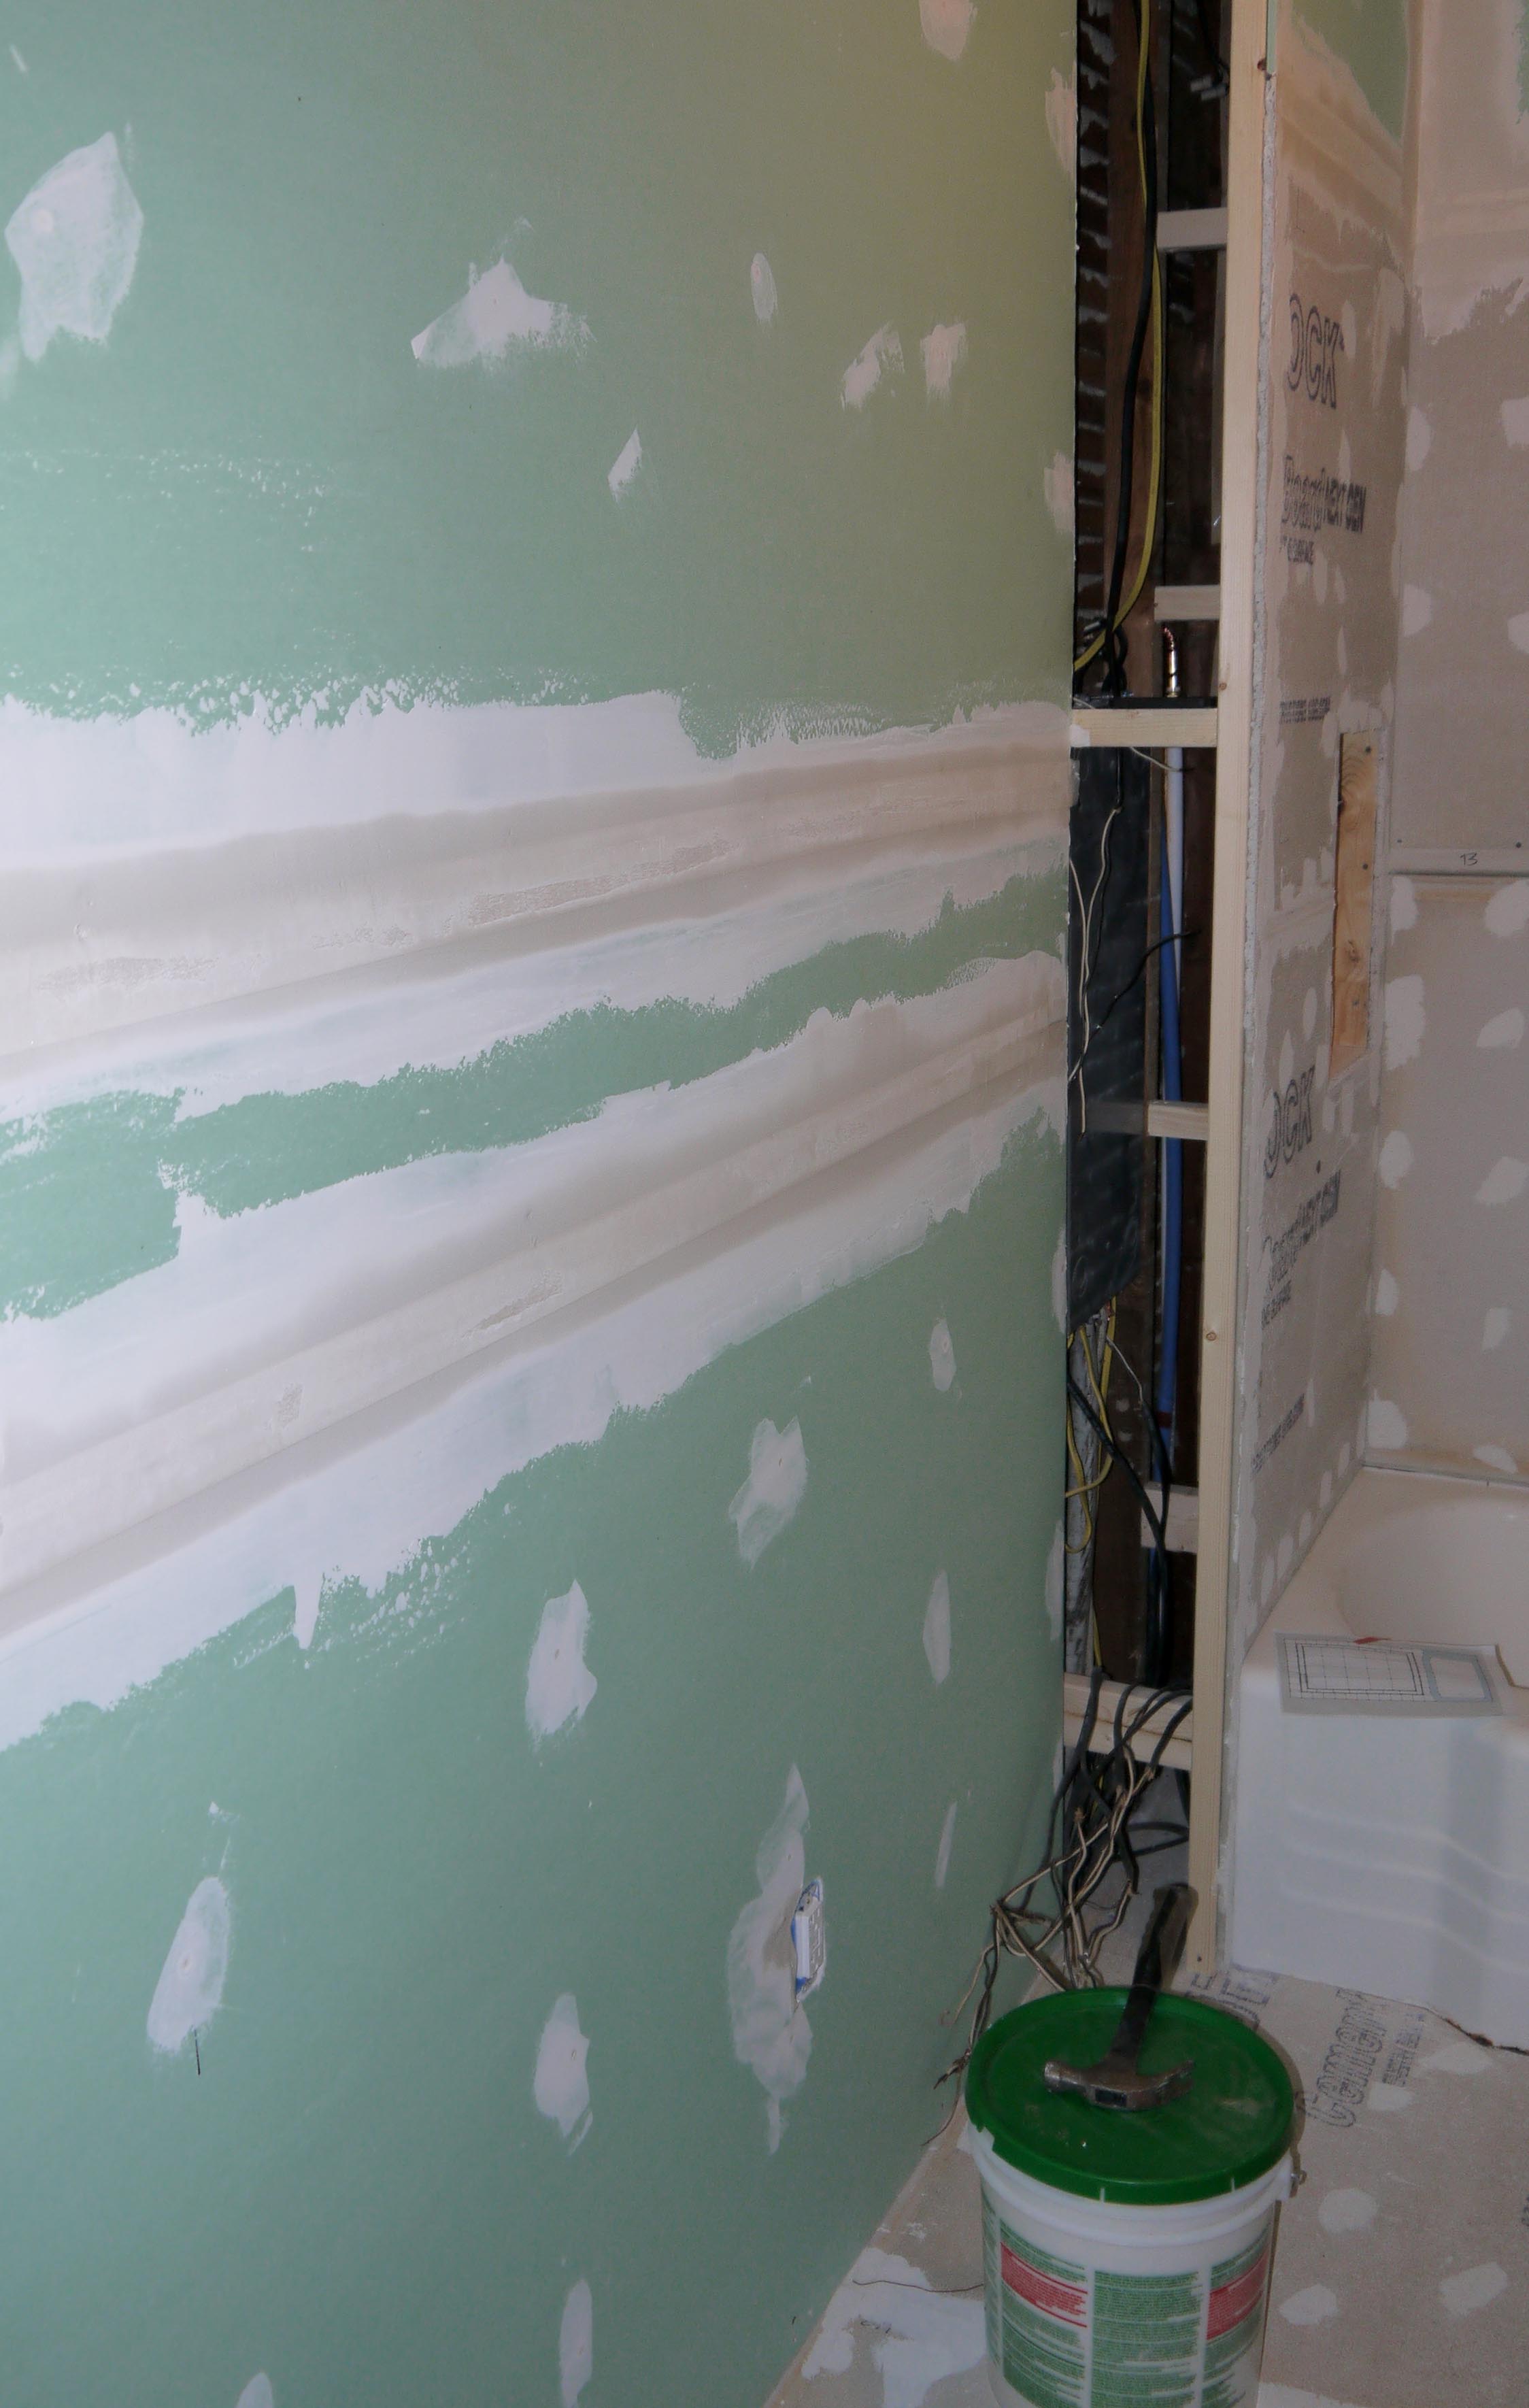
Even after the 2nd coat of joint compound, each coat is so thin that the tape is still visible. I cannot stress enough that scraping off the excess mud after each coat is the most important step. Lather on, scrape and scrape and scrape off. And all the joint compound scraped off can be thrown back into the bucket and used for the next seam.

I’m not sure if I had to, but I went ahead and taped the seam between the drywall and cement board along the shower walls. I haven’t fully made up my mind about how tall the tile in the shower will go. I’ve seen some examples where they tile clear up to the ceiling:

and some other examples where they leave anywhere from 12 to 24 inches of drywall to be painted:

I’m leaning toward leaving drywall to be painted. There’s going to be plenty of white, so leaving that much wall space will bring the paint color onto all 4 walls.
I also like how in this shower, they part wrapped the window opening with tile, and then above the shower head height, they wrapped the upper portion of the window to look like the rest of the home’s trim. I’m thinking this is how I will wrap the window, except using the style of trim that matches my house.

Now onto the second half of the title. As the photo below shows, the ceiling in the bathroom is white was white. The ceiling’s plaster is in really good shape, so I only wanted to patch the cracks and few small holes. But first I used a 3″ putty knife to scrape off the areas of chipping or peeling paint. And that’s where “areas” turned into a larger and larger section of peeling paint. Not just a small area either, a huge area. And it wasn’t just a few layers of paint, I’m talking like every layer of paint in the history of the house. It must have been nearly a 1/16 of an inch thick. Back to a really early layer of most likely oil base paint, possibly the original plaster coat.

It just kept scraping off, I never got to a point where I felt comfortable leaving it. An hour later, the entire ceiling was scraped. So that’s how the ceiling turned yellow.

But the good news is that I got all of the paint scraped off. Better now than down the road when steam from the shower might have caused it to peel or pieces to fall off. And although I did fill all of the cracks, I wasn’t all that particular. If the ceiling looks just a bit crackly and old, that’s fine. After all, every room should have something that helps show the age of the house. It will give it character. After just a light sanding on the ceiling and all the walls, the bathroom is ready to be primed.
On the Up and Up
Posted by Adam A. Ries in DIY, Home Improvement, Interior Design on July 9, 2014
Meaning, drywall and cement board! Although most of the bathroom was ready to accept wallboard once the plaster was torn off, I did have to do a little framing at what would be the back of the tub/shower. As you can see in this 3D model, the bathroom is about 5′-8″ wide, and a tub is only 5 feet.

That leaves me with a 8 in gap between the tub and the existing bath wall. So I framed in a full height wall to have a support to build a shower wall. In the end, I’m planning to trim it out with little cubbie cabinets to look very similar to this (only I will continue it all the way to the ceiling).

I used 2×2 lumber as the main section, and a 2×4 on the outside for strength (non-weight bearing walls can be constructed of 2×2 lumber – it’s how thin walls and even walls that house a pocket door are constructed).

I added lots of cross-supports between the studs and the wall behind. Although it was very strong on it’s own, this will be a tiled shower wall, and I don’t want any flexing to crack tiles or cause them to break off. The 1×4 sections between the studs are flush to the front of the framing studs. Just like the ones you can see along the top edge of the tub, these were a recommendation from a how-to video I found very informative on YouTube (Seriously, TileMasterGA: I have learned so much from his many videos documenting each thorough step of a quality and long-lasting bathroom renovation). These boards he recommended are to provide additional support to secure the wallboard as strong as possible, minimizing flexing. I just used scrap boards for these pieces. I also put them at the height where 2 sections of wall board will meet, to make sure the joint has this strong support as well.
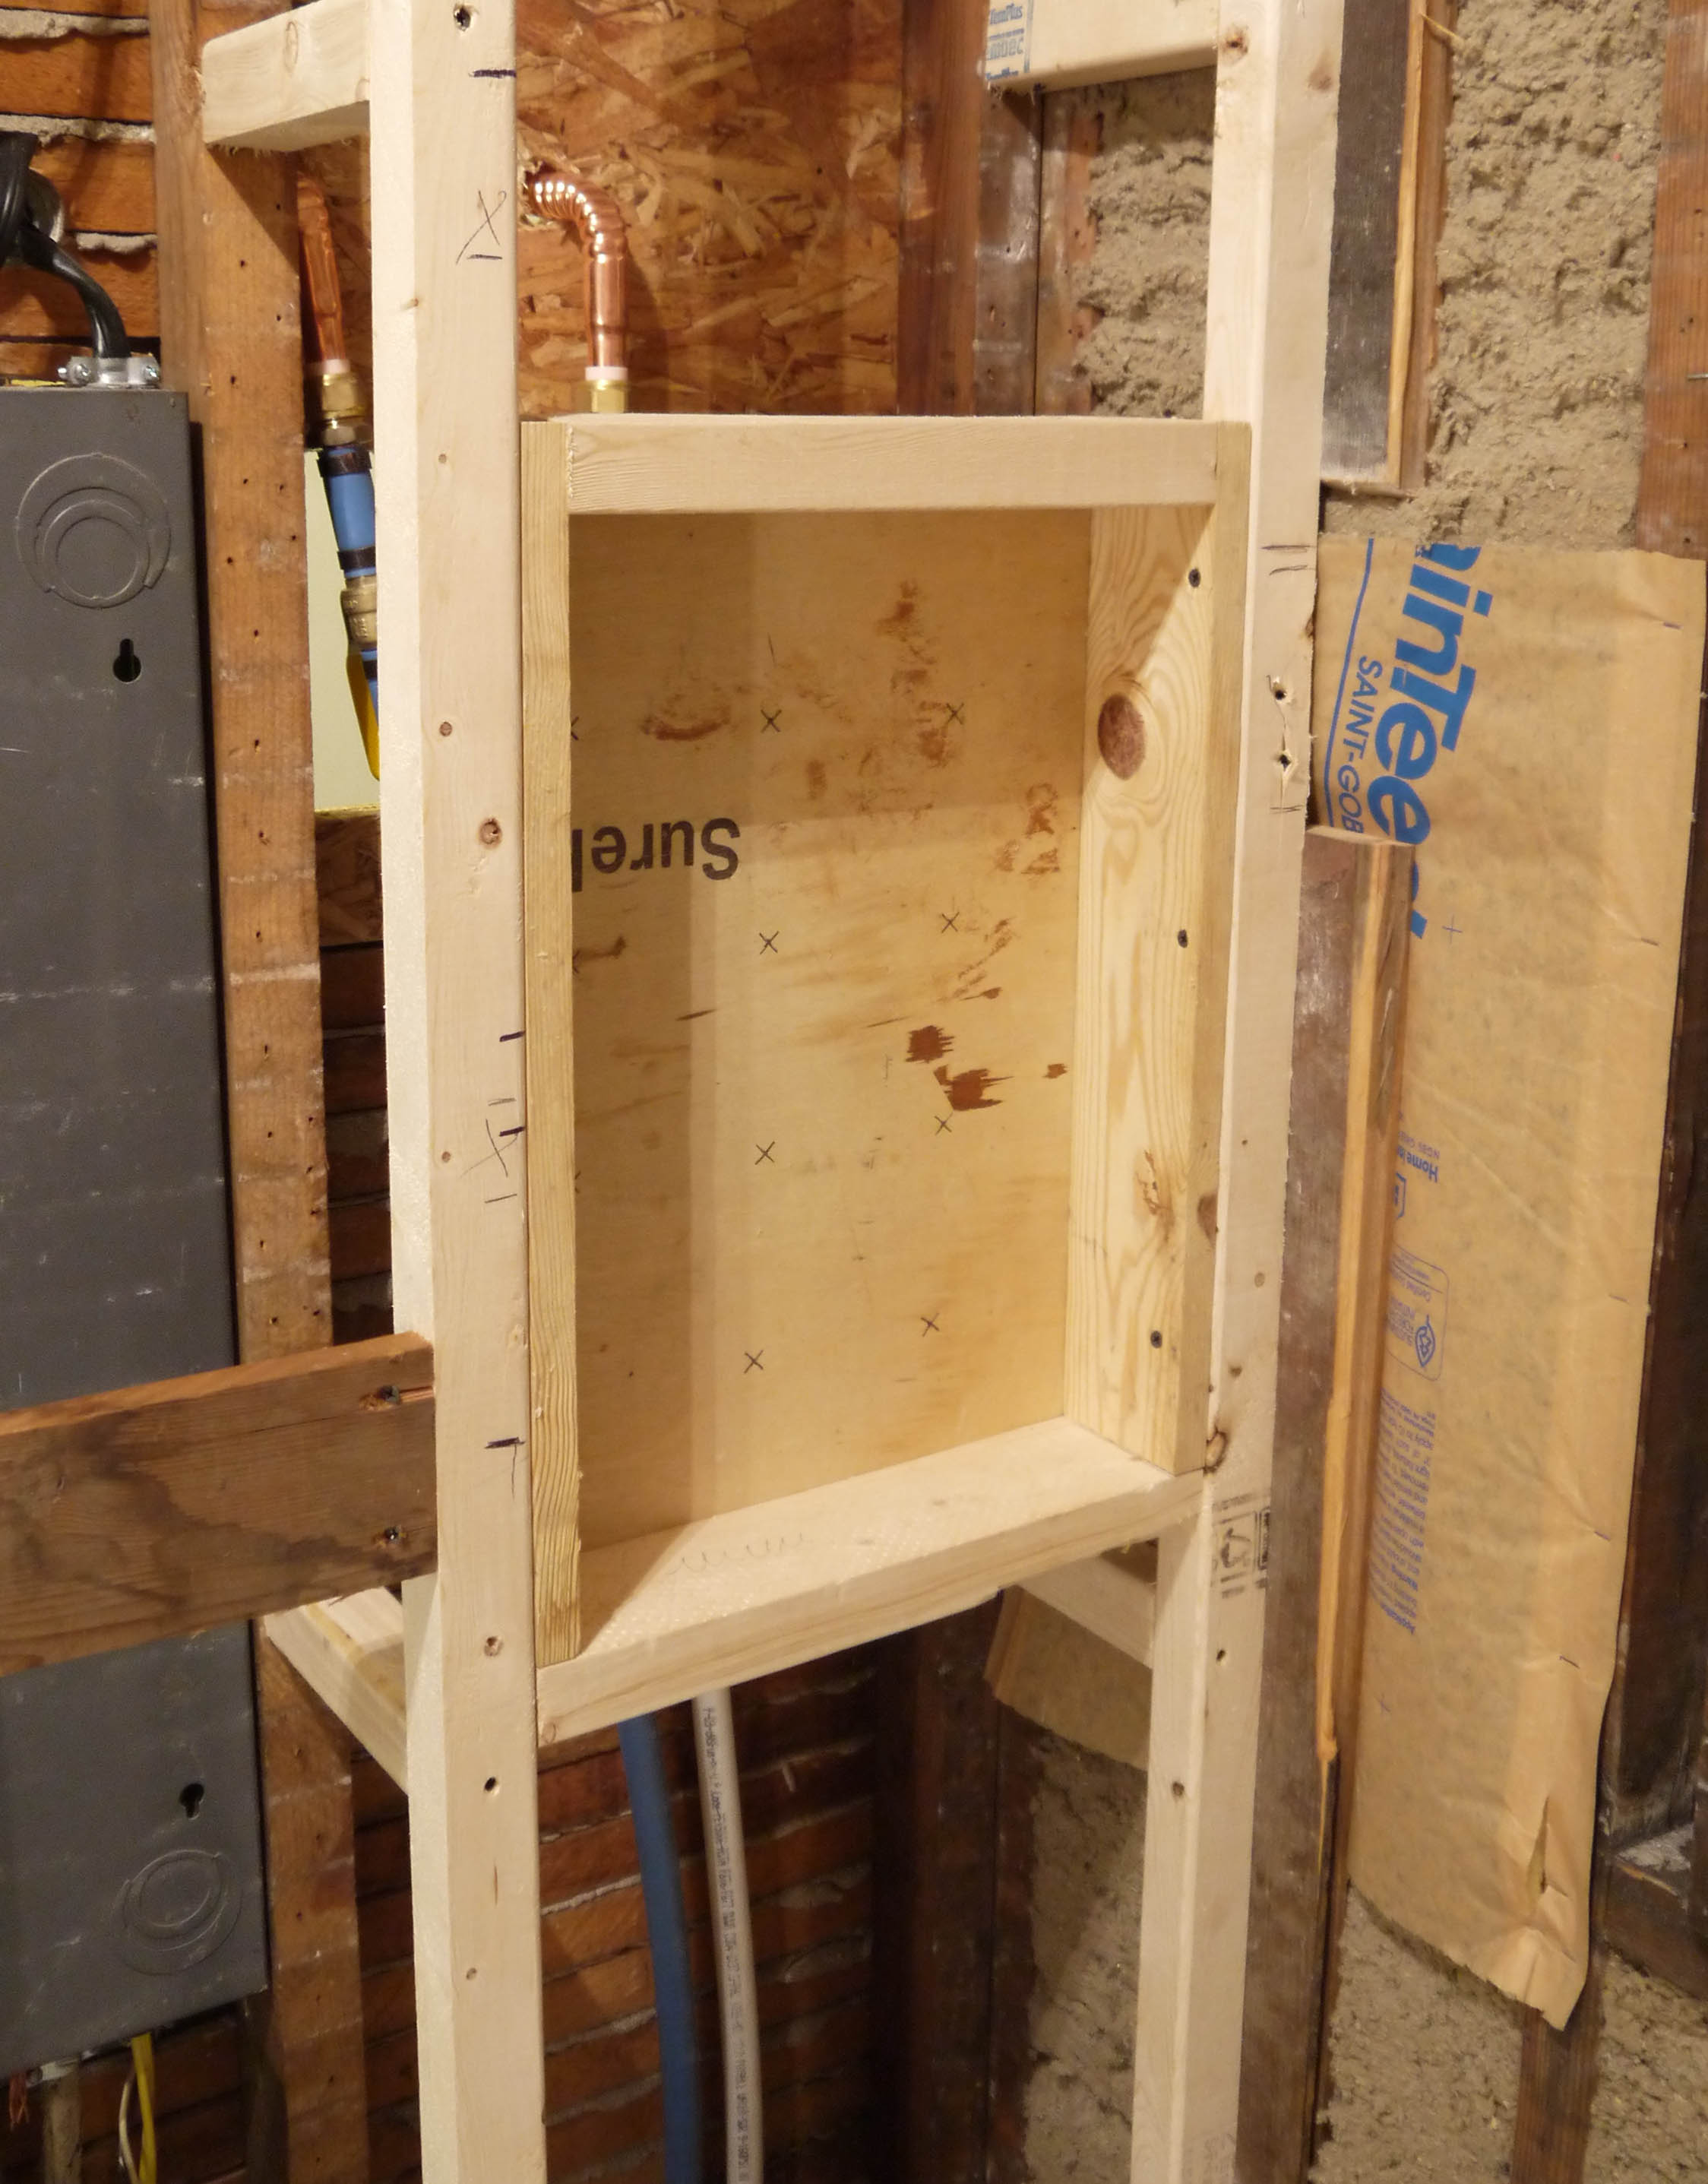
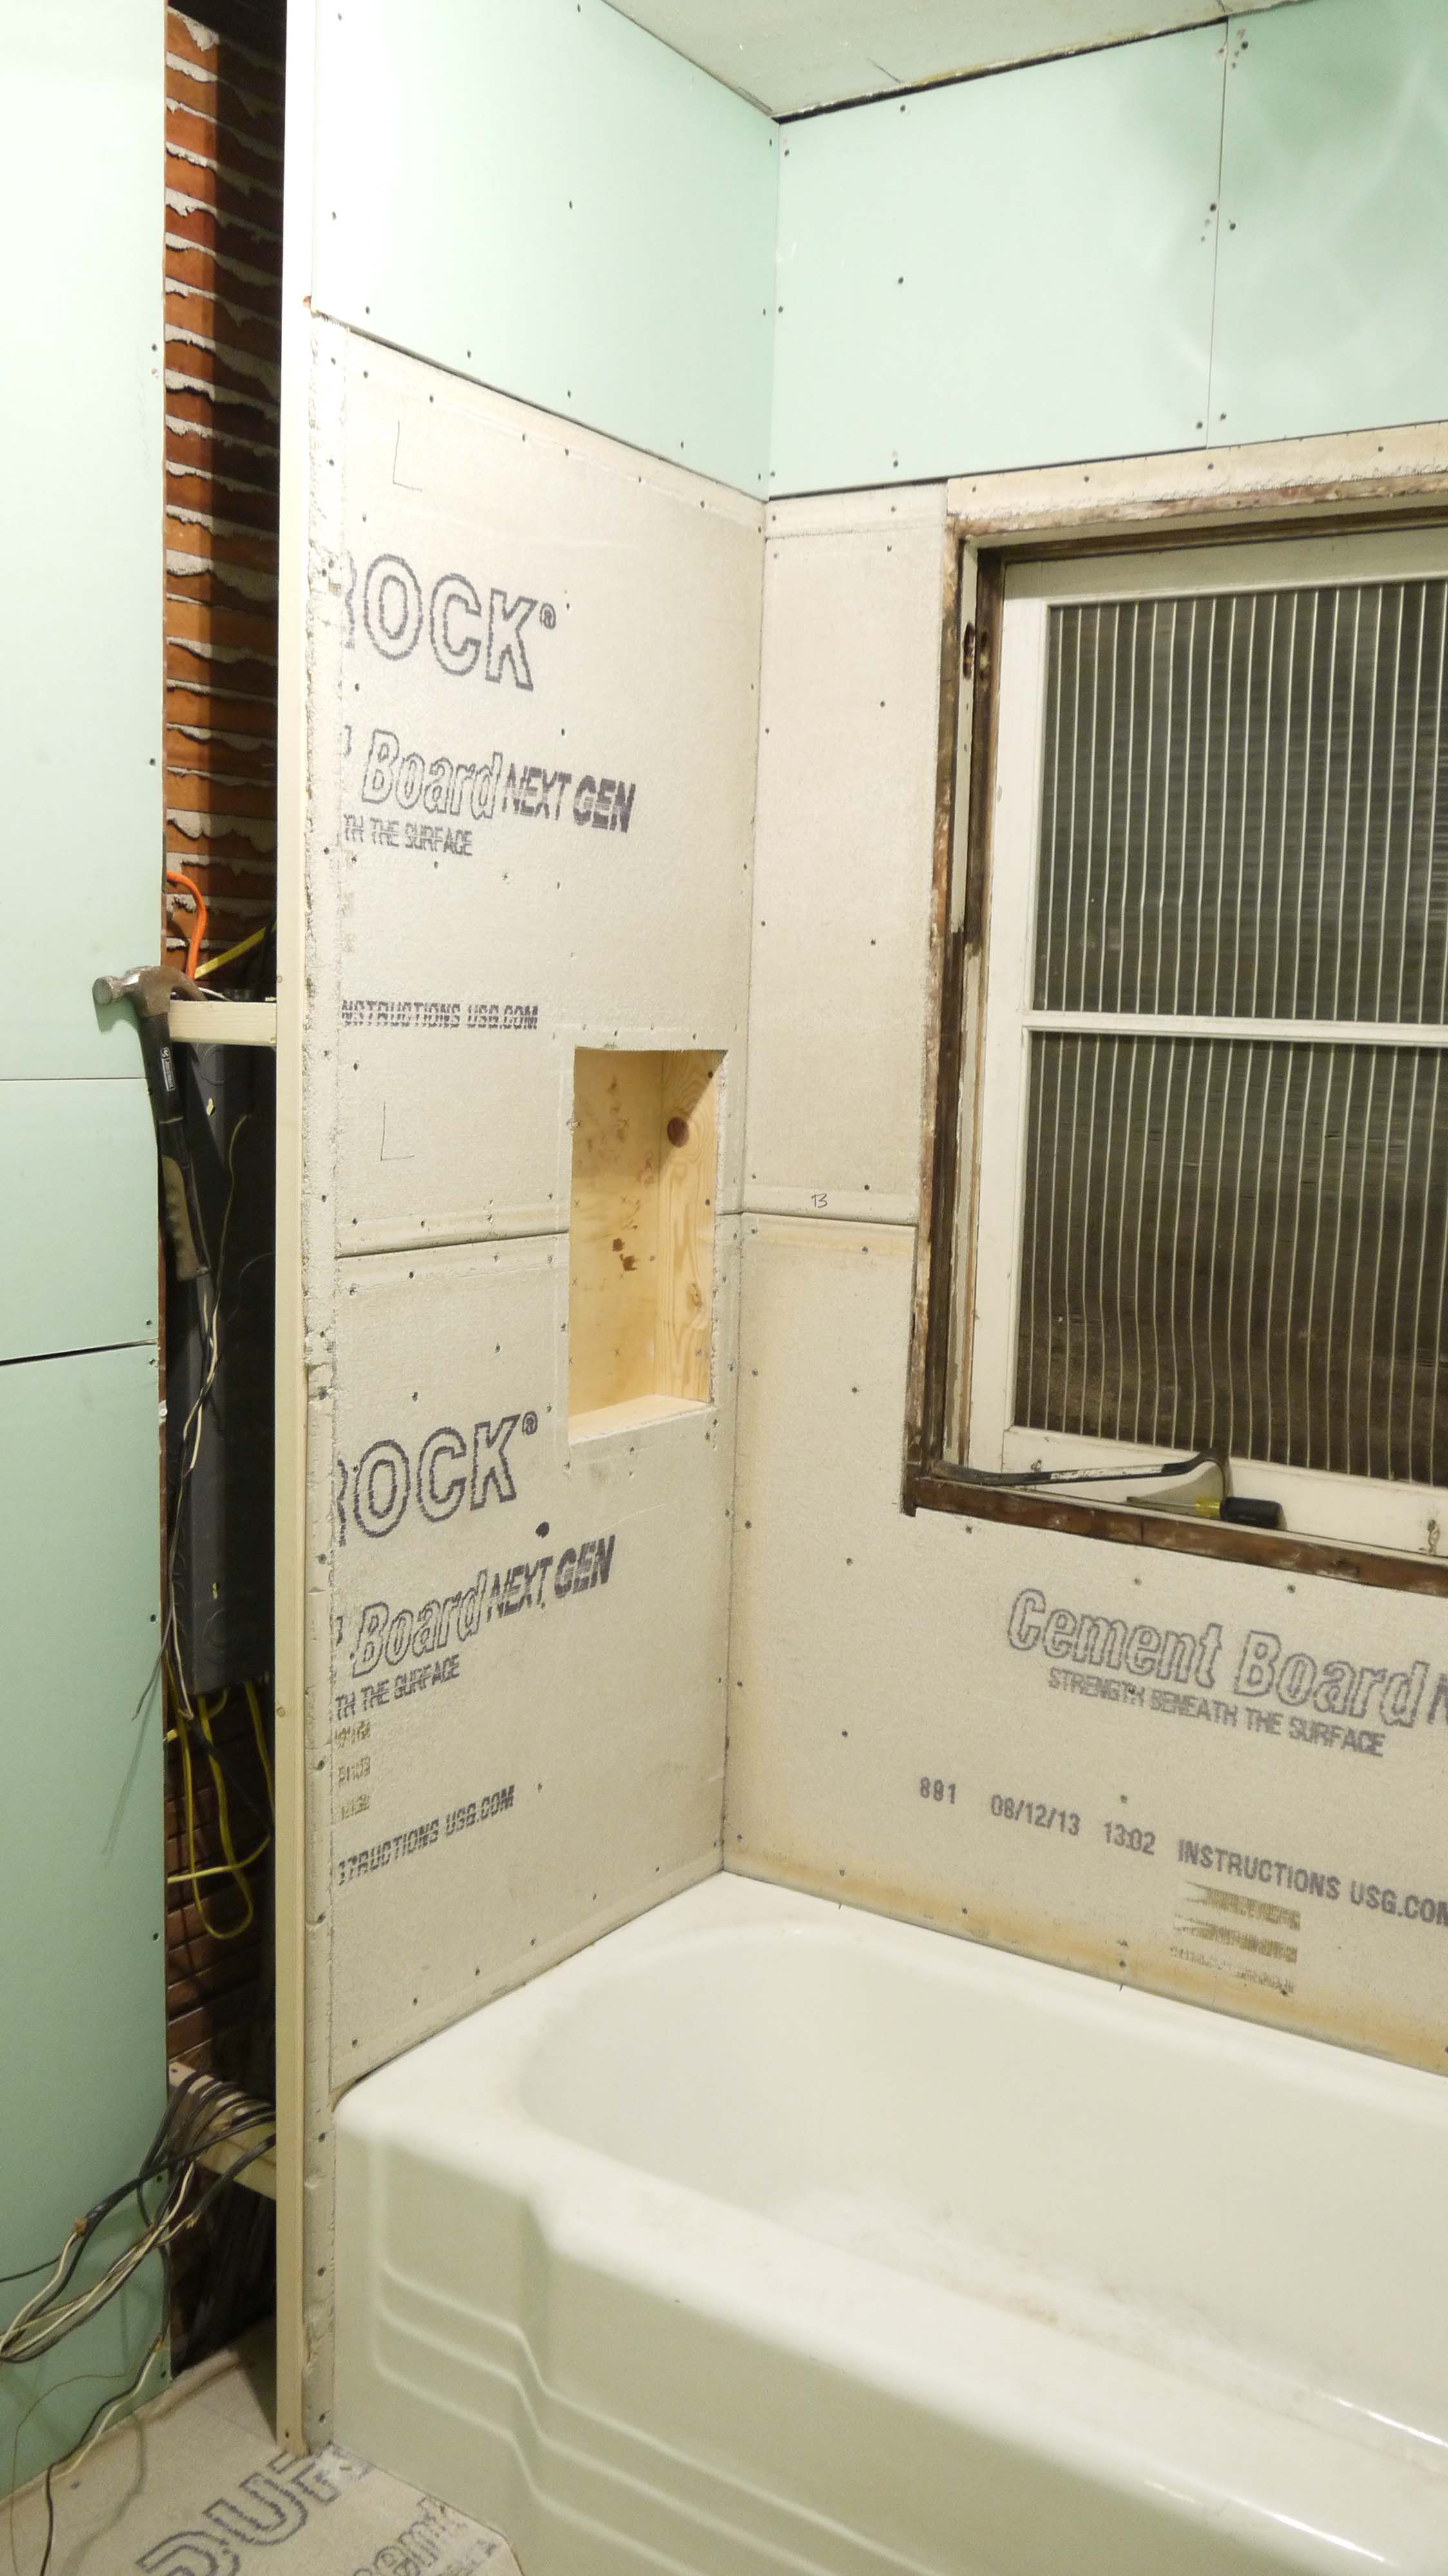
This is what I’m super excited about. It’s my shower soap & shampoo niche. I’m not a big fan of these old metal shower soap trays (although they are very appropriate for the time period look I’m going for – pretty sure I tore 1 or 2 out in the beginning). Instead, I wanted a built in niche, so I basically built a window frame and secured it into this wall space. It will get covered in cement board just like the shower walls, then tiled to look seamless like this:

Only I don’t like how far apart the two niches are, I’m going for more like this, with just a thin shelf for small bottles and a bar of soap:

So back to reality. Wall board goes up pretty quick, and relatively easy. The only bad part is lifting the 2nd sheet up to the ceiling and holding it while driving the first couple screws to secure it.

Oh, and don’t forget to pre-measure & mark the location of outlets, light fixtures, or pipes. That meant taking the one sheet back down to measure, and then lifting it up and securing it all over again. Marking the location takes a lot of the guesswork out of using a RotoZip to cut out for the opening.
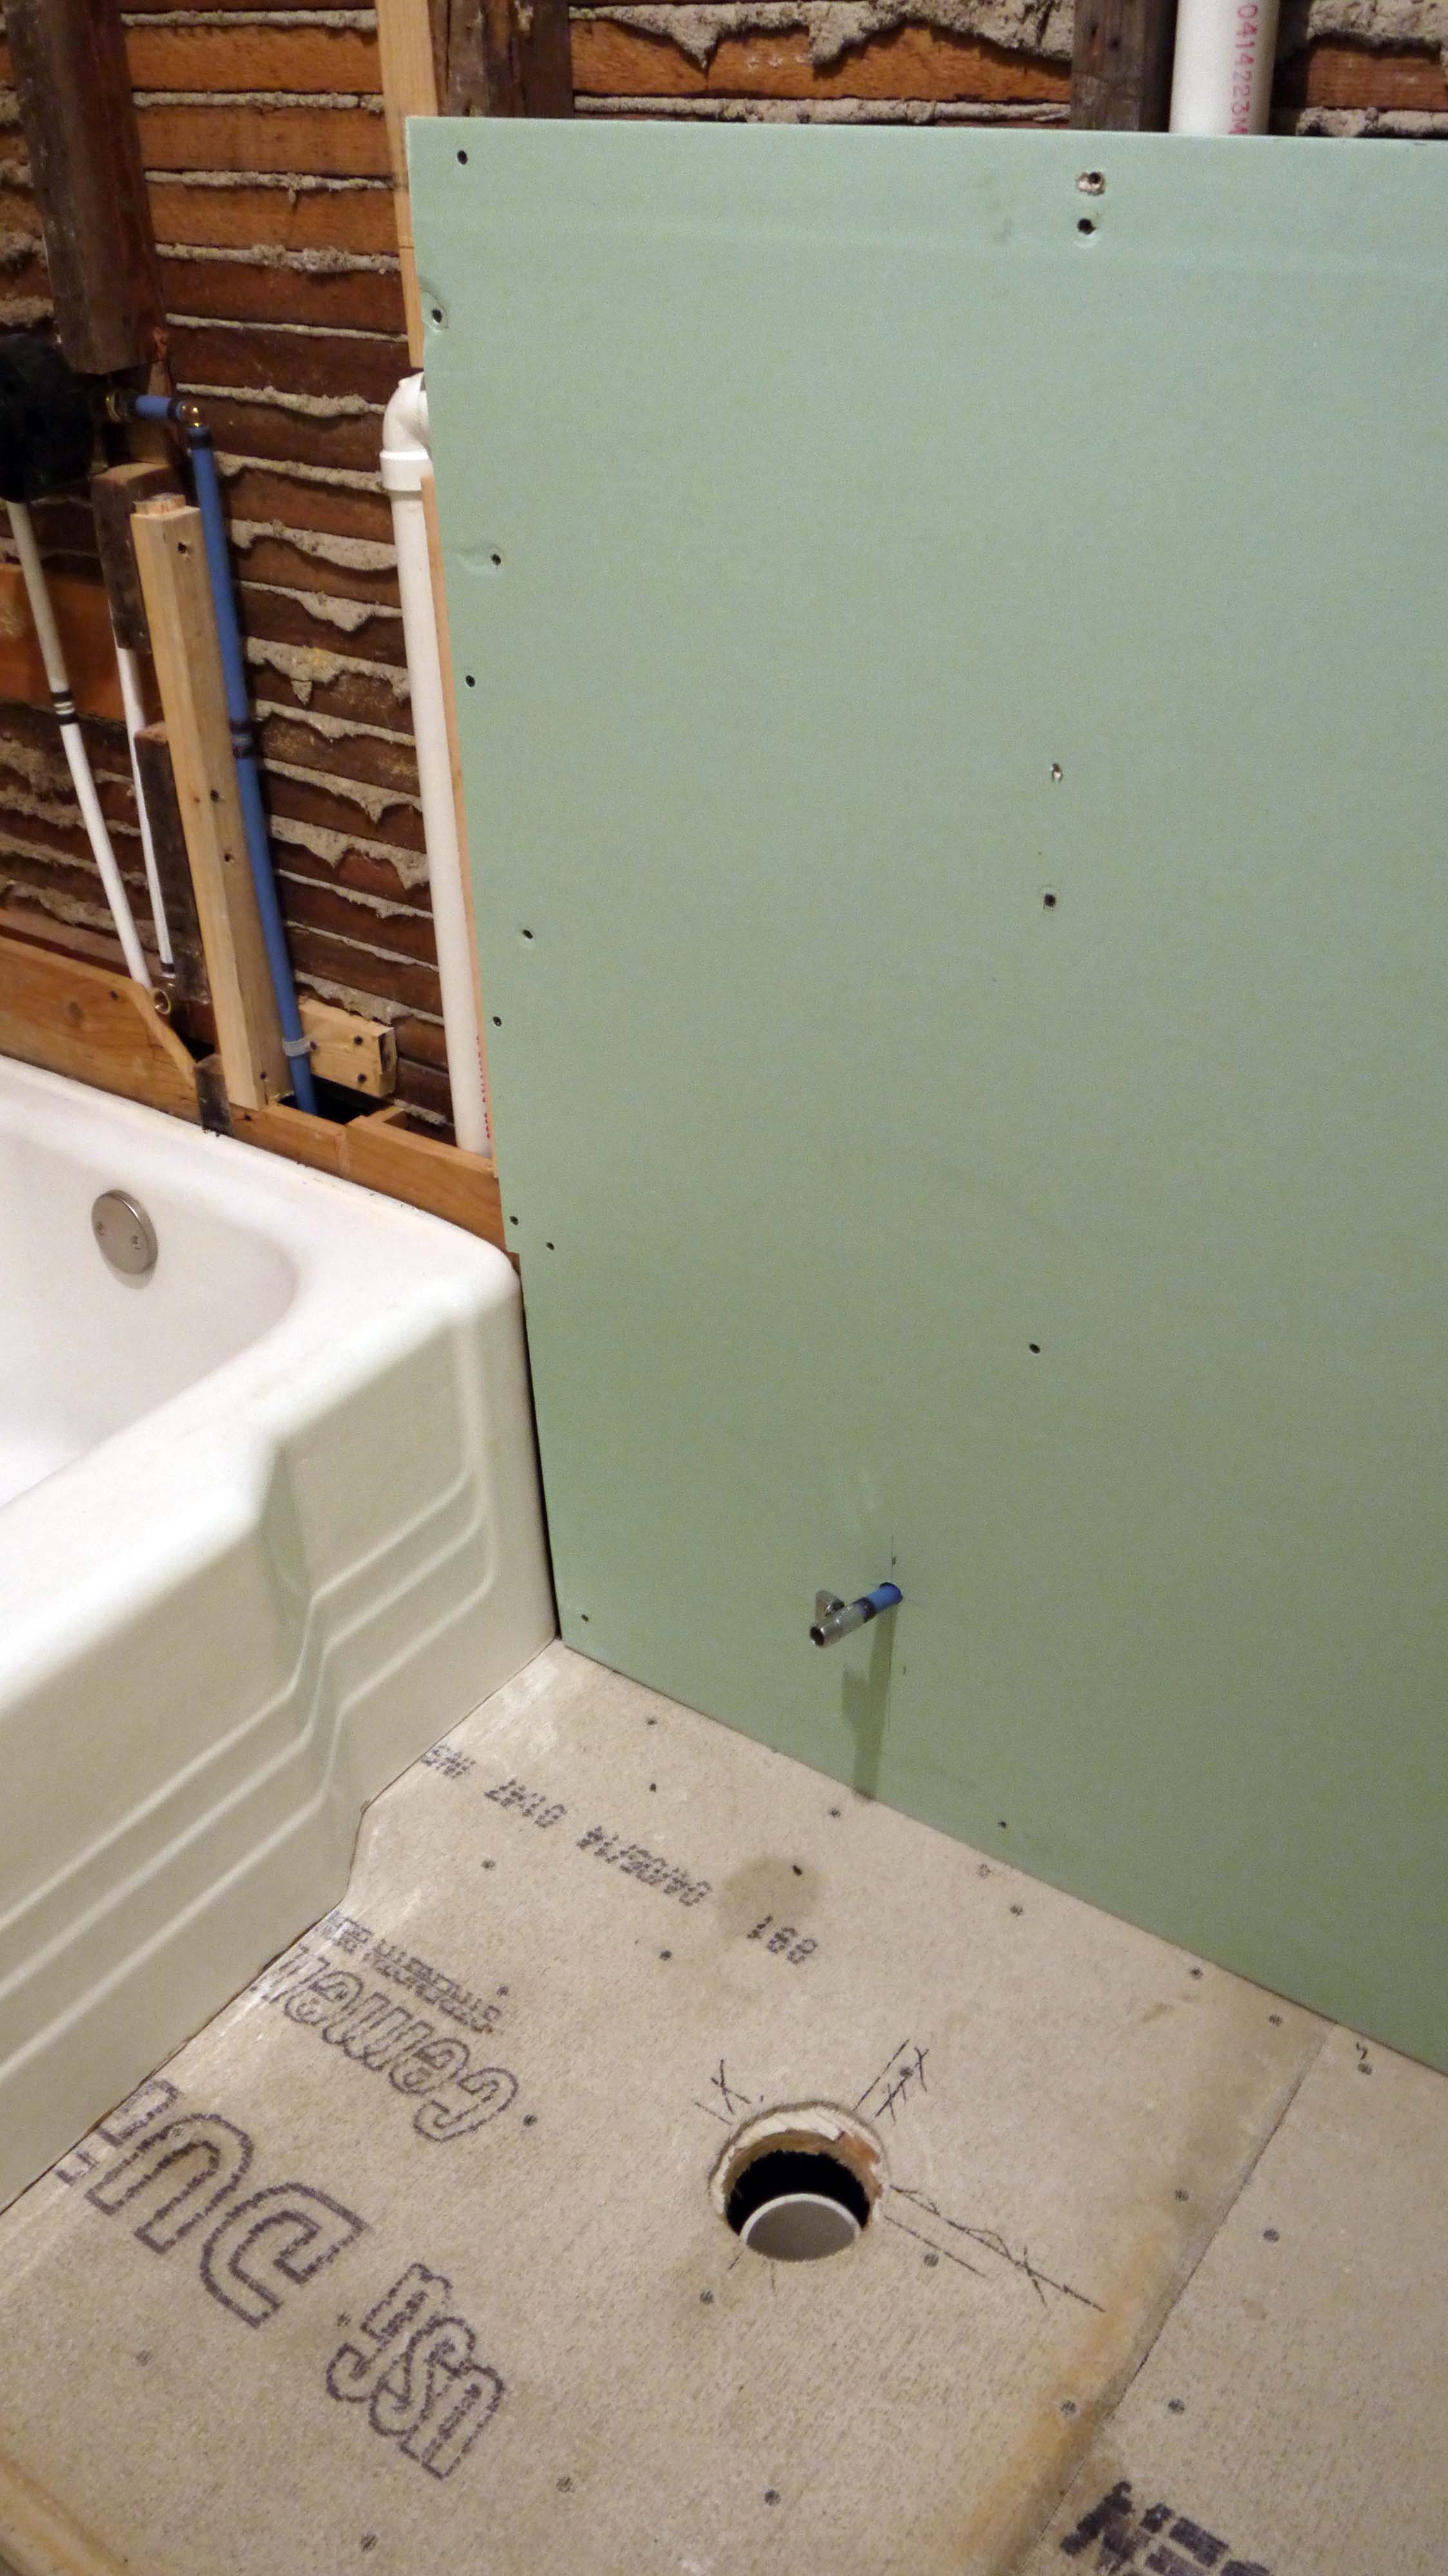
The cement board went pretty easy too. It comes in slightly smaller pieces (3’x5′ instead of a regular drywall 4’x8′), so it’s easier to handle and lift on and off of sawhorses.
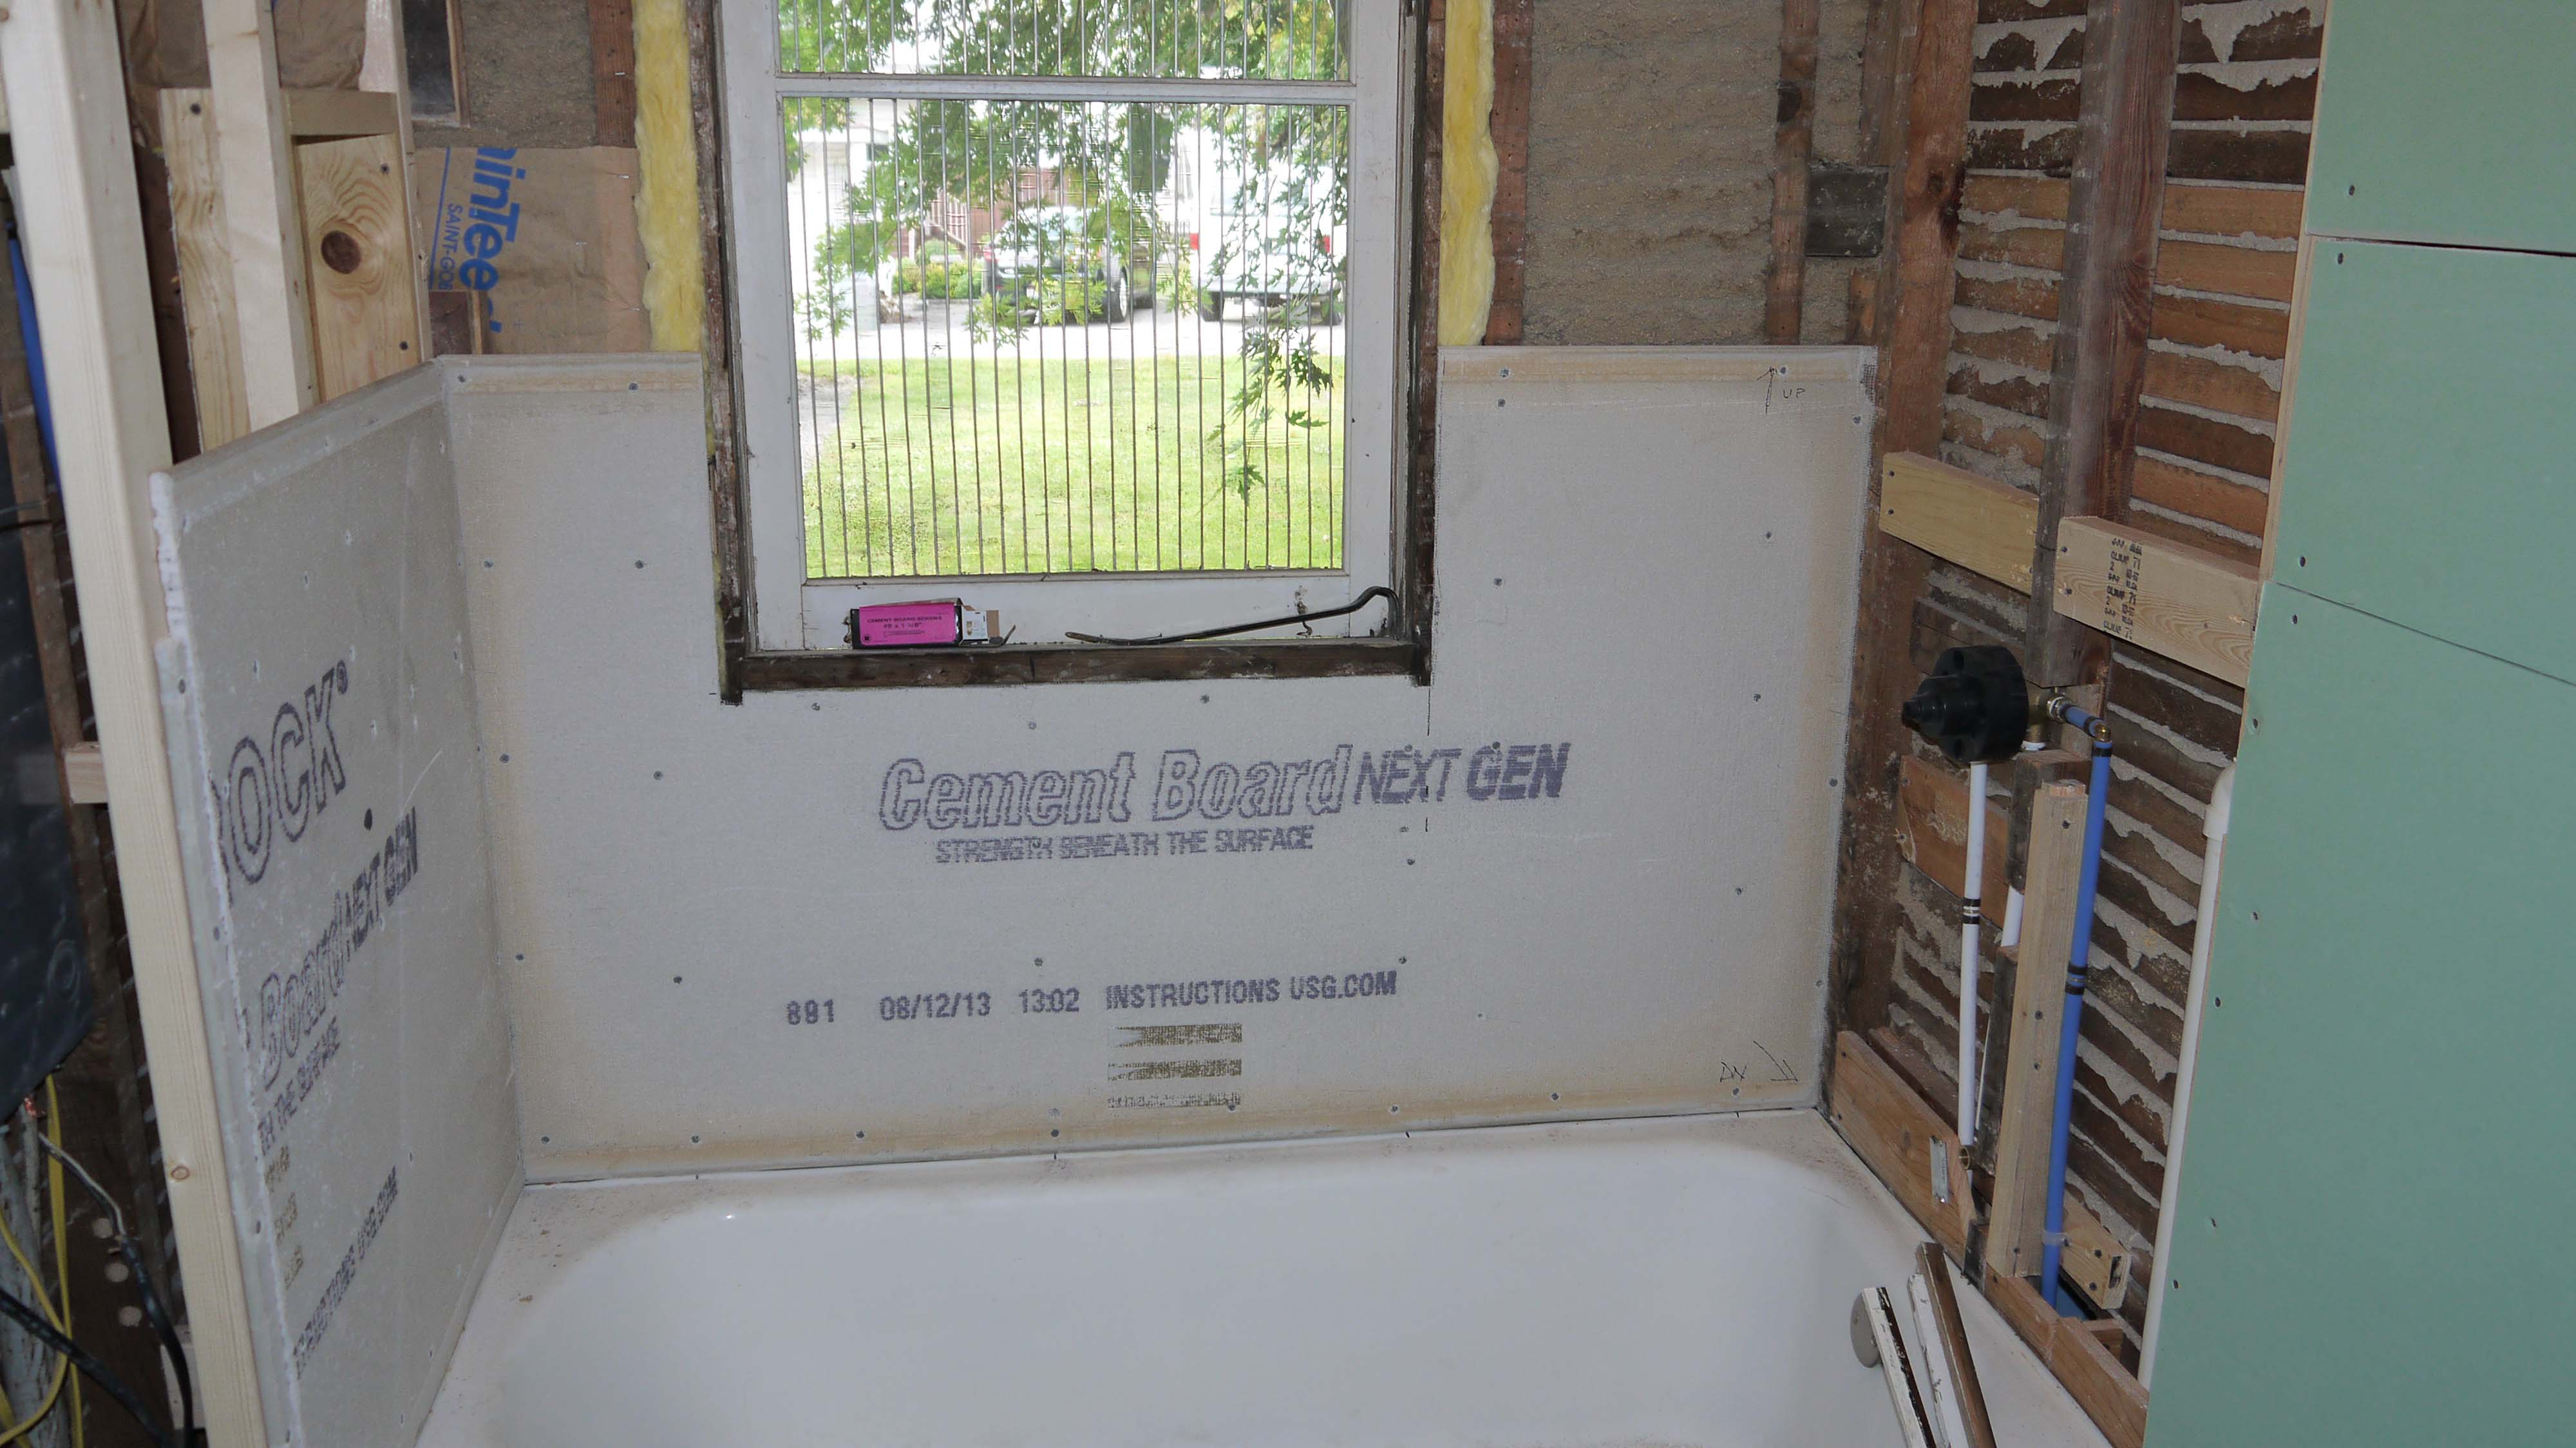
Cutting the cement board is not as easy as cutting drywall. Instead of scoring with a utility knife and snapping it apart, I used a metal cutting blade in my handheld jigsaw. It did a little tearing out along my cut line line (after all, there are pieces of aggregate compressed into the board just like in cement), but it’s a raw edge so that’s ok. I didn’t have any trouble drilling holes for the tub and shower faucet or the mixer valve. I just used the matching size hole saw bit and it went through just fine. For attaching the cement board, the lumberyard sold me special ‘cement board’ screws that are recommended. They have different threads than drywall screws and a larger head, which prevents them from pulling through the surface too far. They barely countersink themselves and that holds the cement board tightly against the wall studs. Same as the floor, the shower walls are super string and rigid, and just about ready for tile!
And here’s the bathroom all boarded up:

I can’t even begin to express how good it feels simply to have walls again!
Oh, except the niche. I still have to cut the smaller pieces to fit inside that area.

Don’t look for regularity in the screws. There isn’t any. I put a screw wherever I felt it needed one. And especially don’t count how many holes there are without screws. Screw guns are so finicky + extremely hard old-growth lumber wall studs = a lot of stripped out screws. But the next step should fill and cover all of those. Bring on the mud!
