How did I spend my Labor Day weekend? While others were frolicking about and eating themselves gluttonous at our County Fair (who am I kidding, I love me some deep fried cheese curds and lemon shake-ups!), I spent my extended weekend grouting and sponging, grouting and sponging. In total, I think I grouted 150 square feet of tile lines. I forgot how long it takes, and how terrible the whole grouting process is to the skin on my hands. Cuticles are shot and fingertips feel paper thin – and the dark stains around my finger nails are awesome – and won’t scrub off. But enough whining, let’s get down and grout!

The walls are grouted with AccuColor Premium Unsanded Grout in the color Silverado. It’s a very pale silvery gray. When selecting grout colors for the walls and floor, I wanted the walls to have a natural looking shadow for the grout lines – almost the way they looked before grout.

This color accomplished that perfectly. The tile store recommended unsanded, basically which means it doesn’t have the sand typical grout has. This is best for skinny grout lines. Mixing it was very similar to mixing the mortar when sticking the tiles up, except the mix was a very fine powder. It was really easy to work with, using a grout float to press it into the little lines.

Then it was lots and lots of sponging to wipe off all of the excess, careful not to take too much out of the lines. Grouting the walls took an entire day – I began right after lunch, took a short break for dinner, and finished about 10pm. As much and as many times as I wiped the walls down, they would always dry hazy. It was impossible to get all of the grout residue off. I even left the wall dry for over an hour, came back to wipe the haze off and sure enough, it dried hazy again. I figured out the next day that a clean dry cotton rag worked the best, almost like polishing the tile.
The next morning I began grouting the floor. I love old bathrooms with the dark grout lines in the floor, so I used a darker color – Light Pewter – for the floor grout.

With a darker grout, it starts to get scary. This was the moment of truth – any inconsistencies in the spacing would stick out like a sore thumb.
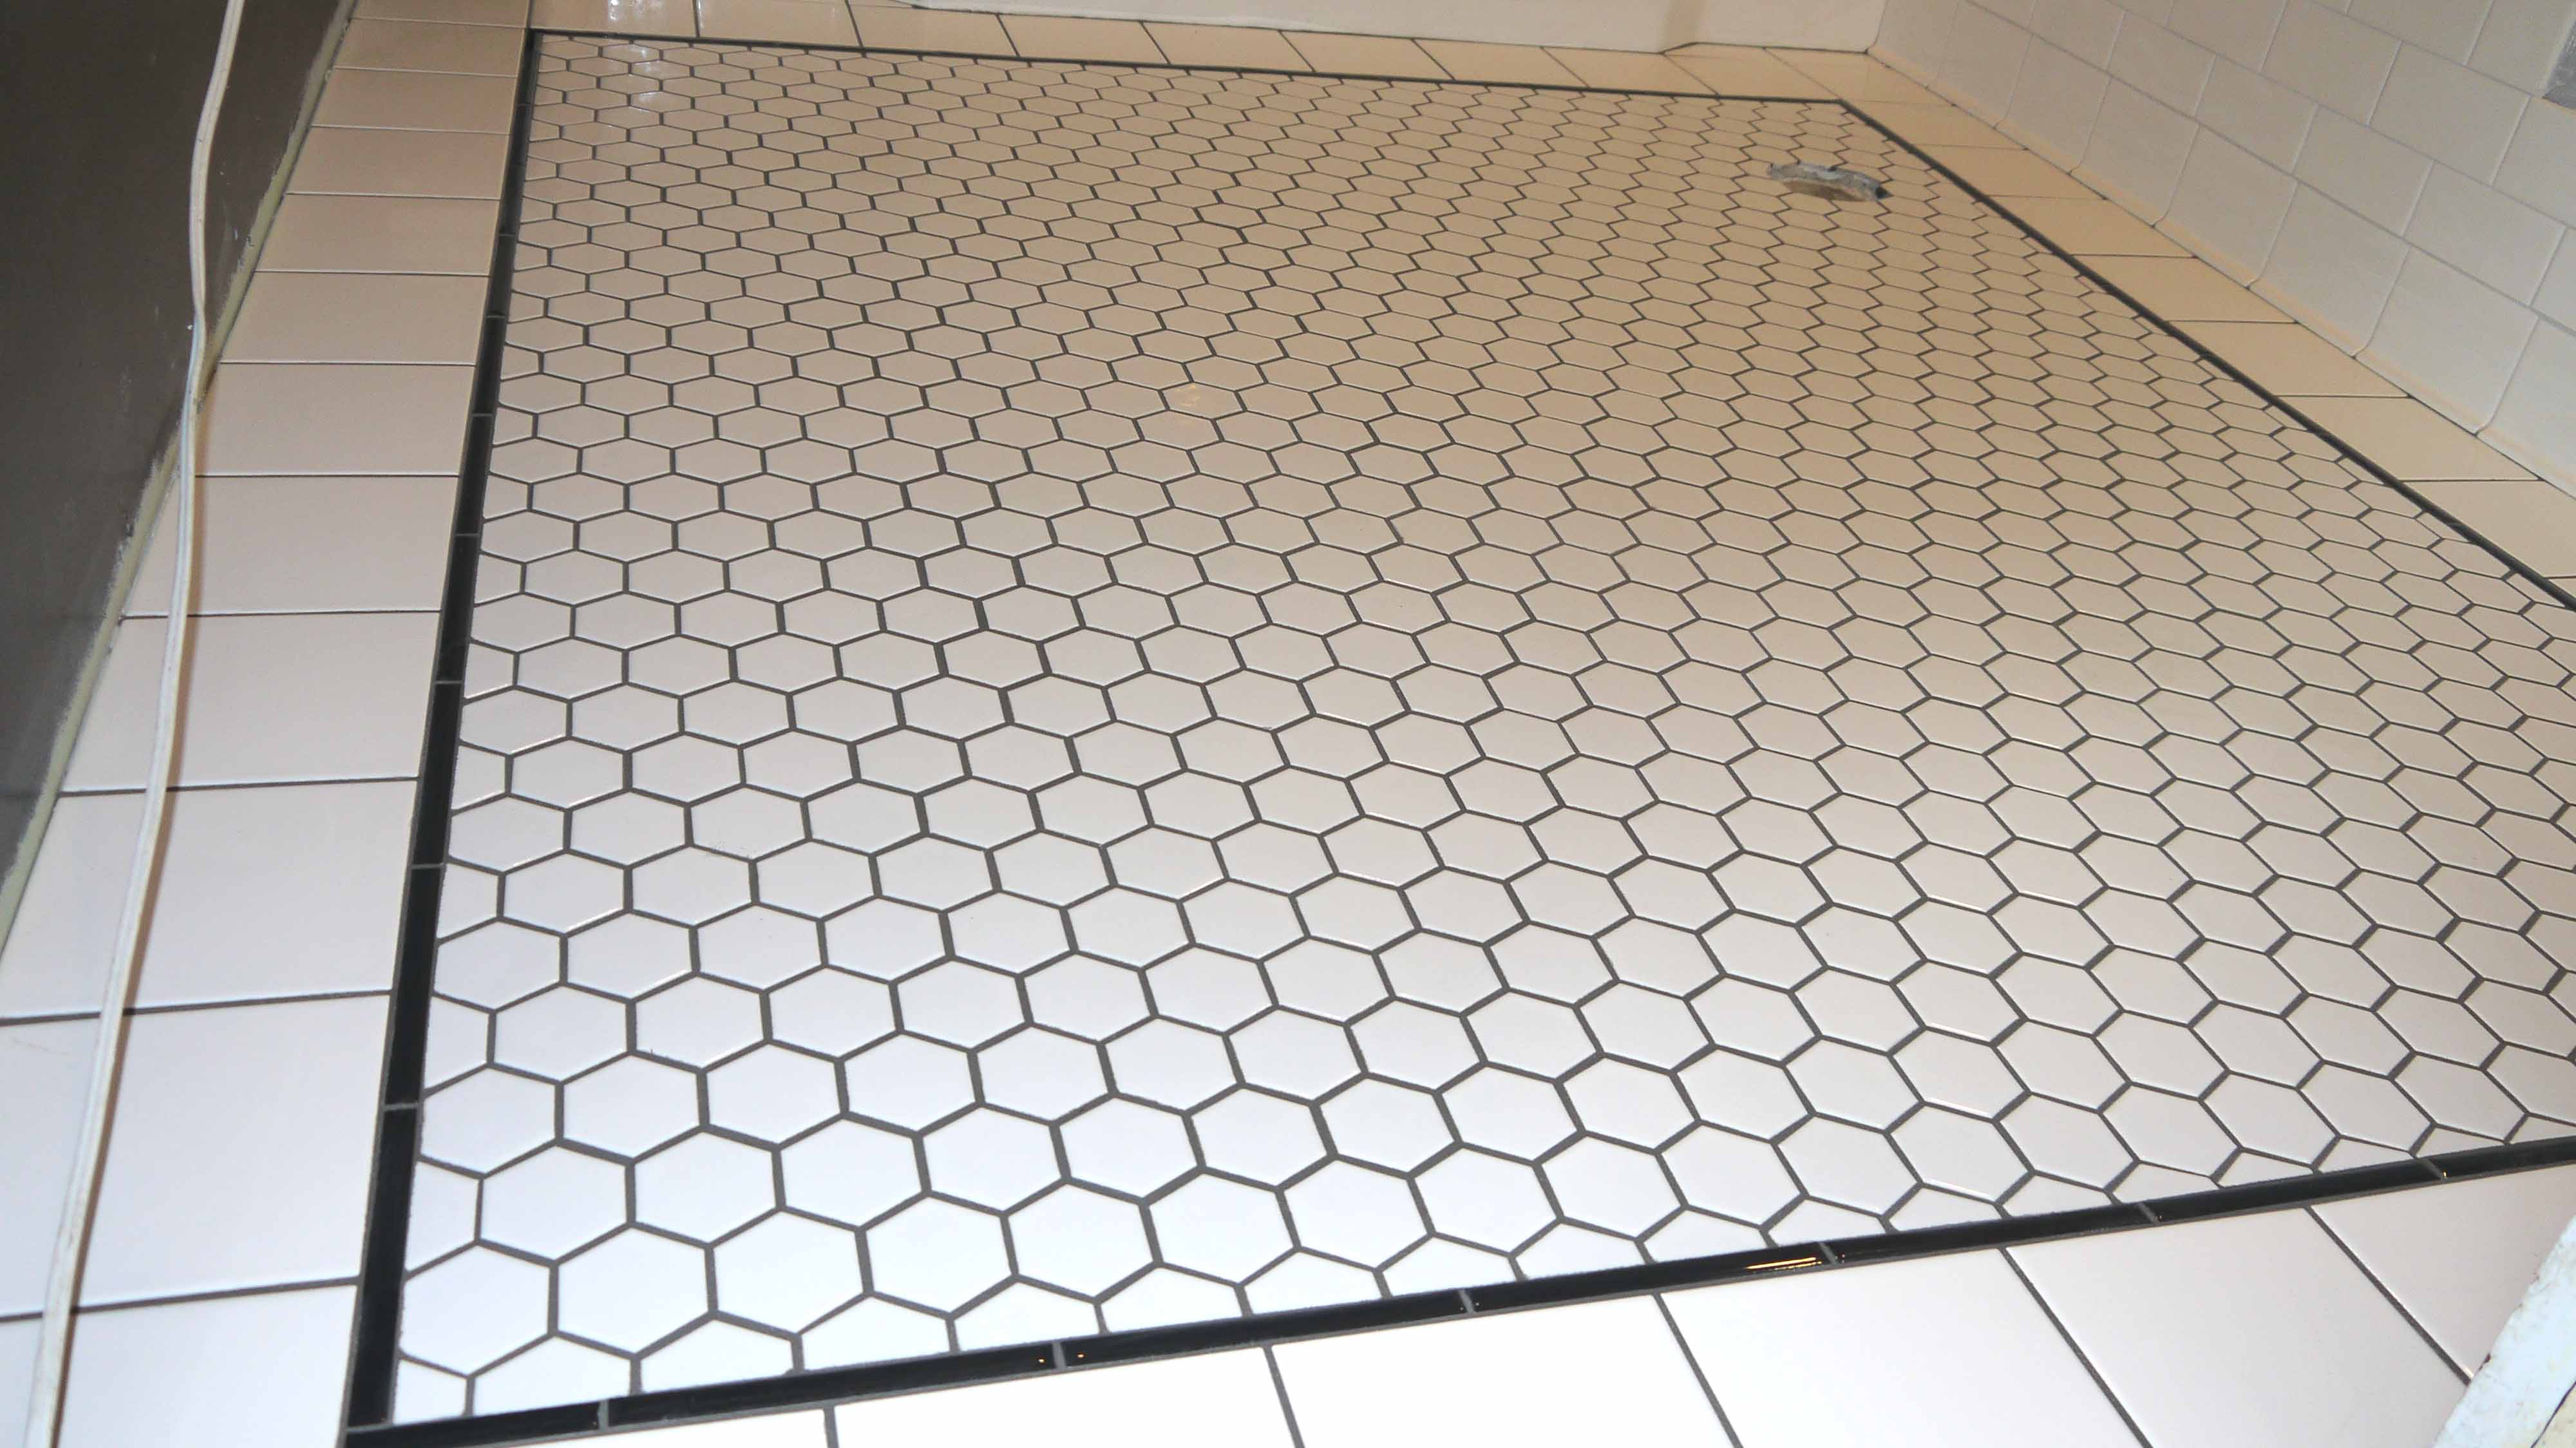
There are literally 2 or 3 individual spots where the tile lines might be thicker than the others, but they are so slight, probably no one but me will ever notice.
In the end, I am thrilled with how it looks! Exactly the vision I’ve had in my mind for months, now it actually exists! But I can’t install the fixtures quite yet. Although it’s an optional step with darker grout colors, I have decided to go the extra step and seal all of the grout lines with a penetrating grout sealer. It goes on liquid, soaks into the grout and makes a water-proof coating within the grout itself. After 2 applications, water will literally bead up when it contacts the grout, keeping water from penetrating below the tile and giving it a super stain resistance. I’ll say it again, when it comes to the bathroom there is no such thing as overly-waterproof.
