Archive for category Home Improvement
Restore or Replace – Part 1
Posted by Adam A. Ries in Exterior, Home Improvement on September 2, 2015
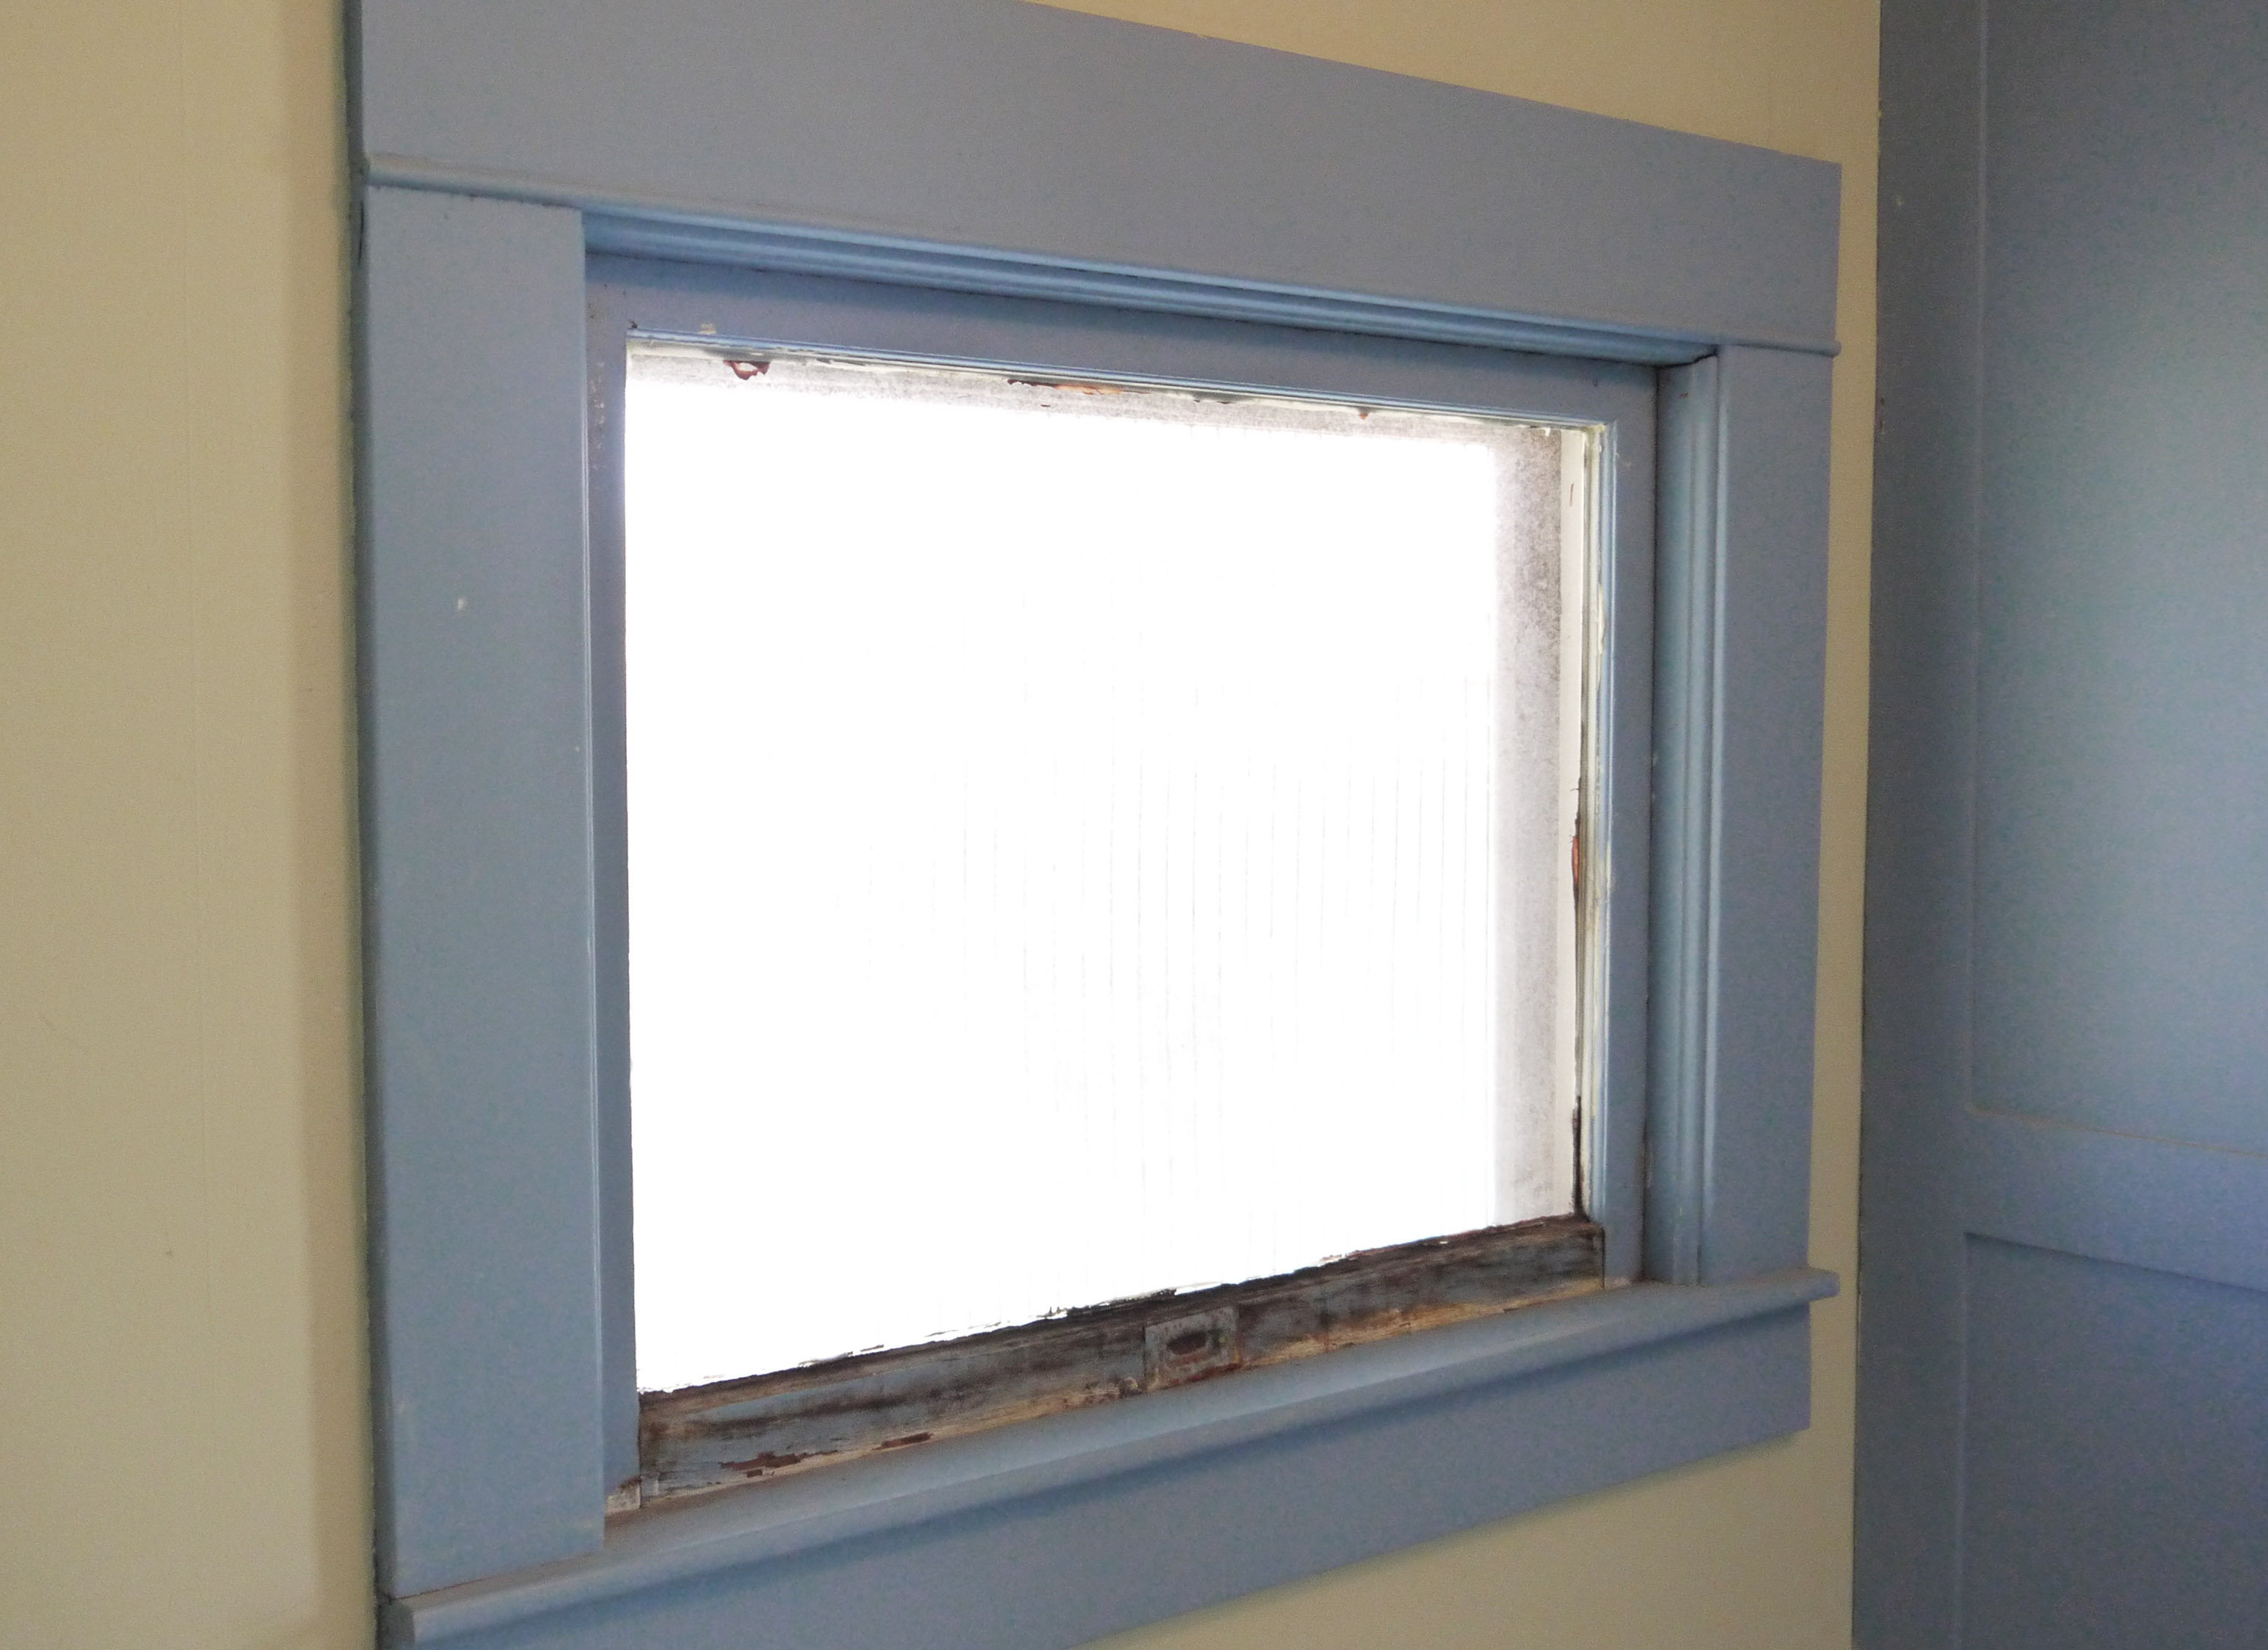
When I bought this humble bungalow (over a year ago!), one of the features I found most interesting was the distorted glass in each of the original wood windows. “Wavy” glass is an understatement. When I really study them, there are bubbles, circles, lines, and other imperfections in every piece of glass. I still remember the 1st or 2nd time looking at the house with the realtor, how beautiful the light danced on the walls through the imperfect glass. Of course, the deterioration of the windows and the rattling glass was one of the scariest features. While the whistling of the wind and drafts around each frame this past winter was an expensive feature.
Working in the field of downtown development, I’ve been lucky to attend dozens of workshops and training events about the importance of building preservation and wood windows. I’ve heard them use the fancy phrases, how wood windows are part of a building’s historic fabric, the vast difference between old growth wood and dimensional lumber available today. And more recently I’ve experienced how downtown revitalization grants can help with almost every aspect of restoring a historic building facade, but the Historic Preservation Office is adamant that grant funds will pay to have wood windows restored- not replaced.
So over the winter months — as I was reluctantly turning up the thermostat, putting more of my paycheck into the “heating” budget, and watching the shrink-wrap plastic flicker from the cold air blowing in around each window — I began seriously researching the best option for my house.
I do advise CAUTION here – only begin typing the word replacement, vinyl, fiberglass, aluminum clad, or easy-to-clean in any internet search engine and the only results will be replacement window companies – hundreds of them claiming that all of my home’s energy problems will be solved if I toss the old windows into a dumpster & install the cheapest vinyl windows on the market. Others claimed I could stand on the windows (before installing them I assume?), $99 window sales, solid vinyl sash frames, one finger open & close, multiple warranties, and even custom colors for the exterior to match any decor.

But then I searched for an answer to my real question, “wood windows restore or repair.” The results were countless forums, threads, magazines, blogs, and even energy efficient building research. They all said the same – wood windows, when restored correctly with the right materials, adding a mix of original and modern weather stripping, and with a quality storm window- will match or even outperform replacement windows in energy efficiency. Add to that the embodied energy already in the existing windows, the un-matchable strength of 100+ year old lumber, and the compiled data of historic home sales that show original windows add significantly to home & neighborhood values. Or do a little more online digging and read how 5 of the largest US replacement window manufacturers were recently charged with class action lawsuits against their false & deeply exaggerated “statistics” of energy savings they claim their windows will achieve. Eventually these 5 companies settled with the Federal Trade Commission to delete the language from their advertising when they can not consistently prove the numbers to be true.
Last summer I had 3 different window salesmen stop me while working outside or mowing the lawn. They tried their hardest to come inside, sit down and talk about their products, the “50% – 55% energy savings I could experience.” When one salesman revisited this spring, I asked him a simple question:
“These windows have lasted almost 100 years; Can you sell me a replacement window that will last that long?”

The answer is no. Many of the highest priced residential replacement windows offer only a 20 year (and very limited) manufacturers warranty. Even then the warranty is often for only the mechanical operations of the window – NOT on the low E gas seals, air-tightness, or their bold energy efficiency claims. And all the research I’ve read from professionals in the historic preservation world say property restored wood windows can last another 100 years (although with painting & glazing repairs in the middle at least once).
I read every online article, blog, and discussion thread I could find. I watched YouTube videos late into the evenings, trying to take notice of the slight differences from one professional’s process to the next – mostly minor, or they each have a different favorite method for steps such as removing paint, making repairs, etc. But the process is the same – remove all paint, remove all glazing, carefully remove glass. Sand, re-glue, prime, reglaze, paint, and re-install.
But I still had so many unknowns and fears about taking this on by myself: the details of weather-stripping (bronze? silicone bulb? vinyl flange? brush.., foam.., felt??) And what are the differences between the many types of glazing compound. Is that the same as glazing putty? And where do I find replacement sash cord that won’t stretch over time, or combination lift/sash locks? Oil or latex primer and then paint?
It was perfect timing to learn about a hands-on wood window workshop taking place in Columbus back in March, hosted by a new historic preservation group somewhat affiliated with the organization my workplace is involved with. Two days, hands on learning, BYOT (bring your own tools), and learn the entire process working alongside 3 professionals. Sign me up.
In Part 2 I’ll describe the workshop in depth, and the basic tools, methods, & products the professionals there taught us – based on each of their 30+ years in this work. But one blog I have found to be very helpful – and exactly step by step in line with the teachings from the workshop – is The Craftsman Blog. The writer is owner of a historic home restoration company so of course the entire blog is a very full resource for old home enthusiasts. But his specific posts detailing window restoration are almost a printable instruction guide. Thank you Scott for all the incredible content you share, I have learned so much from your blog!
Swinging Again (or, “All that for a broom closet?”)
Posted by Adam A. Ries in DIY, Home Improvement on June 24, 2015
“All that for a broom closet?”
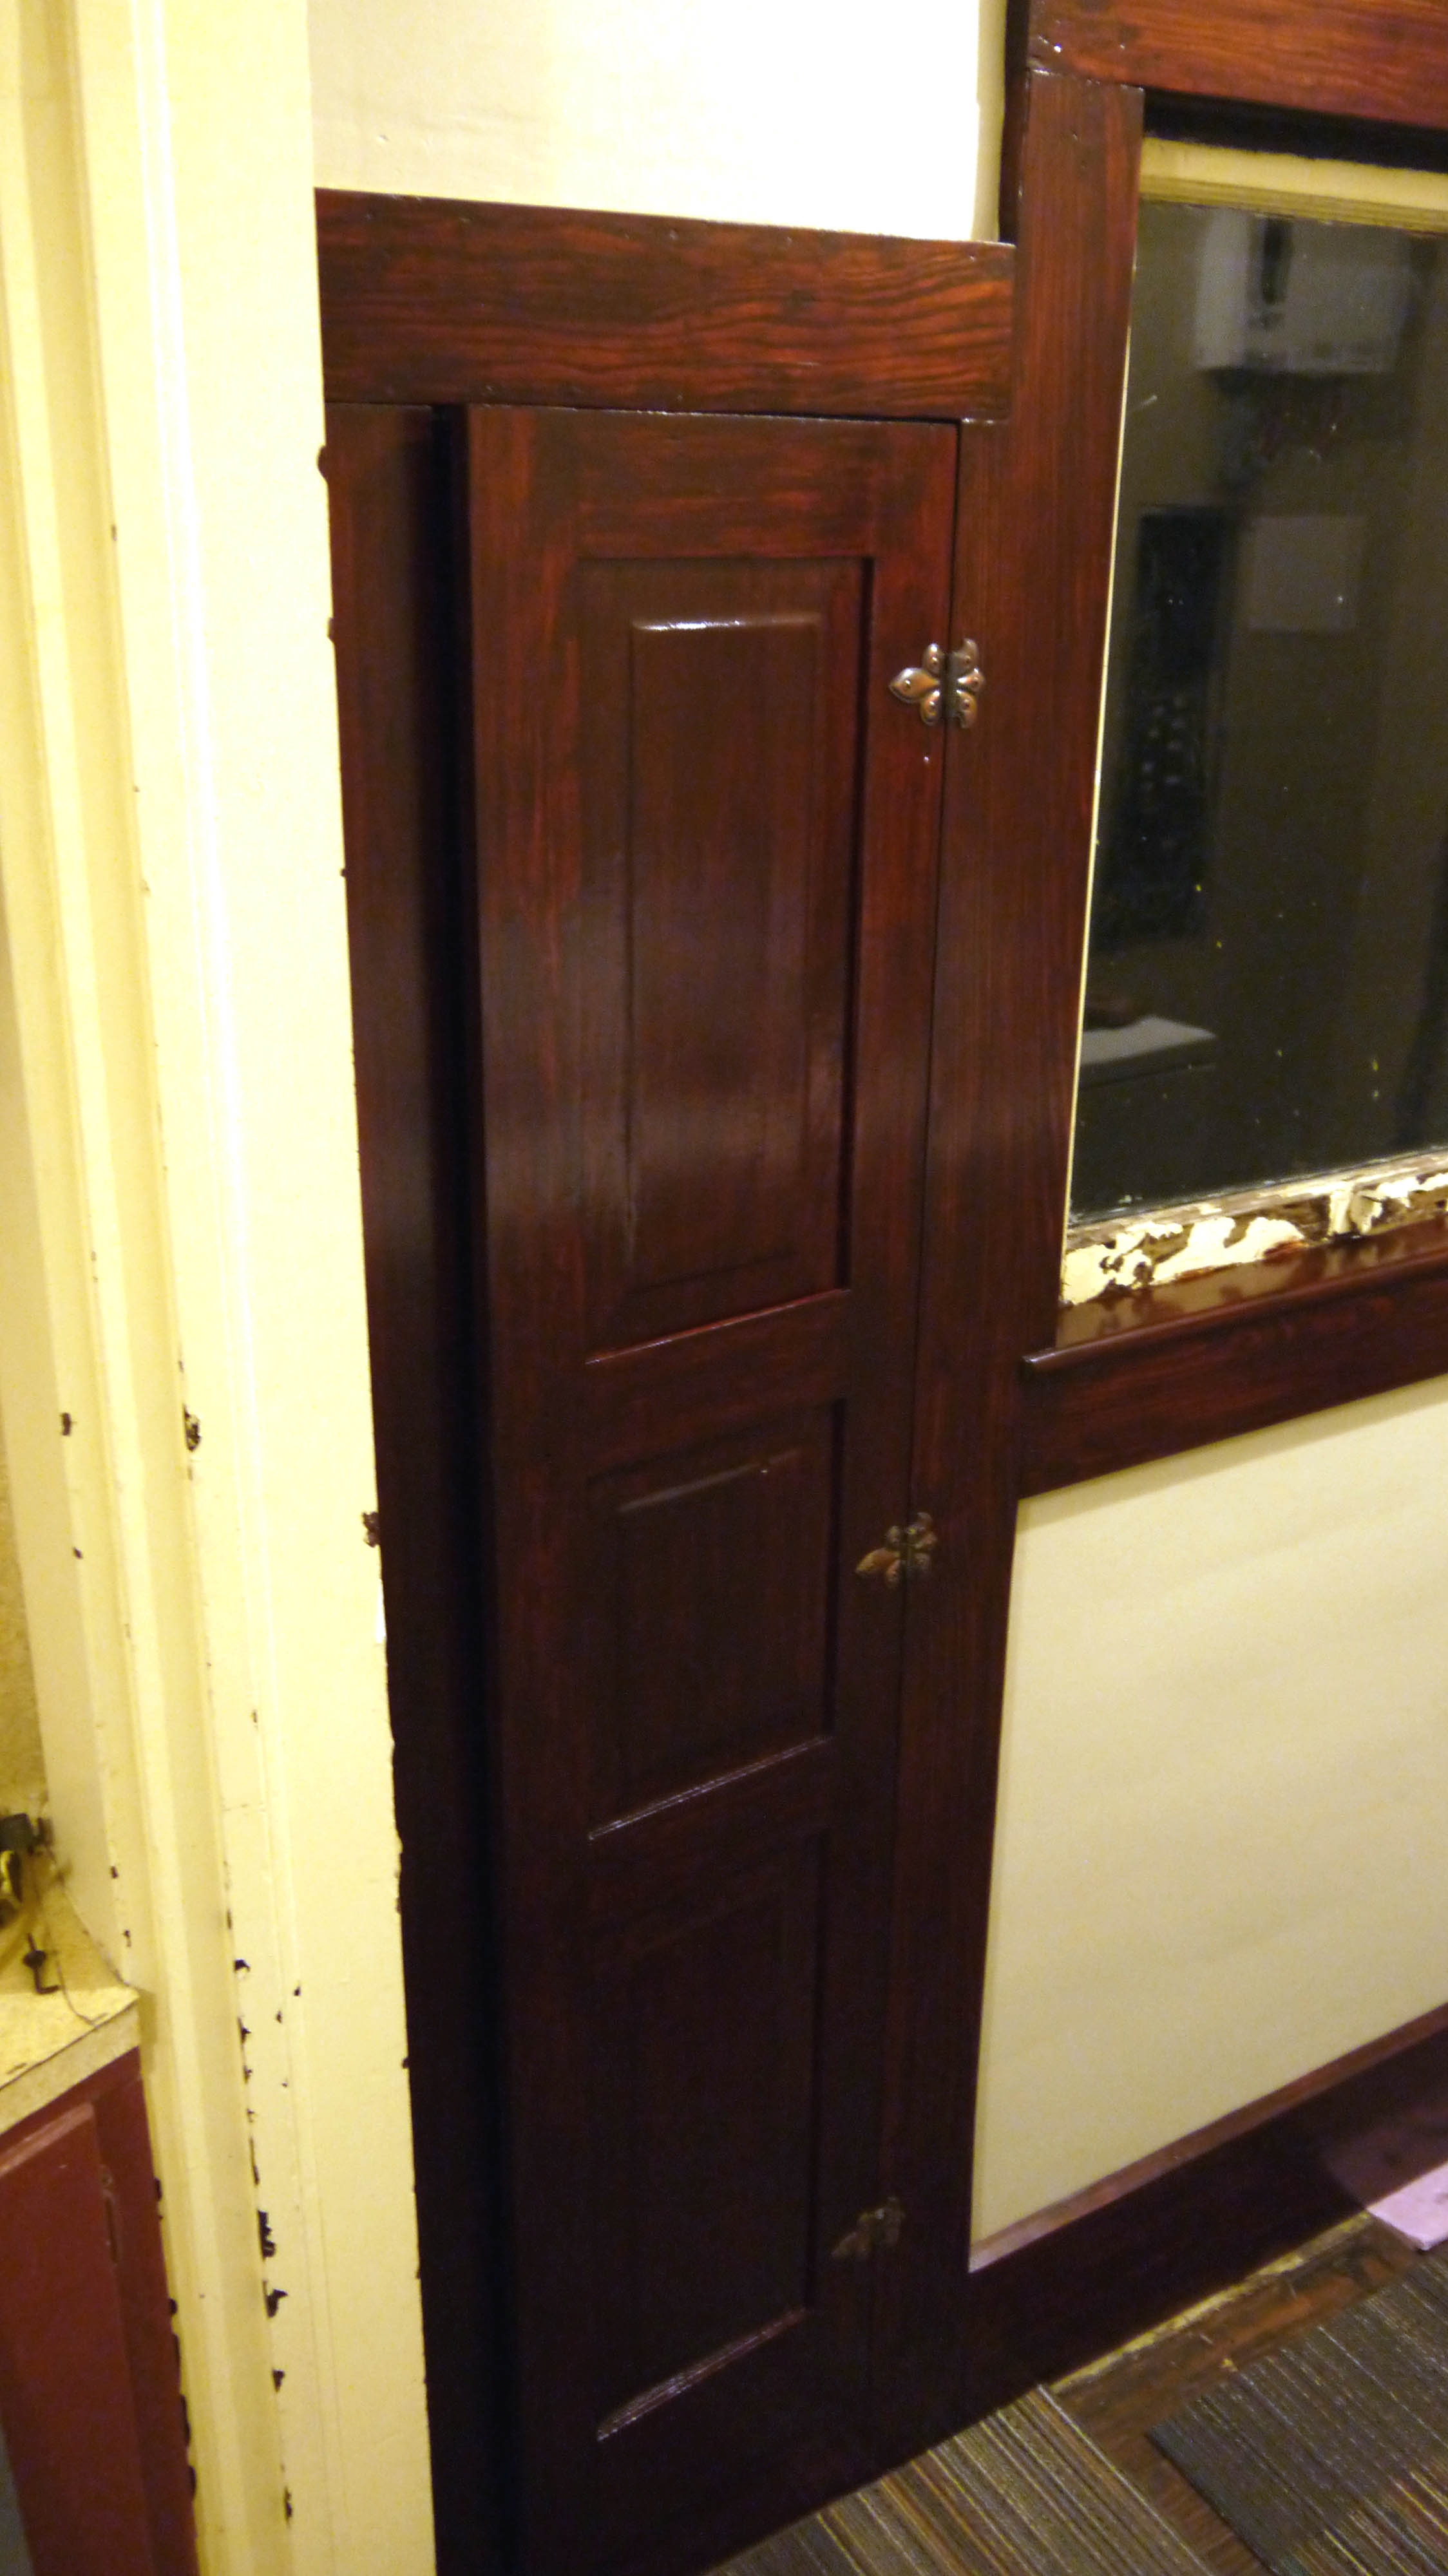
That is exactly what my friend said Monday evening when she was over for dinner. I showed her the finished broom closet door compared to the “before” photo.
“Wouldn’t it have been easier just to build and stain a new door?”

Well, maybe. I’d like to think it would’ve been the same amount of work. But a new door would have been “fake.” It wouldn’t have the gauge near the top hinge, where perhaps the guy who installed the door slipped with his screwdriver. Or the chip on the middle raised panel, from when a little kid running to play outside hit the door with the toy in his hand. And I’d have to have found a couple special boards with wormholes dotting one side, like on the inside of the door frame. Gauged, chipped, and wormholes? Yes. Flat, smooth, perfect; no. Once again, it’s something I like to call “character.”
A quick visit to my local friendly Ace Hardware and I found specialty screws that were a perfect fit & color match for the original hinges, and the door was “swinging again” (It’s like when they say the title of the movie in the movie!) in just 5 minutes.
Unfortunately the cabinet door latch was busted – didn’t have a knob at all, and from all the paint it didn’t have it’s spring action either. (In fact, to open this cabinet, someone had folded over a piece of duct tape & stapled it to the edge of the door to make a pull tab. That’s one solution.) So I’ll keep looking through rummage piles until I find a door latch the same style. For now, the door wants to naturally stay open about 1/2 an inch, so I can use it without a knob.

Lastly, I didn’t like how the back wall of the cabinet looked. The paint is chipping, and whatever is under the paint doesn’t even look or feel like wood- it’s almost flexible like thin hard-board paneling. So I bought a sheet of plywood beadboard panel and ripped it down to the exact width to fit inside. Once it was stained & poly’d, it looks like it has always been there. Yes, I lost 3/8 inch in cabinet depth, but there is still plenty of room for a broom, dustpan, and even a small mop handle. On my next run to the hardware store I’ll pick up a couple broom handle clips, a small hook to hold the dustpan, and I’ll be in business.
Laundry Room Details
Posted by Adam A. Ries in DIY, Home Improvement on June 23, 2015
Although I went ahead and stained & poly’d most of the laundry room trim and baseboard, there were some small pieces of baseboard left that were lost – hiding – waiting in the garage. And the built-in broom closet had a busted panel in the door, so I removed it from the hinges and it was waiting in the garage also. Just like the woodwork had 50 layers of paint, so does all the hardware. The hinges are salvagable (although I destroyed the screws trying to scrape the paint off of them to back them out). The door latch was busted, but there are other examples in the house so I know what type to look for.
I was able to get the busted upper panel out pretty easily – the frame around it on the back of the door was split around the panel, probably when it was broken originally. I carefully scraped the paint off each of the 2 pieces first, I guess I was concerned that once the panel was glued back together there would be paint in the seam that I wouldn’t be able to get out. Once scraped, I glued & clamped the broken panel, and went to scraping the door.

Scraping flat areas isn’t so bad, and it goes pretty quick. The panels are raised in the center, so a smaller slightly round shaped scraper helps on the recessed outer edges. Lots of paint chips. 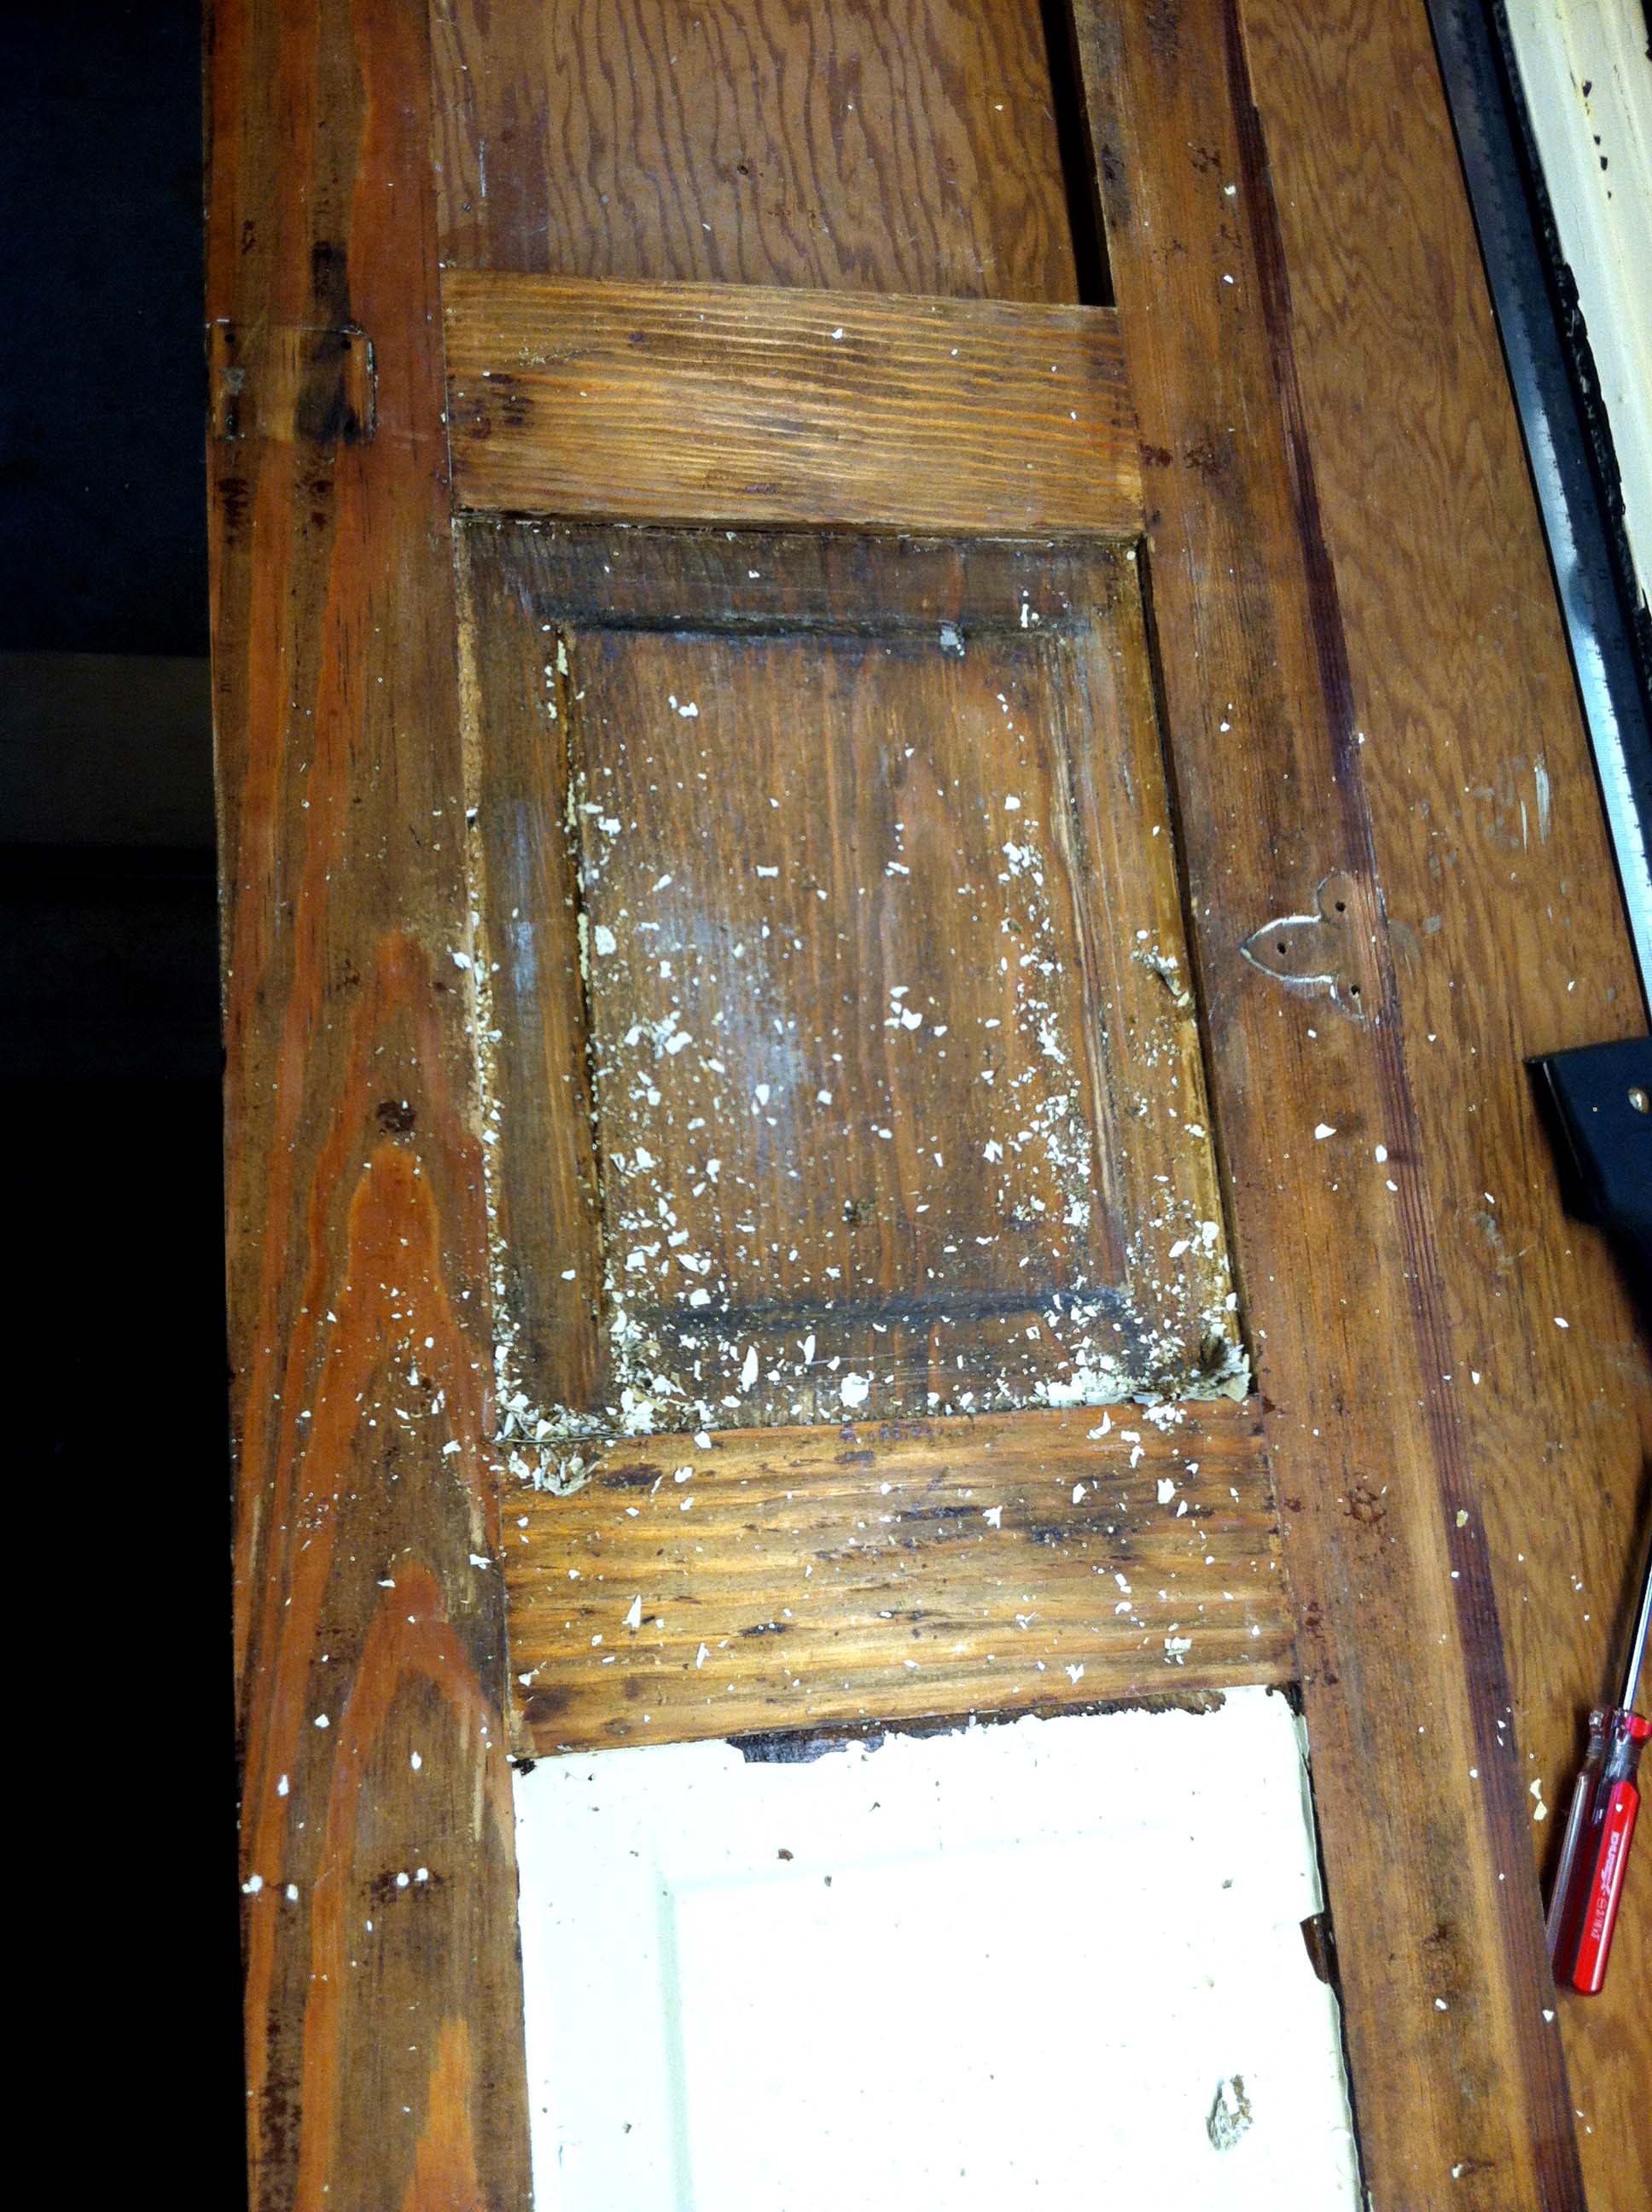
Once the repaired panel was dry, I could remove the clamps and scrape the excess glue off.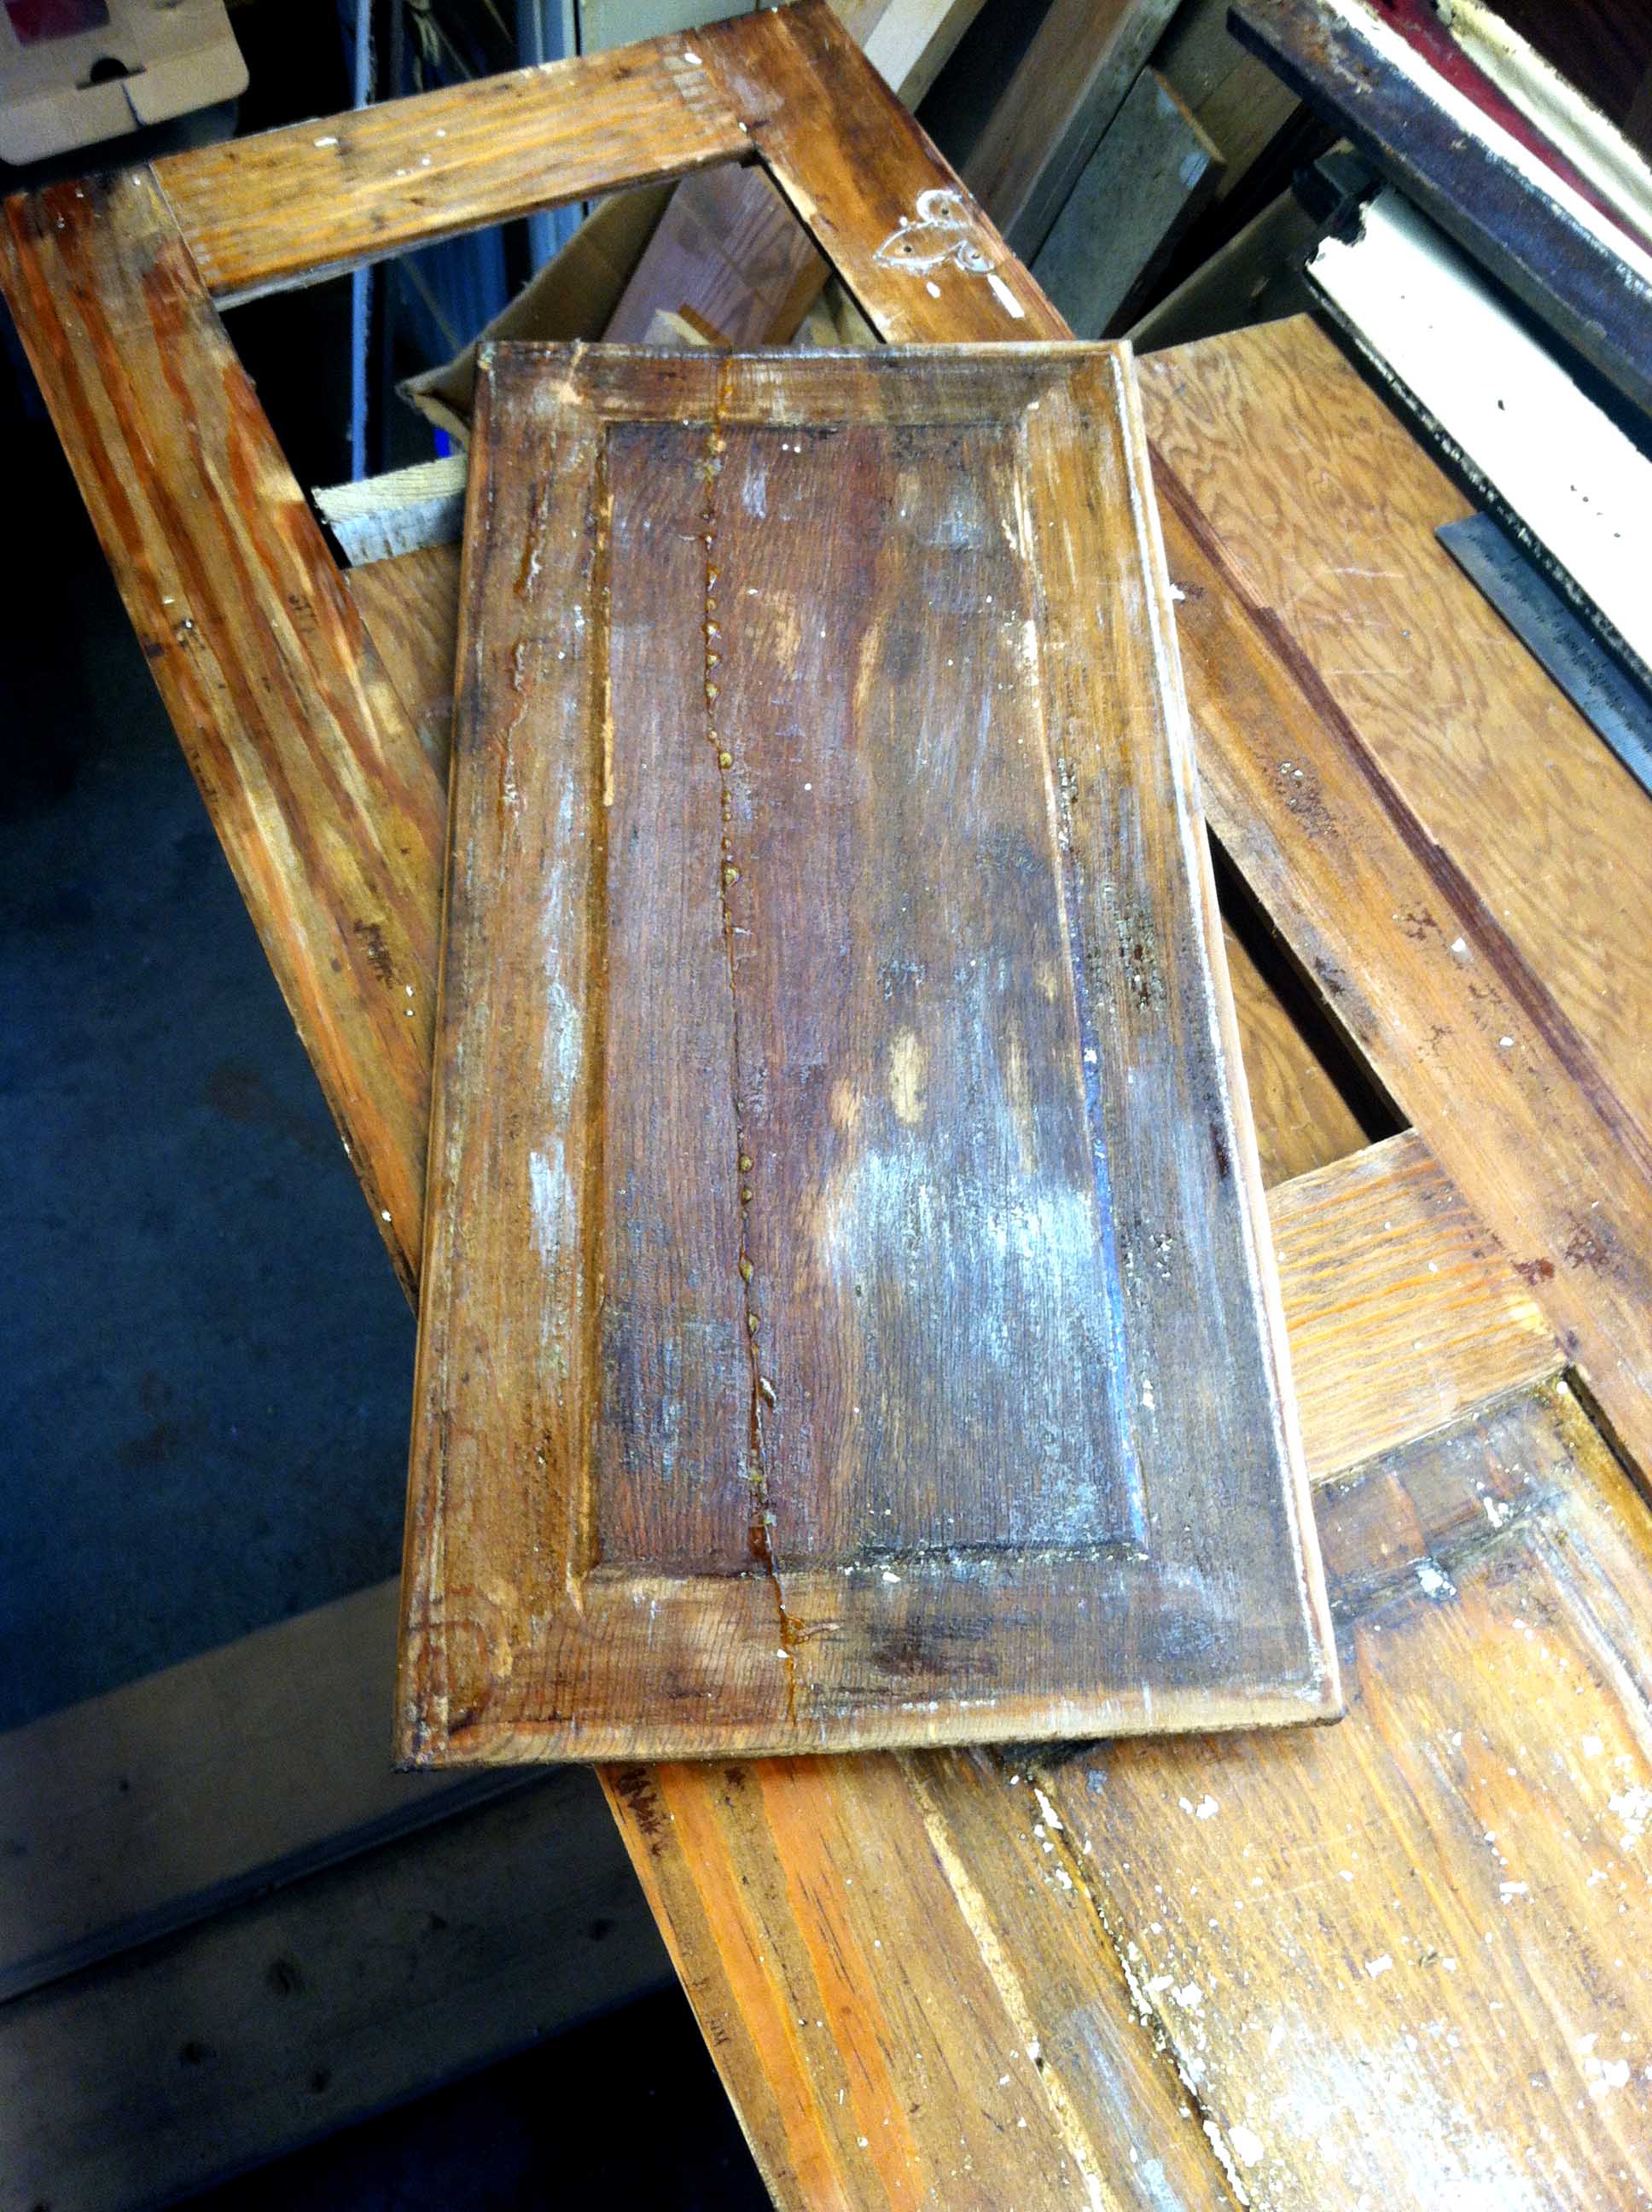
The hardware was caked with paint. This picture is actually after the first soaking and scrub with a brass bristle brush. The secret for removing paint off of metal – hinges, knobs, handles – is a good soaking for several hours in very hot water with a touch of baking soda. An old crock pot works really well for this, set it and forget it.
The paint on these was so thick, no wonder the door would barely open or close. It took two soakings and a little bit of scrubbing.

But they came out perfectly clean. Some new screws and these will be ready for another hundred years of action.

I’ve got the first coat of stain on the door, the panel, and the miscellaneous baseboard pieces. But to achieve the rich mahogany color that was originally under the paint, I have to wait a full day between the 1st and 2nd layers of stain – the stain has to build. If I try to apply the 2nd layer too soon, it simply melts the first layer and I don’t get the rich, full color. I’ll piece the panel back into it’s frame before I brush on the polyurethane, keeping it in place with some thin pieces tacked around it on the back. I think something like screen door trim will do the trick.

One more layer of stain, and 2 coats of poly – and the door will be back where it belongs. And the laundry will be almost, almost, almost finished.
